SCAN Zone Your radio is equipped with the Scan feature, which allows you to search for, lock onto, and monitor voice activity on trunked talkgroups and conventional channels.
PASSPORT PRIMARY AUTO GROUP SCAN When PassPort Group Scan is Enabled • The G symbol appears on the display. PassPort Primary Auto Group Scan automatically scans the primary (first) talkgroup within the selected PassPort zone. Any time you are positioned on a PassPort talkgroup other than the first one, your radio automatically scans activity on the first talkgroup within that zone.
To Start or Stop PassPort Group Scan Operation through a Preprogrammed Button (see page 22) AUTO GROUP SCAN G (LTR TRUNKED OPERATION ONLY) • Press the preprogrammed Scan button to start PassPort Group Scan. • Press the preprogrammed Scan button again to stop the PassPort Group Scan. Auto Group Scan automatically scans talkgroups within an LTR trunked zone as programmed by your dealer. Auto Group Scan can be either non-prioritized or prioritized.
• The G symbol appears on the display when non-prioritized Auto Group Scan has been activated. Note: • The H symbol appears on the display when prioritized Auto Group Scan has been activated. To Start or Stop All Group Scan Operation through the Menu (see page 22) • There is no LED indicator during Auto Group Scan. • Press the preprogrammed All Group Scan button once to start All Group Scan. • Press the preprogrammed All Group Scan button again to stop All Group Scan.
SYSTEM SCAN G –or– (LTR TRUNKED AND CONVENTIONAL OPERATION) Do the following: System Scan scans trunked talkgroups and conventional channels between LTR and conventional zones, as programmed by your dealer. Up to 16 different talkgroups or conventional channels can be programmed into each Scan list. You can edit these lists through your radio’s menu (see page 60). • The G symbol appears on the display.
DELETING A NUISANCE CHANNEL/ TALKGROUP Restoring a Channel/Talkgroup Back to the Scan List (PASSPORT GROUP SCAN OR SYSTEM SCAN OPERATION ONLY) To restore a previously deleted talkgroup or channel back to the Scan list, restart the scan operation or turn your radio off and on again. SCAN If a talkgroup or channel continually generates unwanted calls (a “nuisance” channel), use the preprogrammed Scan button to temporarily delete the talkgroup or channel from the Scan list.
Note: In PassPort mode, talkgroups cannot be prioritized. Your radio cannot receive any calls while you are editing a Scan list. The K symbol is displayed while you are in edit mode. Note: In Conventional operation only, even if there is activity on a non-priority channel, your radio automatically switches to an active priority channel and indicates the activity with a short tone. 1 ) to enter menu mode.
If you delete a talkgroup or channel, You see: 'HOHWH" ) to confirm the deletion. You see: SCAN 11 ( to return to to return to –or– (QWU\ 'HOHWHG $GG (QWU\" 'HOHWH (QWU\" Hold down t to exit menu mode. PRIORITIZING A TALKGROUP OR CHANNEL IN A SCAN LIST (SYSTEM SCAN OPERATION ONLY) You may want to check the activity on one or two talkgroups or channels more frequently 62 English than others.
Setting Priority Talkgroups or Channels 1 ) to enter menu mode. 2 + or ? until 3URJUDP /LVWV 3 ) to select 3URJUDP /LVWV 4 6 ) to select + or ? until 3ULRULW\ " You see the current priority talkgroup or channel. 9 ) to select the desired priority level. 10 + or ? until you see the talkgroup or channel you want to prioritize. 6FDQ /LVW 6FDQ /LVW (GLW 3ULRULW\" 11 ) to prioritize that talkgroup or channel. 12 ( to return to –or– Hold down ( to exit menu mode.
SCAN Notes 64 English
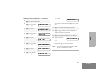
PHONE 2 ) to enter menu mode. –or– Press the preprogrammed Phone button, and skip to step 5. –or– Press and release the Speed Dial button to use the speed dial feature. Then press the (1 to 9) key corresponding to the number you want to call on the Phone list. Or press 0 if you want to call the last number dialed. Press the PTT button. A dial tone sounds. Press the PTT button again to send the phone number. –or– For an LTR trunked system, press and hold the PTT button while dialing a number.
5 6 Press and Release the PTT button. • If phone access is successful, a dial tone sounds. • If phone access is unsuccessful, a lowpitched alternating tone sounds. Disconnect the call (see step 8) and try again. Enter the phone number with the keypad. The number is automatically sent without pressing the PTT button again. –or– + or ? to select a number from the phone list. ;;;-;;;-;;;; Press and release the PTT button again to send the number.
5 (For conventional operation with auto access only). You hear a series of tones, indicating that an access code is being sent automatically, and see your access code: 7 –or– Enter your access code using the keypad. 6 b Press the key (1 to 9) corresponding to the number you want to call, or press 0 if you want to call the last number dialed. ;;;-;;;-;;;; To redial the last number dialed (if not using Speed Dial), press and release the PTT button immediately after the access code is sent.
10 To disconnect a phone call, do one of the following: Enter the deaccess code using the keypad. –or– If your radio has the deaccess code programmed, go to step 9. RECEIVING A PHONE CALL D THROUGH A TRUNKED OR CONVENTIONAL SYSTEM To Receive a Phone Call 1 11 To exit Phone Mode: + or ? to select an LTR trunked talkgroup or conventional channel that has been programmed for telephone. –or– Press and hold # to disconnect the call. D disappears from the display.
3 To disconnect the phone call and exit Phone and menu mode: Press and hold to disconnect the call. Note: D no longer appears on the display in PassPort mode. MODIFYING THE PHONE LIST K Your radio contains a Phone list that holds up to 25 phone numbers. The Phone list is shared between trunked and conventional Phone operation.
3 ) to select 3URJUDP /LVWV 4 + or ? until 3KRQH /LVW 12 + or ? until you see the location in the list where you want to store the phone number. 5 ) to select 3KRQH /LVW 13 ) to store the phone number. 6 + or ? until 'HOHWH (QWU\" 7 ) to select 'HOHWH (QWU\" 8 + or ? until you see the entry you want to delete. 9 ) to select the entry. 10 Use the keypad to enter the phone number.
You see: 11 ( to return to (QWU\ 'HOHWHG 6 + or ? until (GLW (QWU\" 'HOHWH (QWU\" 7 ) to select (GLW (QWU\" 8 + or ? until you see the entry you want to edit. 9 ) to select the entry. –or– Hold down ( to exit menu mode. To Edit an Entry ) to enter menu mode.
12 Use the keypad to edit the entry (see page 21), –or– + or ? until you see the location where you want to store the phone number. 13 ) to store the information. 14 ( to return to (GLW (QWU\" –or– PHONE Hold down ( to exit menu mode.
The HT1250•LS+ radio’s voice storage feature enables your radio to perform seven types of voice related functions: • Incoming Call Recording • Voice Memo Recording • Recorded Message Playback • Recorded Message Delete • Recorded Message Transmission • Automatic Message Reply (“When Available”) • Message Time Stamping There is a total of 120 seconds recording time available for all voice storage activity. Your dealer can divide the 120 seconds into a defined number of equal length time slots.
VOICE STORAGE If a voice storage record function is requested, the display shows: 2 The radio records the call until the message slot is full or until you release the preprogrammed Record/Playback button. 3 Release the Record/Playback button to stop recording.
To Record All Incoming Calls ) to enter menu mode. 2 + or ? until 9RLFH 6WRUDJH 3 ) to select 9RLFH 6WRUDJH 4 + or ? until 5HFRUG 5 ) to select 5HFRUG 6 + or ? until $OO ,QFRPLQJ 7 ) to select $OO ,QFRPLQJ 10 Press ( to stop recording. –or– Go to step 1 again to continue recording in the next available slot. Note: Five seconds 7LPH /HIW ;; before the message slot ends, the radio display shows (where XX = remaining seconds).
VOICE STORAGE VOICE MEMO RECORDING In addition to recording calls received, the HT1250•LS+ radio offers you the ability to record voice memos (or personal reminders) into the radio. The voice memo recording feature is useful for quickly saving phone numbers, names, or any other brief voice information. You can record voice memos using the preprogrammed Record/Playback button (see page 22) or your radio’s menu. Without pressing the PTT button, speak clearly into the microphone to record your memo.
The display shows: 8 Note: ) to select 5HFRUGLQJ Without pressing the PTT button, speak clearly into the microphone to record your memo. The radio records your memo until the message slot is full or until you press (. Note: To stop recording at any time, press (. 3OD\LQJ 0VJ ;;; To Play Back a Message using the Preprogrammed Record/Playback Button 1 9 Press ( to stop recording. –or– Press and release the preprogrammed Record/Playback button.
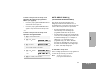
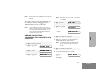
VOICE STORAGE To Playback a Message using the Menu 1 ) to enter menu mode. 2 + or ? until 9RLFH 6WRUDJH 3 ) to select 9RLFH 6WRUDJH 4 + or ? until 3OD\EDFN 5 ) to select 3OD\EDFN 6 + or ? until $ 7 ) to select $ Message # Time Stamp Duration (in seconds) 8 + or ? to select the desired message. 9 Press ) to play the selected message. 10 + or ? anytime during playback to advance to the next message.
To Delete a Message using the Menu ) to enter menu mode. 2 + or ? until 9RLFH 6WRUDJH This feature allows you to transmit a recorded message to another radio user. To Transmit a Recorded Message: 3 ) to select 9RLFH 6WRUDJH 1 Press and hold the PTT button to initiate the message transmission. 4 + or ? until 'HOHWH 2 5 ) to select 'HOHWH While holding down the PTT button, press the preprogrammed Record/Playback button to select and play back the desired recorded call or memo.
VOICE STORAGE AUTOMATIC MESSAGE REPLY: “WHEN AVAILABLE” (LTR TRUNKED OPERATION ONLY) The automatic Message Reply feature allows you to transmit a recorded message to a caller when your radio receives an MDC selective call. 7 ) to select To Record a Message 1 + or ? until 5HFRUGHG 0VJ 2 ) to select 5HFRUGHG 0VJ Note: The display shows 5HFRUGLQJ To Enable the Automatic Message Reply Feature 1 ) to enter menu mode.
1 ) to enter menu mode. 2 + or ? until 8WLOLWLHV 3 ) to select 8WLOLWLHV 4 + or ? until 5 ) to select :KHQ $YDLODEOH 6 + or ? until $XWR5HSO\ 2II" 7 ) to select VOICE STORAGE To Disable the Automatic Message Reply Feature :KHQ $YDLODEOH 81 English
VOICE STORAGE Notes 82 English
AUDIO/TONE SETTINGS You can customize the audio and tone feature settings on your radio by ) to enter menu mode. 2 + or ? until $XGLR 7RQHV 3 ) to select $XGLR 7RQHV 4 + or ? until you see the feature you want to change (see the table on the next page). 5 ) to select the feature. You see the feature’s current setting. 6 + or ? for available settings. (For Name and Call Tone Tagging, see page 51.) 7 ) to set the desired setting.
Audio/Tone Settings AUDIO/TONE SETTINGS Feature What it Does $OHUW 9RO /YO Makes the volume level of the audio and alert tones independent. If turned on, it makes the alert tones follow the settings in the CPS; if turned off, the alert tones follow the setting of the volume knob. ,QG $OHUW 2II ,QG $OHUW 2Q 7RQH 'LVDEOH Turns all alert and audio tones on or off. 7RQHV 2Q 7RQHV 2II 1DPH DQG &DOO 7RQH 7DJJLQJ /75 7UXQNHG 2SHUDWLRQ 2QO\ Assigns a specific ring tone when receiving a call from a s
UTILITIES You can customize some of your radio’s feature by: 1 ) to enter menu mode. 2 + or ? until 3 ) to select 4 + or ? until you see the feature you want to change (see table on the next page). 5 ) to select the feature. You see the feature’s current setting. 6 + or ? for available settings. 7 ) to select the desired setting.
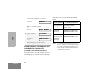
Utilities Features UTILITIES Feature What it Does 6TXHOFK § Sets radio squelch at either normal or tight (see page 88). 6TOFK 7LJKW 6TOFK 1RUPDO 3RZHU /HYHO Changes the power level of the radio to high, low, or auto (see page 88). 3RZHU +LJK 3RZHU /RZ 3RZHU $XWR &ORFN Sets the time, or turns the clock on or off (see page 90). &ORFN 2Q &ORFN 2II 6HW 7LPH 5HPLQGHU $ODUP Sets the alarm, or turns it on or off (see page 90).
Utilities Features (continued) Feature What it Does :KHQ $YDLODEOH ‡ Transmits a recorded message to a caller when your radio receives an MDC Selective call. 6RIWZDUH 9HU Displays the radio’s software version number when you press ). Settings $XWR UHSO\ RQ $XWR UHSO\ RII 5HFRUG PVJ 5HYLHZ PVJ —— Note: The LTR and conventional software version number may be different than the PassPort software version number. ‡ LTR trunking operation only.
SETTING TIGHT OR NORMAL SQUELCH 4 + or ? until 6TXHOFK 5 ) to select 6TXHOFK 6 + or ? until 6TOFK 7LJKW" –or– until 6TOFK 1RUPDO" (CONVENTIONAL OPERATION ONLY) Use this feature to filter out nuisance (unwanted) calls and/or background noise. However, tightening squelch could cause calls from remote locations to be filtered out as well. In this case, normal squelch may be more desired.
SETTING THE POWER LEVEL B To Set the Power Level Each channel in your radio has a predefined transmit power level that can be changed. Press the preprogrammed Power Level button (see page 24) to toggle between low and high, • High power (S) allows you to reach a radio that is farther away. • Low power (R) conserves the battery’s charge. • Auto power (conventional operation only) automatically sets the optimal power level based on the strength of the signal received.
SETTING THE CLOCK/ALARM 8 To Set the Clock/Alarm 1 ) to enter menu mode. 2 + or ? until When a setting is blinking, you can change it with + or ?. Hour (AM or PM) Minutes 8WLOLWLHV Note: ) to select 4 + or ? until &ORFN –or– until 5HPLQGHU $ODUP 5HPLQGHU $ODUP 9 < or > to move to the previous or next setting. 10 ) to save your changes. UTILITIES 11 ( to return to 5 ) to confirm your selection.
WARRANTY I. WHAT THIS WARRANTY COVERS AND FOR HOW LONG: MOTOROLA INC.
WARRANTY furnished by MOTOROLA which is attached to or used in connection with the Product, or for operation of the Product with any ancillary equipment, and all such equipment is expressly excluded from this warranty. Because each system which may use the Product is unique, MOTOROLA disclaims liability for range, coverage, or operation of the system as a whole under this warranty.
IV. HOW TO GET WARRANTY SERVICE: V. WHAT THIS WARRANTY DOES NOT COVER: A) Defects or damage resulting from use of the Product in other than its normal and customary manner. B) Defects or damage from misuse, accident, water, or neglect.
WARRANTY J) K) specifications or the FCC type acceptance labeling in effect for the Product at the time the Product was initially distributed from MOTOROLA. Scratches or other cosmetic damage to Product surfaces that does not affect the operation of the Product. Normal and customary wear and tear. VI.
WARRANTY distribute copies of such Motorola software. MOTOROLA software may be used in only the Product in which the software was originally embodied and such software in such Product may not be replaced, copied, distributed, modified in any way, or used to produce any derivative thereof. No other use including, without limitation, alteration, modification, reproduction, distribution, or reverse engineering of such MOTOROLA software or exercise of rights in such MOTOROLA software is permitted.
WARRANTY Notes 96 English
M./ ACCESSORIES Motorola offers a number of accessories to enhance the productivity of your two-way radio. Many of the available accessories are listed below. For a complete list, see your Motorola dealer.
WPPN4079-R BMS Battery Adapter (For Ni-Cad and NiMH Batteries) WPLN4107-R Motorola Conditioning Charger Kit (includes 7.2 Volt base, removable adapter plate and transformer, 60 minute Rapid Charger, 110V) ACCESSORIES WPPN4065-R Medium Weight Over-the-Head Dual Muff Headset with Noise Cancelling Microphone and in line PTT.
RKN4097 AARMN4021 In-Line Adapter Cable for user with RMN4051.
INTEGRATED MICROPHONE/ RECEIVER This devices’s acoustic technology does not rely on conduction for communication. ACCESSORIES NTN1722 NKN6508 Replacement Cable for NTN1722 NTN1723 Integrated Ear Microphone/Receiver System wit Palm PTT - FM Approved AARLN4885 Receive Only Foam Earbud with 3.5mm plug - (for use with AAHMN9053, AAHMN8054, and AAHMN9057) - FM Approved RLN4941 Receive-Only Earpiece with translucent tube, rubber eartip, and 3.
AARLN4885 RLN4765 Receive Only Foam Earbud with 3.
ACCESSORIES Notes 102 English
Selecting a Trunked Zone and Talkgroup 1. Turn Zone Selector knob to appropriate trunked zone. Sending a Trunked Call 1. Press PTT. If trunked system access was successful — LED = steady red; if unsuccessful — LED = flashing red; low pitched tone sounds. 2. Speak clearly into microphone. Release PTT to listen. Initial PassPort System Registration 3$663257 Upon power up, PassPort alias appears on the display. <285 7/.*53 $/,$6 The selected talkgroup alias appears on the display.
Menu Navigation Chart * — Available in PassPort trunked zones only (Refer to Menu Navigation guidelines— lower, left-hand corner of this page) (LTR) Radio Call‡ Rptr/ Talkarnd§ (p. 38) + + ? (LTR)All Group Scan‡(p. 58) ? + ? on/off repeater mode/ talkarnd mode + PP Group Scan* (p.
6864110R11-O_cvr.qxd 11/30/01 2:09 PM Page 1 Motorola, The Stylized M logo, Professional Radio - As Dedicated As You Are, HT Series, HT1250•LS+, and Call Alert are trademarks of Motorola, Inc. PassPort is a trademark of Trident Micro Systems. LTR is a trademark of E.F. Johnson Company. © 1999, 2000, 2001 Motorola, Inc. All rights reserved. Printed in U.S.A.