SCAN Zone Your radio is equipped with the Scan feature, which allows you to search for, lock onto, and monitor voice activity on trunked talkgroups and conventional channels.
PASSPORT PRIMARY AUTO GROUP SCAN (PASSPORT TRUNKED OPERATION ONLY) PassPort Primary Auto Group Scan automatically scans the primary (first) talkgroup within the selected PassPort zone. Any time you are positioned on a PassPort talkgroup other than the first one, your radio automatically scans activity on the first talkgroup within that zone. SCAN Note: This feature is enabled AUTOMATICALLY with your radio. It is not enabled through the radio menu or through a preprogrammed scan button.
To Start or Stop PassPort Group Scan Operation through a Preprogrammed Button (see page 20) • Press the preprogrammed Scan button to start PassPort Group Scan. • Press the preprogrammed Scan button again to stop the PassPort Group Scan. AUTO GROUP SCAN (LTR TRUNKED OPERATION ONLY) Auto Group Scan automatically scans talkgroups within an LTR zone as programmed by your dealer. Auto Group Scan can be either non-prioritized or prioritized.
• The G symbol appears on the display when non-prioritized Auto Group Scan has been activated. Note: • The H symbol appears on the display when prioritized Auto Group Scan has been activated. To Start or Stop All Group Scan Operation through a Preprogrammed Button (see page 20) • There is no LED indicator during Auto Group Scan. • Press the preprogrammed All Group Scan button once to start All Group Scan. • Press the preprogrammed All Group Scan button again to stop All Group Scan.
SYSTEM SCAN G (LTR TRUNKED AND CONVENTIONAL OPERATION ONLY) System Scan scans trunked talkgroups and conventional channels between LTR and conventional zones, as programmed by your dealer. Up to 16 different talkgroups or conventional channels can be programmed into each Scan list. You can edit these lists through your radio’s menu (see page 66). • The G symbol appears on the display.
DELETING A NUISANCE CHANNEL/ TALKGROUP Restoring a Channel/Talkgroup Back to the Scan List (PASSPORT GROUP SCAN OR SYSTEM SCAN OPERATION ONLY) To restore a previously deleted talkgroup or channel back to the Scan list, restart the scan operation or turn your radio off and on again. SCAN If a talkgroup or channel continually generates unwanted calls (a “nuisance” channel), use the preprogrammed Scan button to temporarily delete the talkgroup or channel from the Scan list.
Note: In PassPort mode, talkgroups cannot be prioritized. 5 ) to select Scan List Your radio cannot receive any calls while you are editing a Scan list. The K symbol is displayed while you are in edit mode. 6 y or z until Add Entry? Note: 7 ) to confirm your selection. In Conventional operation only, even if there is activity on a non-priority channel, your radio automatically switches to an active priority channel and indicates the activity with a short tone. 1 ) to enter menu mode.
you see: 11 ( to return to to return to –or– Entry Deleted Priority Channel Add Entry? Channel 2 (Priority 1) and Channel 8 (Priority 2) Delete Entry? Hold down t to exit menu mode. SCAN PRIORITIZING A TALKGROUP OR CHANNEL IN A SCAN LIST (SYSTEM SCAN OPERATION ONLY) You may want to check the activity on one or two talkgroups or channels more frequently than others.
Setting Priority Talkgroups or Channels 1 ) to enter menu mode. Program Lists 3 ) to select Program Lists 4 y or z until Scan List 5 ) to select Scan List 6 y or z until Edit Priority? 7 ) to select Edit Priority? 8 y or z until Priority #1? or until 12 ( to return to Edit Priority? –or– Hold down ( to exit menu mode. Note: You cannot reprioritize a priority 1 talkgroup or channel to priority 2. SCAN 2 y or z until 11 ) to prioritize that talkgroup or channel.
SCAN Notes 70 English
PHONE Your radio allows you to place and receive telephone calls through trunked and conventional systems (depending on phone line availability). Telephone calls through a repeater allow only one person to speak at a time. 2 ) to enter menu mode. –or– Press the preprogrammed radio or DTMF microphone Phone button, and skip to step 5. –or– a. Press and release the Speed Dial button to use the speed dial feature. MAKING A PHONE CALL D THROUGH A TRUNKED SYSTEM Note: b.
D appears on the display when you are in Phone mode. 7 Hold the radio in a vertical position with the microphone 1 to 2 inches (2.5 to 5 cm) away from your mouth. Press the PTT button to talk; release it to listen. 8 To disconnect the phone call: Press and hold ( to exit Phone. D no longer appears on the display. 5 Press and Release the PTT button. 6 • If phone access is successful, a dial tone sounds. • If phone access is unsuccessful, a low-pitched alternating tone sounds.
2 ) to enter menu mode. 3 y or z until Phone 4 ) to select Phone D appears on the display when you are in Phone Mode. 5 (For conventional operation with auto access only). You hear a series of tones, indicating that an access code is being sent automatically, and see your access code: –or– Enter your access code using the DTMF microphone keypad. 6 When you hear a dial tone: –or– XXX-XXX-XXXX 7 XXX-XXX-XXXX a.
8 Press and release the PTT button, if required for your radio. 9 Hold the radio in a vertical position with the microphone 1 to 2 inches (2.5 to 5 cm) away from your mouth. Press the PTT button to talk; release it to listen. 10 To disconnect a phone call, do one of the following: RECEIVING A PHONE CALL D THROUGH A TRUNKED OR CONVENTIONAL SYSTEM To Receive a Phone Call 1 y o r z to select a LTR talkgroup or conventional channel that has been programmed for telephone.
2 Press the PTT button to answer the phone call. Press the PTT button to talk; release it to listen. To Add an Entry 1 ) to enter menu mode. 2 y or z until Program Lists 3 ) to select Program Lists 4 y or z until Phone List 5 ) to select Phone List MODIFYING THE PHONE LIST K 6 y or z until Add Entry? Your radio contains a Phone list that holds up to 25 phone numbers. The Phone list is shared between trunked and conventional Phone operation.
10 Use the DTMF microphone keypad to enter the phone number. You can also add a dash (press w) and a Pause Indicator (hold down # until the # character on the display changes to a “P”). 3 ) to select Program Lists 4 y or z until Phone List 5 ) to select Phone List 11 ) to store the phone number. 6 y or z until Delete Entry? 12 y or z until you see the location in the list where you want to store the phone number.
To Edit an Entry 10 y or z until 1 ) to enter menu mode. 2 y or z until Program Lists (to edit the name), 3 ) to select Program Lists (to edit the phone number), 4 y or z until Phone List or until 5 ) to select Phone List (to edit the location in the phone list). 6 y or z until Edit Entry? 11 ) to confirm your selection. 7 ) to select Edit Entry? 8 y or z until you see the entry you want to edit. 9 ) to select the entry.
PHONE Notes 76 English
The CDM1550•LS+ radio’s voice storage feature enables your radio to perform seven types of voice related functions: • Incoming Call Recording • Voice Memo Recording • Recorded Message Playback • Recorded Message Delete • Recorded Message Transmission • Automatic Message Reply (“When Available”) • Message Time Stamping There is a total of 120 seconds recording time available for all voice storage activity. Your dealer can divide the 120 seconds into a defined number of equal length time slots.
VOICE STORAGE If a voice storage record function is requested, the display shows: Memory Full INCOMING CALL RECORDING The CDM1550•LS+ radio allows you to record incoming calls in either of two ways: • Selective Incoming Call Recording • All Incoming Call Recording Note: Only the audio transmissions of your caller is recorded. Selective Incoming Call Recording This feature enables you to record incoming calls selectively, or on a call-by-call basis.
To Record All Incoming Calls VOICE STORAGE 9 The display shows while your radio is recording. Recording 1 ) to enter menu mode. 2 y or z until Voice Storage 3 ) to select Voice Storage 4 y or z until Record 5 ) to select Record –or– 6 y or z until All Incoming Go to step 1 again to continue recording in the next available slot. 7 ) to select All Incoming 8 The display continuously flashes, except while a call is being recorded.
VOICE STORAGE VOICE MEMO RECORDING In addition to recording calls received, the CDM1550•LS+ radio offers you the ability to record voice memos (or personal reminders) into the radio. The voice memo recording feature is useful for quickly saving phone numbers, names, or any other brief voice information. You can record voice memos using the preprogrammed Record/Playback button (see page 26) or your radio’s menu. To record properly, incoming calls cannot be received while a voice memo is being recorded.
Note: To Playback a Message using the Preprogrammed Record/Playback Button 1 To stop recording at any time, press (. Press and release the preprogrammed Record/Playback button. • The first mesPlaying Msg XXX sage plays, and the display shows (XXX = the message number) 9 Press ( to stop recording. VOICE STORAGE 8 Without pressing the PTT button, speak clearly into the microphone to record your memo. The radio records your memo until the message slot is full or until you press (.
VOICE STORAGE To Playback a Message using the Menu 1 ) to enter menu mode. 2 y or z until Voice Storage 3 ) to select Voice Storage 4 y or z until Playback 5 ) to select Playback 6 y or z until 001 12:00A Message # Time Stamp 005 10 y or z anytime during playback to advance to the next message. 84 1 Press and release the preprogrammed Record/Playback button. 2 y or z to select the desired message. 3 Press and hold the preprogrammed Delete Playback button to delete current message.
To Delete a Message using the Menu 2 y or z until Voice Storage 3 ) to select Voice Storage 4 y or z until Delete 5 ) to select Delete This feature allows you to transmit a recorded message to another radio user. To Transmit a Recorded Message 1 Press and hold the PTT button to initiate the message transmission. 2 While holding down the PTT button, press the preprogrammed Record/Playback button to select and play back the desired recorded call or memo.
VOICE STORAGE ANSWER MODE The Answer Mode feature allows radio callers to leave recorded audio messages on your radio. Note: This feature is available via the radio’s menu and/or the radio or the DTMF microphone programmable button. To Enable the Answer Mode Feature 1 ) to enter menu mode. Alternate Msg? 4 ) to select Greeting Msg? The LCD shows Recording 5 Without pressing the PTT button, speak clearly into the microphone to record your memo.
To Disable the Answer Mode Feature VOICE STORAGE 1 ) to enter menu mode.
VOICE STORAGE Notes 88 English
AUDIO/TONE SETTINGS You can customize the audio and tone feature settings on your radio by: 1 ) to enter menu mode. 2 y or z until Audio/Tones 3 ) to select Audio/Tones AUDIO/TONE SETTINGS 4 y or z until you see the feature you want to change (see the table on the next page). 5 ) to select the feature. You see the feature’s current setting. 6 y or z for available settings. (For Name and Call Tone Tagging, see page 56.) 7 ) to set the desired setting.
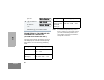
Audio/Tone Settings AUDIO/TONE SETTINGS Feature Settings Alert Vol Lvl Makes the volume level of the audio and alert tones independent. If turned on, it makes the alert tones follow the settings in the CPS; if turned off, the alert tones follow the setting of the volume knob. Ind Alert Off Ind Alert On Tone Disable Turns all alert and audio tones on or off.
UTILITIES You can customize some of your radio’s feature by: 1 ) to enter menu mode. 2 y or z until Utilities 3 ) to select Utilities 4 y or z until you see the feature you want to change (see table on the next page). 5 ) to select the feature. You see the feature’s current setting. 6 y or z for available settings. UTILITIES 7 ) to select the desired setting.
Utilities Features Feature Settings Power Level Changes the power level of the radio to high, low (see page 93). Power High Power Low Clock Sets the time, or turns the clock on or off (see page 94). Clock On Clock Off Set Time Reminder Alarm Sets the alarm, or turns it on or off (see page 94). Alarm On Alarm Off Set Time Language Selection § ‡ Selects the language to be shown on your radio’s displays.
SETTING THE POWER LEVEL B Each channel in your radio has a predefined transmit power level that can be changed. • High power (S) allows you to reach a radio that is farther away. • Low power (R) conserves the battery’s charge. Note: • • Be aware that a message received from a nearby radio might change your radio’s power level to low. This may cause radios that are farther away not to receive your transmissions. In PassPort mode, the power level is predefined radio wide.
SETTING THE CLOCK/ALARM To Set the Clock/Alarm 10 ) to save your changes. 1 ) to enter menu mode. Utilities 11 ( to return to 3 ) to select Set time? –or– to return to Reminder Alarm 4 y or z until Clock –or– Clock Reminder Alarm –or– 5 ) to confirm your selection. UTILITIES Utilities 2 y or z until or until 6 y or z until Set time? 7 ) to select Set time? 8 When a setting is blinking, you can change it with y or z.
DISPLAYING THE TIME To Display the Time 1 ) to enter menu mode. SELECTING THE DISPLAY LANGUAGE (LTR TRUNKED AND CONVENTIONAL OPERATION ONLY) To Select the Display Language 2 y or z until Utilities 3 ) to select Utilities 1 ) to enter menu mode. 4 y or z until Clock 2 y or z until Utilities 3 ) to select Utilities Language Select 5 ) to confirm your selection. 6 y or z until Display Clock? 4 y or z until 7 ) to select Display Clock? 5 ) to confirm your selection.
UTILITIES Notes 96 English
12_Warranty.fm Page 95 Thursday, April 4, 2002 4:39 PM WARRANTY I. WHAT THIS WARRANTY COVERS AND FOR HOW LONG: MOTOROLA INC.
12_Warranty.fm Page 96 Thursday, April 4, 2002 4:39 PM II. GENERAL PROVISIONS: WARRANTY This warranty sets forth the full extent of MOTOROLA'S responsibilities regarding the Product. Repair, replacement or refund of the purchase price, at MOTOROLA’s option, is the exclusive remedy. THIS WARRANTY IS GIVEN IN LIEU OF ALL OTHER EXPRESS WARRANTIES.
12_Warranty.fm Page 97 Thursday, April 4, 2002 4:39 PM V. WHAT THIS WARRANTY DOES NOT COVER: B) C) D) E) F) G) Defects or damage resulting from use of the Product in other than its normal and customary manner. Defects or damage from misuse, accident, water, or neglect. Defects or damage from improper testing, operation, maintenance, installation, alteration, modification, or adjustment. Breakage or damage to antennas unless caused directly by defects in material workmanship.
12_Warranty.
13_Accessory.fm Page 99 Thursday, April 4, 2002 4:40 PM ACCESSORIES Motorola offers a number of accessories to enhance the productivity of your two-way radio. Many of the available accessories are listed below. For a complete list, see your Motorola dealer. MICROPHONES EXCHANGEABLE BUTTON KITS Note: Other individual exchangeable buttons are available through AAD. Please see Basic Service Manual for button numbers.
13_Accessory.fm Page 100 Thursday, April 4, 2002 4:40 PM REMOTE MOUNTS RLN4802_ Remote Mount Kit - CDM1250 and CDM1550 models (requires HKN4192 power cable) RKN4077_ Remote Mount Cable, 3 meter length RKN4078_ Remote Mount Cable, 5 meter length RKN4079_ Remote Mount Cable, 7 meter length HLN9457_R ANTENNAS HKAD4001_ 220 MHz, 1/4-Wave Roof Mount HAF4012_ Mini-U 746-794 MHz, 1/4-Wave Roof Mount ACCESSORIES EXTERNAL SPEAKERS RSN4001_ 13 Watt External Loudspeaker HSN8145_ 7.
13_Accessory.
13_Accessory.fm Page 102 Thursday, April 4, 2002 4:40 PM RDN7367_ ACCESSORIES RDN7368_ Mobile Display Terminal - Mobile messaging device equipped with a data modem. This unit features a 4x40 backlit LCD display and the keypad allows users to send information to the dispatcher in response to base instructions. RDN7369_ Standalone Modem/GPS - Cost efficient Automatic Vehicle Location (AVL) device compatible with Global Positioning System (GPS).
13_Accessory.fm Page 103 Thursday, April 4, 2002 4:40 PM RDN7378_ RDN7379_ AVL Messaging Status Software Mapping software that provides the user with Automatic Vehicle Location to track vehicles along with message dispatch and status tracking capability. PUBLIC ADDRESS HKN9323_ 8 Ft. Public Address Speaker Cable Credit Card Software - Used with RDN7371 (credit card reader). HKN9324_ 15 Ft.
13_Accessory.
Selecting a Trunked Zone and Talkgroup 1. 2. v or w to select desired trunked zone. y or z until you see desired preprogrammed talkgroup on the display. CDM1550•LS+ Quick Reference Card Sending a Trunked Call 1. 2. Press PTT button. If trunked system access was successful — Red LED = steady; if unsuccessful —LED = flashing; red-low pitched tone sounds. Speak clearly into microphone. Release PTT button to listen. Record the functions for your radio’s programmable buttons in the table provided below.
Menu Navigation Chart * — Available in PassPort trunked zones only (Refer to Menu Navigation guidelines— lower, left-hand corner of this page) Radio Call y z Rptr/ Talkarnd§ (p. 34) (LTR) All Group Scan‡(p. 64) y y z y PP Group Scan* (p. 62) z on/off repeater mode/ talkarnd mode y ‡ — Available in LTR trunked zones only ) LTR /Con System Scan Voice Storage y § — Available in conventional zones only z z y z z Program Lists y Phone (p. 71) z y on/off on/off Delete (p.
6864110R13-O_cvr.qxd 2/21/02 12:39 PM Page 1 Motorola, The Stylized M logo, Intelligence Everywhere, Professional Radio - As Dedicated As You Are, CDM Series, CDM1550•LS+, and Call Alert are trademarks of Motorola, Inc. LTR is a mark of E.F. Johnson Company. PassPort is a mark of Trident Micro Systems. © 2002 Motorola, Inc. All rights reserved. Printed in U.S.A.