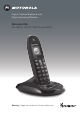
Digital Cordless Telephone with Digital Answering Machine Motorola C5A For C5011A, C5012A, C5013A and C5014A Warning: Charge the handset for 24 hours before use.
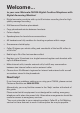
Welcome... to your new Motorola C5010A Digital Cordless Telephone with Digital Answering Machine! • Digital answering machine with up to 60 minutes recording time for high quality message recording. • 200 Name and Number phonebook. • Copy phonebook entries between handsets. • Colour display. • Speakerphone for hands-free conversations. • All handsets are fully cordless for locating anywhere within range. • Screensaver clock display.
This user guide provides you with all the information you need to get the most from your phone. To set up your phone, follow the simple instructions in ‘Getting Started’, on the next few pages. IMPORTANT Only use the telephone line cord supplied.
1. Getting started......................................................... 8 2. Getting to know your phone................................ 12 3.1 Switch the handset on / off........................................................... 19 3.2 Calls................................................................................................. 19 3.2.1 Make a call............................................................................ 19 3.2.2 Preparatory dialling............................
5.2 5.3 5.4 5.5 5.6 6. Reminder................................................................ 32 6.1 6.2 6.3 6.4 6.5 6.6 6.7 7. Dial a number in the Calls list....................................................... 29 View the details of an entry.......................................................... 30 Copy a Calls list number to the phonebook................................ 30 Delete an entry...............................................................................
10. Using additional handsets.................................... 44 10.1 10.2 10.3 10.4 Registering an additional handset............................................... 44 Register a different make of handset to your C5010A base....... 44 Select a base.................................................................................. 45 De-register a handset.................................................................... 45 11. Room monitor...................................................
13.16 13.17 13.18 13.19 Open and read a mailbox text...................................................... 61 Edit a user mailbox........................................................................ 62 Delete a user mailbox................................................................... 62 Set common mailbox sub address.............................................. 62 14. Help......................................................................... 63 15. General information.......................
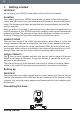
1. Getting started IMPORTANT Do not place your C5010A in the bathroom or other humid areas. Location You need to place your C5010A base within 2 metres of the mains power socket and 1.8 metres from the telephone wall socket so that the cables will reach. The socket-outlet shall be installed near the equipment and shall be easily accessible. Make sure that it is at least 1 metre away from other electrical appliances to avoid interference.
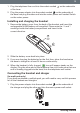
1. Plug the telephone line cord into the socket marked of the base. on the underside 2. Plug the power adaptor into the socket marked on the underside of the base and plug the other end into the mains power wall socket. Switch on the mains power. Installing and charging the handset 1. Remove the battery cover from the back of the handset and insert the rechargeable Ni-MH battery cells supplied. Please note the ’+’ and ’-’ markings inside the battery compartment and insert in the correct direction.
2. Remove the battery cover from the back of the handset and insert the 2 x AAA NiMH rechargeable batteries supplied. Please note the ’+’ and ’-’ markings inside the battery compartment and insert in the correct direction. 3. Slide the battery cover back into place. 4. If you are charging the batteries for the first time, place the handset on the charger to charge for at least 24 hours continuously. 5. When the handset is fully charged, icon will appear steady on the display.
Date and time If you have subscribed to a Caller ID Service, the date and time is set automatically for all handsets when you receive your first call. If you do not have a Caller ID service, you can set the date and time manually. 1. Press Menu, scroll to Clock & Alarm and press Select. 2. Date & Time is highlighted. Press Select. 3. Enter the date using the format DD/MM/YY e.g. 04/08/12 for 4 August 2012. 4. Enter the time (HH:MM) and press Save.
2. Getting to know your phone Overview of your handset A B C D H E I J F K G L M A Earpiece B Display See page 14 for an overview of the display icons. C Redial list / Scroll up / Volume up / Pause In standby mode, press to open the redial list. Scroll up through lists and menus. Increase the earpiece and hands-free volume. When the phone is ringing, press to increase the handset ringer volume. Press and hold to enter a pause (P) when pre-dialling or storing numbers.
F Pulse to Tone dialling / * During a call, press and hold to switch from pulse dialling to tone dialling. Dial a *. G Intercom Press to make an internal call. H Phonebook menu / Clear / Back / Right softkey In standby mode, press to open the phonebook menu. Clear incorrect input during text editing. Return to previous menu. I End / Exit / Switch handset on/off End a call. When in a menu, go back to standby mode. Press and hold to switch handset off (when in standby) or on.
Handset LCD Display Steady when the handset is registered and within range of the base. Flashes when handset is out of range or searching for the base. Displays when ECO mode is on. Handset ringer volume is Off. Displays when in hands-free mode. Displays when the answering machine is on. The alarm clock has been set. The keypad is locked. Displays when you have missed calls and new number(s) in the Calls list.1 Displays when you have a new text message.
Overview of the base A B F C D G E H I J A LED Indicates when the answering machine is on or off, and when you have messages. Status Action 0 Answering machine on - Answering machine off B Volume Up Increase playback volume. C Answering machine On / Off Switches the answering machine on / off.
H Skip forward Press to skip forward through your answering machine messages. I Skip back Press to skip backward through your answering machine messages. J Play / Pause Play or pause recorded messages. Navigating the menu Your C5010A has an easy to use menu system on the handset. Each menu has a list of options, which you can see on the menu map on the following page. When the handset is switched on and in standby: 1. Press the left softkey Menu. The main menu is opened. 2.
Menu map Text Messaging Write Message Inbox Drafts Outbox Templates Delete Messages Text Settings Service Centres Mailbox Number Message Size Message Alert Users Answer Machine Play Play All Answer On/Off Record Memo Outgoing Message. Delete Messages Answer Settings Answer Mode Answer Delay Message Alert Remote Access Calls Lists Missed Calls Received Calls Dialled Calls Delete Calls Reminder If there is an event, press Options and the following will be displayed.
Clock & Alarm Date & Time Alarm Time Format Settings Set Handset Ringtone Ringer Volume Receiver Volume Handset Name Language Wallpaper Menu Colour Screensaver Light Timeout Display Contrast Auto Talk Key Beep PABX Access Code Set Base Ringtone Ringer Volume Dialling Mode Ring Priority Recall Mode First Ring System PIN Master Reset ECO Mode Registration Register Handset Select Base De-register Extra Room Monitor Names Press Names during a call From menu in standby: Search Add Entry Copy Phonebook Mem
3. Using the phone NOTE Your handset will automatically time the duration of all external calls, the call timer will display on the screen. When the call ends, the total duration of your talk time is shown for 5 seconds. 3.1 Switch the handset on / off Press and hold to switch the handset on or off. 3.2 Calls 3.2.1 Make a call 1. Press . 2. When you hear the dial tone, dial the number. 3.2.2 Preparatory dialling 1. Dial the number first.
3.4 Secrecy You can mute your handset so that you can talk to someone nearby without your caller hearing. 1. During a call, press Secrecy. The display shows Secrecy On and your caller cannot hear you. 2. Press Off to resume your call. 3.5 Intercom 3.5.1 Make an internal call If you have more than one handset registered to the base, you can make internal calls between two handsets. Internal Call and Handset X displays to indicate an internal call. 1.
4. If there is no answer from the other handset, press to return to your external caller. 5. Press to end the call. 3.6 Hands-free speakerphone Hands-free lets you talk to your caller without holding the handset. It also enables other people in the room to listen to the conversation. 3.6.1 Make a hands-free call 1. Dial the number and then press twice. icon is displayed and you will hear the call over the handset loudspeaker. 2. Press to switch the call between the earpiece and hands-free. 3.
3.7 Redial The last 20 entries dialled are stored in the redial list. 3.7.1 View or dial an entry 1. Press to open the Redial list. 2. The last number dialled is highlighted. 3. Scroll 4. Press or to the entry you want. to dial the entry or press Back to return to standby. NOTE If the caller’s number exactly matches an entry stored in the phonebook, the name is displayed. Press the left softkey twice to see the caller’s number. 3.7.2 Copy a Redial list number to the phonebook 1.
NOTE When the keypad is locked, you can still answer incoming calls and operate the handset as normal. When the call ends, the keypad lock comes on again. . 1. Press and hold icon is displayed. 2. To unlock the keypad, press Unlock. The display shows Press # to Unlock Keys. 3. Press within 3 seconds. 3.9 Paging / Find handset You can alert a handset user that they are wanted or locate a missing handset. Paging calls cannot be answered by a handset. 1. Press on the base.
4. Phonebook You can store up to 200 names and numbers in the phonebook. Names can be up to 12 characters long and numbers up to 24 digits. You can also select different ringer melodies for the phonebook entries. 4.1 Store a name and number If the C5010A is connected to a switchboard, you may need to enter a pause in a number. This gives the switchboard time to find an outside line. A pause is normally stored after the switchboard access code (e.g. 9).
CHARACTER MAP Key Case L/U Assigned characters and symbols . , - ? ! ¡ ¿ ’ @ : ; / 1 L abc2äæåàç U ABC2ÄÆÅÇ L def3èé U DEF3É L ghi4ì U GHI4 L jkl5 U JKL5 L mno6öøòñ U MNO6ÖØÑ L pqrs7ß U PQRS7 L tuv8ùü U T UV 8 Ü L wxyz9 U W XY Z 9 L/U Space 0 short press to switch between Abc, abc, ABC and 123 mode L/U L = Lower case U = Upper case 4.2 View the details or dial an entry 1. In standby, press . The first entry is highlighted on the display. 2.
4. Show Details is highlighted. Press Select. The name, number and ringtone of the entry are displayed. 5. Press Dial to dial the displayed entry or press to return to standby. 4.3 Search an entry 1. Press Names to enter the phonebook menu. 2. Search is highlighted. Press Select. The first entry is highlighted on the display. 3. Enter the first letter of the name to search alphabetically then scroll to the exact entry. 4. Press to dial the displayed entry or press or to return to standby. 4.
NOTE If an entry with the same number is already stored in the receiving handset, it will not be copied. 4.6 Assign a ringtone 1. In standby, press . The first entry is highlighted on the display. 2. Enter the first letter of the name to search alphabetically then scroll to the exact entry. Press Options. 3. Scroll or to Ringtone and press Select. or to the ringtone you want and press Select. 4. Scroll The ringtone is saved. 5. Press to return to standby. 4.7 Delete an entry 1.
4. Scroll or to Fast Call, press Select. 5. Scroll or to Key X where the entry is stored, press Select. 6. Scroll or to Clear Entry, press Select to confirm. 7. Press to return to standby. 4.10 Access the phonebook during a call 1. During a call, press Names. 2. Press Options and scroll Entry. or to select Add Entry, Show Details, Edit Entry or Delete 4.11 Copy the phonebook to another handset 1. Press Names to enter the phonebook menu. 2. Scroll to Copy Phonebook and press Select. 3.
5. Calls list If you have subscribed to Caller ID service, and provided the identity of the caller is not withheld, the number of the caller will be displayed together with the date and time of the call (if provided by the network). NOTES If the caller’s number is stored in your phonebook along with a name, the name will also be displayed. If the number is unavailable, Unavailable will be displayed. If the caller has withheld their number, Withheld will be displayed.
5.3 View the details of an entry 1. Press Menu, scroll or 2. Scroll you want. to Calls Lists and press Select. to highlight the Calls list (Missed Calls, Received Calls, Dialled Calls) 3. Press Select to confirm. The most recent number or name if stored in the phonebook is displayed. 4. Scroll or to the entry you want and press Options. 5. Display shows Show Details. Press Select. The number (or name if stored in the phonebook) and the date and time of the call are displayed. 6.
5.6 Delete the entire Calls list 1. Press Menu, scroll 2. Scroll to Calls Lists and press Select. to Delete Calls and press Select. or to highlight the Calls list (Missed Calls, Received Calls, Dialled Calls or 3. Scroll All Calls) you want. 4. Display shows Delete All Calls ?. Press Yes to confirm. 5. Press to return to standby.
6. Reminder 6.1 Add a new event Use the C5010A to remind you of details of up to five events such as birthdays, anniversaries or appointments. Up to 24 characters can be entered as the subject. 1. Press Menu, scroll to Reminder and press Select. 2. If no previous event is stored, Add Event is highlighted. Press Select. Or If events are already stored, they are listed. Press Options. Add Event is highlighted. Press Select. 3. Enter the subject and press Save. 4. Enter the date (DD/MM) and press Save.
6.3 Show event details 1. Press Menu, scroll to Reminder and press Select. 2. Stored events are displayed. The first event is highlighted on the display. If required, scroll to the event you want and press Options. to Show Details and press Select. The description, date and time of 3. Scroll the reminder are displayed. 4. Press to return to standby. 6.4 Edit an event 1. Press Menu, scroll to Reminder and press Select. 2. Stored events are displayed.
Or scroll or to: Save Press Select to save the message in the Drafts folder. Insert Symbol Press Select. The symbol table is displayed. Press or to highlight the symbol you want then press Insert. Insert Emoticon Press Select. The Emoticon table is displayed. Press or to highlight the Emoticon you want then press Insert. Insert Template Press Select. The list of templates is displayed. Press or to highlight the template you want then press Insert. 6.
7. Clock & Alarm If you have subscribed to your network’s Caller ID service, the base automatically sets the date and time of all handsets when you receive the first call. You can also manually set the time on the individual handsets. 7.1 Set the date and time 1. Press Menu, scroll to Clock & Alarm and press Select. 2. Date & Time is highlighted. Press Select. 3. Enter the date using the format DD/MM/YY e.g. 04/08/12 for 4 August 2012. 4. Enter the time (HH:MM) and press Save.
8. Handset settings 8.1 Handset ringtone You can set different ringtones for external calls and internal calls. Select from 20 handset ringtones. You will hear a sample ring as you scroll to each ringtone. 1. Press Menu, scroll to Settings and press Select. 2. Set Handset is highlighted. Press Select. 3. Ringtone is highlighted. Press Select. 4. Scroll or to External Call or Internal Call and press Select. 5. Scroll or to the ringtone that you want and press Select. 6.
8.4 Handset name If you are using more than one handset with the C5010A base, you can give each handset a personalised name to easily distinguish between the handsets. A name can be up to 10 characters long. 1. Press Menu, scroll to Settings and press Select. 2. Set Handset is highlighted. Press Select. 3. Scroll to Handset Name and press Select. 4. Enter the name and press Save. Press Clear to delete a character, or press and hold Clear to delete all characters. 5. Press to return to standby. 8.
8.7 To change menu colour Select from 3 menu colours for your handset. The menu colour changes as you scroll to each colour. 1. Press Menu, scroll to Settings and press Select. 2. Set Handset is highlighted. Press Select. 3. Scroll to Menu Colour and press Select. 4. Scroll or 5. Press to the colour you want and press Select. to return to standby. 8.8 Screensaver When the screensaver is set to Clock, an analogue clock is displayed.
5. Press to return to standby. 8.11 Auto talk With Auto Talk switched on, you can answer a call just by lifting the handset off the base or charger. If switched off, you will have to press to answer a call. 1. Press Menu, scroll to Settings and press Select. 2. Set Handset is highlighted. Press Select. 3. Scroll to Auto Talk and press Select. 4. Scroll or 5. Press to Off or On then press Select. to return to standby. 8.
9. Base settings 9.1 Base ringtone Select from 5 base ringtones. You will hear a sample ring as you scroll to each ringtone. 1. Press Menu, scroll 2. Scroll to Settings and press Select. to Set Base and press Select. 3. Ringtone is highlighted. Press Select. 4. Scroll 5. Press or to the ringtone that you want and press Select. to return to standby. 9.2 Base ringer volume The base has 5 ring volume settings plus Off. 1. Press Menu, scroll to Settings and press Select. 2.
4. Scroll or to All Handsets or Select Handset then press Select. If you choose Select Handset, all available handsets are displayed. • Scroll or to the handset you want then press Select. • Scroll or to the number of rings that you want to set: 2, 4 or 6 Rings and press Select. 5. Press to return to standby. 9.5 Recall mode Recall is useful to access certain network services and PABX /switchboard services.
1. Press Menu, scroll to Settings and press Select. 2. Scroll to Set Base and press Select. 3. Scroll to System PIN and press Select. 4. Enter the old PIN (Default setting = 0000) and press OK. 5. Enter the new PIN and press OK. 6. Re-enter the new PIN and press OK. 7. Press to return to standby. NOTE It is advisable to make a note of your new PIN code and keep it somewhere safe. 9.8 Restore default settings You can restore the C5010A to its default (original) settings.
NOTE When ECO mode is set to On, the range will be reduced. is replaced with the and the handset 9.
10. Using additional handsets Up to 5 handsets can be registered to one base station. Additional handsets must be registered to the base before you can use them. • The instructions described below apply specifically to the C5010A handset. If you wish to register another manufacturer’s handset, the instructions may vary. In this case, please refer to the instruction manual of the additional handset. • The System PIN is required to register or de-register handsets. The default PIN is 0000. 10.
On the base: 1. Press and hold until the base emits a double beep. The base will remain in registration mode for 90 seconds. On the handset: Follow the registration instructions given in your handset’s user guide. 10.3 Select a base You can register the C5010A handset with up to 4 bases. Once registered, you can switch between bases, for example, bases at home and at work. 1. Press Menu, scroll 2. Scroll to Registration and press Select. to Select Base and press Select.
11. Room monitor You can use your C5010A handset to monitor the sounds in another room. If the sounds reach a certain level the handset will automatically dial out to a pre-set external number or to another handset. When the Room Monitor is set to On, the handset will display Room Monitor On and only the microphone will be active to monitor the sound levels in the room. Both the speaker and receiver will be set to Off and the handset will not ring if there is an incoming call. 11.
Internal 1. Press Select and the registered handset will be listed, for example “Handset 2”. 2. Scroll or to select the handset the Room Monitor will call if the noise levels reach a certain level. 3. Press Select and Set to handset 2 is displayed. NOTE If only one handset is registered the display prompts “Not available” and returns to the previous screen. You must register additional handsets before the handsets will be displayed and make Internal calls.
12. Using the answering machine The C5010A answering machine records unanswered calls when it is activated. It can store up to 59 messages within the maximum recording time of 60 minutes. Each message can be up to 3 minutes long. Your personalised outgoing messages can be up to 3 minutes long. You can operate your answering machine from: • the base. • the handset. • remotely, from another phone (see page 53). 12.1 Base control keys Press to switch the answering machine on/off.
12.3 Answer delay Answer delay sets the number of times the C5010A will ring before the answering machine picks up your call and starts playing the outgoing message. You can change this setting to between 2 - 9 rings or Time Saver. The default setting is 5 rings. 1. Press Menu, scroll to Answer Machine and press Select. 2. Scroll to Answer Settings and press Select. 3. Scroll or to Answer Delay and press Select. 4. Scroll or to the setting you want and press Select. 5.
12.7 Record a personalised outgoing message You can record personalised outgoing messages up to 3 minutes long for your callers. The personalised OGM will only play if you set your C5010A to Personal OGM in the answer mode menu. The Answer & Record mode allows your caller to leave a message after the announcement, while the Answer Only mode only allows your caller to hear the announcement. You will be prompted to select the mode before the recording. 1. Press Menu, scroll 2.
12.9 Set the answer mode and announcement The Answer & Record mode allows your caller to leave a message after the announcement, while the Answer Only mode only allows your caller to hear the announcement. Select a pre-recorded or personalised outgoing message as your announcement to the callers. 1. Press Menu, scroll to Answer Machine and press Select. 2. Scroll to Answer Settings and press Select. 3. Scroll to Answer Mode and press Select. 4.
NOTE While screening, you can adjust the volume by pressing 12.12 or . Message playback Each message is played back with day and time of the call announced. The caller’s number is displayed (if stored in the phonebook the name will be displayed). 1. Press Menu, scroll to Answer Machine and press Select. 2. Play is highlighted. Press Select to play by message or scroll then press Select to play all messages. to Play All 3. During playback, press Options.
When the memory is full, the outgoing message will automatically be set to Answer Only. You must delete old messages before the C5010A can record new messages. 12.14 Remote access Remote access allows you to operate your answering machine and listen to your messages by calling the C5010A from another phone. The default setting is On. 1. Call your C5010A. When you hear the announcement, press *. 2. Enter your 4 digit remote access PIN (default setting = 0000). You will hear a confirmation beep.
12.15 Switch remote access On / Off 1. Press Menu, scroll to Answer Machine and press Select. 2. Scroll to Answer Settings and press Select. 3. Scroll or to Remote Access and press Select. 4. Scroll or to Off or On then press Select. 5. Press 12.16 to return to standby. Change the remote access PIN The default remote access PIN is 0000. 1. Press Menu, scroll to Answer Machine and press Select. 2. Scroll to Answer Settings and press Select. 3.
13. Text messaging Your C5010A can send and receive text messages from participating mobile networks and compatible landline telephones. IMPORTANT You must subscribe to your Network Provider’s Caller ID service so that you can use text messaging and you must not withhold your telephone number. A quarterly fee may be payable, please contact your network provider for more details. 13.
Writing tips Press Clear to delete incorrect characters. Use text. or to move the cursor through the text, if you want to insert /delete Upper & lower case Press to switch between upper case and lower case letters. Maximum number of characters in a text message is 160 (Short). The display shows a character countdown from 160 down to 0 (Unless message size is set to 612 characters [Long]). NOTE If the text is unsuccessful, the message Message Sending Failed! will be displayed.
can write and send a new one. 13.5 Read a new message Received messages are stored in the Inbox. 1. The Inbox is opened and the list of messages displayed. If you press Back the message is stored in the Inbox for reading later. 2. In the Inbox scroll (to more recent messages) or messages) through the list of messages. (to earlier list of 3. Highlight the message you want to read and press Read or press Back to return to Text messaging menu. 4. Press to return to standby. 13.
13.7 Edit or send texts in the Drafts box If you save a message to complete or send later it will be stored in the Drafts box. Only one message can be saved in each user’s Drafts box. 1. To open the Drafts box, press Menu, Text Messaging is displayed. Press Select. 2. Scroll or to Drafts and press Select. 3. Press Edit to edit your message content. 4. Press Options and scroll Template. or to Send, Save, Insert Symbol, Insert Emoticon and Insert 5.
13.10 Deleting texts 1. Press Menu, Text Messaging is displayed. Press Select scroll Messages and press Select. 2. Scroll or or to Delete to Inbox, Drafts, Outbox or All Messages and press Select. 3. Press Yes to confirm or No to cancel. 4. Press to return to standby. Selecting All messages will delete all messages stored in your Inbox, Outbox and Drafts box. Service Centre numbers To send and receive text messages you need the telephone number of your Network’s text Centre.
13.13 Message alert tone When you receive a text message, the message alert tone will sound. These beeps can be switched on or off. 1. Press Menu, Text Messaging is displayed. Press Select. Scroll and press Select. 2. Scroll or to Message Alert and press Select. 3. Scroll or to On or Off and press Select. 4. Press 13.14 or to Text Settings to return to standby. Set message size A standard text message is 160 characters (short).
1. Press Menu, Text Messaging is displayed. Press Select. Scroll and press Select. 2. Scroll or to Text Settings or to Users and press Select. 3. User 1 is highlighted. Scroll or to select another User. 4. Press Options. Edit is highlighted. Press Select. 5. Enter the user name (up to 8 characters) and press Save. 6. Use the single digit mailbox number displayed or enter your own single digit mailbox number then press Save. 7. Enter a 4-digit mailbox PIN and press Save. 8.
13.17 Edit a user mailbox 1. Press Menu, Text Messaging is displayed. Press Select. Scroll mailbox you want to edit and press Select. or to the 2. Enter the 4 digit mailbox PIN and press OK. 3. Scroll or to Text Settings and press Select. 4. Scroll or to Users and press Select. 5. Scroll or to the user mailbox you want to edit and press Options. 6. Edit is highlighted, press Select. 7. Enter the current mailbox PIN and press OK. 8. Enter the new name and press Save. 9.
14. Help No dial tone • • • Use only the telephone line cord supplied. Check that the telephone line cord is connected properly. Check that the mains power is connected properly and switched on. No display • Check that the batteries are inserted correctly and fully charged. Use only approved rechargeable batteries supplied. • • Check that the handset is switched on. Press and hold . Reset the base by removing the batteries and disconnecting the mains power.
Handset does not ring • The handset ringer volume may be set to Off, see page 36. Base unit does not ring • The base ringer volume may be set to Off, see page 40. Noise interference on my phone or on other electrical equipment nearby • Place your C5010A at least one metre away from electrical appliances or any metal obstructions to avoid any risk of interference. Answering machine will not record new messages • • • Is the recording memory full? Play and delete messages, see page 52.
15. General information IMPORTANT This equipment is not designed to make emergency telephone calls when the power fails. Alternative arrangements should be made for access to emergency services. This product is intended for connection to analogue public switched telephone networks and private switchboards in Europe.
• • • • • • • • • Follow all warnings and instructions marked on the product. Do not install this product near a bath tub, sink, or shower. Operate this phone using only the power source that is indicated on the marking label. If you are unsure of the power supply to your home, consult with your dealer or local power company. Do not place this product on an unstable cart, stand, or table. This product may fall, causing serious damage to the product.
• • • • recommend that to avoid damage, do not place the product on antique / veneered wood. Do not place your product on carpets or other surfaces which generate fibres, or place it in locations preventing the free flow of air over its surfaces. Do not submerge any part of your product in water and do not use it in damp or humid conditions, such as bathrooms. Do not expose your product to fire, explosives or other hazardous conditions.
What Other Limitations Are There? ANY IMPLIED WARRANTIES, INCLUDING WITHOUT LIMITATION THE IMPLIED WARRANTIES OF MERCHANTABILITY AND FITNESS FOR A PARTICULAR PURPOSE, SHALL BE LIMITED TO THE DURATION OF THIS LIMITED WARRANTY, OTHERWISE THE REPAIR OR REPLACEMENT PROVIDED UNDER THIS EXPRESS LIMITED WARRANTY IS THE EXCLUSIVE REMEDY OF THE CONSUMER, AND IS PROVIDED IN LIEU OF ALL OTHER WARRANTIES, EXPRESS OF IMPLIED.
(cracks, scratches, etc.) to the surface of the product resulting from misuse; (b) contact with liquid, water, rain, extreme humidity or heavy perspiration, sand, dirt or the like, extreme heat, or food; (c) use of the Products or Accessories for commercial purposes or subjecting the Product or Accessory to abnormal usage or conditions; or (d) other acts which are not the fault of Motorola or SUNCORP are excluded from coverage. Use of Non-Motorola branded Products and Accessories.
Connecting to a switchboard This product is intended for use within Europe for connection to the public telephone network. Recall You may need to use the recall function if you are connected to a switch. Contact your PABX supplier for further information.
Declaration of Conformity (DoC) Suncorp declares that the following products: Brandname: Type: Motorola C5011A, C5012A, C5013A, C5014A Descriptions: DECT phone with telephone answering machine (C501xA) and their multi-handset versions.
Manufactured, distributed or sold by Suncorp Technologies Ltd., official licensee for this product. MOTOROLA and the Stylized M Logo are trademarks or registered trademarks of Motorola Trademark Holdings, LLC. and are used under license. All other trademarks are the property of their respective owners. © 2012 Motorola Mobility LLC. All rights reserved.