Introducing DVR with Comcast Digital Cable You’ll never watch TV the same way again. Now you can: Record all your favorite shows With DVR (Digital Video Recorder) from Comcast Digital Cable, it’s easy to record your favorite shows — just highlight a program in your on-screen program guide and press record. No tapes, timers, phone lines, or VCR required. You can even record two shows at the same time.
Getting started Prepare your remote control After you have connected the DVR box to your TV, press Cable on your remote control to ensure the remote is in cable mode. You can verify this by pressing the Power key to see if the DVR turns on and off. Get to know your digital cable box with built-in DVR Your DVR box is a dual-tuner Motorola DCT3412/3416 or DCT6412/6416 or a Pace TDC 575D — an advanced interactive digital cable receiver.
Step 1: Access the User Settings Menu* 1. To access the User Settings Menu, power On your TV and power Off the DVR box. 2. Press the Menu button on either your remote or the front of your DVR box to call up the on-screen menu. You may use either the DVR front panel or remote to navigate the menu. 3. Press the 䊱䊲 buttons on your remote to select the setting you wish to change. Press the 䊴 䊳 buttons to select an option for that setting. To exit the setting and move to another setting, use the 䊱䊲 buttons.
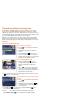
Control live TV and recordings With DVR, you can control your TV in ways you never imagined. Pause live TV when your best friend calls. View an instant replay, or rewind your favorite scenes over and over again — all with a push of a few buttons on your remote control. Buffered programs So how is all this possible? DVR creates a temporary recording of all programs you are watching. This temporary recording is referred to as a buffer.
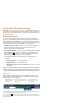
Pause a live program Use Pause to instantly freeze the action. Programs will remain in pause for up to the buffer length — at least 45 minutes for standard-definition programming or 15 minutes for high-definition programming. 1. As you watch TV, press Pause 2. Press Play to instantly freeze the scene. to resume the program. Rewind or fast-forward a live program You can rewind or fast-forward at four different speeds: 2x, 15x, 30x, and 60x. or Fast-Forward up to four times to increase 1.
Control two programs at once With DVR you don’t have to choose between two programs that are on at the same time. You can control the action on both programs. This is because your DVR has two tuners and can buffer one program on each tuner. This is great when you want to watch two sporting events that air at the same time.
Record and play back programs Depending on the DVR model you have, most DVRs can record up to 75 hours of standard-definition programming or 20 hours of highdefinition programming. The Pace TDC 575D can record up to 55 hours of standard-definition programming. Storage space varies based on the type of channel (digital, analog, HD) you are recording. DVR gives you several ways to record, including one-touch recording.
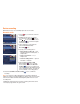
Series recording DVR makes it easy to record multiple episodes of a TV series. Record a series 1. Press on your remote to view the TV Listings. 2. Highlight the TV series you want to twice or record and press Record press on your remote and select the Record icon from the Program Information screen. 3. The Confirmation screen appears. Select the Create a Series Recording icon. 4. Specify your recording options: • Episode types to Record — First Run Only, First Run and Repeats, or All Episodes.
Create a manual recording While scheduling a recording from TV Listings is the quickest way to schedule a recording, you may also set a manual recording based on a date, time, and channel. This is helpful when you want to record only a portion of a long program, such as CNN News. Select the icon from the Quick Menu, then Set a Recording. Next, select Create a Manual Recording and follow the on-screen prompts.
Series conflicts To help you manage which series gets recorded when there is a scheduling conflict, DVR automatically creates a Series Priority List. The first series you set to record has the highest priority and is the program recorded in case of a conflict. Each additional series you set to record is added to the end of the list. When you try to schedule a new series recording at the same time as previously scheduled series recordings, you will see a Series Conflict screen.
Modify the Series Priority List You can easily change the recording priority of the series programs you have scheduled to record. The program with the highest priority will be recorded in case of a conflict. To modify your Series Priority List: 1. Select the icon from the Quick Menu. 2. Select a Series Priority. 3. Use the 䊱䊲 buttons to highlight a listing and use the Page Up button on your remote to raise the priority of the series or Page Down to lower it. icon to 4.
Play back a recorded program Play back recordings whenever you want 1. Press the button on your remote or the icon from the Quick Menu, then My Recordings. • You can view and sort your recordings by title, date recorded, and channel. Use the right arrow 䊳 button to scroll through the different views. 2. Highlight a program you want to play button on your back and press the remote to view the Program Information screen. 3. Select a playback option from the icons at the bottom of the screen.
Cancel or modify a scheduled single recording You can cancel or modify a Scheduled Recording at any time, even a recording that is currently in progress. 1. Select the icon from the Quick Menu. 2. Select Scheduled Recordings to view a list of your scheduled recordings. 3. Select a program title and press the view the Program Information screen. 4. Select the Record button on your remote to icon to view your options. 5. Select the Don’t Record this program recording. 6.
Recording notices DVR will display notices to alert you when a recording may be interrupted or when a recording is about to begin. Recording in progress If you try to change the channel while DVR is recording the program you are watching, you will see a notice reminding you that your recording is in progress. You may: • Select the icon to continue recording, change channels. • Select the icon to stop recording, change channels. • Select the icon to go back.
Manage programs and recordings Maximize your storage space With the Motorola DCT3412/3416 or DCT6412/6416, you can save up to 75 hours of standard-definition programming or up to 20 hours of HD programming. With the Pace TDC 575D, you can save up to 55 hours of standard-definition programming. To maximize your storage space, DVR is set to automatically erase programs when space is needed, beginning with the oldest recordings first.
Copy recordings to a VHS tape When you copy recordings to a VHS tape, make sure the recording is displayed on the main TV screen for the entire time the recording is being copied. If you change channels or display other DVR screens during the copying process, your tape will contain these images and you may not have a complete copy of the recording. 1. Connect an RCA video cable (yellow) to the VIDEO OUT (yellow) jack on the DVR and the VIDEO IN port on the VCR. 2.
Parental Controls Parental Locks put you in control of what your family watches. Parental Locks let you block selected ratings, channels, and titles with a Locks Personal Identification Number (PIN). If you schedule a recording for a program you have locked, the program will be recorded. However, the audio is muted and no video will be visible while the program is recording. A restricted notice will appear allowing you to enter your PIN to view the program during recording.
Locks Setup The Locks Setup screen allows you to review all of the locks you currently have set and to make modifications as needed. To access Locks Setup: 1. Select the Locks icon from the Quick Menu, or select Parental Controls from the Main Menu. 2. Use the 䊱䊲䊴 䊳 buttons on your remote to set or modify locks, hide adult titles, and access master locks. 3. Select Master Locks to modify all locks at one time.
Frequently asked questions Questions about your digital cable box with built-in DVR How many hours of programming can I store on my DVR? The number of recording hours for standard-definition or highdefinition programming depends on the DVR model you currently have. With the Motorola DCT3412/3416 or DCT6412/6416, you can save up to 75 hours of standard-definition programming or up to 20 hours of HD programming. With the Pace TDC 575D, you can save up to 55 hours of standard-definition programming.
If I’m watching a program in progress and want to record it, can I record it from the beginning? Yes. As long as you were tuned to the program when it began. DVR saves the portion in the buffer, plus the remainder of the program. How can I catch up to the live point of a program after I’ve paused it? Press Live on the remote. Or, fast-forward to the point of live programming. The on-screen indicator will display “LIVE” once you reach the live point of the program.
What is the picture format of recorded programs? DVR records programs in the same format they are broadcast. For example, programs broadcast in high-definition format are recorded in high-definition if you are using the HD-capable Motorola DCT3412/3416 or DCT6412/6416 and it is connected to an HDTV. Can I set up my DVR to record every episode of a program? Yes. When you create a series recording, select the Recording Settings icon.
Questions about managing your recordings How long can I keep my recordings? You can keep them as long as you want. Just remember, the recording space is limited, so you may need to erase some recorded programs from time to time in order to make room for new ones. How will I know when I’m almost out of recording space? A message will appear on-screen advising you when recording space is low (80% full) and when it’s full.
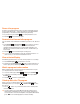
DVR Icons DVR Menu Search Menu Series Recording Record Recording Settings Play the Recording Start the Recording from the Beginning Delete the Program Change the Delete Priority Go Back Tune to the Program Set a Reminder Display Other Showtimes Favorite Channel Set a Parental Lock Confirm/Yes Cancel
DVR remote control Quick reference Power Press to individually turn on or off the DVR, TV, or AUX component. Cable Press to enable control of your digital cable/ DVR box. TV Press to enable control of your TV. (Note: This feature requires the digital remote to be programmed to operate your TV.) Instant replay Press to jump back 15 seconds for an instant replay. Lock Press while watching a program or while in a listings menu to restrict viewing or purchase.
DVR Quick Tip Card Easy steps to use the features of your DVR How do I record a program? You can set a recording with just one touch of the remote. • While in the on-screen program guide, highlight the program you wish to record and press the Record button on your remote. A red dot appears in the Program Information window to indicate the program will be recorded. • While watching live TV, simply press Record . A Recording Started notice appears to indicate recording has begun. How do I record a series? 1.
DVR Quick Tip Card Easy steps to use the features of your DVR How do I pause, rewind, and instantly replay live TV? Press Pause , Rewind , or Instant Replay on your remote. How do I play in slow-motion? Press Pause , then press Fast-Forward to view slow-motion in forward mode. Or press Pause , then Rewind to view slowmotion in reverse mode. How do I return to live TV? Press the button on your remote.