
User's Guide


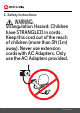

Table Of Contents
- 1. Safety Instructions
- 2. Getting Started
- 2.1 Baby Unit Power Supply
- 2.2 Parent Unit Power Supply
- 2.3 Registration (Pairing)
- 3. Using the Baby Monitor
- 3.1 Setting Up
- 3.2 Night Vision Mode
- 3.3 Talk Mode
- 3.4 Video ON/OFF
- 3.5 Temperature Display (HH °C / °F or LL °C / °F)
- 4. Parent Unit Menu Options
- 4.1 Volume
- 4.2 Brightness
- 4.3 Lullaby
- 4.4 Zoom
- 4.5 Alarm
- 4.6 Camera Control
- 4.6.1 Add (pair) a camera
- 4.6.2 View a camera
- 4.6.3 Delete a camera
- 4.6.4 Scan camera
- 4.7 Temperature
- 4.8 Power Saving Mode
- 4.9 View multiple cameras on screen
- 5. Wi-Fi® Internet Viewing
- 5.1 Minimum System Requirements
- 5.2 Getting Started - Connecting Devices
- 5.2.1 Setup
- 5.3 User Account and Camera Setup on Android™ Devices
- 5.3.1 Power ON and Connect the Camera
- 5.3.2 Download Hubble for Motorola Monitors App
- 5.3.3 Run Hubble for Motorola Monitors App on Android™ device
- 5.3.4 Add the Camera to your account
- 5.4 User Account and Camera Setup on iPhone®/iPad®
- 5.4.1 Power ON and Connect the Camera
- 5.4.2 Download Hubble for Motorola Monitors App
- 5.4.3 Run Hubble for Motorola Monitors App on iPhone®/iPad®
- 5.4.4 Add the Camera to your account
- 5.5 Camera Functions:
- 5.5.1 Connecting the Camera Unit to power
- 5.5.2 Overview of the Features on Hubble App
- 5.6 Working with PC/Notebook
- 5.7 Procedure for Resetting the Camera
- 6. Disposal of the Device (Environment)
- 7. Cleaning
- 8. Help
- 9. General Information
- 10. Technical Specifications

Overview of the Parent Unit
1. Display (LCD screen)
2. Charging LED
RED when mains power connected.
3. Parent Unit ON/OFF LED (Green)
4. Audio Level LEDs (Green, Green,
Amber, Red)
5. Volume Down
Press to decrease Volume level.
6. Volume Up
Press to increase Volume level.
7. Microphone
8. Display ON/Microphone
9. MENU button
Press to open / close the Menu
options.
10. Navigation button
Move Up/Down/Right/Left menu
options.
11. OK button
12. TALK button
Press and hold to speak to
your baby.
13. Power button
Press and Hold to turn the Parent
Unit ON/OFF.
VIDEO ON/OFF button
Press to turn the LCD screen
ON/OFF (Note: audio is
maintained.)
14. RESET button (recessed - use
small pin)
15. Power Socket
16. Stand
17. Speaker
1 2 3 4 5 6 7
14
15
8
9
11
10
12
13
16
17