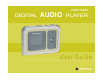
m250/m500 DIGITAL AUDIO PLAYER
Copyright/Trademarks Copyright © 2004 Motorola, Inc. All rights reserved. No part of this publication may be reproduced in any form or by any means or used to make any derivative work (such as translation, transformation or adaptation) without written permission from Motorola, Inc. Motorola reserves the right to revise this publication and to make changes in content from time to time without obligation on the part of Motorola to provide notification of such revision or change.
This equipment has been tested and found to comply with the limits for a Class B digital device, pursuant to Part 15 of the FCC Rules. These limits are designed to provide reasonable protection against harmful interference in a residential installation. This equipment generates, uses and can radiate radio frequency energy and, if not installed and used in accordance with the instructions, may cause harmful interference to radio communications.
Safety WARNING TO REDUCE THE CHANCE OF SHOCK OR INJURY, DO NOT USE or OPERATE THIS DEVICE IN OR NEAR WATER OR WET LOCATIONS. CAUTION RISK OF EXPLOSION, DAMAGE OR BATTERY LEAKAGE IS POSSIBLE IF BATTERY IS REPLACED INCORRECTLY OR BY AN INCORRECT TYPE. NEVER ATTEMPT TO CHARGE A NON-RECHARGEABLE ALKALINE BATTERY. DISPOSE OF USED BATTERIES ACCORDING TO INSTRUCTIONS OR LOCAL LAWS. Use of headphones while operating a vehicle is not recommended and is unlawful in some states and areas.
Contents Package Contents 6 Settings 39 Welcome 7 About 52 Tour of the m250/m500 9 Bookmarks 51 LCD Overview 12 Frequently Asked Questions 53 Basic Setup 15 Glossary 56 Software Setup 18 Appendix A – The MP3 Format 59 Basic Operations 24 Appendix B – Menu Tree 61 Play Music 30 Limited Warranty and Software License 62 FM Tuner 34 Index 69 Advanced Features 37 m250/m500 DIGITAL AUDIO PLAYER 5
Package Contents • m250/m500 Digital Audio Player • Installation CD • Earphones • AC Adapter/Charger • Belt Clip • Mini USB Cable m250/m500 DIGITAL AUDIO PLAYER 6
Welcome Congratulations on your purchase of the Motorola m250/m500 Digital Audio Player (Models DAP102/DAP105). The m250/m500 is a portable player that provides many hours of MP3 and WMA playback, and features a lighted LCD, a stopwatch, and an FM radio tuner. Small and powerful, the m250 internal memory can store about 625 songs on its 2.5-gigabyte (GB) hard drive1 while the m500 internal memory can store about 1250 songs on its 5 GB hard drive1 (based on a 4-minute song encoded as a 128 kbps MP3).
The m250/m500 supports the following digital audio formats: • MP3 with ID3 tags • WMA with ID3 tags • Audible® (spoken word) files (formats 2 and 3) • Microsoft’s DRM (Digital Rights Management) coding The m250/m500 can play most VBR (Variable Bit Rate) files, although not all LCD features may be available for those tracks. The total number of songs that can be stored on the m250/m500 depends on the way in which they are encoded and the bit rate used. See the FAQ section of this manual for more information.
Tour of the m250/m500 Main View m250/m500 DIGITAL AUDIO PLAYER 9
Top View Bottom View m250/m500 DIGITAL AUDIO PLAYER 10
Inside View m250/m500 DIGITAL AUDIO PLAYER 11
LCD Overview Playback Mode Menu Mode m250/m500 DIGITAL AUDIO PLAYER 12
Play Screens Press the Thumbstick to cycle through Date View, Time Code View, and Track Format View screens.
FM Radio Manual FM Radio Store Preset FM Radio Preset m250/m500 DIGITAL AUDIO PLAYER 14
Basic Setup Connections Before you can start using your new m250/m500 player, you’ll have to install and connect a few things. This chapter describes how to attach the battery charger and connect the earphones and the Mini USB cable to the player. AC Power Adapter/Charger The AC adapter uses a Mini USB connector and attaches to the m250/m500 through the USB port. The first time you charge the battery, let it charge overnight. 1 Connect the AC adapter to the m250/m500 at the USB port.
1 Press in the small latch while lifting off the back cover of the player. (See the pictures on pages 10 and 11.) 2 Note that one end of the battery fits under a small metal lip and the other end is held in by small plastic clips. Lift the battery up from the latter end and slide it out from under the lip. The power contacts are underneath. 3 Install a new battery so that the end with the metal contacts will slide under the metal lip, and then snap the other end into place against the plastic clips.
USB Charging When connected to a USB port, the computer can supply the power to run the player and charge its battery. This also allows you to listen to music from the player while it is connected to your computer without draining the battery. Additional Accessories Get the most out of your m250/m500 with additional accessories that can make the player easier and more flexible to use. Shop the Motorola web site at http://www.motorola.com/mp3players.
Software Setup Overview To enable your computer to work most effectively with the m250/m500 and access the full potential of the player, the appropriate software for your computer’s operating system must be installed: • Motorola Digital Music Center must be installed on computers that use the Windows operating system. Motorola Digital Music Center is the provided program you use in Windows to manage your audio files. • iTunes must be installed on computers that use the Macintosh operating system.
Windows Follow these instructions to load the installation software, which enables your PC to recognize the m250/m500. The installation also loads the Motorola Digital Music Center. If you are using Windows 98 Second Edition, you may have to install drivers for the player from the CD; refer to your system documentation and Help files for details on doing this. You can also click on the Add New Hardware icon in Control Panel and follow the prompts.
USB To transfer music or files between your computer and the m250/m500, connect the player to your computer using the supplied Mini USB cable. USB Detection with the Windows Device Driver USB connectivity is ready to work immediately after Motorola Digital Music Center has been installed.
Motorola Digital Music Center Motorola Digital Music Center is an all-in-one solution that is simple to use and can save and manage entire collections of digital audio tracks. Motorola Digital Music Center provides the capabilities listed below. • Copy (rip) audio CDs into compressed (encoded) digital audio formats. Motorola Digital Music Center encodes WMA files by default and MP3 via an optional upgrade pack. • Automatically synchronize the music collection on your computer with your m250/m500.
Macintosh iTunes The iTunes plug-in is required for the Mac Operating System, 10.3 or higher. Your m250/m500 audio player is compatible with Apple’s iTunes, which runs under the Macintosh operating system and is free and available at www.apple.com. Support for iTunes also can be found there and in the Help files of the program. iTunes offers the following features: • Copy (rip) your audio CDs into compressed (encoded) digital formats, including MP3s. • Organize digital audio tracks on your computer.
Gracenote CDDB® Music Recognition Service The Gracenote CDDB© Music Recognition Service can be used to automatically look up details of audio CDs such as Title, Artist, and Track names. There is no charge to register and use the service. You have the option during the installation of Motorola Digital Music Center to register with Gracenote, but if you do not, you can register later by following the instructions below. To register, your PC must be connected to the Internet.
Basic Operations The basic operations of the m250/m500 are divided into four areas: • How to Control the player functions • How to Copy songs from CDs and other sources to your computer • How to Transfer songs to the m250/m500 from your computer • How to Play Songs on the player m250/m500 DIGITAL AUDIO PLAYER 24
Control The following controls on the m250/m500 let you access the player’s functions: • POWER Press to turn the player on. To turn the player off, press and hold until the bar graph moves completely across the screen and Saving Settings is displayed. • LOCK/UNLOCK Slide into the LOCK position to disable Volume and the Thumbstick (except Play/Pause operation). This works when the player is on and off; when the player is turned off, a padlock appears on the LCD if you try to turn it on with LOCK engaged.
• Thumbstick Move, like a joystick, toward any of the four symbols discussed below, or press in like a button. In Playback mode, press in to cycle through the Play Screens. In Menu mode, move to select categories or options, and press in to make choices. o Play/Pause || Press to play or press again to pause playback, and to move up through menus and options. o MENU Press and release quickly to enter Menu mode without stopping music playback.
Copy Copying Tracks with Motorola Digital Music Center Copying tracks from audio CDs involves two steps commonly known as ripping and encoding. Ripping and encoding refer to the process of ripping (copying) audio from a CD and encoding (saving) the audio content into a compressed digital audio format like MP3 or WMA. 1 Launch the Motorola Digital Music Center. 2 Insert an audio CD into your CD-ROM drive. 3 Click the CD-ROM icon on the Motorola Digital Music Center Device List.
Transfer Transferring Tracks with Motorola Digital Music Center Transferring tracks from the PC to the m250/m500 with the Motorola Digital Music Center involves selecting tracks and then transferring them onto the player. 1 Launch the Motorola Digital Music Center. 2 Click My Music in the left frame to access tracks. Motorola Digital Music Center scans the computer’s hard drives for digital audio files that are compatible with the m250/m500 player.
iTunes This is the music management software developed by Apple Computer and is available from the Apple web site. Check your computer documentation to find out how to load it onto your Mac operating system. 1 Launch iTunes. 2 Connect the player to a USB port on the computer. The m250/m500 will turn on. 3 Click Library in the iTunes Source frame. 4 Select the tracks to transfer. 5 Drag and drop the selected tracks onto the m250/m500 player listing in the iTunes Source frame.
Play Music There are two types of music playback in the m250/m500: • Play Music plays digital audio music tracks in Playback mode. • FM Tuner will let the player receive FM radio stations. These types of playback can be changed at any time through the Main Menu. Playback In Playback mode (the default mode), any track or preset customized playlist can be played within seconds by selecting the appropriate category. • Play All will play all songs on the m250/m500.
Play All Album To play all tracks: To play a specific album: 1 Open MENU by pressing Thumbstick to 2 . . 1 Open MENU by pressing Thumbstick to Move Thumbstick to select Play Music. 2 Move Thumbstick to select Play Music. 3 Press Thumbstick in. 3 Press Thumbstick in. 4 Move Thumbstick to select Play All. 4 Move Thumbstick to select Album. 5 Press Thumbstick in to begin playback. 5 Press Thumbstick in. 6 Move Thumbstick to select an album to play.
Playlists To start a playlist: To create a playlist accessible on your m250/m500: 1 Select your m250/m500 from the Device List in Motorola Digital Music Center. 1 Open MENU by pressing Thumbstick to 2 Move Thumbstick to select Play Music. 2 Select tracks to add to a playlist. 3 Press Thumbstick in. 3 Right-click a highlighted track. 4 Move Thumbstick to select Playlists. 4 Click Add to playlist. 5 Press Thumbstick in. 5 Click New Playlist. 6 Move Thumbstick to select a playlist.
FM Record To play tracks recorded from the FM tuner: 1 Open MENU by pressing Thumbstick to 2 Move Thumbstick to select FM Record. 3 Press Thumbstick in. 4 Move Thumbstick to select Playback. 5 Press Thumbstick in. 6 Move Thumbstick to select a recording or to Play All. 7 Press Thumbstick in to begin playback. . To delete tracks recorded from the FM tuner: . 1 Open MENU by pressing Thumbstick to 2 Move Thumbstick to select FM Record*. 3 Press Thumbstick in.
FM Tuner The FM Tuner is a stereo FM receiver with the capability of storing up to eight preset stations and recording broadcasts into the player’s memory. When using the FM Tuner, there are three different modes of operation: • • • Manual allows you to tune in a station by moving Thumbstick forward ( |) or backward (| ). Store Preset lets you set a station frequency under a memory location, like a car radio push button. Preset recalls the stored stations so they can be tuned in by pressing on a number.
Manual To enter the FM Tuner mode and use manual tuning: 1 Open MENU by pressing Thumbstick to 2 Move Thumbstick to select FM Tuner. 3 Press Thumbstick in. 4 Press Thumbstick quickly to to switch between the auto-searching option and no searching. (Autosearch looks |) or Reverse (| )). for the next strong signal when Thumbstick is pressed to Forward ( . Store Preset The m250/m500 allows programming of up to eight FM preset slots.
Preset To access an FM preset slot: 1 When in Manual mode, press Thumbstick in to enter Preset mode. 2 Press Forward ( 3 Press Thumbstick in to select a preset station and return to Manual mode. |) or Reverse (| ) to cycle to the desired preset station. Recording Broadcasts The m250/m500 FM Tuner allows you to record FM broadcasts and play them back through the player. To record a broadcast: 1 Open MENU by pressing Thumbstick to 2 Move Thumbstick to select FM Tuner. 3 Press Thumbstick in.
Advanced Features Your m250/m500 offers a number of useful advanced features beyond the playing of music: • Stopwatch Use this feature to record thousands of laps and instantly tell how much faster or slower the last lap was when compared to the previous one. • Settings The Settings menu lets you adjust basic m250/m500 configurations, such as the LCD backlight, power saving, etc.
Stopwatch You can use the stopwatch to keep track of time-related events while listening to music. 1 2 3 Open MENU by pressing Thumbstick to Move Thumbstick to select Stopwatch. Press Thumbstick in. . Average Lap Time Lap Difference Lap statistics are displayed at the bottom of the Stopwatch screen.
Settings The Settings selection is used to configure certain characteristics of the m250/m500, such as the sound equalizer or the backlight of the LCD. These settings include: • Playback setting lets you choose from regular, shuffled, or repeating. • Equalizer allows you to adjust the player sound using various preset and fully customizable equalizer options. • Power settings are used to adjust the power-saving timeout length.
Playback Various playback settings can be set to modify the way the m250/m500 plays tracks. Tracks can be shuffled at random and/or repeated continuously. . 1 Open MENU by pressing Thumbstick to 2 Move Thumbstick to select Settings. 3 Press Thumbstick in. 4 Move Thumbstick to select Playback. 5 Press Thumbstick in. 6 Move Thumbstick to select between Shuffle and Repeat options and press Forward ( select options within Shuffle and Repeat.
Equalizer The sound of tracks played on the m250/m500 can be adjusted using various preset and fully customizable equalizer options. Equalizer settings include: Custom Custom mode allows the player’s settings to be adjusted according to personal preferences. 1 Open MENU by pressing Thumbstick to 2 Move Thumbstick to select Settings. 3 Press Thumbstick in. 4 Move Thumbstick to select Equalizer. 5 Press Thumbstick in. 6 Move Thumbstick to select Custom. 7 Press Thumbstick in.
EQ Off Rock Select the EQ Off option to apply no equalizer adjustments to audio content on the m250/m500. This is also known as using “flat” settings. Select the Rock equalizer option to change the sound of tracks according to the Rock preset settings. 1 Open MENU by pressing Thumbstick to 2 Move Thumbstick to select Settings. 3 Press Thumbstick in. 4 Move Thumbstick to select Equalizer. 5 Press Thumbstick in. 6 Move Thumbstick to select EQ Off.
Power To conserve energy and extend the amount of playback time during each battery charge, set the player to shut down after being idle for a specific number of minutes. Settings include 1m, 5m (the default setting), 10m, 30m, and Never. 1 Open MENU by pressing Thumbstick to 2 Move Thumbstick to select Settings. 3 Press Thumbstick in. 4 Move Thumbstick to select Power. 5 Press Thumbstick in. 6 Move Thumbstick Forward ( 7 When the options are set as you want, press Thumbstick in.
Resume Use the options in the Resume menu to set the track that the m250/m500 will play whenever the unit is restarted. 1 Open MENU by pressing Thumbstick to 2 Move Thumbstick to select Settings. 3 Press Thumbstick in. 4 Move Thumbstick to select Resume. 5 Press Thumbstick in. 6 Move Thumbstick to select between Track and Timecode options and Forward ( options within Track and Timecode. 7 When the options are set as you want, press Thumbstick in. 8 Press Forward ( .
Display Use the Display menu to adjust backlight and contrast settings. 1 Open MENU by pressing Thumbstick to 2 Move Thumbstick to select Settings. 3 Press Thumbstick in. 4 Move Thumbstick to select Display. 5 Press Thumbstick in. 6 Move Thumbstick to select between Backlight and Contrast options and Forward ( select options within Backlight and Contrast. 7 Press Forward ( 8 If you want to change the screen contrast, press Thumbstick down. 9 Press Forward ( |) or Reverse (| .
Display options include: • Backlight Set the backlight on the player to shut itself off after a specific number of seconds. Settings include Off, 2s, 5s (the default setting), 10s, 20s, and On. Off disables the backlight and On sets the backlight to remain lit constantly. To conserve battery life, the On setting should rarely be used. See other power-saving tips here. • Contrast Move the Thumbstick to control the contrast slider.
Time Use the options in the Time menu to set the player’s internal clock. 1 Open MENU by pressing Thumbstick to 2 Move Thumbstick to select Settings. 3 Press Thumbstick in. 4 Move Thumbstick to select Time. 5 Press Thumbstick in. 6 Move Thumbstick to select between Set Time, Set Date, or Time Mode options and Forward ( (| ) to select options within Set Time, Set Date, or Time Mode. 7 Press Thumbstick to apply settings and return to Playback mode. .
FM Tuner Use the options in the FM Tuner menu to control the player’s FM setup. 1 Open MENU by pressing Thumbstick to 2 Move Thumbstick to select Settings. 3 Press Thumbstick in. 4 Move Thumbstick to select FM Tuner. 5 Press Thumbstick in. The Options bar will be highlighted; press Thumbstick in again. 6 The Stereo and Region options will appear with the current modes displayed and the Stereo setting blinking.
Lock Setup Use the options in the Lock Setup menu to enable volume and Thumbstick control when the lock is enabled. 1 Open MENU by pressing Thumbstick to 2 Move Thumbstick to select Settings. 3 Press Thumbstick in. 4 Move Thumbstick to select Lock Setup. 5 Press Thumbstick in. 6 Move Thumbstick to select between Lock Volume and Thumbstick options and Forward ( (| ) to select options within Lock Volume and Thumbstick. 7 When the options are set as you want, press Thumbstick in.
Tags Tags are used to store the properties information about a digital audio file (size, type, rate, etc.). This information is displayed at the bottom of the LCD during playback of each song; refer to the sample Play screens in Chapter 1. Occasionally this information might not display properly, especially if a file was downloaded from a site outside of the region in which you normally use the player. You may find it necessary to change the tag setting in order to see this information.
Bookmarks Bookmarks are useful for marking a place in an audio book. They are also perfect for multiple users who share the same m250/m500. Bookmarks store specific player settings, including the current running order, the current track, the current time position of the track, the repeat setting, and the shuffle setting. Users can save these settings in a bookmark and restore them whenever they use the player. 1 Open MENU by pressing Thumbstick to 2 Move Thumbstick to select Bookmarks.
About The About screen displays information about the m250/m500, including the total amount of space on the disk, the amount of free space, the number of tracks on the player, and the firmware version. 1 Open MENU by pressing Thumbstick to 2 Move Thumbstick to select About. 3 Press Thumbstick in. 4 Move Thumbstick to select Player or Storage. 5 Press Thumbstick in. . About options include: • Player Displays firmware version, copyright, and Motorola web site information.
Frequently Asked Questions The FAQs in this chapter will help you solve common issues with your player. If you do not find the answers you need here, you can contact our Customer Service Department using any of the following methods: Web: http://broadband.motorola.com/consumers/support/default.
Question Answer What kind of battery can I use with the m250/m500? The m250/m500 uses a Motorola lithium ion rechargeable replaceable phone battery. It is designed to be recharged in the player, and can be easily replaced if it wears out or if you want to keep extra charged batteries on hand. Where is the battery indicator on my m250/m500? The battery indicator on the m250/m500 is located in the top right corner of the display. The segments in the battery icon show the remaining battery power.
Question Answer How much music can I store on the m250/m500? The amount of music that can be stored on the m250/m500 depends on the bit rate of the files stored. Can I update the firmware on the m250/m500? Bitrate Approximate amount of space required per minute of audio content 64 kbps 96 kbps 128 kbps 164 kbps 192 kbps 0.5 MB 0.75 MB 1 MB 1.25 MB 1.75 MB Yes. If available, firmware for your m250/m500 can be downloaded from the Motorola web site: http://broadband.motorola.
Glossary Bass Bass is the particular low-range area of the sound spectrum where low musical notes and sounds are located. Increasing the bass value will make the low vocals and drums more prominent in your music. You can select the amount of bass in your music by selecting various equalizer options. Bitrate Bitrate denotes the number of bits per second used by a digital music file. The size and quality of a compressed digital audio file are determined by the bitrate used when encoding the file.
Firmware Firmware is the read-only software that is installed on the player. Like software, it can be updated, but unlike software it can never be deleted from the player. Gain Gain is a measurement of the amplitude of all frequency ranges. Gain adjustments boost or reduce frequencies to provide a more desirable audio output.
Treble Treble notes occupy the higher portion of the sound spectrum. Increasing the treble value will raise the levels of the high sounds in your music files. You can select the amount of treble in your music by selecting various equalizer options. VBR Variable Bit Rate (VBR) encoding converts tracks at a variable rate, using higher bit rate encoding for complex portions and lower bitrate encoding for pauses in songs.
Appendix A – The MP3 Format The MP3 format has vastly expanded the capabilities of music distribution. Able to compress digital sound to a fraction of the size of conventional WAV sound, MP3 lends itself ideally to Internet distribution, and to new listening device technologies. Your Motorola m250/m500 is a leading edge player able to take advantage of the incredible flexibility afforded by this format. To understand how the MP3 format works, it is helpful to know something about how CDs store music.
Ripping and Encoding One of the great features of a portable MP3 player like the Motorola m250/m500 is that it allows you to select the best of the music you own and download it to the player, creating your own “greatest hits” collections. Using a tool like the Motorola Digital Music Center, you can copy (rip) a song’s file from the CD onto your hard disk. The encoder then compresses the song into the MP3 format.
Appendix B – Menu Tree m250/m500 DIGITAL AUDIO PLAYER 61
Limited Warranty and Software License Motorola, Inc., Broadband Communications Sector (“Motorola”) 101 Tournament Drive, Horsham, PA 19044 IMPORTANT: PLEASE READ THIS SOFTWARE LICENSE (“LICENSE”) CAREFULLY BEFORE YOU INSTALL, DOWNLOAD OR USE ANY APPLICATION SOFTWARE, USB DRIVER SOFTWARE, FIRMWARE AND RELATED DOCUMENTATION (“SOFTWARE”) PROVIDED WITH MOTOROLA’S MP3 PLAYER PRODUCT (THE “PRODUCT”).
You may: USE the Software only in connection with the operation of the Product. TRANSFER the Software (including all component parts and printed materials) permanently to another person, but only if the person agrees to accept all of the terms of this License. If you transfer the Software, you must at the same time transfer the Product and all copies of the Software (if applicable) to the same person or destroy any copies not transferred.
Motorola is not responsible for any third party software provided as a bundled application, or otherwise, with the Software. U.S. GOVERNMENT RESTRICTED RIGHTS The Product and documentation is provided with RESTRICTED RIGHTS. The use, duplication or disclosure by the Government is subject to restrictions as set forth in subdivision (c)(1)(ii) of The Rights in Technical Data and Computer Software clause at 52.227-7013. The contractor/ manufacturer is Motorola, Inc.
This software contains the BSD db library, under the following license: Copyright (c) 1991, 1993 The Regents of the University of California. All rights reserved. Redistribution and use in source and binary forms, with or without modification, are permitted provided that the following conditions are met: 1Redistributions of source code must retain the above copyright notice, this list of conditions and the following disclaimer.
following disclaimer in the documentation and/or other materials provided with the distribution. 3. Neither the name of the Xiph.org Foundation nor the names of its contributors may be used to endorse or promote products derived from this software without specific prior written permission.
Portions based upon Microsoft Windows Media Technologies. Copyright 1999 Microsoft Corporation. All Rights Reserved. Microsoft, Windows Media, and the Windows Logo are trademarks or registered trademarks of Microsoft Corporation in the United States and/or other countries. Gracenote is CDDB, Inc. d/b/a "Gracenote." CD and music-related data from Gracenote CDDB® Music Recognition ServiceSM © 2000, 2001, 2002 Gracenote. Gracenote CDDB Client Software © 2000, 2001, 2002 Gracenote. U.S.
PARTIES. EXCEPT AS EXPRESSLY STATED IN THIS SECTION (“WARRANTY INFORMATION”), THERE ARE NO WARRANTIES OF ANY KIND RELATING TO THE PRODUCT, EXPRESS, IMPLIED OR STATUTORY, INCLUDING BUT NOT LIMITED TO IMPLIED WARRANTIES OF MERCHANTABILITY, FITNESS FOR A PARTICULAR PURPOSE, OR THE WARRANTY AGAINST INFRINGEMENT PROVIDED IN THE UNIFORM COMMERCIAL CODE. Some states do not allow for the exclusion of implied warranties, so the above exclusion may not apply to you.
Index AAC codec, 22 About, 52 AUD, 30, 53 Backlight, 46 Basic Operations, 24 Bass, 56 Battery, 15 indicator, 54 Bitrate, 56 Bookmarks, 37, 51 Buttons and Controls, 25 Codec, 56 Contrast, 46 Controls, 25 Copy, 28 Display, 45 Earphones, 16 Encoding, 27 Equalizer, 39, 41, 42 Firmware, 57 FM Tuner, 34 Forward, 26 Gracenote, 18, 23, 67 ID3 Tag, 21, 57 iTunes, 7, 18, 22, 29 Limited Warranty, 62 Lithium Ion, 54 Mini USB, 15 Motorola Digital Music Center, 7, 18, 19, 20, 21, 27, 28, 57 m250/m500 DIGITAL AUDIO PLAYE
Visit our web site at: www.motorola.