
Owners Manual
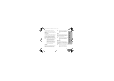
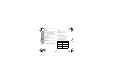

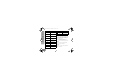
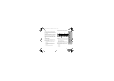
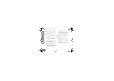
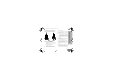

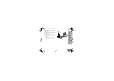
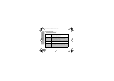
Table Of Contents
- Contents
- Product Safety
- Introduction
- FCC Licensing Information
- Canada Licensing Information
- Batteries and Chargers Safety Information
- Radio Overview
- Parts Of The Radio
- Side Buttons
- Battery Features
- About the Li-Ion Battery
- Battery Recycling and Disposal
- Installing the Lithium-Ion (Li-Ion) Battery
- Removing the Lithium-Ion (Li-Ion) Battery
- Attaching the Antenna
- Removing the Antenna
- Installing Spring Action Belt clip.
- Power Supply, Adaptor and Drop-in Tray Charger
- Battery Life Information
- Charging the Battery
- Drop-in Tray Charger LED Indicators
- Estimated Charging Time
- Multi-Unit Charger LED Indicators
- Getting Started
- Turning radio ON/OFF
- Adjusting Volume
- READING THE DISPLAY
- Selecting a Channel
- Talking and Monitoring
- Receiving a Call
- Signal strength indicator and channel busy indicators
- Talk Range
- Radio LED Indicators
- Hands-Free Use/VOX
- Toggle Voice Prompt in User Mode
- Power Up - Tone Mode
- Reset to Factory Defaults
- Keypad Beeps
- Keypad Lock/Unlock
- Menu Options
- Setting VOX/IVOX Sensitivity
- Microphone Gain
- Programming Features
- Advanced Configuration Mode
- Programming RX (Reception) Frequencies
- Programming RX (Reception) codes (CTCSS/DPL)
- Programming Scramble
- Programming Maximum Number of Channels
- Programming Call Tones
- Programming Microphone Gain Level
- Programming Microphone Accessory Gain Level
- Other Programming Features
- Customer Programming Software (CPS)
- Text-to-Speech (Changing Pre- Defined Voice Aliases)
- Weather Feature (Not for RDU4163)
- The Weather Alert has two modes of operations
- Event Type Filter
- Warning
- Watch
- Emergency
- Statement
- Event Code Filter
- Block Event
- Event Code
- The Critical Events Table
- Geographic Filter
- State
- County
- FIPS
- Cloning Radios
- Troubleshooting
- Use and Care
- Frequency and Code Charts
- Accessories
- Motorola Solutions Limited Warranty for the United States and Canada

English
54
PROGRAMMING FEATURES
When cloning, the MUC does not need to be plugged
into a power source, but ALL radios require charged
batteries.
1. Turn ON the Target radio and place it into one of
the MUC Target Pockets
2. Power the Source radio following the sequence
below:
• Long Press the PTT button and SB2
simultaneously while turning the radio
ON.
• Wait for 3 seconds before releasing the
buttons until the audible tone “Cloning” is
heard.
3. Place the Source radio in the source pocket that
pairs with the target pocket you chose in step 1.
Press and release the SB1 button.
4. After cloning is completed, the Source radio will
announce either “successful” (cloning is
successful) or “fail” (cloning has failed). The
‘successful’ tone sounds like a good key ‘chirp’
whereas the ‘fail’ tone sounds similar to a ‘bonk’
tone. If the Source radio is a display model, it
will either show ‘Pass’ or ‘Fail’ on the display (a
tone will be heard within 5 s).
5. Once you have completed the cloning process,
turn the radios OFF and ON or, long press the
PTT button to exit the ‘cloning’ mode.
Further details on how to clone radios are explained in
the Instructions Sheet provided with the MUC.
When ordering the MUC, refer to part number
RLN6309_.
Note:
• If cloning fails, refer to “What To Do If Cloning
Fails” on page 56.
• Paired Target radios and Source radios must be
of the same band type in order for the cloning to
run successfully.
• MUC pockets numbers should be read from left to
right with the Motorola logo facing front.
MN002894A01_final.book Page 54 Wednesday, January 4, 2017 5:32 PM