
Installation guide


Network Setup
4-15
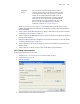
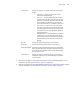
The Associated Secondary IP Addresses field displays additional IP and subnet resources
available, but designated as secondary and not immediately used unless the primary designations
become unavailable.
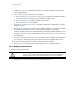
3. Select a record from the table and click the Edit button to modify the record. For more information,
see Modifying a Virtual Interface on page 4-16.
4. Select a record from the table and click the Delete button to remove the configuration from the list
of switch virtual interfaces.
5. Click the Add button to add a new configuration to the switch virtual interface. For more information,
see Adding a Virtual Interface on page 4-15.
6. Select an interface as click the Startup button to invoke the selected interface the next time the
switch is booted.
7. Select an interface as click the Shutdown button to disable the selected interface.
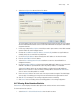
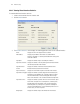
4.4.1.1 Adding a Virtual Interface
To add a new virtual interface for the switch:
1. Select Network > Switch Virtual Interface from the main tree menu.
2. Select the Configuration tab
3. Click the Add button.
4. Enter the VLAN ID for the switch virtual interface.
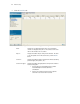
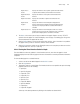
Management
Interface
A green checkmark within this column defines this VLAN as
currently used by the switch. This designates the interface settings
used for global switch settings in case of conflicts. For example, if
multiple SVIs are configured with DHCP enabled on each, the
switch could have multiple domain names assigned from different
DHCP servers The one assigned over the selected Management
Interface would be the only one used by the switch. This setting
does not affect any of the Management Access Interfaces
configured in Configuring Access Control on page 7-3.