
Installation guide


11
Chapter 2
Pre-Installation
Before you begin the M-eMTA hardware installation, make sure that you have the required tools
and equipment and that you have identified the proper location to mount the SBV5506 chassis.
Pre-Installation Checklist
The following hardware, tools, cables, and wiring are required for the M-eMTA
installation.
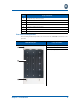
Hardware
Note that the chassis are shipped without the power supplies and blades
installed. The number of power supplies and blades varies according to the cus-
tomer’s requirements. Before you begin, do the following:
• Check chassis exterior and interior for damaged, missing, or loose
parts.
• Verify that you have all of the components (power supply and blades)
that are required for the installation.
• Verify that the accessory kit is complete. (See the parts list included
with the kit.)
• Check the wall bracket for damage.
Basic Tools
The following basic tools are required for the M-eMTA installation:
• Chalk • Punch-down tool
• Drill • Safety glasses
• Drill bits • Socket (3/8”)
•Dust mask •Socket (7/16”)
• ESD band • Torx T10 screwdriver
• Flat head screwdriver (4 mm) • Voltmeter
• Level • Wire-cable cutters
• Permanent marker • Wire strippers
• Phillips screwdriver