
Installation guide


Chapter 3: Hardware Installation 29
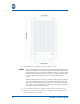
Mounting the Chassis Onto the Wall Bracket
Prior to mounting the SBV5506 chassis onto the wall bracket, verify the following:
• Wall bracket is securely attached to the structure.
• Pilot holes for the Mounting Flange on the chassis have been drilled.
(Unless the surface is wood.)
• Panel fasteners around the perimeter of the chassis door are
engaged to prevent the door from opening during the installation.
Follow these steps to mount the chassis onto the wall bracket:
1. Carefully lift the chassis to the approximate height of the mounting bracket.
2. Lower the chassis until the chassis mounting cleats slide into the cleat slots
in the wall bracket.
Place a chalk line on the wall as a visual aid to prevent possible damage to
the heat sink.
3. Hold the top of the chassis in place while fastening the unit to the wall. For
the appropriate fastener, refer to the table in “Required Tools” on page 26.
Installing the Power Supplies and the Blades
Install the power supplies before you install the blades.
Installing the Power Supplies
Follow these steps to install the power supplies:
1. Align the power supply with power supply guide rails in upper part of the
chassis.
2. Slide the power supply using the front handle until the rear connector mates.
3. Secure the power supply by tightening the two T10 Torx screws that are
located on the power supply faceplate. Torque each screw to 1–2 in-lbs.
4. Repeat the first three steps for the second power supply unit.
Installing the Blades
Follow these steps to install the blades:
1. Before inserting the blade, carefully remove the protective film from the rear
heatsink block of the blade.
2. Verify that the inject/eject handle of the blade is in the unlocked position by
pressing the top handle up and the bottom handle down.
WARNING: You must use an ESD wristband while performing these
tasks.
NOTE: