
Switch User Guide
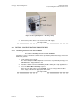
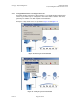
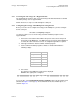
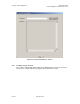
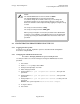
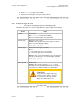
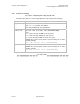
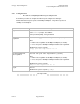
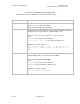
Table Of Contents
- UNDERSTANDING THE CANOPY T1/E1 MULTIPLEXER
- Status LEDS
- Physical Specifications
- Technical Specifications
- T1 Channel Mode
- E1 Channel Mode
- Alternate Mark Inversion (AMI)
- The 1 in 15 Requirement (AMI)
- Binary Eight Zero Substitution Coding
- High Density Bipolar Order Three Encoding
- Master and Secondary Clocks
- Loss of Clock Signal
- Timing Modes
- Loopback Timing Mode
- Recovered Timing Mode
- Network Timing Scenarios
- INSTALLING AND CONFIGURING YOUR CANOPY T1/E1 MULTIPLEXERS
- MANAGING YOUR CANOPY T1/E1 MULTIPLEXERS
- CANOPY T1/E1 MULTIPLEXER REFERENCE INFORMATION
- Canadian Compliance Statement
- Statement of Compliance

Canopy T1/E1MultiplexerSeptember2004
T1/E1MultiplexerFPGAVersion3.4
Page34 of 73
2.3.3 AccessingtheCLIusingaPC+HyperTerminal
The Command Line Interface (CLI) is accessed using a PC with that includes a terminal
emulation package such as HyperTerminal
®
.
NOTE: The device is only accessible through the serial port.
2.3.4 ConfiguringtheCanopyT1/E1MultiplexerusingtheCLI
Before you use the CLI to configure the Canopy T1/E1 Multiplexer, you must configure
the PC serial port.
Procedure 6: Configuring serial port
Use this procedure to access the CLI using a terminal emulation program such as
HyperTerminal.
®
1. Connect the serial cable from the DB9 serial port on a PC to the Serial port on
the Canopy T1/E1 Multiplexer. The DB9 connector on Canopy T1/E1 Multiplexer
is female; the cable from the PC is male. A straight-through cable is required.
2. Start HyperTerminal or another terminal emulation program.
3. Set the terminal emulation program to emulate a VT100 terminal with the
following settings:
Parameter Value
Bits per second 19200
Data bits 8
Parity none
Stop bits 1
Flow control none
4. Press Enter.
The Canopy T1/E1 Multiplexer Login menu is displayed.
RESULT: The signal port is configured.
end of procedure
To use the CLI, select Command Line Interface terminal from the File drop-down menu
(illustrated in Figure 14 on Page 33). The Command Line Interface window opens, as
shown in Figure 16.
Issue3