FRANKLIN COUNTY PUBLIC HEALTH MOBILE JOINT INFORMATION CENTER (JIC) USER GUIDE System Manager: Mitzi Kline, Cell: 614-374-1924 March 2, 2011 Franklin County Public Health Mobile Joint Information Center (JIC) User Guide 1 of 83
THIS PAGE INTENTIONALLY LEFT BLANK Franklin County Public Health Mobile Joint Information Center (JIC) User Guide 2 of 83
Getting Started Prior to arrival: 1. Requestor completes and submits Mobile JIC request form under Tab S. 2. Franklin County Public Health coordinates details and completes checklist to approve deployment of trailer. Please note: If the Mobile JIC is deployed in an emergency situation the request form can be completed once the trailer is deployed and set up or as soon as it can be during the event. Upon arrival: 1.
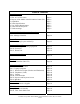
Table of Contents Basic Information 1. How to Use This Guide 2. Purpose of the Mobile Joint Information Center (JIC) 3. Capabilities 4. Trailer Specifications 5. Tow Vehicle Requirements 6. Trailer Electrical System 7.
Informational Materials Tab S: Request Form Tab T: Safety Briefing Checklist Tab U: Equipment Inventory Tab V: Pictures of Equipment Tab W: User After-Action Report Form Tab X: Maintenance Record Tab Y: Maintenance Worksheet Tab Z: Checklist to Approve Deployment of Trailer Tab AA: Towing Checklist Tab BB: Franklin County Public Health Contact Information Page 61 Page 65 Page 67 Page 71 Page 76 Page 77 Page 78 Page 80 Page 81 Page 82 Note: Equipment owner’s manuals are maintained in the plastic file stora
BASIC INFORMATION 1. HOW TO USE THIS GUIDE The Mobile JIC guide is made up of three main sections: 1) Basic Information: This section provides information regarding purpose, capabilities and trailer specifications. 2) Tabs A-R: Equipment Standard Operating Procedures (SOPs). This section is broken into tabs. Each tab provides specific guidance on a system or piece of equipment. Important safety information regarding the use of equipment is included in each section.
3. CAPABILITIES The Mobile JIC provides three main communication capabilities: 1. Internet Satellite a. Connection to the internet b. VoIP telephone service c. Fax service 2. Television Satellite a. Service to two televisions b. DVD and VHS capabilities 3. Multi-Media Station a. 4 laptop computers b. 4 black ink printers c. 1 all-in-one color printer/fax/copier d. 2 digital cameras e. 1 video recorder f.
• Seven-plug electrical trailer hookup (standard seven-plug). If the truck is wired to proper specifications with a six-plug connection, a six-plug to seven-plug adapter comes with the trailer. 6. TRAILER MAIN POWER CMI Main Dash Control Panel Aux Battery System: This trailer is equipped with an auxiliary battery system. It is located on the trailer tongue and the main battery is in the trailer cabinet.
source. This will allow the batteries to be charged and all the on board systems be used during an event. We recommend the vehicle be plugged in when not in use to maintain the battery systems. Outside, curbside door 1 2 3 4 1. The switch controls the external driver’s side scene lights. (Battery Switch must be on and battery guard not tripped). 2. The switch controls the external passenger side and front scene lights. (Battery Switch must be on and battery guard not tripped). 3.
TAB A: MANAGER CHECKLIST This checklist is designed to be used by the lead person deploying the Mobile JIC Trailer. This checklist ensures that systems are deployed safely and effectively.
phones using Tabs H, I, J, K, L, M, N and O. o Tent Team: sets up 10’x10’ portable tent using Tab Q. Sets up 20’x30’ gable tent using Tab R (if necessary). o Generator/Lighting Team: sets up generators and halogen lights using Tab D. Routes extension cords to where power is needed. Note: Set up generator immediately upon arrival. o Heater Team: sets up tent heater and ducting using Tab E.
Diagram 1: Sample layout for use in a building/facility Mobile JIC Set-up Staffing at Various Levels Use the following chart to determine what jobs should be filled at various staffing levels (3, 5, 10, 15 and 20 people). In many cases one person will have multiple job assignments. For example, if you only have three people to set-up the Mobile JIC “Person One” will be the Manager as well as a member of the Load and Unload team, the Layout Team and the Internet Satellite Team.
Mobile JIC Set-up Staffing at Various Levels Manager 3 People Person 1 Person 2 Person 3 5 People 1 2 3 4 5 10 People 1 2 3 4 5 6 7 8 9 10 15 People 1 2 3 4 5 6 7 8 9 10 11 12 13 14 15 20 People 1 2 3 Deputy Manager Safety Officer X X Load/ Unload Layout Internet Satellite X X X X X X X X X X TV MultiMedia Admin X X X X X X X X X X X X X X X X X X X X X X X X X X X X X X X X X X X X X X X X X X X X X X Franklin County Public Health Mobile Joint Information Center (JIC) User Guide 13 o
Mobile JIC Set-up Staffing at Various Levels Manager 4 5 6 7 8 9 10 11 12 13 14 15 16 17 18 19 20 Deputy Manager Safety Officer Load/ Unload Layout Internet Satellite TV MultiMedia Admin X X X X X X X X X X X X X X X X X Franklin County Public Health Mobile Joint Information Center (JIC) User Guide 14 of 83
TAB B: ASSESSING LAYOUT AND SET-UP Equipment: 16 chairs 8 Six-foot tables 8 rugs Layout Template (Page 18) A. Assessing the Space 1. Review the list of equipment in the trailer to familiarize yourself with the components of the Mobile JIC (Tabs U and V). 2. Perform an assessment of the space you will be using as the JIC before moving the equipment into the space. Assess the following: a. Room requirements: i.
Wireless Components Printers to Satellite Case Computers to Satellite Case Distance (This may be dependent on the thickness of the walls, etc.) Maximum 300 foot with no obstructions Maximum 300 foot with no obstructions d. Satellite requirements: i. The two satellites need to be setup outside. ii. The area immediately south of both satellites should not have any large obstructions such as buildings or trees. iii. Both satellites need to be on semi-level ground at a 45 degree angle. e.
2. The Layout Team is responsible for moving the equipment into the JIC facility and placing the equipment in the space according to your layout diagram. 3. If setting up outdoors for an extended period of time, set up the 20x30 gable tent first. Approximately 6 people are needed to set up the tent. See TAB R for further instructions. 4. The layout team may need to recruit other teams to assist with moving equipment once it is unloaded from the trailer. 5.
Franklin County Public Health Mobile Joint Information Center (JIC) User Guide 18 of 83
TAB C: UNLOADING AND LOADING EQUIPMENT Safety Items for Team: Gloves and flashlights located in First-Off Box (optional) Instructions for Unloading the Trailer: 1. Unlocked all doors, see the manager for the combination to the locks. Open side door. Use gray latch at the bottom of the door to affix open door to trailer. 2. Pull out the Manager First-Off Box located on the shelf next to the right of the door. Use the supplies in the box as necessary. Flashlights are available for evening setup. 3.
Instructions for Loading the Trailer: Load equipment in the following order (please refer to Load Plan Diagram on the following page for placement of items in trailer): Safety Items for Team: Gloves and flashlights located in First-Off Box (optional) 1. If the 20x30 tent was used, place the galvanized tent poles on top of the 2x4 wood braces located near the roof of the trailer. Insert poles through slots cut in the board located at the rear of the trailer.
Load Plan Diagram View looking from top Notes: Tongue Jack Items shaded gray with diagonal lines are placed on top of the case in the diagram Auxilliary Battery Unshaded box indicates item sits directly on the floor of the trailer or on a shelf. Note: When loading, position items so the black information label on each item is visible when viewed from the reard of the trailer.
TAB D: GENERATORS CAUTION: Ensure one (1) fire extinguisher is located with 50 feet of each generator. Fire extinguishers are stored in the white metal cabinet in the trailer. A. Setup and Teardown: • Follow manual instructions. Manual is in manual box located in the white metal cabinet in the trailer. • Generator fuel capacity is 5 gallons. Fill with 87 octane unleaded fuel. Each generator produces 5,000 watts of energy. • IMPORTANT NOTES: o Turn off generator and let cool prior to refueling.
TAB E: HEATER UNIT WARNING: Heater unit operates with propane fuel. Prior to operating the heater, read instructions located on inside of the heater access panel to ensure all safety precautions are followed. CAUTION: Ensure one (1) fire extinguisher is located with 50 feet of the heater. Fire extinguishers are stored in the white metal cabinet in the trailer. Setup and Teardown: See owner’s manual for instructions (located to the right of the white cabinet on the trailer) on how to set up heater.
TAB F: INTERNET SATELLITE NOTE: ENSURE THE DIRECTION TO THE SOUTH OF THE SATELLITE AND 45 DEGREES FROM THE GROUND IS NOT OBSTRUCTED (objects such as trees or buildings that would prevent satellite from establishing connection) A. To Auto Deploy Internet Satellite System: Do not manually manipulate the satellite dish. When activated from the Datastorm-3 control box, the dish will deploy and find satellites on its own. Satellite System Components 1.
4. Remove the wireless router from the satellite case. Set the router on top of the case. The wireless router should be connected to a port on the Linksys panel. 5. Remove connector wires from around the internet satellite dish in the storage case. (There are 3 connectors: 1 large black cord with quick connect, 1 black coaxial, and 1 black coaxial with red zip tie) Connect in the following manner to the satellite case: a.
the system is operational and ready to use. NOTE: it can take up to 10 minutes from the time the “SEARCH” button is pushed for the dish to acquire the satellite signal and for the system to become operational. 11. Obtain a laptop from the Multi-Media team. Use a blue CAT-5/network cable to connect the laptop to a port in the Linksys box. Open Internet Explorer or other applicable web browser software. a. Navigate to the URL 192.168.1.
B. To “Stow” Internet Satellite System: 1. When system is no longer needed, push the “STOW” button located on the front of the MOTOSAT Datastorm D3 box. The dish will automatically stow itself (note- it is normal for the dish to move slowly). Do not manually manipulate the satellite dish. Do not disconnect any wires until dish completes the “STOW” cycle and is in the completely “down” position. 2. Press the “POWER” button to turn off the MOTOSAT Datastorm D3 box. 3.
• • Mitzi Kline Bill Oxenrider Amber Breedlove o Note: The Franklin County Public Health will invoice you the additional cost per day for the increased bandwidth after the deployment is complete. Mobil Satellite must receive a written request to support@mobilsat.com in order to increase the bandwidth. A second request is required to decrease your bandwidth to the basic speed.
A. Set up: TVs and DirecTV System: 1. TVs and DirecTV receivers are located in the TV case. Roll the TV case to the location it will be utilized. Undo the locking clasps on the case and separate the case into two separate television stations. If the bottom latches pull apart and the latch does not come off, squeeze together and pop the latch out. You may need to get a key from the lead PIO to unlock the clasp. The TVs are top heavy.
13. Autodeploy the TV Satellite system following instructions in section B (next page). B. To Autodeploy TV Satellite System: 1. Remove the lid of the satellite storage case if you haven’t done so already. (See the instructions in section A, step 5). 2. To autodeploy the TV Satellite system, press the “POWER” button located on the front of the Nomad 2 Positioner Box labeled “DirecTV”. Do not push any more buttons until all lights stop blinking. 3.
Account Number: 34607382 TV Receiver ID (RID) Serial # #1 0015 6569 2538 A01GB6HC313198 #2 0015 6493 0665 A01GB6HC313286 Satellite Receiver 6LA7 E229301 6LA7 E229301 DTV Access Card #: 0018 6566 9004 0018 6566 3247 FCPH # 790 789 D. Teardown: TV Satellite System: 1. Press the “STOW” Button on the Nomad 2 box. The DirecTV dish will automatically return to stowed position. Do not manually manipulate the satellite dish. 2.
C. Power off the unit using the “POWER” button. D. Turn the power back on the unit, after the startup sequence is complete (blinking lights), press and hold the “FIND” and “STOW” buttons and let them go. You should see the “STOW” light blinking which means it is returning back to the stowed position. E. System should be operational at this time. Vendor Information: • DirectTV receivers and satellite dish were purchased from Mobil Satellite Technologies. • DirectTV service provided by DirectTV.
Figure I1 – Diagram to set up TERK MultiSwitch for DirecTV system Franklin County Public Health Mobile Joint Information Center (JIC) User Guide 33 of 83
TAB H: MULTI-MEDIA STATION The Multi-Media Station consists of four (4) laser printers with black toner, one (1) all-in-one printer and fax, four (4) laptops, one (1) projector, two (2) digital cameras, one (1) camcorder, four (4) telephones with 100 foot wires, ten (10) Cat 5 or Internet cables (5 needed, 5 extras) and five (5) toner cartridges. The Multi-Media Station also has wireless internet and printing capabilities. Wireless is the preferred method but hard wire set-up is also available.
connect to the wireless network. Once connected to the wireless network the laptops will be able to access the internet. Laptops will not be able to wirelessly print until the instructions in Tab J are completed.
TAB I: LAPTOP COMPUTERS Please note that setting up the laptops to the internet requires working with those setting up the internet. All primary cables for the Multi-Media Station have been marked with one of five colors (yellow, green, orange, blue or pink). It will serve you best to assign each workstation one of these colors and ensure that the appropriate colored cords are used at that workstation. Being consistent will make your set-up, operation and tear down much easier.
viii. In the Network Name Box type: MJIC2. ix. Select the following options: 1. Network Authentication: WPA-PSK 2. Data Encryption: TKIP 3. Network Key: bli21314 (all lowercase - type the password as: b, number one, i, two, lowercase L, three, lowercase L, four). x. Repeat to confirm. xi. Click okay. xii. Click to confirm. xiii. Click Add. xiv. Select/Type the following: 1. Network Name: MJIC2 2. Network Authentication: WPA-PSK 3. Data Encryption: TKIP 4. Network Key: bli21314 (same as above). xv.
f. Plug this shorter end of the CAT 5 Internet cable into the laptop, making sure that the cord colors match the workstation colors. g. Repeat steps b-e for the remaining 4 stations. 4. Connect laptops to the network share drive. The 1tb server is connected to the Wireless Router located with the black Satellite Control Box. To connect to the server: a. The MJIC laptops already have the share drive available as the “Z-drive” when you open “My Computer”. b.
TAB J: PRINTERS/FAXES All outside laptops must be connected to the wireless network prior to connecting to wireless printing. See instructions in Tab I on how to connect to the wireless network. Please note: printers are mounted to the carrying case. Electronic manuals for the printers are on each computer’s desktop. Printer Setup Instructions 1. Connect Printer Power: a.
BWLaser2 192.168.2.42 BWLaser1 192.168.2.41 Color Laser BWLaser3 BWLaser4 192.168.2.43 192.168.2.44 Printer Name BWLaser1 BWLaser2 BWLaser3 BWLaser4 Color Laser 192.168.2.45 Printer IP Address 192.168.2.41 192.168.2.42 192.168.2.43 192.168.2.44 192.168.2.45 n. Click next. o. Click finish p. Insert into the computer the Printer software disk that corresponds to the printer you are loading. The software disks are stored in one of the drawers in the Multi-media station.
n. o. p. q. r. Click next Click next again Choose if you want to print a test page (recommended). Click next; this will print the test page if you selected the option to do so. Click finish Instructions for Color Printer a. Click browse. b. Browse to the CD Rom drive c. Select the printer software d. Open the drivers folder e. Open the folder to match the computers operating system (most likely Windows 200 XP) f. Click open g. Choose color 2840 PS h. Click next. i. Name the Printer “Color Laser” j.
2. Use the < or the > button to select the appropriate resolution setting. 3. Press Enter to save the selection. This procedure changes the fax resolution for the current fax job. For instructions about changing the default fax resolution, see Changing the default resolution setting. To change the fax contrast or glass-scan size, you must change the default settings. See Changing the default light/dark (contrast) setting or Changing the default glass-size setting. To send a fax to one recipient: 1.
entry. If you want to send a fax to a group of numbers (maximum of 20) that have not been assigned to a group-dial entry, see To send a fax to a group manually (ad hoc faxing). In the rare instance that your document does not fit into memory, complete one of the following: • Clear saved faxed from the fax memory. For more information, see Deleting faxes from memory. • Divide the document into smaller sections, and then send the documents as multiple fax jobs. To send a fax by using a group-dial entry 1.
Note: When dialing by using the alphanumeric buttons, include any pauses or additional numbers that are necessary for the call, such as an area code, an access code for numbers that are outside of a PBX system (usually a 9), or a long-distance prefix. See Using dialing characters for more information. 3. Press Enter. 4. Complete one of the following tasks: • To continue dialing numbers, repeat steps 2 and 3. • If you are finished dialing numbers, go to the next step. 5. Press Start Fax.
Making Copies The Color Laserjet 2840 All-In-One unit will make color or black and white copies. In addition, it is the fax machine and a color printer. There are good instructions printed directly on the copier so follow those steps to copy. Printing photos directly from the memory card To print photos directly from the memory card, complete the following steps: 1. Insert the memory card into the device. See Inserting a memory card. 2. Press Photo. 3. Use the < or the > button to select Print Photos. 4.
TAB K: TELEPHONES (VoIP) SETUP AND USE Please note that setting up the phones requires working with those setting up the internet. Setup Instructions 1. The Internet Team must have the MobileSat satellite system must be deployed and fully operational before phones will be functional. 2. Connecting Equipment: o Four analog phones are stored in one of the drawers located at the bottom of the MultiMedia station. o 100-foot phone cords are in one of the drawers located at the bottom of the Multi-Media Station.
Phone Operation 1. Dialing Out: When dialing standard numbers, dial out using the following format: “1-area code-7 digit phone number” followed immediately by the “#” sign. NOTE: When dialing out, calls going out will connect faster by pushing the “#” sign immediately after entering the last digit of the phone number. Reason: as this is a VoIP phone line, nontraditional phone numbers can be longer than 7 digits.
TAB L: CAMERA Refer to Owner’s Manual for operating instructions (located in storage bags). Two cameras are stored in one of the drawers located at the bottom of the Multi-Media Station. The drawers are labeled to identify their contents. • When uploading photos, hook one end of the grey USB cable to the camera and the other to the laptop. • Follow prompts on screen. Teardown: Remove the batteries from the cameras and place them in the camera bags.
TAB M: VIDEO RECORDER Refer to Owner’s Manual for operating instructions (Located in camera storage bag). The video recorder is stored in one of the drawers located at the bottom of the Multi-Media Station. The drawers are labeled to identify their contents. • To play video on TV you must hook the camera to the DVD player using the AV cord. • Plug the single plug end into the camcorder. • Plug the three plug end into TV as follows: yellow=video, white=L (mono), and red=audio.
TAB N: PROJECTOR AND PROJECTOR SCREEN The projector is located in one of the drawers on the Multi-Media Station. The instruction manual is inside the box. The projector screen is located in its own separate box in the trailer. ** Note: Two wall size maps are also stored in the Projector Box. One is all Franklin County and the other is Franklin and the surrounding counties.
TAB O: MULT BOX A Mult box is used during a press conference and connects to powered speaker or mixer to allow many separate recordings of one audio signal. The Mult Box is located in the white cabinet on the trailer. Model A24/2ML 2in/24out (Mic/Line Switchable) Audio Press Feed Description- The Model A-24/2ML Audio Press Feed is a high quality transformer coupled versatile unit for conferences, meetings, courtrooms, auditoriums, etc. It is a portable unit mounted in a Halliburton aluminum case.
TAB P: ADMINISTRATIVE SUPPLIES BOX SETUP AND USE Set up of the Administrative Supplies Box A. Open the Administrative Supplies Box. B. Inventory the contents of the box using the Mobile JIC Admin Supplies Checklist on page 61-63. C. Set out a copy of the supply sign out sheet. Anyone who needs a supply may sign it out to help assure all items are account for all items at the end of activation. You may wish to use the supply sign out sheet on the following page. D.
NOTE: Use of this form is optional, but may make supply inventory easier when Mobile JIC use is complete Supply Admin Supply Sign-Out Sheet User Date/Time Out Date/Time In 1 2 3 4 5 6 7 8 9 10 11 12 13 14 15 16 17 18 19 20 21 22 23 24 25 26 27 28 29 30 31 32 33 34 Franklin County Public Health Mobile Joint Information Center (JIC) User Guide 53 of 83
Mobile JIC Admin Supplies Checklist This completed form (4 pages) must be returned to the Franklin County Public Health.
Item Flip Chart Paper (table top/ post-it) Glue Stick Hanging Folders Inter-office envelopes Labels (Avery 5260) Legal Pads Map (Franklin County Road Map) Masking Tape Media Kit (media badges, media list) Name Badges ( Avery 74541) Packaging Tape Paper (Laser) Paper Clips Pen (black) Pen (blue) Pen (red) Pencil Pencil Sharpener Photo Paper Podium Poster Board Post-it Note Power Cord Splitter Power Strips Power strips with surge protectors Push pin Rubber bands Rubber Cement Scotch Tape Quantity (pack/total
Item Sharpies (colored) Sharpies (black) Signs - “Caution: Tripping Hazard” Staples Steno Pads Storage containers (1.5 gallons) Storage Containers (7.
Station Kit Supplies Checklist There are five station kits in the Administrative Supply Box. Each kit is contained in a portable file case.
TAB Q: TENT: 10X10 PORTABLE A. Setup: Remove tent from fabric transportation container. Using 2 people, each individual grasp a leg on opposite corners and pull to expanded the collapsed tent. This will open the tent and provide a 10 foot by 10 foot covered workspace. Use accompanying stakes and rope to secure the tent to the ground. B. Teardown: Remove stakes and rope and return to storage container. Using 2 people, each individual should push on the legs on opposite corners to collapse the tent.
TAB R: TENT: 20X30 GABLE TENT (A laminated copy of the owner’s manual is located in the Tent Box.
THIS PAGE INTENTIONALLY LEFT BLANK Franklin County Public Health Mobile Joint Information Center (JIC) User Guide 60 of 83
TAB S: MOBILE JIC REQUEST FORM MOBILE JOINT INFORMATION CENTER TRAILER REQUEST FORM FOR TRAININGS, DRILLS OR EXERCISES PURPOSE The Mobile Joint Information Center (Mobile JIC) was purchased by the Franklin County Public Health with 2005 Urban Area Security Initiative (UASI) Homeland Security federal grant funds.
e. 1 video recorder f.
REQUEST FORM To request the Mobile Joint Information Center trailer for training, drills, or exercises this form must be completely filled out by the requesting agency, and then faxed (614-462-6672) or mailed to the Franklin County Public Health, Director of Communication. The Franklin County Public Health must receive this request four weeks prior to your scheduled event for approval consideration and scheduling purposes.
**********Important Liability and Cost Recovery Information*********** Liability The trailer and its contents are fully insured by the Franklin County Public Health (FCPH). By requesting and utilizing the Mobile JIC Trailer the agency/organization accepts liability for the hauling of the trailer. Should an accident occur or equipment be damaged or lost the requesting agency/organization must notify FCPH immediately for so proper claim steps can be followed. Call Mitzi Kline at (614) 374-1924 (24/7 number).
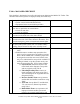
TAB T: SAFETY BRIEFING CHECKLIST The manager should conduct a safety briefing to all staff prior to unloading anything. 1 2 3 4 5 6 7 8 9 12 13 14 15 16 17 User Initials Safety Item Owner’s Manuals: At all times, safety specification in Owner’s Manual take precedence regarding safety items mentioned in this User Guide. Owner’s manuals are located in the plastic file storage container inside the white cabinet on the trailer, unless noted otherwise. Heavy Equipment: some equipment items are very heavy.
Franklin County Public Health Mobile Joint Information Center (JIC) User Guide 66 of 83
TAB U: EQUIPMENT INVENTORY LIST Description of Equipment Model # Serial #s Trailer, 14'x7' enclosed Cabinet (mounted in trailer) 500kW Light w/stand Mult Box Tire Change Ramp Lug Wrench Electrical Exterior Use Cable, 100' 300V 12/3 gauge Multi -Media Station Case Lapotop, Acer TM4072WLMI C9.1.73 100G 1GB XPP Portable Printer, HP Laserjet 1320N FCPH Qty Actual Unit Cost Total Cost 1 $19,051.
Power Strips N/A N/A Telephone (digital/analog) 959 Telephone Cord, 100 ft CAT 5 Cables, 100f Electrical Exterior Use Cable, 100' 300V 12/3 gauge N/A N/A AY803991451 AY803991444 AY804060262 AY803991468 N/A N/A N/A N/A 3 4 10 3 4 Toner Cartridge for 2840 Printer 1 TV Monitor, Viewsonic N3260W 32" Blk LCD TV DVD/VCR, Toshiba SDV394 DVD/VCR Combo silver DirectTV Receivers (in TV case) Grant Local Free $ 59.00 $ 177.00 N/A Grant Local Local 2 $ 98.00 $ 196.
Fire Extinguishers (ABC) Propane tanks, 20gal Power Strips N/A N/A N/A N/A 4 2 N/A N/A 3 1 N/A N/A 1 N/A N/A N/A N/A 1 4 10 2 5EGMBE5270A J05E001808 1 $ 876.00 $ 876.00 745 Grant 200 5EGMBE5270A FAST10X10-00 E06E001457 1 $ 891.41 $ 891.41 795 Grant 200 1 $ 199.00 $ 199.00 765 Grant 63 N/A 1 $ 1,677.00 $ 1,677.
Flyaway Portable Casing for F2 System (Gray Case) Roto Mold F-2 Reusable plastic shipping container. API-AP-39235 N/A 1 $ 2,695.00 $ 2,695.00 786 Grant MST-F21D MST-F21D 1 $ 8,995.00 $ 8,995.00 784 Grant N/A N/A N/A N/A 1 1 $ 59.00 $ 59.
TAB V: PICTURES OF EQUIPMENT Franklin County Public Health Mobile Joint Information Center (JIC) User Guide 71 of 83
Franklin County Public Health Mobile Joint Information Center (JIC) User Guide 72 of 83
Franklin County Public Health Mobile Joint Information Center (JIC) User Guide 73 of 83
Franklin County Public Health Mobile Joint Information Center (JIC) User Guide 74 of 83
Franklin County Public Health Mobile Joint Information Center (JIC) User Guide 75 of 83
TAB W: USER AFTER ACTION REPORT FORM The purpose of this form is to inform the system coordinator of problems of the Mobile JIC such as broken items, systems not operating properly, safety issues, etc. It is not intended to serve as part of a formal exercise After Action Report.
TAB X: MAINTENANCE RECORD DATE Satellite Internet Satellite TV VoIP Printer Station Trailer Battery Trailer Emer Brakes Battery Trailer Tires Gen #1 Legend √ – Operations check or Inspection complete, no problems noted X – Problems encountered during operations check.
TAB Y: MAINTENANCE WORKSHEET (To be accomplished once a month) Date: _____________ Name of person conducting Maintenance Check: ___________________ Instructions: 1. Run up all systems using Equipment Standard Operating Procedures in this guide. 2. Mark whether the system was operational or not operational by placing a “check mark” in the applicable yes / no column. 3. Check off checklist items as they are completed 4. Enter any comments regarding problems encountered in remarks column. 5.
Check coupler ball or 5th wheel and pin – check for unusual wear, sufficient lube and lock mechanism Check safety chains and hitch ball – check for unusual war on chain links and hitch ball Check coupler – check safety pin for proper fastening Check brakes – check general operation and proper adjustment Check breakaway battery – check charge light by pulling switch Check doors, windows and vents – close and lock all doors, windows and vents before travel Check welds – check welds for cracking of separations
TAB Z: Checklist to Approve Deployment of Trailer Do you have a ¾ or 1 ton truck? 1. Does your truck have a 2 5/16 ball with 10,000 lb capacity? 2. 6. 7. N Y N Y N Y N Y N Y N Notes: Is the tongue capacity at least 1,000 lbs? 5. Y Notes: Does truck come with a 7 plug electrical hook-up? 4. N Notes: Is your truck hitch rated for 10,000 lb capacity? 3.
TAB AA: Towing Checklist Inspect tow package on vehicle: o Ball: 2 5/16” and 10,000lb capacity o Hitch: 10,000lb capacity o Tongue: 1,000 lb capacity minimum o Electrical Plug Load truck: o 2 generators o 2 extension cords o 2 gas cans (fill with unleaded fuel prior to MJIC set-up) Connect truck to trailer: 1. Raise trailer tongue to clear ball 2. Back truck up and align ball with trailer hitch 3. Ensure ball locking lever is in full upright position (ITEM 1) 4.
TAB BB: Franklin County Contact Information: Name VACANT Title Contact Info Email: Preparedness Office: 614-462-3699 Training Supervisor Cell: 614-561-3200 Director of Communication Email: mrkline@franklincountyohio.gov Office: 614-462-3028 Cell: 614-374-1924 Bill Oxenrider MIS Director Email: wroxenri@franklincountyohio.gov Office: 614-462-6676 Cell: 614-778-2475 Amber Breedlove Health Communications Specialist Email: adbreedl@franklincountyohio.
Potential Deployment Option: Deployment of Multi-Media Station to location with wireless or wired network access: 1. Bring the following equipment: a. Multi-Media Station b. Wireless Router (retrieve from Satellite Control Box) c. Share drive (retrieve from Satellite Control Box) 2. Setup: a. Connect the Wireless router to the network at the facility. b. Connect the share drive to the Wireless Router. c. Follow the instructions in TAB H, I, and J.