PlotStalker Timelapse Camera User Guide www.moultriefeeders.com Rev.
1. QUICK START GUIDE The following steps outline the quickest way to begin using your camera. We recommend that you scan the remainder of this user’s guide before using your new camera. 1. Remove camera from packaging. 2. Insert four new AA batteries and an SD card. 3. Mount the camera so that it is level and aimed at your target. Use viewfinder to insure accurate aim. 4. Set the Rotary Dial to SETUP and press the Power/Status button to turn the camera ON. 5.
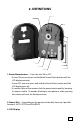
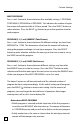
2. DEFINITIONS 9 1 8 5 2 6 3 4 7 1. Power/Status button — Turns the unit ON or OFF. • To turn ON you must press and hold the Power/Status button until the LCD display activates. • To turn OFF you must press and hold the Power/Status button until the LCD display goes off. • To see the status of the camera, click the power button quickly (warning: if camera is within 15 seconds of taking its next photo or video, pressing this button will reset the timelapse timer) 2.
Definitions 4. Function buttons SELECT button Used to confirm selections during SETUP and PLAYBACK modes. + or – button • Used to change the setting values within the SETUP mode. • Used to move forward or backward while reviewing pictures in PLAYBACK mode. LEFT ( ) button • Used to choose previous settings in SETUP mode. • Used to delete pictures or video in PLAYBACK mode. RIGHT ( ) button • Used to choose next settings in SETUP mode. • Used to play video clips in PLAYBACK mode. 5.
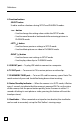
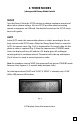
3. THREE MODES (change with Rotary Mode Switch) SETUP Turn the Rotary Dial to the SETUP position to change timelapse interval and adjust other camera settings. Also use SETUP position when connecting camera to computer via USB cord. See detailed instructions for SETUP menu later in this guide. AUTO In the AUTO mode, the camera takes photos or videos according to the settings chosen in the SETUP menu. When the Rotary Mode Switch is turned to AUTO, the camera status (Fig.
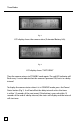
Three Modes Fig. 3 LCD display shows the camera status (Estimated Battery Life). Fig. 4 LCD display shows ‘’CAPTURING” Then the camera returns to STANDBY mode again. The red LED indicator will flash every 3 sec to indicate that the camera is powered ON, but is in a delay interval. To display the camera status when it is in STANDBY mode, press the Power/ Status button (Fig.1). It will not affect the delay interval unless the timer is within 15 seconds of the next event.
Three Modes Memory Full In the AUTO mode, if the LCD shows “MEMORY FULL”, it means that the memory is full. The camera will shut down automatically. Please insert an empty SD card. Low Battery In the AUTO mode, if the LCD shows “LOW BATTERY”, it means that the battery is low. The camera will shut down automatically. Please replace the batteries. PLAYBACK Use the PLAYBACK mode to view photos and video on a television. See detailed instructions for television viewing later in this guide.
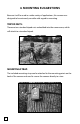
4. Mounting Suggestions Because it will be used in a wide variety of applications, this camera was designed to be extremely versatile with regard to mounting. TRIPOD NUTS: There are two standard tripod nuts embedded into the camera case, which will attach to a standard tripod. MOUNTING STRAP: The included mounting strap can be attached to the mounting points on the back of the camera and used to secure the camera directly to a tree.
5. Custom Settings TURN POWER ON Turn the rotary dial to the SETUP position. Press and hold the Power/Status button. The SETUP MENU window will appear in the LCD display. TURN POWER OFF If you want to turn the unit off simply press and hold the Power/Status button again until the LCD display goes off. Note: in SETUP and PLAYBACK modes, if there is no activity for 2 minutes, the camera will automatically shut off to conserve battery life. SETUP MENU The setup menu will start with TIME LAPSE INTERVAL.
Custom Settings MULTI-PROGRAM Press + and - button to choose between four available settings: 1 PROGRAM, 2 PROGRAM, 3 PROGRAM or 4 PROGRAM. This indicates the number of cycles the camera will operate within a 24-hour period. Press the SELECT button to make selection. Press the RIGHT ( ) button to go set the operation time for each program. PROGRAM (1, 2, 3 or 4) WAKEUP (Take Pictures) Press + and - button to choose between 24 different settings: any hour from MIDNIGHT to 11 PM.
Custom Settings IMPRINT INFO? Press + or - button to choose between YES and NO. Select YES to imprint the time lapse interval, camera name, date and time on the bottom of your photos. Note: if YES is selected while camera is programmed to take VIDEO, the camera will take a photo with imprinted info before each video clip. Press the SELECT button to make selection. Press the RIGHT ( ) button to choose next setting. DATE/TIME Press the SELECT button and the month will flash.
Custom Settings UPGRADE FIRMWARE Press + or – button to choose between YES and NO. Choose YES to upgrade the firmware through a SD-card. Press the SELECT button to make selection. Press the RIGHT ( ) button to choose next setting. Firmware updates will be available periodically at www.moultriefeeders.com. To determine which firmware version is installed on your camera, set dial to PLAYBACK and hold select button while turning camera ON.
Custom Settings 6. MEMORY STORAGE and CAPACITY Your digital camera supports external SD memory card ONLY. (NO internal memory available) Memory Chart* Resolution Picture count stored with 2GB SD Card LOW 640 x 480 10,994 MEDIUM 1280 x 720 3,206 HIGH 1920 x 1080 1,749 FINE 3264 x 2448 961 VIDEO 640 x 480 274** *Estimates. Actual capacity will vary based on image properties. **10-second video clips.
7. IMAGE VIEWING by TV Out cable or USB Out cable TV VIEWING Move the rotary dial to PLAYBACK position. Connect unit TV OUT port to a VIDEO-IN jack on your TV. Press + or – button to scroll through recorded images. Press the RIGHT ( ) button to play a video clip. Press the LEFT ( ) button to delete pictures or video clips. DELETE PHOTO In the PLAYBACK mode, Press the LEFT ( ) button, then the selection will flash.
8.
Plot Stalker Software Instructions INTRODUCTION In time-lapse photography a series of still images is taken at regular time intervals and then played back faster - giving the illusion that time is passing quickly. This instruction manual provides you with the general information you need to start using the Time Lapse Software to view and assemble images into a video. For more detailed instructions relative the operation of your camera, please refer to the instruction manual.
DOWNLOADING IMAGES IMAGES 1. Double click on (TimeDOWNLOADING Lapse Software) to open the software. 2. Click on File. 1. Double click on (Time Lapse Software) to open the software. 2. Click on File. 3. Browse through your files to the folder where the time lapse images 3. Browse throughyou your folder where the time lapse images wish files to opento arethe stored. 4. Onceare the stored. file is selected, click OK. you wish to open 5. The images saved in the file are now available to view through the 4.
VIEWING IMAGES cont. header 5. Preview Search Click the Search button to do an automatic Preview scan of your images. The scan pauses when the software detects a change in pixel content from the last photo viewed. Detection is based on averaging picture changes so this mode will skip some images and should only be used to preview a set of images quickly. The frame counter on the slider bar turns black when searching. Note: this is the least precise of the viewing modes but it is automatic, quick and easy.
VIEWING IMAGES cont. 5.3 Search Steps A. This allows for even faster scans by skipping the selected amount of images (1-50). The higher this setting, the lower the search results as it is ignoring selected photos. You may find this option helpful if you have a very large quantity of photos to scan. B. Click (OK). C. Click on Motion Search Advance button. IMPORTANT- Since this option forces the Easy Search to “overlook” pictures it will lower the accuracy of your search if set above 1.
TO TURN PHOTO SEQUENCES INTO TIME LAPSE VIDEO cont. 3. Choose a starting image (frame) and an ending image (frame). Note: The frame limit is 300. 4. Choose the frame rate. Options include 1, 5, 10, 20, and 30 frames per second (fps). Note: The frame rate says how many images of a video are displayed every second a video is played. The higher frame rate a video has the smoother movement appears in the video. However, a higher frame rate video will create a larger file and will require more memory. 5.