N P o r t Server Pro User’s Manual for DE-303/308 Fourth Edition, Mar. 2001 Moxa Technologies Co., Ltd. Tel: +866-2-8919-1230 Fax: +886-2-8919-1231 www.moxa.com service@moxa.com.
N P o r t Server Pro User’s Manual The software described in this manual is furnished under a license agreement and may be used only in accordance with the terms of that agreement. Copyright Notice Copyright 2000 Moxa Technologies Co., Ltd. All rights reserved. Reproduction without permission is prohibited. Trademarks MOXA is a registered trademark of Moxa Technologies Co., Ltd. All other trademarks or registered marks in this manual belong to their respective manufacturers.
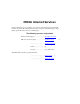
MOXA Internet Services Customer satisfaction is one of our number one concerns. To ensure that customers receive the full benefit of our products, Moxa Internet Services has been set up to provide technical support, driver updates, product information, and user’s manual updates. The following services are provided E-mail for technical support: ................................support@moxa.com.tw FTP site for free driver updates: ...........................ftp://ftp.moxa.com or ............................
Table of Contents Chapter 1.1. Overview ...........................................................................................1-1 Features .................................................................................................1-2 Package Checklist ...................................................................................1-2 Front Panel View....................................................................................1-3 Rear Panel View..........................................
Using NPort Pro Manager .......................................................................5-6 Saving Your Configuration.......................................................................................... 5-7 Adding an NPort Server Pro — Add Server Wizard ................................................. 5-7 Deleting a Server ......................................................................................................... 5-13 Modifying COM Name Mappings ...................................
Chapter 9.9. Windows 2000 — Installation and Configuration.....................9-1 Installing NPort Server Pro..........................................................................................9-2 Installing NPort Server Pro’s Serial Port ...................................................................9-9 NPort Server Pro Properties...................................................................9-11 Configuration.................................................................................
1 1. Overview Welcome to Moxa NPort Server Pro, an Industrial Serial Device Server that greatly enhances the ability of a Windows NT/95/98 host to control multiple serial port devices over a TCP/IP based Ethernet network.
Features q Provides a stand-alone multi-port serial solution, over a TCP/IP network, for connecting 8 or 16 COM ports for each NPort Server Pro q Long range connection and distributed serial device control over an Ethernet network q Easy expansion to provide up to 256 serial ports for one Windows NT server q Supports sharing of the server and its ports to multiple hosts q Remote control of NPort Server Pro over the Internet and Intranet q Driver for Windows NT/95/98 platform q Fixed TTY driver
Overview Front Panel View Figure 1-1. 16-Port NPort Server Pro Front Panel (DE-303) Figure 1-2.
Rear Panel View Figure 1-3. 16-Port NPort Server Pro Rear Panel (DE-303) Figure 1-4.
2 Getting Started 2. Now that you are familiar with NPort Server Pro's features and specifications, it’s time to install the hardware and get your system up and running. We begin this chapter with a brief explanation of the operation modes available when using NPort Server Pro, and then discuss the basics of setting it up.
Knowing Your Application NPort Server Pro is an advanced Industrial Serial Device Server designed to fit into today's everexpanding networking world. It extends the usage of traditional COM ports on a PC—an isolated machine with restricted ports—to being able to access the ports over a TCP/IP network. Through the nature of networking, you are able to control your serial devices from a distance, either over a LAN, or even over the Internet.
Getting Started . Figure 2-2. Single-Host Mode using two NPort Server Pros Multi-Host Mode For advanced applications you may share one NPort Server Pro with multiple hosts on a Local Area Network(LAN).Unlikeserialdevicesbundledtoa dedicated host, sharing one NPort Server Pro with several computers saves resources, since you no longer need to add multi-port serial boards to each computer. Figure 2-3 shows the basic concept of the Multi-Host application.
NT NT NT TCP/IP Figure 2-3. Three-Hosts sharing two NPort Server Pros If you decide to configure your NPort Server Pro as Multi-Host, you will need to know something about the networking concept of assigning IP addresses. There are two basic roles at play with this application mode—the administrator, and general users. The administrator assigns a dedicated IP address to NPort Server Pro, so that other Windows NT/95/98 hosts on the network, i.e.
Getting Started NT TCP/IP NT Router Router Internet NT TCP/IP NPort Server Pro Figure 2-4. A remote control link diagram Custom Mode The Custom Mode of operating NPort Server Pro allows for situations more complex than those mentioned in the two previous subsections. These functions include remote control from an Internet host, setting the ports on NPort Server Pro as WAN ports for remote control, and adding complicated routing protocols.
Locating NPort Server Pro There are two placement options available. NPort Server Pro can be: q q placed on a desktop, fixed to a 19-inch rack-mount. Desktop This option involves placing NPort Server Pro on a clean, flat, well-ventilated desktop. There are four rubber pads fixed to the bottom of the server, and we recommend leaving sufficient room between NPort Server Pro and neighboring equipment to create clearance for air to circulate. .
Getting Started Connecting to the Network There are two ways to use the 10/100BaseT Ethernet jack located on NPort Server Pro’s back panel (see Figs. 1-3 and 1-4): 1. For many of the applications using NPort Server Pro, you will simply plug one end of your Ethernet cable into the 10/100BaseT jack, and the other end into the hub connected to your network. 2.
3 3. IP Address Configuration In this chapter we explain how to configure NPort Server Pro’s IP address, using: q Telnet Console q DHCP Server The first method uses the Telnet program to access the server over the network. The second method applies if you have a Dynamic Host Configuration Protocol (DHCP) server.
Telnet Console You may use the Telnet program to easily communicate with NPort Server Pro over a TCP/IP Ethernet network. All you need is the server’s current IP address and a computer running the Telnet program, provided the computer is hooked up to the server’s network. The example in this section was generated using a Windows NT/95/98 host. . Note: After activating the Telnet Console, you will need to use the keyboard keys to maneuver about the VT100 screen.
IP Address Configuration 4. A connection between your computer and NPort Server Pro should now be established, and the MOXA NPort Server Pro utility program will automatically start running. . Note: After activating the Telnet console, use the following procedure to make sure that the VT100 Arrows option is selected. Not doing so could cause the server’s name to be changed inadvertently. 5. Choose Preferences from the Telnet Console Terminal menu. 6.
8. Use the keyboard arrow keys to position the cursor over the first digit of the IP address. 9. Type in the correct IP address and then press Enter to accept this value. 10. Press ESC to return to the main menu, and then select Restart to activate the change. DHCP Server This section applies if you are using your Windows NT host as a DHCP server. This type of server is set up to provide IP addresses for new devices as they log onto a network.
IP Address Configuration 2. The left info box of the DHCP Manager window will show a list of DHCP hosts currently hooked up to the network. Note that before you can make changes to the host’s parameters, there must be a minus sign (–) located to the left of the server name (Local Machine in the example shown below.) If, as shown, there is a plus sign (+) to the left of the server name, use the left mouse button to click on the name of the host until the minus sign appears. 3.
5. Once the Create Scope (Local) window opens (see below), you will be required to input a range of IP addresses in the IP Address Pool. There is also an Exclusion Range used to prevent the DHCP server from issuing addresses to existing devices that have already been assigned IP addresses from this range. By using the Add and Remove buttons, several different ranges can be excluded, and later included. 3-6 6. Another item that must be attended to is the Subnet Mask.
IP Address Configuration 9. A window opens with the question: Activate the new scope now? Click on Yes to activate. At this point we explain how to input a unique IP address reserved exclusively for use by your NPort Server Pro. 10. From the DHCP Manager – (Local) menu bar, click on Scope, and then select Add Reservations. 11. The Client Properties window that opens contains text input boxes for IP address, Unique Identifier, Client Name, and Client Comment.
12. To check that the numbers just entered are correct, return to the DHCP Manager main window, click on Scope, and then choose Active Leases from the pull down menu. The IP address reserved for your NPort Server Pro will be displayed in the window that opens up. Check to make sure that it is accurate.
4 Setting Up Single-Host 4. In this chapter we explain how to set up NPort Server Pro for Single-Host Mode. This type of application uses one Windows NT/95/98 server to control several serial devices in a manner similar to the way you would use a traditional multi-port serial board.
q Replacing a Server TCP/IP NPort Server Figure 4-1 Application with one host and two NPort Server Pros . Note: If you need to set up Multi-Host Mode or Custom Mode, refer to Chapters 5 and 6, respectively, for complete descriptions of these types of application.
Setting Up Single-Host Driver and Software Installation 1. Insert the NPort Server Pro disk into either the floppy disk drive or CD ROM drive, depending on the type of disk that was provided. From the Windows NT/95/98 desktop, click on Start and then choose Run. 2. Type A:\setup in the Open input box if using drive A and then click OK (replace A with the correct drive letter if you are using a different drive). 3.
4-4 4. When the Setup Wizard window opens, choose Single-Host, and then click on Next to continue. 5. The Select Destination Directory window gives you the option to change the directory which program files will be copied to. Click on Next to copy NPort Server Pro files to the given default directory. To choose a different directory, click on Browse, navigate to the desired directory, and then click on Next.
Setting Up Single-Host 6. The Installing window shows the progress of the installation process. Click on Cancel at any time to terminate the installation. 7. The next window verifies that the installation process has completed. Click on Next to continue. . Note: If you click on Cancel you will need to run Add Server Wizard at a later time to install your NPort Server Pro. 8. Clicking on Next in the previous window activates the Add Server Wizard.
Using NPort Pro Manager When you run the Setup program to install NPort Server Pro software, you are given the option to run the Add Server Wizard. However, you may run NPort Pro Manager at a later time if you decide to add more servers, change server names, remove servers, or change COM names. To start NPort Pro Manager, click on: Start à Programs à NPort Server Pro à NPortPro Manager.
Setting Up Single-Host Figure 4-2. NPort Pro Manager menus and toolbar functions. Saving Your Configuration Modifications of Nport Server Pro, or changes to port configurations, must be saved in order to be activated.Choose Save Configuration fromthe Server menu, or click on the toolbar Save all Servers icon to automatically detect any changes and save them in the appropriate places.
2. If the NPort Server Pro you wish to add is listed in the Add Server Wizard window, use the mouse to highlight the server Model and then click on Next to continue. . Note: If the server you want to add is not listed in the above window, you will receive the warning window shown below. Check to make sure that the power cord is connected, and the power switch is in the “on” position. C lick OK to return to the window shown above, and click on Find. The new server should now be listed as shown above.
Setting Up Single-Host . Note: If you have several servers hooked up to your network, and it’s not clear which server is the one you are currently adding, click on Locate in the Add Server Wizard window shown in step 2 above. The “Ready” LED on the listed server will start blinking, allowing you to identify it. 3. Select the COM port name that you would like the first port on the server to map to.
4. You will be asked to assign a server password if you are installing a new server. We highly recommend assigning a password, since this will help to prevent other users from changing the server’s configuration. Click on Next to continue. . Note: Make sure the Auto Saved check box is selected if you want your NT/95/98 system to remember the password.
Setting Up Single-Host 5. Check the Add Server Wizard Complete! window to verify that all of the information is correct. Click on Finish if everything is correct, or click on Back to return to the previous window. 6. The NPort Pro Manager window opens, with the newly installed server listed. 7. Click on the server name to highlight it. Basic information about the server’s COM ports will be listed in the right info box.
. Note: The NPort Pro Manager title bar shows the application mode of the newly installed server—Single-Host in this case. 8. To add another server, choose Add Server Wizard from the Server menu, or click on the toolbar Add Server icon, and then repeat the above steps. 9. Before exiting NPort Pro Manger you should save the new configuration. Choose Save Configuration from the Server menu, or click on the toolbar Save all Servers icon to carry this out. 10. Exit NPort Pro Manager when you finish.
Setting Up Single-Host Changing the COM Name of One Port 1. Click on the server name whose port you would like to modify. 2. Click on the port, in the right info box, whose COM name you would like to modify. 3. Choose Map Port from the Port menu, or click on the toolbar Map Port icon to activate the function. 4. Select the COM name that the port will be mapped to. 5. Click OK to activate the change.
Server Properties—General 1. Select the General tab in the Server Properties window. 2. Modify the server name as desired. 3. Select Enable or Disable, for DHCP, depending on whether or not you are using a DHCP server. Server Properties—Password Toaddmore security to your NPort Server Pro, it is highly recommended that you set a password as soon as you complete the installation.
Setting Up Single-Host Server Properties—Transmission The Transmission page allows the user to set the Transmission Mode and TxFIFO options for each of NPort Server Pro’s ports. Transmission Mode SelectHi-Performance tousebuffering technology to accelerate data writing. This allows your communication software to reach maximum data throughput when transmitting large amounts of data. The driver will notify the user that the transmission is complete when the output datalengthislowerthantheLOW WATER setting.
1. Stop all port action related to the server you are upgrading. 2. Choose Upgrade Server from the Server menu, or click on the toolbar Upgrade icon. 3. Locate and then select the filename of the firmware that you downloaded. 4. Click on Open and then wait until you see an “upgrade completed” message. The server will restart automatically. . Note: When using this procedure, only the selected server’s firmware is upgraded.
Setting Up Single-Host 3. The Replace Server… window that opens up shows a list of servers that you have not configured. You can identify the new server by looking at the serial number. 4. Confirm the Server with the pop-up window. 5. If the new server is password protected, enter the pre-set password when prompted to do so. 6. Click OK to save the current settings to the new server. 7. Click on Save Configuration to activate. .
5 5. Setting Up Multi-Host In this chapter we explain how to set up NPort Server Pro for Multi-Host Mode. This type of application uses more than one host on a local network to control several serial port devices.
q Access Control — — Configuring Through View by IP Ø Adding Access Permission of One Host Ø Modifying the Host Settings Ø Removing Ports from a Granted Host Ø Removing a Granted Host Configuring Through View by Port Ø Adding a Host IP Address to a Specific Port Ø Modifying a Granted Host Ø Removing Granted Host NT NT NT TCP/IP Figure 5-1. Application with three hosts and two NPort Server Pros. .
Setting Up Multi-Host Driver and Software Installation 1. Insert the NPort Server Pro disk into either the floppy disk drive or CD ROM drive, depending on the type of disk that was provided. From the Windows NT/95/98 desktop, click on Start and then choose Run. 2. Type A:\setup in the Open input box if using drive A and then click OK (replace A with the correct drive letter if you are using a different drive). 3.
5-4 4. When the Setup Wizard window opens, choose Multi-Host, and then click on Next to continue. 5. The Select Destination Directory window gives you the option to change the directory which program files will be copied to. Click on Next to copy NPort Server Pro files to the given default directory. To choose a different directory, click on Browse, navigate to the desired directory, and then click on Next.
Setting Up Multi-Host 6. The Installing window shows the progress of the installation process. Click on Cancel at any time to terminate the installation. 7. The next window verifies that the installation process has completed. Click on Next to continue. . Note: If you click on Cancel you will need to run Add Server Wizard at a later time to install your NPort Server Pro. 8. Clicking on Next in the previous window activates the Add Server Wizard.
Using NPort Pro Manager When you run the Setup program to install NPort Server Pro software, you are given the option to run the Add Server Wizard. However, you may run NPort Pro Manager at a later time if you decide to add more servers, change server names, remove servers, or change COM names. To start NPort Pro Manager, click on: Start à Programs à NPort Server Pro à NPort Pro Manager.
Setting Up Multi-Host Figure 5-2. NPort Manager and the menus. Saving Your Configuration Modifications of NPort Server Pro, or changes to port configurations, must be saved in order to be activated. Choose Save Configuration from the Server menu, or click on the toolbar Save all Servers icon to automatically detect any changes and save them in the appropriate places.
1. Select Yes and then click on Next to continue the installation process. 2. If the NPort Server Pro you wish to add is listed in the Add Server Wizard window, use the mouse to highlight the server Model and then click on Next to continue. . Note: If the server you want to add is not listed in the above window, you will receive the warning window shown below. Check to make sure that the power cord is connected, and the power switch is in the “on” position.
Setting Up Multi-Host . Note: If you have several servers hooked up to your network, and it’s not clear which server is the one you are currently adding, click on Locate in the Add Server Wizard window shown in step 2 above. The “Ready” LED on the listed server will start blinking, allowing you to identify it. 3. If you are the system administrator and know the current password, or if you are setting up a new password, select Yes, I am the administrator and then enter the password in the text input box.
5-10 4. The next window lists NPort Server Pro’s current IP address. Change the number if needed, and then click on Next to continue. 5. Select the COM port name that you would like the first port on the server to map to. This will add all of NPort Server Pro’s ports (8 or 16, depending on the server model number) to your NT/95/98 system, using consecutively numbered COM names. Click on Next to continue.
Setting Up Multi-Host 6. When the Complete! window opens, check the information to make sure that everything is correct, and then click on Finish to continue.
7. This evokes the NPort Pro Manager program, with the newly installed server listed. 8. Click on the server name to highlight it. Basic information about the server’s COM ports will be listed in the right info box. . Note: If you see ports with status ‘Non-authorized’, and you are a general user, be sure to ask your server administrator to add access permission so that you may make modifications to the server. .
Setting Up Multi-Host Deleting a Server If for some reason you need to delete a server from your system, click on the server name to highlight it,andthenchoose Delete Server fromthe Server menu, or click on the toolbar Delete Server icon. A warning window will pop up asking if you really want to delete the server. Click OKto delete. Modifying COM Name Mappings You may use NPort Pro Manager to change previously assignedCOMnames.Choose Map Port fromthe Portmenu, or click on the toolbar Map Port icon.
3. Choose Map Port from the Port menu, or click on the toolbar Map Port icon to activate the function. 4. Select the COM name that the port will be mapped to. 5. Click OK to activate the change. Un-Mapping a Port If you do not need to use a port any more, you may use the UnMap Portfunctiontoremoveitfrom your Windows NT/95/98 operating system. 1. Click on the port (in the right info box) that you want to remove. 2. Choose UnMap Port from the Port menu, or click on the toolbar Unmap Port icon .
Setting Up Multi-Host 4. Click on Open and then wait until you see an “upgrade completed” message. The server will restart automatically. . Note: When using this procedure, only the selected server’s firmware is upgraded. If you know that new NPort Pro Manager software has been released, it is recommended that you uninstall the old NPort Pro Manager program from your NT/95/98 host’s hard drive, and then install the new one.
Server Properties—Password To add more security to your NPort Server Pro, it is highly recommended that you set a password as soon as you complete the installation. If you did not set the password while running Add Server Wizard, or you would like to change the current password, you may use the toolbar Properties function to do so. You may also use this function to “Auto-Save”, i.e., to have Windows NT/95/98 remember your password for you.
Setting Up Multi-Host Server Properties—Transmission The Transmission page allows the user to set the Transmission Mode and Tx FIFO options for each of NPort Server Pro’s ports. Transmission Mode SelectHi-Performance tousebuffering technology to accelerate data writing. This allows your communication softwaretoreachmaximum data throughputwhentransmittinglarge amounts of data. The driver will notify the user that the transmission is completed when the output data length is lower than the LOW WATER setting.
. Note: If you empty the access control list, then by default, only the connecting host’s IP address is granted. 1. Select the Access Control tab. 2. The screen will show a list of ports, and two methods of adding permission. . Note: When adding access permission, you may either view the access control list by Port, or by IP address. These two approaches also apply to the procedure for adding new hosts. The next two sections describe how to add hosts using both approaches.
Setting Up Multi-Host 2. Click on the server you would like to modify. 3. Click on Add IP to open the Grant Access IP window. 4. To add access for only one computer, select a single computer, and then enter the host’s IP address in the appropriate text box. To add access for a group of computers, select a group of computer, and then enter the IP address and netmask. (E.g., for network class C computers, you might enter 192.168.1.0 for IP address and then 255.255.255.0 for netmask.) 5. Click OK. 6.
7. Click OK to finish and return to the Access Control page. 8. The ports granted access to will be listed under the host’s IP address. Click OK to finish, and then choose Save Configuration to activate the settings. Modifying the Host Settings 5-20 1. Select the IP address of the host you would like to modify. 2. Click on the Modify button.
Setting Up Multi-Host 3. Modify the configuration as desired. 4. Click OK to exit. Removing Ports from a Granted Host 1. Select the IP address of the host you would like to modify. 2. Click on the Port that you would like to remove from the list.
3. Click on Remove, and then click OK to exit. As you can see from the window shown below, Port 3 has been removed from the host’s access control. Removing a Granted Host If you do not allow a particular host to use any of the ports, simply remove the host from the list. . Note: If you empty the access control list, then by default, only the connecting host’s IP address is granted. 5-22 1. Click on the host’s IP address to highlight it. 2. Click on the Remove button, and then click OK to exit.
Setting Up Multi-Host Configuring Through View by Port By choosing the option View access control list by Port, it is easy to see the access permission granted for each port. This viewing option is particularly useful for adding hosts to specific ports. Adding a Host IP Address to a Specific Port 1. Click on the Port you would like to add a host to. 2. Click on Add IP. 3. To add access for only one computer, select a single computer, and then enter the host’s IP address in the appropriate text box.
5. When the Server Properties window opens up, you can look at the Access Control page to verify that the host was added to the port. 6. Click OK to finish. Modifying a Granted Host 5-24 1. Click on the port whose host you would like to modify. 2. Click on the IP address you want to change, and then click on Modify. 3. Modify the IP address as needed.
Setting Up Multi-Host . Note: The modification will only be valid for this port. Removing a Granted Host 1. Click on the port whose host you would like to remove. 2. Click on the IP address you want to delete, and then click on Remove. 3. Click OK to finish.
6 6. Setting Up Custom In this chapter we explain how to set up NPort Server Pro for Custom Mode. Custom Mode users can apply NPort Server Pro for multi-port serial applications with remote control or monitoring, and as stand-alone machines connected to serial devices at a remote site.
q Access Control — — q 6-2 Configuring Through View by IP Ø Adding Access Permission of One Host Ø Modifying the Host Settings Ø Removing Ports from a Granted Host Ø Removing a Granted Host Configuring Through View by Port Ø Adding a Host IP Address to a Specific Port Ø Modifying a Granted Host Ø Removing a Granted Host Adding Routes to NPort Server Pro — Adding Routes Through Server Properties — Modifying Routes — Removing Routes — Examples of Internet/Intranet Routing Configurati
Setting Up Custom NT TCP/IP NT Router Router NT TCP/IP Internet NPort Server Pro Figure 6-1. A remote control link diagram . Note: If you need to set up Single-Host Mode or Multi-Host Mode, refer to Chapters 4 and 5, respectively, for complete descriptions of these types of application.
Driver and Software Installation 1. Insert the NPort Server Pro disk into either the floppy disk drive or CD ROM drive, depending on the type of disk that was provided. From the Windows NT/95/98 desktop, click on Start and then choose Run. 6-4 2. Type A:\setup in the Open input box if using drive A and then click OK (replace A with the correct drive letter if you are using a different drive). 3.
Setting Up Custom 4. When the Setup Wizard window opens, choose Custom, and then click on Next to continue. 5. The Select Destination Directory window gives you the option to change the directory that program files will be copied to. Click on Next to copy NPort Server Pro files to the given default directory. To choose a different directory, click on Browse, navigate to the desired directory, and then click on Next.
6. The Installing window shows the progress of the installation process. Click on Cancel at any time to terminate the installation. 7. The next window verifies that the installation process has completed. Click on Next to continue. . Note: If you click on Cancel you will need to run Add Server Wizard at a later time to install your NPort Server Pro. 8. Clicking on Next in the previous window activates the Add Server Wizard.
Setting Up Custom Using NPort Pro Manager When you run the Setup program to install NPort Server Pro software, you are given the option to run the Add Server Wizard. However, you may run NPort Pro Manager at a later time if you decide to add more servers, change server names, remove servers, or change COM names. To start NPort Pro Manager, click on: Start à Programs à NPort Server Pro à NPort Pro Manager.
Current Installation Type Figure 6-2. NPort Manager and the menus Saving Your Configuration Moditications of NPort Server Pro, or changes to port configurations, must be saved in order to be activated. Choose Save Configuration from the Server menu, or click on the toolbar Save all Servers icon to automatically detect any changes and save them in the appropriate places.
Setting Up Custom 1. Select Yes and then click on Next to continue the installation process. 2. If the NPort Server Pro you wish to add is listed in the Add Server Wizard window, use the mouse to highlight the server Model and then click on Next to continue. . Note: If the server you want to add is not listed in the above window, you will receive the warning window shown below. Check to make sure that the power cord is connected, and the power switch is in the “on” position.
. Note: If you have several servers hooked up to your network, and it’s not clear which server is the one you are currently adding, click on Locate in the Add Server Wizard window shown in step 2 above. The “Ready” LED on the listed server will start blinking, allowing you to identify it. 3. If you are the system administrator and know the current password, or if you are setting up a new password, select Yes, I am the administrator and then enter the password in the text input box.
Setting Up Custom 4. The next window lists the NPort Server Pro’s current IP address. Change the number if needed, and then click on Next to continue. 5. Select the COM port name that you would like the first port on the server to map to. This will add all of NPort Server Pro’s ports (8 or 16, depending on the server model number) to your NT/95/98 system, using consecutively numbered COM names. Click on Next to continue.
6-12 6. When the Complete! window opens, check the information to make sure that everything is correct, and then click on Finish to continue. 7. This evokes the NPort Pro Manager program, with the newly installed server listed.
Setting Up Custom 8. Click on the server name to highlight it. Basic information about the server’s COM ports will be listed in the right info box. . Note: If you see ports with the status ‘Non-authorized’, and you are a general user, be sure to ask your server administrator to add access permission so that you can make modifications to the server settings. . Note: The NPort Pro Manager title bar shows the application mode of the newly installed server—Custom in this case. 9.
Modifying COM Name Mappings You may use NPort Pro Manager to change previously assigned COM names.Choose Map Port fromthe Portmenu, or click on the toolbar Map Porticon. You will be asked to choose from two options. You may change the name of all servers simultaneously, provided you want the COM port numbers to be consecutive, or, you may change the names one port at a time. The procedure is as follows: Change All COM Names Consecutively: 1.
Setting Up Custom Un-Mapping a Port If you do not need to use a port any more, you may use the UnMap Portfunctiontoremoveitfrom your Windows NT/95/98 operating system. 1. Click on the port (in the right info box) that you want to remove. 2. Choose UnMap Port from the Port menu, or click on the toolbar Unmap Port icon . Note: The screen at the right shows the display after un-mapping ports 3 and 5.
. Note: When using this procedure, only the selected server’s firmware is upgraded. If you know that new NPort Pro Manager software has been released, it is recommended that you uninstall the old NPort Pro Manager program from your NT/95/98 host’s hard drive, and then install the new one. Configuring Server Properties The Server Properties function can be used to change the server’s name, password, and transmissionparameters.
Setting Up Custom Stepsfor configuring the server’s password: 1. Select the Password tab in the Server Properties window. 2. Enter the current password and new password as indicated. 3. Checkthe Auto Save Password on this computer box if you want Windows NT/95/98 to remember your password. . Note: If you do not check the Auto Save Password on this computer box, you will need to enter the correct password each time you want to view Server Properties.
Tx FIFO Set to Enable to the get the best performance from the board. Set to Disable to avoid data loss when communicatingwithplaincommunicationdevicesusingS/W flow control. In this case only one byte will be put into the UART when the FIFO is empty. Access Control It is possible to assign access permission to hosts to allow them access to the ports on a shared NPort Server Pro. For security reasons, the access control list can only be defined by the server’s administrator.
Setting Up Custom . Note: When adding access permission, you may either view the access control list by Port, or by IP address. These two approaches also apply to the procedure for adding new hosts. The next two sections describe how to add hosts using both approaches. Configuring Through View by IP Using the view access control list by IP address option displays the access control list by giving the server IP addresses.
5. Click OK. 6. When the Add Port window opens up, highlight the port(s) that the host will be granted access to. . Note: You can select blocks of ports by holding down the left mouse button while scolling through the list of ports. 7. 6-20 Click OK to finish, and return to the Access Control page.
Setting Up Custom 8. The ports granted access to will be listed under the host’s IP address. Click OK to finish, and the choose Save Configuration to activate the settings. Modifying the Host Settings 1. Select the IP address of the host you would like to modify. 2. Click on the Modify button. 3. Modify the configuration as desired. 4. Click OK to exit.
Removing Ports from a Granted Host 6-22 1. Select the IP address of the host you would like to modify. 2. Click on the Port you would like to remove from the list. 3. Click on Remove, and then click OK to exit. As you can see from the window shown below, Port 3 has been removed from the host’s access control.
Setting Up Custom Removing a Granted Host If you do not allow a particular host to use any of the ports, simply remove the host from the list. . Note: If you empty the access control list, then by default, only the connecting host’s IP address is granted. 1. Click on the host’s IP address to highlight it. 2. Click on the Remove button, and then click OK to exit.
Configuring Through View by Port By choosing the option View access control list by Port, it is easy to see the access permission granted for each port. This viewing option is particularly useful for adding hosts to specific ports. Adding a Host IP Address to a Specific Port 1. Click on the Port you would like to add a host to. 2. Click on Add IP. 3. To add access for only one computer, select a single computer, and then enter the host’s IP address in the appropriate text box.
Setting Up Custom 4. Click OK to finish. 5. When the Server Properties window opens up, you can look at the Access Control page to verify that the host was added to the port. 6. Click OK to finish. Modifying a Granted Host 1. Click on the port whose host you would like to modify. 2. Click on the IP address you want to change, and then click on Modify. 3. Modify the IP address as needed. . Note: The modification will only be valid for this port.
Removing a Granted Host 1. Click on the port whose host you would like to modify. 2. Click on the IP address you want to delete, and then click on Remove. 3. Click OK to finish. Adding Routes to NPort Server Pro To enable access from an Internet/Intranet host, first make sure your NPort Server Pro can be connected through the Internet. You may add routes into NPort Server Pro if your Windows NT/95/98 host is at a remote site.
Setting Up Custom Adding Routes Through Server Properties 1. Select the Advanced tab in the Server Properties window, and then click on Add. 2. Enter the Destination, Gateway, Netmask and Metric as needed. 3. Click OK to exit Gateway Settings.
Modifying Routes 6-28 1. Select the Advanced tab in the Server Properties window. 2. Click on the route setting you would like to modify to highlight it. 3. Click on Modify and then make any necessary modifications. 4. Click OK to exit Gateway Settings.
Setting Up Custom Removing Routes 1. Select the Advanced tab in the Server Properties window. 2. Click on the route setting you would like to remove to highlight it. 3. Click on Remove. Examples of Internet/Intranet Routing Configurations Configuring Router for Internet Connection Some routers have the capability to learn routes automatically. To ensure that your Internet connection will work properly, you can consider adding the routes without RIP protocol.
For the case shown above, you should set up the Destination, Gateway, Netmask, and Metric as shown below: Configuring Router for One Internet and One Intranet Connection In the more complex case in which NPort Server Pro connects to both the Internet and Intranet, you will need to add two routes to the server. 203.67.6.10 Router 203.67.6.254 NT Router 203.67.6.252 Router 202.65.66.2 TCP/IP 203.67.6.253 NPort Server Pro Internet 202.65.66.4 202.65.66.5 Asynchronous Devices Figure 6-4.
Setting Up Custom If you are under the same environment as shown above but your NPort Server Pro only needs to be accessed by the private network as opposed to the global Internet, then just add the first route to the server.
7 Utility Programs 7.
q NPort Pro Diagnostic — q 7-2 Toolbar Functions Ø Configuration Ø Viewer Status and Diagnose Ø Test Initiation Ø Printing Ø Saving the Configuration Ø Exiting NPort Pro Diagnostic Uninstalling the Software NPort Server Pro User’s Manual
Installation and Configuration Firmware Utility Moxa continually upgrades its driver software and server firmware to keep pace with the everexpanding world of computing. Youcanusethe Firmware Utility to carry out the upgrade procedure. Access Moxa's Web site atwww.moxa. comto download the required computer file (contact our sales department if you need assistance with this), and then follow these instructions. 1. To start Firmware Utility, click on Start à Programs à NPort Server Pro à Firmware Utility.
3. After completing the search, the NPort Server firmware upgrade utility window opens, listing all NPort Server Pros that were found. Toolbar Functions In this section we describe how to use the Firmware Utility toolbar functions. NPort Server General Info The General Info function can be used to display basic information about a specific NPort Server Pro. To apply the function, do the following: 7-4 1. Click on the server you would like to obtain information about to highlight it. 2.
Installation and Configuration 4. The NPort Server General Info window opens, displaying the Server Name, IP address, Model Number, Serial Number, MAC Address, and Firmware Version. Attributes that can be modified are displayed in a text input box. 5. Make modifications as needed, and then click OK to close the window. Search All NPort Servers The Search all NPort Servers function can be used to search the network for all active NPort Server Pros. 1.
2. Click on Cancel if during the search you decide that it’s no longer necessary to continue. Otherwise, when the search is complete, you will see the NPort Server firmware upgrade utility window. The servers located by the search will be listed in the info box. Connect to an NPort Server Pro The Connect an NPort Server function can be used to manually connect to a specific NPort Server Pro. 7-6 1. Choose Connect from the Server menu, or click on the toolbar Connect an NPort Server icon. 2.
Installation and Configuration Upgrade Firmware The Upgrade NPort Server function can be used to upgrade the server firmware. 1. Access Moxa's Web site at www.moxa.com to download the required computer file (contact our sales department if you need assistance with this). 2. Click on the server whose firmware you would like to upgrade to highlight it. 3. Choose Upgrade from the Tool menu, or click on the toolbar Upgrade firmware icon. 4. The Upgrade NPort Server window opens.
1. To start NPort Server Monitor, click on Start à Programs à NPort Server Pro à NPort Monitor. 2. The NPort Server Monitor window opens. . Note: You will need to configure your server before using any of the NPort Server Monitor toolbar functions. Refer to the next section for instructions on how to configure. Toolbar Functions In this section we describe how to use the NPort Monitor toolbar functions.
Installation and Configuration 1. Choose Configure from the Monitor menu, or click on the toolbar Configure icon to open the Monitor configuration window. . Note: There are three tabs, Select Port, Select Item, and General, located at the top of the window. The Select Port page will be opened by default, and the program will find all NPort Server Pros currently connected to the network. 2. Select the server that you want to monitor from the Server IP Address pull down menu.
7-10 3. The Port No. check box, for ports needing to be monitored, should be checked as shown above. For those ports that no longer need monitoring, click inside of the checked box to remove the check mark. 4. If you need to delete some servers from the list, highlight the servers to be deleted, and then click on the Delete Server button in the lower left hand corner of the Monitor configuration window. 5. Click on the Select Item tab to open the list of options shown below.
Installation and Configuration 7. The servers and ports that were selected will be listed in the info box upon returning to the NPort Server Monitor window. General information such as Model No., NPort Server Pro Name, OP_mode, NPort Server Pro IP Address, and Port No. will also be displayed. Save Configuration This function is provided so that you can save new or updated configurations for future use after making modifications to the monitoring program. To save a configuration, do the following: 1.
. Note: The configuration file will be saved in .mnt format. Load Configuration This function is provided so that you can load a configuration file that was previously saved. When initating NPort Server Monitor, you will be give the option to load a previously save file. To load a saved configuration file, do the following (refer to the figure in the previous subsection): 7-12 1. Choose Load Configuration from the File menu, or click on the toolbar Load Configuration icon. 2.
Installation and Configuration Monitor Once a configuration has been set up, or a configuration file has been loaded, NPort Server Monitor will automatically start monitoring servers and ports. Refer to the figure below for an example of the type of monitoring information that will be displayed. (Check the Help menu to find additional information about using this program.) NPort Server Monitor will use different colors to indicate the status of the ports.
Port Status This function is used to display a status graph for each port being monitored. It also provides additional information such as TX/RX CPS history. 1. Click on the port item you wish to check to highlight it. 2. Choose Port Status from the Monitor menu, or click on the toolbar Port Status icon. 3. Click OK to return to the NPort Server Monitor window. Refresh Monitor This function is provided to allow you to manually update or refresh port information. 7-14 1.
Installation and Configuration Reset Port This function is provided to allow you to reset the port whenever the NT/95/98 server was not shut down properly, or the network was disconnected. Normally, NPort Server Pro will be launched automatically five minutes after the NT/95/98 server is reconnected. This function allows you to restart the port manually if necessary. While resetting the port, the port transmission process will be halted, and all temporary data will be lost. .
1. Click on the server that you are going to reset to highlight it. 2. Choose Reset Server from the Monitor menu, or click on the toolbar Reset Server icon to reset the server. . Note: If you have previously set up a security password using NPort Pro Manager, a Reset Server window will open requesting a password before resetting the port. If you did not set up the security password, the following dialog box will not be displayed. 3. Enter the correct password, and then click OK.
Installation and Configuration 1. Start à Programs à NPort Server Pro à NPort Pro Diagnostic. 2. The NPort Server Diagnostics window will open, from which you can navigate to the different functions provided by this utility. Toolbar Functions In this section we describe how to use the NPort Pro Diagnostic toolbar functions. Configuration The first time you run NPort Server Diagnostics you will need to choose configuration settings by selecting target servers, ports, and diagnostics items. 1.
3. When the Diagnostic Config window first opens, the Selected NPort Server info box under the Test Object tab is empty. Click on the text box’s pull down button and choose the desired server, and then press Enter to select. If the server you’re looking for is not on the list, click on Search to let the program search the network for all connected NPort Server Pros, and then choose the desired server. 4. 7-18 If the NPort Server Pro you chose is password protected, the following window will open.
Installation and Configuration 5. The server information will now appear in the Selected NPort Server information window. . Note: Click the Search button before selecting a server from the pull down menu if you add more NPort Server Pros after the Diagnostics utility is initiated. 6. The check box for all ports needing to be tested should be checked (refer to the figure in step 5). For those ports that no longer need to be tested, click inside the checked box to remove the check mark. 7.
o o o o o The items described below which are check marked will be tested. Tx n Rx: Displays test result of transmitting and receiving data between two ports. RTS g CTS: Displays test result of the RTS and CTS signals between two ports. DTR g DSR: Displays test result of the DTR and DSR signal between two ports. DTR g DCD: Displays test result of the DTR and DCD signal between two ports. Communication Parameters Selection 7-20 1.
Installation and Configuration Exiting Config Click OK in the bottom right corner of the Diagnostic Config window to return to the NPort Server Diagnostics window.
Viewer Status and Diagnose Before starting the testing procedure, you can use the Server Status function to check the status of your NPort Server Pro. 1. Choose Server Status from the Diagnose menu, or click on the toolbar Server Status icon to open the NPort Server Status window. The server information displayed is server name, IP address, model number, serial number, and firmware version.
Installation and Configuration 3. The Test Status window that opens displays some basic information about the test and test results. Click on View Report to see details about the tests that were done. 4. The report will be displayed in the Test Report info box. Items that tested okay will be marked with a green OK. Error codes are in red. To check error messages with corresponding error codes, choose Error Code Reference from the Help menu in the NPort Server Diagnostics window.
Printing The printing function is included to provide a convenient way to print out test reports. 1. Click on the NPort Server Pro shown in the To be tested… info box to determine which testing report to print. 2. Choose Print… from the File menu, or click on the toolbar Printer icon to print out the report. Saving the Configuration This function allows you to save the diagnostic report in a .txt file for future reference. 1. Click on the test object in the To be tested… info box. 2.
Installation and Configuration Uninstalling the Software If your Windows NT/95/98 host no longer needs access to any NPort Server Pros, you may use the Uninstall NPort Server utility to uninstall the driver and software. To activate Uninstall NPort Server Pro, click on 1. Start à Programs à NPort Server Pro à Uninstall NPort Server Pro. 2. To completely remove the driver and utility programs, select Automatic. To remove or modify only part of the installed software, select Custom.
3. 7-26 Click on Finish to complete the uninstall procedure.
8 8. Changing Your Installation Type This chapter describes how to change between the three application modes — Single-Host, Multi-Host, and Custom—after installation. The only way to change from one application mode to another is to rerun the driver/software Setup program If you started off by installing your serverasSingle-Host, you will have noticed, for one thing, that it is not possible to change the server’s IP address from this application type.
9 9. Windows 2000—Installation and Configuration In this chapter, we explain how to configure NPort Server Pro under the Windows 2000 operating system. The installation and configuration procedure is substantially different than for Windows NT/95/98/ME, so read carefully.
Windows 2000 Driver Installation Installing NPort Server Pro to run under Windows 2000 involves installing the drivers that are used to operate the NPort Server Pro and its port. This is done by running the Windows 2000 “Add/Remove Hardware Wizard”. In fact, unless you have previously installed and then uninstalled an NPort Server Pro on your system, you will need to run the “Add/Remove Hardware Wizard” twice, once to install NPort Server Pro itself, and then once to install NPort Server Pro’s ports.
Installation and Configuration 4. 5. Select the Add/Troubleshoot a device option, and then click on Next to continue. Windows 2000 will spend some searching for a device that is connected directly to your computer. Keep in mind, however, that this procedure does not detect devices that are connected over a network.
6. 7. Select Add a new device and then click on Next to continue. Choose the No, I want to select the hardware from a list option from the next window, and then click on Next to continue.
Installation and Configuration 8. 9. Select Multiport serial adapters and then click on Next to continue. The Select a device driver window displays a list of manufacturers and products. If Moxa’s name is not listed, you will need to click on Have Disk… and then select the NPort Server Pro driver from diskette, CD, or from your hard drive.
10. If necessary, click on Browse… to locate the directory that contains the NPort Server Pro driver. During the installation shown here, the driver was located on the A: drive, so the next step is to click OK. Note from the second figure that the driver name is NPSERVER. 11. The next window will contain a list of NPort Family products. Select MOXA NPort Server Pro DE311 and then click on Next to continue.
Installation and Configuration MOXA NPort Server Pro DE-303 12. The Start Hardware Installation window should verify that you have chosen the correct driver. Click on Next to continue. MOXA NPort Server Pro DE-303 13. You may safely ignore any admonitions such as Digital Signature Not Found. Simply click on Next to continue.
14. A series of windows indicating the progress of the installation procedure will open and then close. 15. The next window lists all NPort Server Pro units that are currently connected to your network. Select the server you wish to install, or manually enter an IP address of your server if it does not show up in the list. Click on Next to continue. D E-303 16. When the Installation Completed! window opens, check to make sure that the information displayed is correct.
Installation and Configuration 17. Click on Finish to complete the installation of NPort Server Pro. Keep in mind, however, that you may still need to install the port. MOXA NPort Server Pro DE-303 Installing NPort Server Pro’s Serial Port If you or someone else has previously installed an NPort Server Pro on your system, then NPort Server Pro’s serial port should be installed automatically. In this case, you may skip this section and continue to the section “NPort Server Pro Properties”.
to continue. 3. If necessary, click on Browse… to locate the directory that contains the NPort Server Pro driver. During the installation shown here, the driver was located on the A: drive, so the next step is to click OK. Note from the second figure that the driver name is NPORT. 4. The next window verifies that a MOXA communication port will be installed, and the correct driver, nport.ini, will be used for the installation.
Installation and Configuration 5. Click on Finish to complete the installation procedure. NPort Server Pro Properties NPort Server Pro’s configuration parameters, such as IP address, COM port number, etc., are easily changed from within the Windows 2000 system’s device manager. 1. To evoke the device manager, double click on the System icon from the Control panel window.
2. 3. Select the Hardware tab, and then click on Device Manager…. Click on the plus sign to the left of Multi-port serial adapters and then double click on MOXA NPort Server Pro DE-303 or DE-308 to open the Properties window.
Installation and Configuration MOXA NPort Server Pro DE-303 MOXA NPort Server Pro DE-303 Properties MOXA NPort Server Pro DE-303 Configuration Select the Properties window’s Configuration tab to change parameter settings for your NPort Server Pro. Most of the system settings are accessed by clicking on Settings (see the “NPort Server” subsection below). The COM port number can be changed by clicking on Ports Setting (see the “Port Status” subsection below).
MOXA NPort Server Pro DE-303 Properties D E-303 COM3-COM18 NPort Server Clicking on Settings in the above Properties window causes NPort Server Pro’s Property Sheet to open. If prompted, enter NPort Server Pro’s password, and then click OK to continue. The Basic Configuration page, open by default, allows you to make changes to the following items. Server Name Choose an appropriate name for NPort Server Pro. The default name is simply “NP” followed by the serial number.
Installation and Configuration connected to your LAN. D E-303 The Password page allows you to change the password. Click the Remember Password box to have the password automatically stored by your operating system. The Interface Setting page shows the current Serial Port interface setting. You must use the DIP switch settings on NPort Server Pro’s front panel to make any changes.
The Access Control page can be used to allow access to NPort Server Pro’s serial port. The process of adding and removing IP addresses is straightforward, although three comments are in order. • You may add access by IP Address as shown here. • You may add access by Port as shown here.
Installation and Configuration • There are two options to choose from when adding access. Choose Single Host to only allow access to the computer with the given IP Address. Choose A Group of Host to allow access to a group of computers. In the example shown here, computers connected to the same LAN as NPort Server Pro, and with IP addresses of the form 192.168.xxx.xxx, will all be given access.
D E-303 COM3-COM18 Click on Modify Setting to make changes. Use the following window to change the Port Number, Transmission Mode, and TxFIFO.
Installation and Configuration Driver The Driver page displays important information about the driver. Use the buttons at the bottom of the window for Driver Details…, Uninstall the driver, or Update Driver.
A A. Troubleshooting This appendix explains how to solve some of the most common problems you could encounter while using NPort Server Pro. If you are still having problems after reading this chapter, contact your dealer, or e-mail Moxa for help. You may also use the "Problem Report Form" at the end of this manual to notify your dealer that you require prompt technical support. We cover the following topics.
¿ Cannot change IP address or other server properties. There are two situations that could give rise to this problem. ¿ ¿ 1. Password Mismatch – If you type the wrong password while running NPort Pro Manager, the Manager program automatically assumes that you are not the administrator. The administrator of the server is the only one allowed to modify the server’s configuration.
Troubleshooting To solve this problem: ¿ 1. Confirm your IP address with NPort Server Pro. 2. Ask the administrator to set up the server configuration so that you are on NPort Server Pro’s Access Control List. While running NPort Pro Manager, a question mark, '?', shows up on top of the server icon, and you are unable to enter server properties. This means that the host cannot find the server.
¿ You cannot find the server after rebooting your Windows NT/95/98 server. It’s possible that you have a DHCP server on your network. Since DHCP servers can assign IP addresses, the IP address for either the host or NPort Server Pro might have been changed. To recover from this problem, you should: 1. Ask the administrator of your DHCP server to assign a dedicated IP address to both your Windows NT/95/98 host and to NPort Server Pro. 2.
Troubleshooting To solve this problem, programs should: 1. Try to re-open the port if the fail code is returned during the open (i.e. sio_open) session. 2. If the fail code returns while writing data, reading data, changing settings, etc., you should close the file handler, and then try to open the port again.
B B. About PComm Pro PComm Pro is a professional serial comm developing tool for PCs running Windows NT or Windows 95/98. It consists of a powerful serial communication library for easy programming in most popular programming languages. Furthermore, it contains useful utilities, such as Terminal Emulator, Data Scope, and Performance Analyzer, as well as illustrative example programs and comprehensive online documents.
Features q Easy-to-use API (more than 50 functions) q Supports Zmodem, Ymodem, Xmodem q VB, C++, Delphi, examples q Compatible to standard COMs q Terminal Emulator, Datascope Benefits q Eliminates the need to use the more complicated Microsoft Win32 API q Easy to develop q Easy to debug q Quick time to market q Portable API, investment guaranteed Formoreinformation,checkthePComm Pro CD included with your NPort Server Pro. . Note: NPort Server Pro only includes the PComm Pro software.
C C. Cable Pinouts This appendix lists the cables that you may use with NPort Server Pro, and includes information needed to make your own cable. We cover the following topics: q 10/100BaseT Port Pinouts q Asynchronous Port Pinouts q CN20040-RJ45 to Male DB25 RS-232 Cable Pinouts 10/100BaseT Port Pinouts Listed below are the pinouts for the 10BaseT port on NPort Server Pro.
Asynchronous Port Pinouts Listed below are the pinouts for the asynchronous port on NPort Server Pro.
Cable Pinouts CN20040 – RJ45 to Male DB25 RS-232 Cable Pinouts NPort Server Pro User’s Manual C-3
D D. Setting Up a Windows NT/95/98 Network In order use a PC via an Ethernet network to control serial devices connected to NPort Server Pro, you must first have a host running Windows NT/95/98 This type of application also requires the host to have an Ethernet card and TCP/IP protocol installed. If your computer does not already have an Ethernet card installed, you will need to purchase one, and then follow the instructions provided by the Ethernet card manufacturer to install and set up the card. .
Problem Report Form NPort Server Pro Customer name: Company: Tel: Fax: Email: Date: 1. Moxa Product: o DE-308 ( 8 RS-232 ports) o DE-303 ( 16 RS-232 ports ) 2. Serial Number: ___________ 3. NPort Pro Firmware Version: ________________ 4. NPort Pro Manager Version: ________________ 5. PC Host: Make _________ Model _________ 6. CPU: Speed _____MHz Make ______ Model ____ 7. Ethernet Card : o ISA Card Make__________ o PCI Card Make: __________ 8.
RETURN PROCEDURE For product repair, exchange, or refund, the customer must: Provide evidence of original purchase. Obtain a Product Return Agreement (PRA) from the sales representative or dealer. Fill out the Problem Report Form (PRF). Include as much detail as possible for a shorter product repair time. Carefully pack the product in an anti-static package, and send it, pre-paid, to the dealer.