NPort Server User's Manual First Edition, Jan 1999 Moxa Technologies Co., Ltd. Tel: +866-2-8665-6373 Fax: +886-2-8665-6372 http://www.moxa.com e-mail: support@moxa.com.
NPort Server User’s Manual The software described in this manual is furnished under a license agreement and may be used only in accordance with the terms of the agreements. Copyright Notice Copyright 1998, 1999 Moxa Technologies Co., Ltd. All rights reserved. Reproduction without permission prohibited. Trademarks MOXA is a registered trademark of Moxa Technologies Co., Ltd. All other trademarks or registered marks in this manual belong to their respective manufacturers.
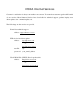
MOXA Internet Services Customer’s satisfaction is always our number one concern. To ensure that customers get the full benefit of our services, Moxa Internet Services have been built for technical support, product inquiry, new driver update, user’s manual update, etc. The followings are the services we provide. E-mail for technical support address: support@moxa.com.tw FTP site for free driver update address: ftp://ftp.moxa.com or ftp://ftp.moxa.com.
About This Guide This section discusses the audience, objectives and organization of the NPort Server User's Manual. Document Objective and Usage This manual guides you through the preparation, installation, configuration and troubleshooting of MOXA NPort Server on Windows NT.
Appendix B, "About PComm", describes the information about programming tools of PComm and information sources. Appendix C, "Cable Pinout", describes the pin layout information about the cable and interfaces. Appendix D, "Setting up Windows NT Network", describes how to connect your NT system to network by installing and configuring an Ethernet card. Appendix E, “About Async Server”, describes features of Moxa Async Server and where you can get the software.
Table of Contents Chapter 1 Overview..........................................................................................1-1 Features...........................................................................................................................1-2 Package Checklist............................................................................................................1-2 Front Panel View .....................................................................................................
Chapter 4 Setting Up Multi-Host.....................................................................4-1 Driver and Software Installation.......................................................................................4-3 Adding NPort Server - Add Server Wizard .......................................................................4-5 Configuration Using NPort Manager ................................................................................4-9 Saving Configuration ...............................
Chapter 6 Changing Your Installation Type....................................................6-1 Why Should You Change to Other Type ...........................................................................6-1 Changing Between Types.................................................................................................6-2 Chapter 7 Printer Server Configuration .........................................................7-1 Connecting Printer to NPort Server .........................................
1 Overview Welcome to Moxa NPort Server, a RS-232 Device server based on TCP/IP network for Windows NT. This chapter is an overview of the NPort Server and includes the following: q Features q Package Checklist q Front Panel View q Rear Panel View NPort Server provides a data communication solution from Windows NT to multiple asynchronous serial ports(RS-232) through TCP/IP network. It is a device that has multiple asynchronous connection on one end and a network connection on the other end.
transmit/receive data function, but also provides all the control signals like DSR, CTS, RTS, DTR, DCD signals. NPort Server can be used for applying to your existing application supporting serial communication. Above all, NPort Server provides the easy installation procedures and wizard that lets you access to the asynchronous devices easily.
Front Panel View 10Base2 (BNC) 10BaseT (UTP) Connector Connector NPort Server P1 P8 P16 S 0 S 1 Tx R x LED 16 Serial Ports Figure 1-1. 16-Port NPort Server Front (DE309-16) 10Base2 (BNC) 10BaseT (UTP) Connector NPort Server Connector P1 P8 S 0 S 1 Tx R x LED 8 Serial Ports Figure 1-2. 8-Port NPort Server Front (DE309-8) Rear Panel View *RS-232 Console Console Printer Parallel Port Power Switch Power Connector Figure 1-3.
1-4 NPort Server User’s Manual
2 Getting Started After knowing what the NPort Server's feature and specification, you may start installing the hardware and running the system. However, because the complex functions that NPort Server might provide, you have to plan your application before you start installing your hardware and software. This chapter tells you what to prepare before you start installing and configuring the NPort Server. Be sure to read everything so you will not get confused while you setup the system.
Knowing Your Application NPort Server is an advanced solution for multiport serial application to fit into today's networking world. It extends the usage of traditional multiport serial add-on boards an isolated machine with restricted ports, to TCP/IP network - easy to expand, and easy to connect. Through the nature of networking, we can elongate our application to more ports, distributed, wide area or even Internet.
If you are users of this type of application, NPort Server with Ethernet connection remains the concept of adding device to your computer and benefits you the easy range extension, ports extension and high throughput (see Figure 2-2). The installation procedure is simplified to be the same as the traditional multiport serial boards. You don't have to read or realize about the concept of networking to make configuration.
Multi-Host Type For advanced application, you may share NPort Server to multiple hosts on server base or port base at your Local Area Network. Unlike the serial devices bundled to dedicated host, sharing of the server saves resource from adding multiport serial boards to all computers and provides flexibility and easy maintenance. Figure 2-3 shows the basic concept of multi-host type.
Custom Type There are more functions available by NPort Server other than mentioned above. These functions include –remote control through Internet host, setting the ports as WAN port for remote control, and adding complicated routing protocols. These settings require knowledge about Networking and possible Internet/Intranet. Figure 24 shows you a complex remote-controlling example.
Connecting the Hardware So far you have known about the types of application that NPort Server can offer. You can outline your own application and prepare to connect the NPort Server to your Windows NT. Now you have to define how you connect the NPort Server to your Windows NT host. Preparing Windows NT with TCP/IP Network You need a Windows NT host where you can install the NPort Server on it. If you are a custom user, you need to configure the server first before it can be put at remote site alone.
Locating NPort Server Desktop You can find a clean, flat and ventilated desktop to put the NPort Server. Be aware that putting things on top of the NPort Server is not recommended. Rack Mount NPort Server comes with one pair of L-Shape metal plates and screws kits. It can be mounted to the 19" rack through the holes on the side of the NPort Server. L-Shape Metal Plate L-Shape Metal Plate Console Printer Screws Figure 2-5.
Connecting the Network This section describes how to connect the NPort Server to your network. There are two ways to connect the NPort Server to an Ethernet Network. Be sure to connect to network before power on so the network type can be detected correctly. q Through 10Base2 (BNC) port q Through 10BaseT (UTP) port To decide which Ethernet connection to make, you need to know what type of your network is being used at your site. Do not make both Ethernet connections.
10BaseT Connection You must supply an Ethernet hub and a RJ-45 to RJ-45 cable for this connection. Your Windows NT system must on the same network too. Figure 2-7. 10BaseT(UTP) connection from NPort Server to your computer through a HUB. Connecting the Power After putting NPort Server to your network, you may take the following steps to connect the power to your NPort Server. The power supply inside the NPort Server is designed to support 90V-260V.
1. Connect the power chord to NPort Server. 2. Connect the power male end of power chord to the power outlet. 3. On the rear panel of the NPort Server, turn ON the power by switch the I/O to the I position. 4. Check the S0 LED on the front panel if that is on. Connecting Asynchronous Serial Devices You may use the RJ-45 to female DB25 cable enclosed in the package to connect to your Serial Devices with male DB25 connector. Or, check with Appendix for detail pinouts to make your own cable.
3 Setting Up Single-Host This chapter describes the steps for setting up NPort Server for single-host type of application. Single-Host users apply the NPort Server to the traditional multiport serial application.
Figure 3-1 Application with single host and multiple NPort Servers . Note: If you are user for Multi-Host or Custom type, please skip this chapter and jump directly to Chapter 4 or Chapter 5 for whole description about other types individually.
Driver and Software Installation 1. Insert the NPort Server disk into drive. (If enclosed in the package is a CD, insert it into the CD ROM drive). From the start menu, click Run. 2. Under the dialog box, type in the drive name followed with ":" then "\setup". For example "a:\setup" then click OK to continue. 3. Setup program prompts you a welcome message and asks if you want to install the NPort Server now. Click Next. 4. Select the type of application – Single-Host, then click Next.
5. Enter the name of directory to install the NPort Server files. You may click Next to use default directory name. 6. NPort Manager pops up a dialog asking if you like to add a new NPort server now. Select Yes. 7. Click Next to start Add Server Wizard. Following is the instruction that guides you to add a selected NPort Server.
Adding a NPort Server 1. Select the server you want to add from the list. If you forgot to power on your system, turn it on now and click on this button. This function will blink up the S1 LED on the server. It helps you locate which server is the one you selected.
2. Select the name of COM that you like the first port on the server to map to. This will add all ports (8 or 16) on the NPort server to your NT system with consecutive numbered COM names. 3. You will be asked to assign the server password if you install a new server. Please remember to assign it because this will protect the server from other users changing the configuration. . Note: If you do not want the server password to be saved to your NT, please check off the Auto-Saved box.
4. At complete screen, click OK if everything is correct. 5. After Add Server Wizard, installation program evokes NPort Manager program. NPort Manager displays the server you have added and the ports information. You should see a screen as below if you have successfully added a server. . Note: From NPort Manager Window caption shows program name with the type of installation for easy verification of the type you need.
6. You may click on Add Server Wizard again to add another server. 7. Be sure to select Save Configuration to save settings to both your Windows NT and the server selected. 8. Exit NPort Manager when you finish. You will be asked to restart your NT system. Press OK to restart. Configuration Using NPort Manager When you run the Setup program for software installation, it automatically asks you to add one server.
NPort Manager displays the servers you have selected on the left-sided window and shows the corresponding Port mapping and status on the right-sided window. All functions can be selected from the menu. Functions regarding to servers are put under the Server menu. Port Functions are put under the Port menu. Help menu shows the topics about NPort manager and on-line help. You may also use the icons at toolbar for a quick pick up of the function you like to select.
Saving Configuration Modifications of the servers or ports need to be saved into either your NT system or the NPort servers in order to be activated. By selecting Save Configuration, it will automatically check any changes and save them to wherever needed. 1. Move your mouse pointer to the left-most button of the toolbar. 2. Click on the button to save configuration. Adding More Servers You may need to add more servers after first installation. Use the following steps to complete. 1.
Modifying Mapping COM Names If you like to choose other COM names different from what you have assigned at Add Server Wizard, you may follow the steps below to accomplish it. Change all COM names of all ports on the server consecutively: 1. Go to the server you like to modify COM names. 2. Go to first port. 3. Go to toolbar and select Map Port. 4. Select the COM name of the port you like to map to. 5. Check on the box for adding COM names consecutively. 6. Click OK to finish.
Unmapping Ports If you do not need to use the port any more, you may unmap the port to free the resource from your Windows NT. Follow the steps below: 1. Go to the server you like to modify. 2. Go to port. 3. Go to toolbar and select Unmap Port. . Note: Screen above shows you the display after you unmap port5 and port6. Configuring Server General Information You may modify the server name while running server properties. Server name is easier for you to manage the whole system. 1. Go to the Server. 2.
Configuring Server Password To add security to your NPort Server, it is highly recommended that you set a password as soon as you complete installing the server. If you do not set the password during Add Server Wizard or you would like to change current password, you may enter into Server Properties to set a new password. The other action for this Password page is to 'Auto-Save' your password to your Windows NT. By auto saving the password, you will not be asked for the password checking anymore.
Replacing A Server Sometimes your NPort server might need to be replaced because of spurring surge or some particular reason. You have learned from Chapter 1 that NPort Server can be hot-swapped. To accompany with the hot-swap feature, we provide the Replace Server function. Replace Server provides you an easy way to find the server for replacement and store the server with the settings you configured on the defect server.
the growing world of computing. You may check with Moxa's Web site at http://www.moxa.com or contact with our sales representative for upgrading. To upgrade firmware of a NPort Server: 1. Stop all ports action (applications) related to this server. 2. Select Upgrade from Server menu. 3. Select the filename of the firmware that you downloaded. 4. Wait till the message shows upgrade completion. The server will be restarted automatically. . Note: This Upgrade method is done to the selected server only.
3-16 NPort Server User’s Manual
4 Setting Up Multi-Host This chapter describes the steps for setting up NPort Server for Multi-Host user. Multi-Host users apply the NPort Server to multiport serial application but let the NPort Server controlled by more than one host at local network.
. Note: If you are user for Single-Host or Custom type, please skip this chapter and jump directly to Chapter 3 or Chapter 5 for whole description about other types individually.
Driver and Software Installation 1. Insert the NPort Server disk into drive. (If enclosed in the package is a CD, insert it into the CD ROM drive). From the start menu, click Run. 2. Under the dialog box, type in the drive name followed with ":" then "\setup". For example "a:\setup" then click OK to continue. For example: 3. Setup program prompts you a welcome message and asks if you want to install the NPort Server now. Click Next to continue. 4.
5. Enter the name of directory to install the NPort Server files. You may click Next to use default directory name. 6. NPort Manager pops up a dialog asking if you like to add a new NPort Server now. 7. Click Next to start Add Server Wizard. Following is the instruction that guides you to add a selected NPort Server to your NT system.
Adding NPort Server - Add Server Wizard 1. Select the server you want to add to your NT system from the list. If you forgot to power on your system, turn it on now and click on this button. This function will blink up S1 the LED on the server. It helps you to locate which server is the one you selected.
2. Click Next to continue. For first-time installer, you will jump to Next step directly. If the server being set with password, you will see a Password Protected screen. If you are a server administrator, select ‘Yes’ and enter the password. However if you’re a general user, select ‘No’ and continue to install ports. . Note: If you’re not the administrator, be sure to ask the administrator to add you to the access control list of the server before accessing the ports. 3.
4. Select the name of COM that you like the first port on the server to map to. This will add all ports available on the NPort Server to your NT system with consecutive COM names. 5. You will be asked to assign the server password if you install a new server. Please remember to assign it because this will protect the server from misuse of other users. And be sure to record the password down and store it at a safe place. .
6. At complete screen, click OK if everything is correct. 7. After Add Server Wizard, the installation program stops at the NPort Manager. It displays the server you have added and the ports. You should see a screen like below showing Multi-Host at the program caption. . Notes: You might see ports with status ‘Non-authorized’. If you are a general user, be sure to ask your server administrator to add your access permission to the server.
8. You may click on Add Server Wizard again to add another server. 9. Be sure to click Save Configuration to save settings to both your Windows NT and the server selected. 10. Exit NPort Manager when you finish. You will be asked to restart your NT system. Click OK to restart. Configuration Using NPort Manager When you run the Setup program for software installation, it automatically asks you to add one server.
NPort Manager displays the servers you have selected on the left-sided window and shows the corresponding Port mapping and status on the right-sided window. All functions can be selected from the menu. Functions regarding to servers are put under the Server menu. Functions regarding Adding Ports are put under the Port menu. Help menu shows the topics about NPort manager and on-line help. You may also use the icons at toolbar for a quick pick up of the function you like to select.
Saving Configuration Any modification of the servers or ports you have made needs to be saved into either your NT system or the NPort Servers. By selecting Save Configuration, it will automatically check any changes and save them to wherever needed. 1. Move your mouse pointer to the left most button of the tool bar. 2. Click on the Save Configuration button. Adding More Servers You may need to add more servers after first installation. Use the following steps to complete. 1.
Modifying Mapping COM Names If you like to choose other COM names different from what you have assigned under Add Server Wizard, you may follow the steps below to accomplish it. Change COM names of all ports on the server consecutively 1. Go to the server you like to modify COM names. 2. Go to first port. 3. Go to toolbar and select Map Port. 4. Select the COM name of the port you like to map to. 5. Check on the box for mapping COM names consecutively. 6. Click OK to finish. Change COM name of one port 1.
Unmapping Ports If you do not need to use the port any more, you may unmap the port to free the resource from your Windows NT. Follow the steps below: 1. Go to the server you like to modify. 2. Go to port. 3. Go to toolbar and select Unmap Port. . Notes: The following screen shows you the display after you unmap port5 and port6.
Configuring Server General Information If you need to modify the server name and server IP address after Add Server Wizard, please go to server properties. They are under the General page. 1. Go to the Server. 2. Click on Server Properties from toolbar. . Note: You can modify server properties with following steps only with correct server password. Otherwise, you will be asked to enter the server password, if:1)You are the general user not the server administrator.
Configuring Server Password To add security to your NPort Server, it is highly recommended that you set a password as soon as you complete installing the server. If you do not set the password during Add Server Wizard or you would like to change current password, you may enter into Server Properties to set a new password. The other action for this Password page is to 'Auto-Save' your password to your Windows NT. By auto saving the password, you will not be asked for the password checking anymore.
Granting Access to Hosts You can allow hosts to use the ports on a shared NPort Server by assigning access permissions to the host. The access control list can only be defined by the server’s administrator for security. Without granting access, you see the port status at the right-sided windows with ‘Non-authorized’. After Add Server Wizard and if you have input your password showing that you are the administrator, your NT host is granted to access to the server you have added.
Configuring Through View by IP View by IP displays access control list on IP address base. It is clear to see what IP address has been granted to what ports and what IP addresses are allowed onto the server. Adding Access Permission of One Host If there is a host who is permitted to access to all ports on some specific server, it is recommended that you configure through viewing by IP address. 1. Go to “Access Control” page. Select “IP address from the “View access control list by” 2.
6. On the popped up screen, select the port(s) you wish to grant access to this host. You may hold the mouse left key and scroll down to select multiple ports on the NPort Server. 7. Click OK to finish. 8. Back to the “Access Control” page, you may see the IP with a list of ports. Click OK to finish. 9. Save Configuration if you want to activate this setting.
Modifying the Host Setting 1. Select the IP address of the host you like to modify. 2. Select on Modify button. 3. Modify any configuration for your needs. 4. Click OK to exit. 5. Click Save Configuration if you need to activate the settings now. Removing Ports from a Granted Host 1. Click on the IP address of the host. 2. Click on the Port that you like to remove from the list. 3. Click Remove. 4. Click OK to exit. 5. Click Save Configuration if you need to activate the settings now.
Configuring Through View by Port By viewing access control list by Port, it is easy to see the access permission granted for each port. It is easy for adding hosts to specific ports. Adding Host IP address to Specific Port 1. Click on the Port where you like to add host. 2. Click on Add IP.
3. If you like to add the IP address of a single computer, select 'a single computer', then input the IP address of the host. If you like to add a group of computer, select 'a group computer', then input the IP address and netmask. For example, enter IP address 192.168.1.0 and 255.255.255.0 for network class C computers. 4. Click OK to complete. 5. You can see the host you have added to the ports from the Access Control page. 6. Click OK to finish. 7.
Modifying Granted Host 1. Click on the Ports. 2. Click on the IP address you like to modify. 3. Click on Modify. 4. Modify the IP address as needed. 5. Click Save Configuration if you need to activate the settings now. . Note: This host modification will be activated on the specific host of that port only. Removing Granted Host 1. Click on the Ports. 2. Click on the IP address of the host you like to remove. 3. Click on remove. 4. Click OK to finish. Save Configuration as needed. 5.
Upgrading NPort Server Firmware Moxa continuously upgrades the driver, software or firmware to keep pace with the growing world of computing. You may check with Moxa's Web site at http://www.moxa.com or contact with our sales representative for upgrading. To upgrade firmware of a NPort Server: 1. Stop all ports action (applications) related to this server. 2. Select Upgrade from Server menu. 3. Select the filename of the firmware that you downloaded. 4. Wait till the message shows upgrade completion.
4-24 NPort Server User’s Manual
5 Setting Up Custom This chapter describes the steps for setting up NPort Server for Custom type of application. Custom users apply NPort Server not only for multiport serial application but also with remote controlling or monitoring, or using the server as a standalone machine connecting to serial devices at remote site.
q Upgrading the Server Firmware q Uninstalling the Software NT TCP/IP NT NT Router Router Internet TCP/IP NPort NT Server TCP/IP Modem NT Modem . Note: If you are user for Single-Host or Custom type, please skip this chapter and jump directly to Chapter 3 or Chapter 4 for whole description about other types individually. Driver and Software Installation 1. Insert the NPort Server disk into drive. (If enclosed in the package is a CD, insert it into the CD ROM drive).
3. Setup program prompts you a welcome message and asks if you want to install the NPort Server now. Click Next to continue. 4. Select the type of application – Custom 5. Enter the name of directory to install the NPort Server files. You may click Next to use default directory name.
6. NPort Manager pops up a dialog asking if you like to add a new NPort server now. 7. Click Next to start Add Server Wizard. Following is the instruction that guides you to add a selected NPort Server to your NT system.
Adding NPort Server - Add Server Wizard 1. Select the server you want to add to your NT system from the list. . Note: If the server is at remote site, you have to click ‘No’ and define the server’s IP address. If you forgot to power on your system, turn it on now and click on this button. This function will blink up S1 the LED on the server. It helps you to locate which server is the one you selected.
2. Click ‘Next’ to continue. For first-time installer, you will jump to next step directly. If the server being set with password, you will see a password protected screen. If you are a server administrator, select ‘Yes’ and enter the password. However if you’re NOT the administrator, select ‘No’ and continue to install ports. . Note: If you’re not the administrator, be sure to ask the administrator to add you to the access control list of the server. 3.
4. Select the name of COM that you like the first port on the server to map to. This will add all ports available on the NPort server to your NT system with consecutive COM names. 5. You will be asked to assign the server password if you install a new server. Please remember to assign it because this will protect the server from misuse of other users. And, be sure to record the password down and sotre it at a safe place. .
6. At complete screen, click OK if everything is correct. 7. After Add Server Wizard, the installation program stops at the NPort Manager. It displays the server you have added and the ports. You should see a screen like below showing Custom at the program caption. . Notes: You might see ports with status ‘Non-authorized’. If you are a general user, be sure to ask your server administrator to add your access permission to the server.
8. You may click on Add Server Wizard again to add another server. 9. Be sure to click Save Configuration to save settings to both your Windows NT and the server selected. 10. Exit NPort Manager when you finish. You will be asked to restart your NT system. Click OK to restart. Configuration Using NPort Manager When you run the Setup program for software installation, it automatically asks you to add one server.
NPort Manager displays the servers you have selected on the left-sided window and shows the corresponding Port mapping and status on the right-sided window. All functions can be selected from the menu. Functions regarding to servers are put under the Server menu. Functions regarding Adding Ports are put under the Port menu. Help menu shows the topics about NPort manager and on-line help. You may also use the icons at toolbar for a quick pick up of the function you like to select.
Saving Configuration Any modification of the servers or ports you have made needs to be saved into either your NT system or the NPort servers. By selecting Save Configuration, it will automatically check any changes and save them to wherever needed. To save configuration: 1. Move your mouse pointer to the left –most button of the tool bar. 2. Click on the Save Configuration button. Adding More Servers You may need to add more servers after first installation. Use the following steps to complete. 1.
Modifying Mapping COM Names If you like to choose other COM names different from what you have assigned under Add Server Wizard, you may follow the steps below to accomplish it. Change COM names of all ports on the server consecutively 1. Go to the server you like to modify COM names. 2. Go to first port. 3. Go to toolbar and select Map Port. 4. Select the COM name of the port you like to map to. 5. Check on the box for mapping COM names consecutively. 6. Click OK to finish. Change COM name of one port 1.
Unmapping Ports If you do not need to use the port any more, you may unmap the port to free the resource from your Windows NT. Follow the steps below: 1. Go to the server you like to modify. 2. Go to port. 3. Go to toolbar and select Unmap Port. . Note: The following screen shows you the display after you unmap port5 and port6.
Configuring Server General Information If you need to modify the server name and server IP address after Add Server Wizard, please go to server properties. They are under the General page. 1. Go to the Server. 2. Click on Server Properties from toolbar. . Note: You can modify server properties with following steps only with correct server password. Otherwise, you will be asked to enter the server password, if:1)You are the general user not the server administrator.
Configuring Server Password To add security to your NPort Server, it is highly recommended that you set a password as soon as you complete installing the server. If you do not set the password during Add Server Wizard or you would like to change current password, you may enter into Server Properties to set a new password. The other action for this Password page is to 'Auto-Save' your password to your Windows NT. By auto saving the password, you will not be asked for the password checking anymore.
Granting Access to Hosts You can allow hosts to use the ports on a shared NPort server by assigning access permissions to the host. The access control list can only be defined by the server’s administrator for security. Without granting access, you see the screen with ‘Nonauthorized’ for the ports. After Add Server Wizard and if you have input your password showing that you are the administrator, your server is granted to access to the server you have added.
Configuring Through View by IP View by IP displays access control list on IP address base. It is clear to see what IP address has been granted to what ports and what IP addresses are allowed onto the server. Adding Access Permission of One Host If there is a host who is permitted to access to all ports on some specific server, it is recommended that you configure through viewing by IP address. 1. Go to “Access Control” page. Select “IP address from the “View access control list by”. 2.
6. On the popped up screen, select the port(s) you wish to grant access to this host. You may hold the mouse left key and scroll down to select multiple ports on the NPort Server. 7. Click OK to finish. 8. Back to the “Access Control” page, you will see the IP with a list of ports. Click OK to finish. 9. Save Configuration if you want to activate this setting.
Modifying the Host Setting 1. Select the IP address of the host you like to modify. 2. Select on Modify button. 3. Modify any configuration for your needs. 4. Click OK to exit. 5. Click Save Configuration if you need to activate the settings now. Removing Ports from a Granted Host 1. Double click on the IP address of the host. 2. Click on the Port that you like to remove from the list. 3. Click Remove. 4. Click OK to exit. 5. Click Save Configuration if you need to activate the settings now.
Configuring Through View by Port By viewing access control list by Port, it is easy to see the access permission granted for each port. It is easy for adding hosts to specific ports. Adding Host IP address to Specific Port 1. Click on the Port where you like to add host. 2. Click on Add IP.
3. If you like to add the IP address of a single computer, select 'a single computer', then input the IP address of the host. If you like to add a group of computer, select 'a group computer', then input the IP address and netmask. For example, enter IP address 192.168.1.0 and 255.255.255.0 for network class C computers. 4. Click OK to complete. 5. You can see the host you have added to the ports from the “Access Control” page. 6. Click OK to finish. 7.
Modifying Granted Host 1. Click on the Ports. 2. Click on the IP address you like to modify. 3. Click on Modify. 4. Modify the IP address as needed. 5. Save Configuration if you need to activate the settings now. . Note: This host modification will be activated on the specific host of that port only. Removing Granted Host 1. Click on the Ports. 2. Click on the IP address of the host you like to remove. 3. Click on remove. 4. Click OK to finish. 5.
Adding Routes to NPort Server To enable the access from an Internet/Intranet host, you need to make sure your NPort Server can be connected through Internet. You may add routes into the NPort Server if your Windows NT host is at remote site. This section lists the steps to add the routes and examples of different routes to be added for your reference. Adding Routes Through Server Properties 1. Go to Start à Programs à NPort à NPort Manager. 2. Select the server you want to add routes. 3.
5. Click on Add. 6. Enter the Destination, Gateway, Netmask and Metric as needed. 7. Click OK to exit Gateway Settings. 8. Click OK to exit Server Properties. 9. Save Configuration as needed.
Modifying Routes 1. Run NPort Manager. 2. Select the server you want to modify routes. 3. Select Server Properties from the Toolbar or double clicks on the server. 4. Select Advanced Page 5. Select the route setting you like to modify. 6. Click on Modify button. 7. Click OK to exit Gateway Settings. 8. Save Configuration as needed. Removing Routes 1. Run NPort Manager. 2. Select the server you want to remove routes. 3. Select Server Properties from the Toolbar or double clicks on the server. 4.
Examples for Internet/Intranet Routing Configuration Configuring Router for Internet Connection Some of the routers have the capability to learn routes automatically. While, to ensure your connection through Internet can work properly, you may consider adding the routes for those routers without RIP protocol. Figure 5-1 shows you the example of connecting to Internet through a Router. 203.67.6.10 NT Router 203.67.6.254 192.167.1.11 TCP/IP 203.67.6.
. Configuring Routers for one Internet Connection and one Intranet Connection In complex case that NPort Server connecting to both Internet and Intranet, you need to add two routes to the server. 203.67.6.10 Router 203.67.6.254 NT Router 203.67.6.252 TCP/IP 203.67.6.253 Router 202.65.66.2 NPort Server NPort Server Internet 202.65.66.4 202.65.66.5 Asynchronous Devices R 6 2 o 7 5 .4 u e N 2 T 0 3 .N R 2 6 0 e 2 o .3 6 u 7 5 0 t.2 nI2 et0 n r3 e T 2 N trt0 C 6 2 3 P 7 5 S .
Configuring Routes through Multiple Routers If there are two subnets to reach through routers, you should configure NPort Server route as: 203.67.6.10 Router 203.67.6.254 Router 204.5.6.254 NT Router 203.67.6.252 Router 202.65.66.2 TCP/IP 203.67.6.253 NPort Server NPort Server 204.5.6.2 202.65.66.4 202.65.66.5 Asynchronous Devices Figure 5-3. Scheme for NPort Server connecting to multiple routers. If only 202.65.66.
Setting Up WAN Port What we have talked about at the previous chapters is mainly the use of COM for multiport serial solution. Aside from the use of multiport communication, ports on the NPort Server can be configured to mode called WAN. WAN port is the mode for remote connection through leased-line or dial-up line. The function works like we configure Remote Access Service (RAS) for COM ports under Windows NT.
Figure 5-5 shows you the application example to put the NPort Server at remote site alone. Under this situation, there is no NT host to configure the port for RAS. Thus, WAN port is the only possible configuration for these applications. You have to configure the NPort Server at local before you can put that at remote site. Or, you can connect a notebook besides the server for configuring the server before it can be run under this environment.
The following information describes how you setup the port as WAN port and configure it. 1. Start NPort Manager from Start à Programs à NPort 2. Move your mouse pointer to the port you want to setup as WAN connection. 3. Click on the mouse right button and Select Set port as WAN. 4. You can see now the port has been configured as WAN.
5. To keep configuring the port, right click to select WAN Port Properties. 6. Under the TCP/IP page, enter the IP address for Remote and Local interfaces. For example, if the IP address for the WAN port providing for connection is 192.167.1.11 and you may assign a remote one as 192.168.1.12.
7. Go to the Settings page to check if the parameters are what your connection needed. At present, the default suggested settings, 115200, 8, None, 1 are the most popular one. Under Connection, please choose from Direct Cable, Leased-line Modem, or Dial-Up Modem. For Direct Cable, you are connecting another serial line directly to the port on the NPort Server. For Leased-line Modem, the WAN port is used to connect through leased-line modem to remote site.
8. Go to the Authentication page if you need to assign password for remote incoming connection. Outgoing PAP is only needed when this port needs to dial out to a remote site . Note: WAN port is also known as a PPP port under terminal/Async Server. If you would like detail information about PPP or Dial-in connection, please refer to Appendix E- About Async Server. 9. Go to the Access Control Page of Server Properties. Add the Remote IP address to the Access Control List to ensure accessing. 10.
Upgrading NPort Server Firmware Moxa continuously upgrades the driver, software or firmware to keep pace with the growing world of computing. You may check with Moxa's Web site at http://www.moxa.com or contact with our sales representative for upgrading. To upgrade firmware of a NPort Server: 1. Stop all ports action (applications) related to this server. 2. Select Upgrade menu. 3. Select the filename of the firmware that you downloaded. 4. Wait till the message shows upgrade completion.
5-36 NPort Server User’s Manual
6 Changing Your Installation Type This chapter describes how to change types among Single-Host, Multi-Host and Custom after installation. This chapter includes: q Why Should You Change to Other Type q Changing Between Types Why Should You Change to Other Type Though you might have selected the Single-Host type during first installation, you might find it practical to share the ports to other hosts or use some remote control function later.
Changing Between Types 1. Insert the NPort Server Disk or CD to the drive. 2. Go to Start à Run. 3. Enter drive name then follow with ":\setup". Click Next to continue. 4. Select 'Multi-Host' or ‘Custom’ and continue with installation. 5. Follow the instruction on the screen to finish. You may skip the procedure for adding servers. 6. Check with NPort Manager. You should see the servers configured by previous installation procedure with program caption as your new installation type.
7 Printer Server Configuration NPort Server is equipped with a Parallel Port on the back of the server. This port is to be used as a TCP/IP network printer port and become a one port printer server for sharing to hosts running TCP/IP networking protocol under all kinds of OS platform. Since this manual is based on supporting Windows NT, this chapter describes how NT users can configure and print to the parallel port of NPort Server only.
Connecting Printer to NPort Server Connect your printer to the back of NPort Server using printer cable. Figure 7-1 Connecting printer to NPort Server Configuring Printer Server on Windows NT To configure NPort Server as printer server, simply follow the instruction in this section. Adding the TCP/IP Printing Services Before adding printer, you have to add the TCP/IP printing services to your Windows NT. 1. Go to Start -> Settings -> Control Panel. 2. Select Network. 3. Go to the page for Services. 4.
Adding the Printer Now you have the TCP/IP printing services, you have to add the TCP/IP port to your computer and install the driver of the printer connecting to the TCP/IP printer port. 1. Run Add Printer wizard from Start -> Settings -> Printers -> Add Printer. 2. Select 'My Computer' answering to 'This Printer will be managed by' then click next. 3. Select "Add Port". Click Next to continue. 4. Select "LPR Port". Click Next to continue. 5.
7-4 NPort Server User’s Manual
Appendix A A Troubleshooting This appendix explains how to solve the most common problem that you might encounter while using NPort server. If you still have problems, contact with your dealer or email to Moxa for help. You may report the problem using the "Problem Report Form" to your dealer at once for prompt technical support.
2. Error Installation Type- If you installing NPort under 'Single-Host' type, you cannot change server IP address. This is to simplify the Single-Host configuration procedures to be as close as traditional multiple board installation. Under 'Single-Host', user can only modify the server's name and server's password. This is because 'Single-Host' users do not need to share their NPort server to other hosts.
u NPort Manager showing '?' on top of the server. And, the server cannot to enter into server properties. This means the server cannot be found under this environment. There are some steps to recover from this problem: If at local site and the server still exists: 1. Check if your server is powered on. 2. Check if the network connector is plugged in properly. 3. Check if your computer is connected to network properly. 4. Double click on the server with '!'.
2. Make sure your NPort Manager type is under the Multi-Host or Custom type. 3. Modify the IP address of the server to the dedicated IP address assigned by your DHCP administrator. 4. Modify the IP address of your Windows NT to the dedicated IP address assigned by your DHCP administrator. . Note: Please refer the Appendix D for Configuring your Windows NT to Dedicated IP Address. 5. Modify the Security list to make sure your NT host is on the list. 6. Save Configuration.
LEDs Descriptions The LEDs on the front panel of the NPort Server enable you to determine NPort operation at a glance. This section contains information about LEDs and using them as a troubleshooting reference. S0 S1 Tx Rx LED Color Description S0 Red Indicates the NPort Server is turned on and the power is being supplied to the server. S1 Yellow Flashing indicates the server is being located by the NPort Manager Locate Server function.
A-6 NPort Server User’s Manual
Appendix B B About PComm Pro PComm Pro, a professional serial comm developing tool for PC, is a software package under Windows NT and Windows 95/98. It consists of powerful serial communication library for easy programming in most popular languages, useful utilities, such as Terminal Emulator, Data Scope and Performance Analyzer, as well as illustrative example programs and comprehensive online documents.
Benefits ² Get rid of complicated Microsoft Win32 API ² Easy to develop ² Easy to debug ² Quick time to market ² Portable API, investment guaranteed For more information, check with the PComm Pro CD enclosed in the package. Read the PComm manual carefully and you will find the benefit thereafter. . B-2 Note: NPort Server only includes the software of PComm Pro. For PComm diagnostic cable, please refer to the PComm Pro manual to make the cable yourself.
Appendix C C Cable Pinouts This appendix lists the cables that you may use with NPort server. And, the information you may need to make your own cable for using with NPort Server. q 10BaseT Port Pinouts q Asynchronous Port Pinouts q CN20030 - RJ45 to female DB25 RS-232 Cable Pinouts q CN20040 - RJ45 to female DB25 RS-232 Cable Pinouts 10BaseT Port Pinouts Table C-1 lists the pinouts for the 10BaseT port on NPort Server.
Asynchronous Port Pinouts Table C-2 lists the pinouts for the asynchronous port on NPort Server.
CN20030 - RJ45 to Female DB25 RS-232 Cable Pinouts 1 10 20 DSR RJ-45 Jack DB25 Female DCD 1 8 DCD DSR 2 6 DTR RTS 4 CTS GND 4/7 7 GND TxD 5 2 RxD RxD 6 3 TxD CTS 5 RTS 20 DSR 3 8 DTR 9 8 7 6 5 4 3 2 DCD GND DTR RTS CTS TxD RxD Cable Pinouts C-3
CN20040 - RJ45 to Male DB25 RS-232 Cable Pinouts 1 10 DTR 20 C-4 RJ-45 Jack DB25 Male DCD 1 8 DCD DSR 2 20 DTR RTS 5 CTS GND 4/7 7 GND TxD 5 3 RxD RxD 6 2 TxD CTS 8 4 RTS DTR 9 6 DSR 3 NPort Server User’s Manual 2 3 4 5 6 7 8 TxD RxD RTS CTS DSR GND DCD
Appendix D Setting Up Windows NT Network D This appendix is a simple guide for users who have not used network before. It describes how to install an Ethernet card to the Windows NT computer and how to configure the Ethernet card to connect to your network for NPort Server usage.
Log on as a member of the Administrators group for the local computer to install and configure TCP/ IP. Follow these steps to install network card on a Windows NT computer: 1. Right click the Neighborhood on the desktop and click on Properties. 2. Choose Adapter then select Add. The system will show you a list of network card. Follow your network card manual to choose the card type you have or install from a disk and click OK to continue. 3.
Appendix E E About Async Server Async Server, also known as terminal server, remote access server and communication server, is a multi-protocol server providing connection through TCP/IP for serial ports. The CN2100 Async Server is a new generation of multiserial solution that provides a common connectivity platform to connect up to 16 serial ports to existing LAN. This solution allows async terminals, printers, modems, remote hosts and any other serial equipment to attach to the LAN.
Problem Report Form NPort Server Customer name: Company: Tel: Fax: Email: Date: 1. Moxa Product: o 16 Port NPort Server o 8 Port NPort Server 2. Serial Number:___________ 3. NPort Firmware Version: ________________ 4. NPort Manager Version: ________________ 5. PC Host: Make _________ 6. CPU: Speed _____MHz 7. Ethernet Card : o ISA Card Make__________ o PCI Card Make: __________ 8. You Installation Type: o Single-Host o Multi-Host o Custom 9.
RETURN PROCEDURE For product repair, exchange or refund, the customer must: v Provide evidence of original purchase v Obtain a Product Return Agreement (PRA) from the sales representative or dealer v Fill out the Problem Report Form (PRF) as detailed as possible for shorter product repair time. v Carefully pack the product in anti-static package, and send it, pre-paid, to the dealer.