
Installation Guide


- 12 -
• Step 2: Connect the AWK to the notebook or PC via the
AWK’s LAN port.
The LED indicator on the AWK’s LAN port will light up when a
connection is established.
NOTE
If you are using an Ethernet-to-USB adapter, follow the
instructions in the user manual provided with the adapter.
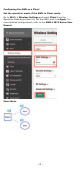
• Step 3: Set up the computer’s IP address.
Choose an IP address for the computer that is on the same subnet
as the AWK. Since the AWK’s default IP address is
192.168.127.253, and the subnet mask is 255.255.255.0, set
the IP address to 192.168.127.xxx, where xxx is a value between
1 and 252.
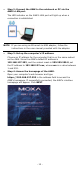
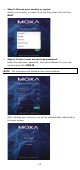
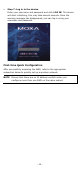
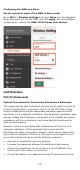
• Step 4: Access the homepage of the AWK.
Open your computer’s web browser and type
https://192.168.127.253 in the address field to access the
AWK’s homepage. If successfully connected, the AWK’s interface
homepage will appear. Click NEXT.