
Installation guide


- 9 -
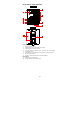
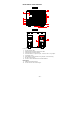
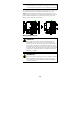
STEP 2—Insert the top of the
DIN-Rail into the top slots on the
DIN-Rail attachment plate.
STEP 3—The DIN-Rail attachment
unit will snap into place as shown in
the following illustration.
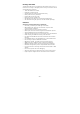
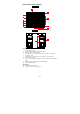
To remove the Moxa EDS-600 switch from the DIN-Rail, use a screwdriver
to push down the spring-loaded bracket until it locks in place, as shown in
the following diagram. Next, rotate the bottom of the switch upwards and
then remove the switch from the DIN-Rail.
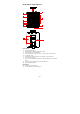
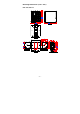
Wall Mounting (Optional)
For some applications, you will find it convenient to mount the EDS-600
on the wall, as shown in the following illustrations:
STEP 1—Remove the aluminum DIN-Rail attachment plate from the rear
panel of the EDS-600, and then attach the wall mount plates with M3
screws, as shown in the figure at the right.
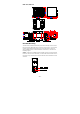
STEP 2—Mounting the EDS-600 on the wall requires 4
screws. Use the EDS-600, with wall mount plates attached,
as a guide to mark the correct locations of the 4 screws. The
heads of the screws should be less than 6.0 mm in diameter,
and the shafts should be less than 3.5 mm in diameter, as
shown in the figure at the right.