Dell™ ChangeBASE 6.2.
© 2015 Dell Inc. ALL RIGHTS RESERVED. This guide contains proprietary information protected by copyright. The software described in this guide is furnished under a software license or nondisclosure agreement. This software may be used or copied only in accordance with the terms of the applicable agreement.
Contents Introduction 4 Key Phases of a Migration Project 4 Assessment Capabilities 5 Features and Benefits 5 Before You Start...
1 Introduction Dell™ ChangeBASE is a leading provider of automated application compatibility analysis, remediation and conversion. ChangeBASE can assess and fix application compatibility issues automatically prior to migration to the latest Microsoft platforms and virtualized package environments. ChangeBASE also enables you to virtualize your packages automatically. ChangeBASE is based on a thin client-server model in which most of the processing is carried out by a central service.
l Fix: ChangeBASE assesses packages according to a Red/Amber/Green (RAG) system. ChangeBASE can automatically remediate many Amber issues, and some Red issues, by means of MST (Transform) files. The underlying packages and installations are never modified directly. ChangeBASE can also fix compatibility issues through the use of additional files such as Manifests and runtimes to allow packages to run correctly on the new Platform.
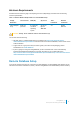
l l l Instant Multi-Platform Compatibility Assessment l Identify compatibility issues instantly on import into ChangeBASE, across a wide range of specified target platforms. So, for example, you can simultaneously see the issues that would be affected by deploying packages on both Windows Server 2012 and Windows 8.1, and arrive at accurate and informed decisions on the timeframes and costs of such deployments, in order to prioritize packages for relicensing, replacement and testing.
2 Before You Start... ChangeBASE System Requirements Before installing ChangeBASE, ensure that your system meets the minimum hardware and software requirements described in the following sections.
Minimum Requirements Provided that the machine is going to be importing less than 1,000 packages, it should meet the following minimum specifications: Table 1: Minimum Machine Requirements for Local Database Setup Display Resolution Core Processor RAM (GB) SQL Server .NET Framework Network Connection 1024 x 768 pixel array Quad-core processor 8, preferably on a 64-bit Operating System SQL Server Express 2008/2012 4.
Figure 1: Multi-User Setup Minimum Client Requirements Each client should be running under one of the following Operating Systems: l Windows Vista SP2 (x86 and x64) l Windows 7 SP1 (x86 and x64) l Windows 8 (x86 and x64) l Windows 8.
Display Resolution Core Processor RAM (GB) .NET Framework pixel array processor packages are imported), preferably on a 64-bit Operating System Network Connection Ethernet You will also need the following: l Microsoft Visual C++ Redistributable 2012. It is available from http://www.microsoft.com/enus/download/details.aspx?id=30679. Install the 64-bit version on 64-bit Windows, and the 32-bit version on 32-bit Windows.
Small Operation (i.e. less than 1,000 packages and less than 10 clients) Medium Operation (i.e. between 1,000 and 5,000 packages and 10 or more clients) Large Operation (i.e. more than 5,000 packages and 10 or more clients) possible, especially if you are using 64-bit SQL Server. Core Processor Quad-core processor 8-core processor 16-core processor RAM (GB) 8 16 32 .NET Framework 4.5 4.5 4.
Virtual Machines Virtual machines (VMs) are utilized by ChangeBASE for the Repackaging of legacy installer files (whether in EXE, VBS, BAT or CMD format) into MSIs, and for the conversion of MSIs/EXEs into virtual formats (Virtualization).
Virtual Machines used for Virtualization Table 5: Requirements for Virtual Machine used for Virtualization Running under Hypervisor Operating System RAM (GB) Minimum Display Resolution Software One of: One of: 4 or greater 1024 x 768 pixel array As follows: l Microsoft Hyper-V l Windows XP SP3 32-bit (x86) l VMware Workstation 9 (with shared VMs) l Windows 7 32-bit (x86) l Windows 7 64-bit l Windows 8 32-bit (x86) l VMware Server 2.x/ESX Server 5.1 l Microsoft.NET Framework 3.
l If you are running ChangeBASE on a Machine that does not have VMware Workstation installed and you want to connect to an ESX/vCenter server, or if you encounter errors connecting to ESX servers 5.1 and above, download and install the VIX SDK (http://www.vmware.com/support/developer/vix-api/). l The App-V 5.0 Sequencer requires the prior installation of Microsoft.NET Framework 4.0 Full and PowerShell 3.0. The latter is automatically installed with Windows 8 and Windows Server 2012.
Figure 2: Client/server set up To set up using Active Directory 1. Assuming that SQL Server has already been installed centrally, create an AD group related to ChangeBASE. 2. Create a user account (for example SVC_ChangeBASE) that will be used to connect to the ChangeBASE service, and ensure that the password is set to never expire. NOTE: This account will be prompted for when you select the ChangeBASE service during installation.
b. To add the Log On as a Service Right to the account if it is not on your local computer: i. Select Start > Run, type mmc, and then click OK. ii. Select File > Add/Remove Snap-in. iii. In Add/Remove Snap-in, click Add, and then, in Add Standalone Snap-in, double-click Group Policy Object Editor. iv. In Group Policy Object, click Browse, move to the GPO (Group Policy Object) that you want to modify, click OK, and then click Finish. v. Click Close, and then click OK. vi.
g. Click on Enable. NOTE: The final step will be to link the Physical Path (D:\My Reports) to ChangeBASE. This will be done at the end of this Best Practice Setup, as the last part of the product setup. 8. Open SQL Server Management Studio and connect to the SQL Server instance. TIP: If you want to know the name of the SQL Server instance, open the Services window and select SQL Server. The instance name is given in brackets. 9. Set up SQL Security as follows: a. Browse to Security > Logins. b.
d. Click Add and add the ChangeBASE group. e. Check Allow next to Modify to give the group Modify permissions on the folder. f. Click OK. 12. Set up shares and permissions to each of the Package Sources that you are going to set up in ChangeBASE, as follows: a. Locate the Package Source. b. Right-click on it and select Properties. c. Move to the Sharing tab and select Advanced Sharing. d. Check Share this folder. e. Click Permissions. f. Add the ChangeBASE group to the share permissions. g.
If you are going to use Windows Authentication, then you can associate the logon with the dbcreator and sysadmin roles via Server Roles in the SQL Server Login Properties. If you followed the Best Practice Setup using Active Directory, then you will have associated this account with the necessary rights via the ChangeBASE AD Group. Refer to Set up SQL Security. 3.
5. If you are going to be importing Web data for assessment, having specified a browser platform, and wish to first capture the data using the Web Capture utility, then install and use it in accordance with the section on Web Capture. 6. Ensure that you have your Site's Dell License Key and Site Message. ChangeBASE 6.2.
3 Installing ChangeBASE This chapter covers the following topics: Local Installation Multi-User Installation Further Details on ChangeBASE Local Installation If you are installing all ChangeBASE components on the same machine, proceed as follows. To install ChangeBASE 1. Run the ChangeBASE installation MSI (Local Administrative privileges are required), and click Next. 2. Accept the license agreement and click Next. 3.
CAUTION: There is no facility within ChangeBASE to modify access to the service once setup is complete. For example, if the service is started in LocalSystem, then all the files created in ProgramData will be owned by LocalSystem, and all the individual file permissions would need to be changed if access to the ChangeBASE service was subsequently modified to run under a network account. 5. Click Next, and then Install. 6. Once installation is complete, click Finish.
To install the client 1. Run the ChangeBASE installation MSI (Local Administrative privileges are required), and click Next. 2. Accept the license agreement and click Next. 3. Leave the ChangeBASE Client at the default Will be installed on local hard drive, and, if required, install MSI Studio locally under the ChangeBASE Client option. Right-click the ChangeBASE Service, and select Entire feature will be unavailable. Then change the location of the installation as required, using the Browse button. 4.
4 Web Capture This chapter covers the installation of the Web Capture utility. Web Capture Installation You can install the Web Capture utility on a ChangeBASE client, the ChangeBASE server, or on its own dedicated server. NOTE: If you are going to be installing the utility on its own dedicated server, then the requirements for this machine are the same as for Minimum Client Requirements. To install ChangeBASEWeb Capture 1. Run the installation MSI - ChangeBASE_Web_Capture.msi - and click Next.
About Dell Dell listens to customers and delivers worldwide innovative technology, business solutions and services they trust and value. For more information, visit www.software.dell.com. Contacting Dell Technical Support: Online Support Product Questions and Sales: (800) 306-9329 Email: info@software.dell.com Technical support resources Technical support is available to customers who have purchased Dell software with a valid maintenance contract and to customers who have trial versions.