Prestige Series LCD Monitor Prestige PS341WU (3DA1)
Contents Copyright and Trademarks Notice ��������������������������������������������������������������������������iii Revision ������������������������������������������������������������������������������������������������������������������iii Technical Support ���������������������������������������������������������������������������������������������������iii Safety Instructions ���������������������������������������������������������������������������������������������������iv CE Conformity ���������
Preface Copyright and Trademarks Notice Copyright © Micro-Star Int’l Co., Ltd. All rights reserved. The MSI logo used is a registered trademark of Micro-Star Int’l Co., Ltd. All other marks and names mentioned may be trademarks of their respective owners. No warranty as to accuracy or completeness is expressed or implied. MSI reserves the right to make changes to this document without prior notice. Revision Revision V1.
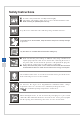
Safety Instructions ◙◙ ◙◙ ◙◙ Read the safety instructions carefully and thoroughly. All cautions and warnings on the device or user’s manual should be noted. Refer servicing to qualified personnel only. Keep the User’s Guide that comes with the package for future reference. To prevent fire or shock hazard, keep this device away from humidity and high temperature. Lay this device on a reliable flat surface before setting it up.
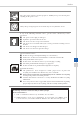
Preface Place the power cord in a way that people are unlikely to step on it. Do not place anything on the power cord. Always keep strong magnetic or electrical objects away from the device. If any of the following situations arises, get the device checked by service personnel: ◙◙ The power cord or plug is damaged. ◙◙ Liquid has penetrated into the device. ◙◙ The device has been exposed to moisture. ◙◙ The device does not work well or you can not get it work according to user’s manual.
CE Conformity This device complies with the requirements set out in the Council Directive on the Approximation of the Laws of the Member States relating to Electromagnetic Compatibility (2014/30/EU), Low-voltage Directive (2014/35/EU), ErP Directive (2009/125/EC) and RoHS directive (2011/65/ EU). This product has been tested and found to comply with the harmonized standards for Information Technology Equipment published under Directives of Official Journal of the European Union.
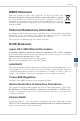
Preface WEEE Statement Under the European Union (“EU”) Directive on Waste Electrical and Electronic Equipment, Directive 2012/19/EU, which takes effect on August 13, 2005, products of “electrical and electronic equipment” cannot be discarded as municipal waste anymore and manufacturers of covered electronic equipment will be obligated to take back such products at the end of their useful life.
1 Getting Started This chapter provides you with the information on hardware setup procedures. While connecting devices, be careful in holding the devices and use a grounded wrist strap to avoid static electricity. IMPORTANT The illustrations are for reference only. Your monitor may vary in appearance.
Package Contents 1. Monitor 2. Stand 3. Stand Base with Screw 4. Wall Mount Screws x4 5. Stand Screws x4 6. Power Cord 7. HDMI Cable 8. Type C Cable 9. DisplayPort Cable 10. Y-type Audio Cable 11. USB Upstream Cable (to enable the USB ports on the monitor) 12. Quick Start Guide 13. Warranty Card 14. Cord Sleeve 15. Paperweight 1-2 16. Color Calibration Factory Report * Contact your place of purchase or local distributor if any of the items is damaged or missing.
Getting Started Installing the Monitor Stand IMPORTANT • Place the monitor on a soft, protected surface to avoid scratching the display panel. • Avoid pressing the monitor when installing the monitor stand.
1. Align the latches of the stand to the monitor. 2. Tighten the stand with the stand screws. 3. Connect the base to the stand and tighten the base screw to secure the base. 1 2 1-4 3 IMPORTANT The holes for installing the stand can be also used for wall mount. Please contact your dealer for proper wall mount kit.
Getting Started 4. Adjust the angle of the stand. Align the latches to place the VESA cover and I/O cover.
Adjusting the Monitor This monitor is designed to maximize your viewing comfort with its adjustment apabilities. IMPORTANT • • Do not use any sharp objects on the monitor. Avoid touching the display panel when adjusting the monitor.
Getting Started Monitor Overview 1 2 3 4 5 6 8 9 10 11 12 13 15 7 14 1-7 16 18 19 17
1 Power Jack 2 HDMI 2.0 Port 3 DisplayPort 1.4 4 5 USB-C Port This port can send simultaneously video signal and power stream up to 5V/3A. It doesn’t support data transmition function. USB3.1 Gen1 Type B Upstream Port For USB Upstream Cable. IMPORTANT Check the package for USB Upstream Cable and connect it to the PC and monitor. Once this cable is connected, the USB Type A Downstream Ports on the monitor will be ready for use. 1-8 6 7 To Monitor To PC USB3.
Getting Started 12 Headphone Jack 13 Navi Key 14 Kensington Lock 15 Macro Key To activate Creator OSD.
Connecting the Monitor to PC 1. Turn off your computer. 2. Connect the HDMI/DisplayPort cable from the monitor to your computer. 3. Connect the power cord to the monitor power jack. (Figure A) 4. Plug the power cord into the electrical outlet. (Figure B) 5. Turn on the monitor. (Figure C) 6. Power on the computer and select your input source in OSD menu.
2 OSD Setup This chapter provides you with essential information on OSD Setup. IMPORTANT All information is subject to change without prior notice.
Navi Key The monitor comes with a Navi Key, a multi-directional control that helps navigate the On-Screen Display (OSD) menu. Navi Key 2-2 The Navi Key default settings are as follows.
OSD Setup Navi Key Hot Key Basic Operations (When OSD menu is OFF) (When OSD menu is ON) Pro Mode ■■ Press Middle Button to confirm selection and exit. ■■ Press Up and Down Buttons to adjust. ■■ Press Left Button to cancel preview and exit without applying mode effect. ■■ Selecting function menus and items ■■ Allowing upward adjustment in function values Screen Assistance ■■ Press Middle Button to confirm selection and exit. ■■ Press Up and Down Buttons to adjust.
Users may enter the OSD Menu to customize their own Navi Key Hot Keys. More Hot Key options are as below. 2-4 Navi Key Hot Key Options Operations Brightness ■■ Press Middle Button to save value and exit. ■■ Press Up and Down Buttons to adjust. ■■ Press Left Button to cancel preview and exit. PIP/PBP ■■ Press Middle Button to confirm selection and exit. ■■ Press Up and Down Buttons to adjust. ■■ Press Left Button to cancel preview and exit.
OSD Setup OSD Setup via Navi Key Press the Middle button of Navi Key to launch the On-Screen Display (OSD) main menu. Use the Up, Down, Left, Right buttons to tune the desired function menus to suit your personal preferences. hh Professional 2-5 1st Level Menu 2nd/ 3rd Level Menu Description Mode User ■■ User Mode is default mode for Product shipment and all items can adjust it flexibility in this mode.
1st Level Menu 2nd/ 3rd Level Menu Description Alarm Clock Location ■■ Users can adjust Alarm Clock in any Mode. ■■ After setting the time, press the Middle Button to activate the timer. ■■ Default Alarm Clock Location is Left Top. Users can select their own location. Left Top Right Top Left Bottom Right Bottom Customize OFF 15:00 30:00 45:00 60:00 Screen Assistance OFF Ruler: Center Ruler: Edge ■■ Users can adjust Screen Assistance in any Mode. ■■ Default Screen Assistance is OFF.
OSD Setup 1st Level Menu 2nd/ 3rd Level Menu Description ■■ Image Enhancement enhances image edges to improve their acutance. ■■ Users can adjust Image Enhancement in any Mode. Image Enhancement OFF Weak Medium Strong Strongest Response Time ■■ Users can adjust Response Time in any Mode. ■■ Default Response Time is Fast. Normal Fast Fastest Low Blue Light ■■ Low Blue Light protects your eyes against blue light. When enabled, Low Blue Light adjusts the screen color temperature to a more yellow glow.
1st Level Menu 2nd/ 3rd Level Menu Description Saturation Red 0-100 Green 0-100 Blue 0-100 Cyan 0-100 Magenta 0-100 Yellow 0-100 ■■ Default is 50 for all Saturation items shipment setting, end user can adjust these flexibility, unless otherwise specified. ■■ Default is 0 for the Black-White mode only. ■■ In the regular Color mode: Adobe RGB, sRGB, Display P3 and DICOM that Saturation was gray out.
OSD Setup hh PIP/PBP 1st Level Menu 2nd Level Menu OFF PIP Source PIP Size Location Display Switch Audio Switch PBP (X2) Source 1 Description ■■ Default is OFF for shipment setting, end user can adjust it flexibility, unless otherwise specified. ■■ While Audio Switch function implement, the Audio Source will changed to Digital. ■■ This function will be gray out while HDR content received. ■■ Input Source auto detect function in Main source only.
hh Setting 1st Level Menu 2nd Level Menu Description Language 繁體中文 ■■ Language factory default is English. ■■ Users have to press the Middle Button to confirm and apply the Language setting. ■■ Language is an independent setting. Users’ own language setting will override the factory default. When users set Reset to Yes, Language will not be changed.
A Appendix IMPORTANT All information is subject to change without prior notice.
Specifications Model Prestige PS341WU (3DA1) Size 34 inch Panel Type IPS Resolution 5120 x 2160 @60Hz Aspect Ratio 21:9 Brightness (nits) 450 (VESA Certified DisplayHDR™ 600) Contrast Ratio 1200:1 Refresh Rate 48~60Hz Response Time 8ms Input Interface ■■ HDMI Port 2.0 x2 ■■ DisplayPort 1.4 x1 ■■ USB-C x1 USB Port ■■ USB3.1 Gen1 Type A Port x2 ■■ USB3.1 Gen1 Type B Upstream Port x1 ■■ USB3.
Appendix Model Environment Prestige PS341WU (3DA1) Operating Temperture: 0°C to 40°C Humidity: 20% to 90%, non-condensing Altitude: 0 ~ 5000m Storage Temperture: -20°C to 60°C Humidity: 10% to 90%, non-condensing * Based on CIE1976 test standards.
Preset Display Modes HDMI 1/ 2 Prestige PS341WU (3DA1) DP Type C V V V 800 x 600 @ 60Hz V V V 1024 x 768 @ 60Hz V V V 1152 x 864 @ 60 Hz V V V 1280 x 720 @ 60 Hz V V V 1280 x 800 @ 60 Hz V V V 1280 x 960 @ 60 Hz V V V 1280 x 1024 @ 60 Hz V V V 1600 x 1000 @ 60 Hz V V V 1680 x 1050 @ 60 Hz V V V 1920 x 1080 @ 60 Hz V V V 640 x 480p @ 60 Hz V V V 720 x 480p @ 60 Hz V V V 1280 x 720p @ 50 Hz V V V 1280 x 720p @ 60 Hz V V V 1920 x 1080i @ 50 Hz V V
Appendix Troubleshooting The power LED is off. ■■ Press the monitor power button again. ■■ Check if the monitor power cable is properly connected. No image. ■■ Check if the computer graphics card is properly installed. ■■ Check if the computer and monitor are connected to electrical outlets and are turned on. ■■ Check if the monitor signal cable is properly connected. ■■ The computer may be in Standby mode. Press any key to activate the monitor. The screen image is not properly sized or centered.