Safety • Assembly • Operation • Adjustments • Maintenance • Troubleshooting • Parts Lists • Warranty OPERATOR’S MANUAL 21” Rotary Mower — Model Series 400 IMPORTANT: READ SAFETY RULES AND INSTRUCTIONS CAREFULLY BEFORE OPERATING EQUIPMENT. PRINTED IN U.S.A. For US Customers: MTD LLC, P.O. BOX 361131 CLEVELAND, OHIO 44136-0019 For Canadian Customers: MTD Products Ltd., P. O.
This Operator’s Manual is an important part of your new equipment. It will help you assemble, prepare and maintain the unit for best performance. Please read and understand what it says. Table of Contents Slope Gauge ....................................................... 3 Safe Operation Practices ................................... 4 Set-Up & Adjustments........................................ 6 Operation............................................................. 8 Maintenance & Off-Season Storage....
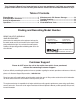
Use this page as a guide to determine slopes where you may not operate safely. Do not operate your lawn mower on such slopes. 1 Slope Gauge ������������������������������������������������� ��� ���������������������������� ��������������� �� ������ �� � � � � ����� � � � � � ����� � � � � ��� ���� � � � � � �� 3 WARNING Do not mow on inclines with a slope in excess of 15 degrees (a rise of approximately 2-1/2 feet every 10 feet). A riding mower could overturn and cause serious injury.
2 Safe Operation Practices WARNING: Engine Exhaust, some of its constituents, and certain vehicle components contain or emit chemicals known to State of California to cause cancer and birth defects or other reproductive harm. DANGER: This machine was built to be operated according to the rules for safe operation in this manual. As with any type of power equipment, carelessness or error on the part of the operator can result in serious injury.
Do: 1. Mow across the face of slopes; never up and down. Exercise extreme caution when changing direction on slopes. 2. Watch for holes, ruts, rocks, hidden objects, or bumps which can cause you to slip or trip. Tall grass can hide obstacles. 3. Always be sure of your footing. A slip and fall can cause serious personal injury. If you feel you are losing your balance, release the blade control handle immediately, and the blade will stop rotating within 3 seconds. Do Not: 1.
3 1. Remove loose parts and any packing material which may be between upper and lower handles. a. Pull up and back on the upper handle to raise the handle from position A into the operating position B. See Figure 1. b. Tighten hand knobs (star knobs) securing upper handle to lower handle. Make sure that each carriage bolt is seated properly in the handle. Setup and Adjustments NOTE: On some models wing nuts have been replaced with star knobs. Figures show wing nuts only. 2.
3 6. To assemble the grasscatcher: a. Place bag over frame (black plastic side is the bottom of bag.) Insert the hooks on the frame through the holes in the side plastic channels of the bag. See Figure 6. � � � b. Secure bag to frame by working the plastic channels on bag over frame as shown in Figure 6. All of the plastic channels except center top of bag attach from the outside of bag. Center top of bag attaches from the inside of bag. Setup and Adjustments 7. Attaching Grass Catcher to Mower a.
4 Operating Your Lawn Mower Know Your Lawn Mower ������������� ������ ������� ����� ������� ���������� WARNING ��������������� ����������������� Read, understand, and follow all instructions and warnings on the machine and in this manual before operating. This blade control mechanism is a safety device. Never attempt to bypass its operations. Use extreme care when handling gasoline. Gasoline is extremely flammable and the vapors are explosive.
To Stop Engine 1. Release the blade control handle to stop the engine and blade. � WARNING: The blade continues to rotate for a few seconds after the engine is shut off. 2. Disconnect and ground the spark plug wire as instructed in the separate engine manual to prevent accidental starting while equipment is unattended. Operating Your Lawn Mower � Using Your Lawn Mower 4 � WARNING: Never operate your mower without either the rear door or the entire grass catcher assembly firmly secured.
5 Engine 1. Refer to the separate engine manual for engine maintenance instructions. ���������������� �������������� ����������� Maintenance Figure 10 General Recommendations WARNING Always stop engine, disconnect spark plug, and ground against engine before cleaning, lubricating or doing any kind of maintenance on your machine. 1. Always observe safety rules when performing any maintenance. 2.
Rear Flap Replacement 1. The rear flap is attached to the back of the mower deck, and is designed to minimize the possibility that objects will be thrown from the rear of the mower toward the operator. If the rear flap becomes damaged, replace as follows. 2. To remove the old rear flap, cut off the flat end of the wire rod which secures it to the deck using a pair of side-cutters. Attach the new rear flap using the new rod provided with the rear flap, bending the ends of the rod over to secure.
6 Problem Engine fails to start Trouble Shooting Engine runs erratic For repairs beyond the minor adjustments listed here, contact an authorized service dealer. Engine overheats Occasional skip (hesitates) at high speed Idles poorly Excessive vibration Mower will not mulch grass Uneven cut Cause Remedy 1. Blade control handle disengaged. 1. Engage blade control handle. 2. Spark plug wire disconnected. 2. Connect wire to spark plug. 3. Fuel tank empty or stale fuel. 3.
TWO YEAR LIMITED WARRANTY The limited warranty set forth below is given by MTD LLC with respect to new merchandise purchased and used in the United States and/or its territories and possessions, and by MTD Products Limited with respect to new merchandise purchased and used in Canada and/or its territories and possessions (either entity respectively, “MTD”).