
Owners Manual


Installation Instructions
Installation and Operational Manual
°
Designer Collection
°
Acrylic Freestanding Tubs
3 / mtibaths.com
Freestanding Bath - Important Information
IMPORTANT NOTICE: Do not attempt to remove the foam from the bottom of the tub. Doing so may cause
damage and will void the warranty. Do not remove the wires attached to the sensors located on each side
of the drain. The sensor wire must be connected to the remote blower for proper operation. Do not remove
cables or wires located between the walls of the tub that may be connected to either a tub mounted on/off
device or shell warming factory installed heating pads for Radiance®.
Rough in Dimensions – See pages 4-5 for critical dimensions. We suggest taking the measurements of the
actual tub. All printed specifications are +/- ½ inch and subject to change without notice.
Access panel – Many MTI freestanding tub models have a removable access panel for ease of installation
of the waste and overflow, as well as deck mounted valves on select models. It is located on the drain side
(rear) of the tub. If your tub is equipped with System Aria, LED Lights or Radiance, it will provide access during
installation to make electrical connections. See pages 7-8 for installation instructions for electrical components.
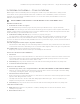
Pedestal Base – The optional pedestal base, available for some models, is an ormamental ring and does not
raise the height of the tub. Both tub and base will make full contact with the finished floor. The base will extend
beyond the top rim of the tub by approximately 1”. Use care when selecting your faucet, whether freestanding
or wall mounted, ensuring the reach of the spout will extend beyond the tub deck and clear the inside tub wall
to avoid unnecessary splashing. It may be necessary to omit or trim the baseboard or molding to allow the tub
to sit close to the wall. Please note: the base is not symmetrical; if it does not fit, rotate the base 180º.
Fixtures – Fixtures may only be mounted on freestanding tub models designed with an integrated deck for
valve installation. For all other freestanding tubs, floor or wall mounted fixtures are required.
Floor-Mounted – Not all MTI freestanding tubs will accomodate stabilization of a floor mounted faucet,
however, many of these types of freestanding faucet kits can be secured to a wall, rather than a drain pipe.
Contact the freestanding faucet kit manufacturer for alternate installation instructions.
Drain and Overflow – MTI offers a variety of waste and overflow kits. A direct connect toe tap drain kit comes
standard with tub models that include an integrated overflow. For other freestanding models, we recommend
using our low-profile cable driven drain kit. The flexible neck makes this an ideal choice as a concealed drain.
If access is available from below the tub during the final installation, it is easier to make precise adjustments
to the final location fo the tub. The cutout in the bottom of the outer shell for the drain tee can be enlarged, if
necessary. NOTICE: If enlarged too much, the drain pipe might be visible between the side of the tub and the
floor when viewed from certain angles. When an optional base is used, it is easier to conceal an enlarged cut-
out.
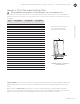
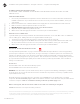
Clawfoot Tub - This tub is designed to be installed with the drain side as the back of the tub. Use a ’ level on top of the tub to
ensure tub is perfectly level from side to side and front to back. Adjust the leveling feet as needed to
acheive level prior to dry fitting the drain and completing drain installation. Tub will not drain properly if not
perfectly level. Without access from below, box out around the drain pipe approximately ” to allow
trimming overflow pipe below grade.