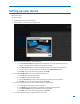
MultiConnect rCell Router Using the Router’s Web Interface Using the Router’s Web Interface 1
MultiConnect® rCell User’s Guide Intelligent Wireless Router S000573A, Revision A Copyright This publication may not be reproduced, in whole or in part, without prior expressed written permission from Multi‐Tech Systems, Inc. All rights reserved. Copyright © 2013 by Multi‐Tech Systems, Inc. Multi‐Tech Systems, Inc.
Table of Contents Welcome ........................................................................................................................................................................ 6 Getting started .......................................................................................................................................................... 6 Setting up your device ............................................................................................................
Advanced Settings .............................................................................................................................................. 23 Setting up static routes ........................................................................................................................................... 23 Setting up cellular features ..........................................................................................................................................
Saving and restoring settings .................................................................................................................................. 36 Setting up the router's debug options .................................................................................................................... 37 Automatically rebooting the device ................................................................................................................... 37 Configuring Syslog ......
Welcome This help file provides information on configuring, managing, and updating your MultiConnect® rCell 100 Series router. Your router includes a Web Management Interface (this application) that allows you to set up your router and the networks and devices that your router supports. You can use your rCell router to provide secure data communication between many types of devices that use legacy as well as the latest communication technologies.
Setting up your device The initial setup wizard can help you set up your device quickly with information that is commonly needed to operate the router. To use the wizard: 1. From Administration, select Initial Setup. A series of wizard panels step you through setup. 2. In the Choose Password panel, enter the following: 3. a. In the Current Password field, type the current password, that is, the password you want to change. The initial password shipped from the factory is admin. b.
6. a. To use PPP, check Enable. When enabled, your device functions as a router. b. To enable the dial‐on‐demand feature, check Dial‐on‐Demand. To configure the settings that re‐ establish the connection when Dial‐on‐Demand is enabled, see Configuring wakeup‐on‐call. c. In the Idle Timeout field, type the amount of idle time that passes before the router times out. If the time expires, the PPP connection to the Internet is disconnected d. In the APN field, type the APN (Access Point Name).
Configuring miscellaneous features for your device Configuring IP address and DNS information for LANs Your router manages traffic for your local area networks (LANs). To change the IP address and DNS configuration: 1. From Setup, select IP Configuration. 2. To configure the address information: 3. In the IP Address field, type the router's IP address. The default is 192.168.2.1. In the Mask field, type the mask for the network. The default is 255.255.255.0.
Configuring Dynamic Domain Naming System (DDNS) This feature allows your router to use a DDNS service to associate a hosted server's domain name with a dynamically changing internet address. To configure your router to use DDNS: 1. From Setup, select DDNS Configuration. 2. In the Configuration group, check Enabled. 3. In the Server field, type the name of the server from which the currently assigned IP address is obtained.
Configuring the DHCP server Configuring a Dynamic Host Configuration Protocol (DHCP) Server You can configure your router to function as a DHCP server that supplies network configuration information— such as IP address, subnet mask, and broadcast address—to devices on the network. To configure the DHCP server: 1. From Setup, select DHCP Configuration. 2. To use the DHCP feature, check Enabled. 3. The Subnet field displays the subnet address. 4.
Assigning fixed addresses You must let your router know about devices with fixed IP addresses. To do so, you manually enter the device's MAC address and the IP address that is bound to that MAC address. After you bind the MAC address to the IP address, the IP address cannot be used by any DHCP client with a different MAC address, even if there is no active DHCP connection with that IP address. To assign fixed addresses: 1. In the Fixed Address group, click Add.
3. To allow your router to connect and send GPS data to a remotely located server, see Sending GPS information to a remote server. 4. To set the time interval after which GPS data is sent, and to configure further details about the GPS information that is sent, see Configuring which NMEA sentences are sent and when they are sent. Notes: All enabled sentences are forwarded periodically using the interval specified in the NMEA Configuration section.
Configuring which NMEA sentences are sent and when they are sent To configure the time interval, additional prefix or ID information, and which NMEA sentences that can be sent: 1. In the Interval field, type the amount of time, in seconds, that passes before the NMEA information is sent. The default is 10 seconds. The range is 1 to 255 seconds. 2. You can further identify the router—also called a remote asset—that is collecting and sending the GPS information. To do so: 3.
Setting the device's date and time You can configure how your router manages the setting of time on its domain of systems. The system date and time display in these formats: MM/DD/YYYY / HH:MM:SS You can set the date and time manually. Or you can configure the router to get this information from an SNTP server. Setting the date and time To set the router's date and time: 1. From Setup, select Time Configuration. The Setup: Time Configuration panel opens. 2.
4. In the Subnet Mask field, type the network mask. Editing or deleting an existing network 1. To delete a network, click Delete. 2. At the top of the pane, a message tells you the network is deleted. To un‐do the delete, click the Undo link found in the message. 3. To edit a network, click Edit. Change the IP address or subnet mask as desired. Click Finish. Notes: You cannot edit the network name. You cannot delete a network if it is used in another configuration.
Setting up wireless features Setting up Wi‐Fi access points Your router can be configured as a wireless access point (AP) to allow Wi‐Fi enabled devices to connect to the router using Wi‐Fi. The Wi‐Fi hot spot can only handle 5 concurrent sessions. To set up your router so it can securely provide data communication to your Wi‐Fi devices: 1. From Wireless, select Wi‐Fi Access Point. 2. To allow the router to provide communication to Wi‐Fi devices, check Enabled. 3.
8. In the DTIM Interval field, type how often a beacon frame includes a Delivery Traffic Indication Message, and this number is included in each beacon frame. It is generated within the periodic beacon at a frequency specified by the DTIM Interval. A delivery traffic indication message is a kind of traffic indication message (TIM) which informs the clients about the presence of buffered multicast/broadcast data on the access point.
Setting up Wi‐Fi client As an alternative to functioning as a Wi‐Fi Access Point, your router can function as a Wi‐Fi Client. 1. From Wireless, select Wi‐Fi Client. 2. To allow the router to act as a Wi‐Fi client, check Enabled. 3. From the Client Mode drop‐down list, select one of the following: WAN LAN 4. Click Submit. If Wi‐Fi Access Point feature is enabled, you are asked for permission to disable it before proceeding. 5. After 30 to 60 seconds, click Refresh.
2. Confirm that the far‐end Bluetooth device is powered on and waiting for a connection. 3. In the Available Devices group, click Refresh. A list of detected Bluetooth devices appears. 4. Click the name of the Bluetooth device that you want to use. The name and MAC address appear under the selected device. To configure the IP Pipe in TCP/UDP Server mode: 1. In the IP Pipe group, from the Mode drop‐down list, select SERVER. 2.
To configure the IP Pipe in TCP/UDP Client mode: 1. In the IP Pipe group, from the Mode drop‐down list, select CLIENT. 2. From the Protocol drop‐down list, select the desired protocol, either TCP or UDP. 3. In the Server IP Address field, type the address of the far‐end TCP‐UDP server. 4. In the Server Port field, type the port value used by the far‐end TCP/UDP Server. 5.
Setting up firewalls Defining firewall rules The router's firewall enforces a set of rules that determine how incoming and outgoing packets are handled. By default, all outbound traffic originating from the LAN is allowed to pass through the firewall, and all inbound traffic originating from external networks is dropped. This effectively creates a protective barrier between the LAN and all other networks.
8. In the Source Port field, type the port that is the origin of the traffic. Type ANY if the source port does not matter. 9. From the Action drop‐down list, select the action to perform on the traffic. You can allow the traffic to be accepted, rejected, logged or dropped. Accepted packets are allowed to continue through the firewall. Dropped packets are removed and no further processing is performed on them.
Setting up cellular features PPP configuration Configuring Point‐to‐Point (PPP) To configure how the PPP protocol is used on your router: 1. From Cellular, select PPP Configuration. 2. To use PPP, check Enabled. When enabled, your device functions as a router. If PPP is enabled, you cannot access the integrated cellular radio. 3. To access the cellular radio integrated with your router, disable PPP.
8. In the Dialing Max Retries field, type the number of dialing retries allowed. The default is zero, which means an infinite number is allowed. The range is 0 to 100. Configuring PPP: Setting up the modem To set up the cellular modem that is integrated with your router: (Refer to the Customer Activation Notices included with the product for proper information to enter). 1. From Cellular, select PPP Configuration. 2. In the Dial Number field, type the number to be dialed.
6. In the ICMP Count field, type the number of ICMP keepalive checks to be sent to the specified host. Default is 10. Configuring PPP: Sending modem commands to the integrated modem on router You can allow an external application to query modem information by setting up certain modem commands. The application can use the URL HTTP://xxx.xxx.xxx.xxx/modeminfor.html to get the IP address that is currently assigned to the integrated cellular modem after the PPP connection is established.
Configure wake‐up on call. Define the settings or events that occur in order to wake up the router. Example 1 – Determine if the router supports incoming calls and caller ID 1. From the Cellular option, select PPP Configuration. Make sure that PPP is disabled. 1. From the Cellular option, select Wakeup‐on‐Call. Make sure that Wakeup‐on‐Call is disabled. 2. Open a command prompt. To do so, on many Windows‐based operating systems, from the Start button select Run. 3.
Check Wakeup‐on‐Call. Set the Time Delay to 3 seconds. You can use the 10 second default. Ensure that all Init Strings fields are empty. Submit Button Click Submit to save these settings. Caller ID Configuration 3. Enter the string RING to the Caller ID list. Click the Add Button to save the string to the Caller ID list. After you complete all your changes, save and restart. The device saves all the settings and reboots.
Click Add to save each Caller ID as it is entered to the Caller ID list. 3. After you complete all your changes, save and restart. The device saves all the settings and reboots Example 4 – Set Up the Ethernet Router to Activate on Incoming SMS Message Setting up PPP 1. From the Cellular option, select PPP Configuration. Set the following parameters: 2. In the PPP General section: Make sure that PPP is Disabled (the default). Make sure Dial‐on‐Demand is Disabled (the default).
Setting up Caller Acknowledgement 1. In the group, in the field, type a configured string (0 to 40 characters) that is sent to the integrated cellular modem upon receiving a valid SMS from the WAN. 2. Set the Wakeup Acknowledgement string configuration with the command AT+CNMA. 3. To save the Acknowledgement Configuration click Submit. After you finish making your changes, you must save and restart. The device saves all the settings and reboots.
Defining tunnels to your device Setting up Generic Routing Encapsulation (GRE) tunnels Tunneling allows the use of a public network to convey data on behalf of two remote private networks. It is also a way to transform data frames to allow them to pass networks with incompatible address spaces or even incompatible protocols. Generic Routing Encapsulation (GRE) is a tunneling mechanism that uses IP as the transport protocol and can be used for carrying many different passenger protocols.
Defining Virtual Private Networks (VPNs) Your router supports VPN tunnels for secure LAN‐to‐LAN access. To set up a VPN through your router: 1. From the navigation pane, select Tunnels, IPsec Tunnels. 2. In the pane that opens, click Add Tunnel. A series of wizard panels helps you configure the connection. 3. In the first panel, enter the following information: 4. 5. In the Name field, type a name for the connection.
Administering devices Configuring how routers access the Internet You must define how your router accesses the Internet and how the router can protect the networks and devices that it hosts. To set up the router for Internet access: 1. From the navigation pane, select Administration, Access Configuration. The Administration: Access Configuration pane opens. 2. To configure the web server, use the Web Server group.
Defining When the Device Connects to Remote Server 1. If you want the device to connect to the Remote Management Server only when the device's PPP link is up, check When PPP is up 2. If you want the device to bring up the PPP link when it is time for the device to connect to the Remote Management Server, check Bring up PPP. Defining When Device Gets or Sends Updates 1.
Specifying Device Settings To define other custom settings for devices: 1. In the Device Name field, type a name to identify the device. 2. In the Custom ID field, type an identifier for the device. 3. You can change the color of the interface's buttons, button fonts, highlights and highlight font by specifying red, green, and blue settings in their respective fields. Use the format #rrggbb to define the desired color in the respective field. 4.
Saving and restoring settings To restore previous configuration settings to your router, to restore settings to their factory defaults or to save the current configuration: 1. From the navigation bar, select Administration, then Save/Restore. 2. To restore a previous configuration: 3. a. Next to the Restore Configuration field, click Browse. b. Navigate to the location where the configuration file is stored and select the desired file. c. Click Restore. The device reboots.
Setting up the router's debug options You can set up your device to automatically reboot itself. You can also set up the device to record and report Syslog messages that can help you resolve issues you might experience with your device. To do so: From Administration, select Debug Options. Automatically rebooting the device To specify the amount of time that passes before the device automatically reboots itself: 1.
Checking the status of devices Viewing device statistics 1. From Status, select Statistics. 2. The application categorizes statistics about your device. To see statistics that appear in a particular category, click the appropriate tab. System Ethernet Wireless PPP Serial Bluetooth GRE IPSec Viewing services running on routers 1. From Status, select Services.