
Operation Manual


The
Digi-Adjustor
is connected
"in
parallel"
with the
El
and
El
keys, and
has exactly
the same effect,
namely ol
adjusting
the degree
of differential.
All
you
need to do
in
this
case
is to rotate the
Digi-Adjustor
while the model
is
flying
(don't
look down at
it!) until
you
are
satisfied.
Land
the model,
then leave
the menu by
pressing
the
E]
key
(everything
gets
stored
automatically
-
there's
nothing
more to be done).
Caution!
Although
it is theoretically
possible, you
should
never aitempt
to
make changes
via the
keypad while
the
model is
flying. You
would have to take
your
eyes
off
the model
to find the
right key; and
if
you
made a
mistake, the
results could
be catastrophic!
The
"Fixed
Value" option
-
what's
that?
"Dual
Rates",
"Exponential"
and so on are
terms Jamil-
iar to
the advanced
modeller.
He may not be on such
close
terms with
"Fixed
Value",
however.
The simplest
method of explaining
it is to describe
an
examore:
lmagine a
model
with
camber-changing
flaps which
are
operated
by the
right-hand slider
=
transmitter
control
F.
Travel
has been reduced
(using
the
"Travel"
option)
so
that
full flap movement
is in the
range
-5
to
+75 de-
grees
at the two
slider end-points
(this
is not necessary
to use
"Fixed
Value", but
it
does
show up
the useful-
ness
of the option).
NoW
on this
model there is a specitic
Jlap
position (+15
degrees)
which is only
needed for a
particular
f
light situ-
ation
(say,
launching).
Wouldn't
it be nice
if we could
move
the
flaps to this fixed
position
with a switch, then
return to
normal operation
again afterwards?
In order
to achieve
this it
would be necessary
for lhe
switch
to override
the
"normal"
flap control
signal, so
that the
flaps take
up a
pre-set,
fixed value.
This
is what
"Fixed
Value"
is
all
about.
"Fixed
Value"
moves the control
function
to a
pre-
set
fixed
value when the
associated switch
is
oper'
ated.
and overrides
the transmitter
control
itself.
There
are therefore
tlvo things
to set up:
First, of course,
the Fixed
Value itself
(in
o/o
of
full
travel).
Second,
the switch
which
is to
"activate"
the
Fixed
Value
has to be
selected.
Adiustment
is carried
out in a similar
way
to that de-
scribed
above
for
"Dual
Rates''.
Here
is another example:
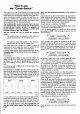
rF:t:tl_liri.
1 FII:-1r
rrJFF
Stlli:,r
Selecting
the
Fixed Value
switch:
36
We will assume
that
you
have assigned
the controls
as
In order
to exploit
this option,
you
will need to use
the
follows:
special
3-position
switch
"S1".
lf
you
use the switch
I for
Transmitter
control
F
=
AUX.I;
gsrvo
g
=
AUX.1. this
purpose,
you
must not assign
it as
a transmitter
This
means that
the
right-hand slider
controls
the servo
control
Jor normal
usage;
i.e' Icontrols
=
""
connected
to receiver
output 6
(nothing)'
More
on this on
page
69'
Move
to the
"Transmitter
control
Adjustment"
menu.
lf-your brain
is slill
lunctioning
clearly'.
this is a
good
Select
Transmitter
Control
F, d;:i.^"'"""'
time
to
present
a
further reJinement
of this transmitter:
press
rhe
N
key; rhen
s
"g;,
un,ir
"Flx-1"
appears
äffi'H:1'iT"Ut["i,n:t".ofi':llj]tt"flöt
ilJSffil
You
will now
see this
display:
toni,-insteäO
äiä
noimat toggie
switch.'
Th'e optionat
ln our examole
this is to be
the switch 55.
Press the
Sl
key; the display
in the bottom
left-hand
corner
will flash.
It will
probably
show
"OFF".
Press
the
tr
key;
"OFF"
turns to
"ON".
Leaf through
with
the
E
key until
"55"
appears
(after
it
you
will see an arrow
and
possibly
an asterisk).
Operate
the switch 55;
at one
of the two
positions
the asterisk
must
appear.
This means that
the switch
is set to
"ON".
Adiusting
the Fixed
Value:
Press the
Z
key; the
value shown
in the bottom
right-
hand corner
starts
to flash.
You can
now adjust
the'Fixed
Value"
with the
El
and
El
keys. 00/o
means one servo
end-point;
1000/o the
other end-point.
For
example,
if
you
set the
value to
750lo
this means a
position
half-way between
centre and
one
end-ooint.
Now
you
can carry
out a
practical
test
to see how the
"Fixed
Value"
function works:
when switch
55 is
"Off",
the servo
can be controlled
in the normal
way with the
slider.
When set to
"On"
the servo
runs
to the
position
you
have
just
set.
lf
vou
now
want the switch
to
work the
"other
way
roünd",
press
the
S
key again;
"S5"
will flash.
Press
the
E
key, and
the arrow
after
"S5"
will be
reversed'
and
you
will find that
the direction
of switch
actuation
is
also
reversed.
lmportant
note
for F3B flyers:
When
"leafing
through" the
options
you
may
have no-
ticed
that there
is a
further option
"Fixed
Value-2".
You
can,
in
fact, set up
two
"Fixed
Values"
(Fixed Value and
Fixed
Value-2)
which
you
can
select at
will.
For example,
you
could
set up
two
pre-set
positions
for
camber-changing
flaps on a
glider:
"Tow"
and
"
SDeed".
"stick
press-button"
is one
example, or
the
momen'
tary
switch
which
is recommended
for operating
the
stopwatch.
In the
lollowing
we assume
that
you
have connected
a
momentary
switch
of this
type to
"S4".