
Operation Manual


1155Iril..l
5EFitlu
i
I
Tr_r
ELEtl.
+
r
This
is the mixer
that we need.
(lt
is described
in detail
in the
preamble
to the detail
description
of mixers
which
follows.)
That's äll
there
is to it; flap servo
next:
Select
servo
No. 6, then select
the servo
function tield
with the
Z
key. Leaf through
again with the
El
key.
For an unmixed
flap function
you
would now select
"FLAP";
because
of the
mixer, however,
you
have to
con'
tinue
leafing through
until
'SNAPFLAP"
appears:
the
name of
the mixer
which
produces
the
desired
mixing
effect:
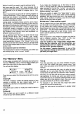
II:,5IIJH
5EH[.JÜ
E
1
TI:I
SHHFFLI-IF^T
Now to
the setting-up
process.
Move
to the
"Servo
adjustment"
menu.
Servo
No. 4 is the
first
one
to adjust.
There is not
much to
say about
it: set
the direction of
rotation and the
centre
point (if
necessary)
in the usual
way.
The
flap
servo
(No.
6) comes
next. In this case
we
should
really call
it the snapJlap
servo,
because
we have
assigned
the SNAPFLAP
function to
it. Hair-splitting?
Well, that's
how
your
transmitter
sees
it.
Select
servo No. 6.
You see this:
r:-1EF:.
i:
l.J-Ttl
l L
t
+Itli:
F't' FLHF
In the second
line
you
will see
"FLAP"
on the right. So
we will set up
this
input first.
Release
the
input value
field with the
S
key
(value
flashes). Check
whether the
direction of servo
rotation
is
correct.
lf not,
press
the
E
key.
But the values
them-
selves?
We cannot
tell
you
exactly
what they should
be,
as this depends
on
your
model, and
in
particular
on the
length of
the actuating
arms on lhe servo
and the
control
surfaces.
lt is best
to measure
the result on
the flaps
themselves;
for
camber-changing
flaps a
good
starting
ooint
would
be around 5
-
10 degrees
up and
15
-
20
degrees
down. Set
the slider to
the one end-point
and
then
the other,
and use the
E
and
El
keys to set the
0/o
vatues.
Now to the
"elevator"
inout.
Press the
!
key, then the
El
key. With
ELEVATOR
flash-
ing, the display
will
look like this:
r5EFl.
E,: :;HHFFLIIF
r+ 1riifi:t
Ert ELEt.Jl.lr
Activate the
input
value tield with the
!
key once
more.
Check
the
direction of
servo
rotation; for snapjlaps
the
elevator
must move
in opposition
to the flaps,
i.e. up-el-
evator
with downJlap.
ls that
how it is?
lf not, reverse
it
with the
E
key. Apply
"full
up" at the
elevator stick,
and
set
the desired
flap deflection
with the
El
or
E
keys.
Repeat the
process
for
"full
down" elevator.
A
good
start-
ing
point
for both sides
would be around
5
-
10 degrees
flap detlection;
you
will be able
to find the optimum
set-
tings
later on, during
test-flying.
4a
Do
you
remember that
we wanted
to make
the eleva'
tor
---
f lap mixing switchablet
That comes
next.
You can
-
or
rather, must
-
tell the
transmitter
which
switch
is to carry oul
this task
(you
have to
do this
because
your
PROFI
mc 3010 sets
virtually
no restrictions
on
what
you
can and
cannot do)
Now
move to the SWITCH
menu,
by
pressing
the key
sequence
EIZ Z
from the basic display.
Press the
0l
key.
Iap the
El
key
repeatedly until
"55+"
appears
and
flashes. The arrow shows
that
the switch
must be
pushed
in that direction
to switch
it ON, i.e. the
coupling
is then effective.
lf
you
want to reverse
this,
press
the
E
key, and
the
job
is
done.
You
are
finished
with the snapJlap
servo.
Now to the
elevator
(more
accurately:
ELEVATOR+)
servo,
in our
case
No. 2.
First
move to the
TRAVEL & REVERSE
menu.
Select servo
No.
2 with the
Z
and
El
keys.
The
display
will look
like
this:
rtEF:.
::
ELETJ.
+
L+ 1
|i1fi:t
Et ELEtJHT
Input:
"ELEVATOR"
is already there,
so
we will set that up
first. Release
the input
value field with
the
!
key, then
check
the direction of
rotation;
reverse it
if necessary
Then set the travel
itself on both
sides: 900/o
would be a
usetul starting
point.
The
"SPOILER"
and
"FLAP"
inputs are
adjusted
next,
but we don't
need to describe
the adjustment
procedure
in detail again.
In both cases
it is all
"business
as usual":
select the
input, set the
value tor both sides.
Reverse
the
tunction
if necessary
The method
of making the
inputs
switchable
has already been
described
for the
SNAPFLAP
mixed
function.
One
final thing
you
might
like to try out
in addition to
the
last example
(this
has nothing to do
with mixers):
Try
out
the transmitter
control option
"
Fixed
Value" for the
flap function
(see
page
36).
You will see that
every aspect
of the adjustments
you
have made
regarding the slider
control still
functions
if
you
"ovenide"
the slider
position
with a switch.
Our
tip:
Practise
"adiusting
inputs" until
you
are
confident
with the
procedure.
Later on,
at the
flying
site,
you
will also need to
know
what to do, so that
you
can
make sense of the
test-flying
process.
lt is
not always
quite
as
quiet
and calm out
there on
the
tlying strip
as it
is in
your
workshop; and
in
such
"mild
stress situations"
you
can easily
make an
error
-
unless
you
are
contident of
what
you
are
doing,
that is.
The
same
applies
if
you
use
the
"ready-made
lists"
supplied
with the
transmitter,
without assigning
any-
thihg
yourself.
lt is almost
impossible
to use any of
the
mixers unless
you
know how to set
and adiust
input values.
Never attempt
to adiust
anything
trom the
keypad
when
you
are
flying a
model. Instead
use the
oigi-
Adiustor,
which is always switched
"in
parallel"
with
the
E
and
El
keys,
when it makes sense
to use
it.
The basic
rule
is
this:
keep the
keypad
flap
shut
whlle
you
are
flying!