Operation Manual SERIES MODELs jwn24htcsl jwn24hscsl ride-on power trowels (HONDA GX690RTAF GASOLINE ENGINE) STARTING S/N VB0206952 Revision #1 (05/12/12) To find the latest revision of this publication, visit our website at: www.multiquip.com THIS MANUAL MUST ACCOMPANY THE EQUIPMENT AT ALL TIMES.
Proposition 65 Warning Engine exhaust and some of its constituents, and some dust created by power sanding, sawing, grinding, drillingandotherconstructionactivities contains chemicals known to the State of California to cause cancer, birth defects and other reproductive harm. Some examples of these chemicals are: Leadfromlead-basedpaints. Crystalline silicafrombricks. Cementandothermasonryproducts. Arsenicandchromiumfromchemically treatedlumber.
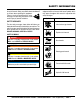
Silicosis/Respiratory Warnings WARNING WARNING SILICOSIS WARNING RESPIRATORY HAZARDS Grinding/cutting/drilling of masonry, concrete, metal and other materials with silica in their composition may give off dust or mists containing crystalline silica. Silica is a basic component of sand, quartz, brick clay, granite and numerous other minerals and rocks. Repeated and/or substantial inhalation of airborne crystalline silica can cause serious or fatal respiratory diseases, including silicosis.
Table of Contents JWN24 Series Ride-On Power Trowel Proposition 65 Warning............................................ 2 Silicosis/Respiratory Warnings................................. 3 Table Of Contents..................................................... 4 Training Checklist..................................................... 5 Daily Pre-Operation Checklist.................................. 6 Safety Information............................................... 7-12 Specifications/Dimensions (Trowel).....
Training Checklist Training Checklist No, Description 1 Read operation manual completely. 2 Machine layout, location of components, checking of engine oil levels. 3 Fuel system, refueling procedure. 4 Operation of spray and lights. 5 Operation of controls (machine not running). 6 Safety controls, safety stop switch operation. 7 Emergency stop procedures. 8 Startup of machine, pre-heat, engine choke. 9 Maintaining a hover. 10 Maneuvering. 11 Pitching. 12 Matching blade pitch.
daily pre-operation checklist Daily pre-Operation Checklist 1 Engine oil level 2 Condition of blades 3 Blade pitch operation 4 Safety stop switch operation 5 Steering control operation page 6 — JWN-SERIES RIDE-ON POWER TROWEL • operation manual — rev.
Safety Information Do not operate or service the equipment before reading the entire manual. Safety precautions should be followed at all times when operating this equipment. Failure to read and understand the safety messages and operating instructions could result in injury to yourself and others. Potential hazards associated with the operation of this equipment will be referenced with hazard symbols which may appear throughout this manual in conjunction with safety messages.
Safety Information geNeRaL SaFeTy CauTION NeveR operate this equipment without proper protective clothing, shatterproof glasses, respiratory protection, hearing protection, steel-toed boots and other protective devices required by the job or city and state regulations. Avoid wearing jewelry or loose fitting clothes that may snag on the controls or moving parts as this can cause serious injury. NeveR operate this equipment when not feeling well due to fatigue, illness or when under medication.
Safety Information TROWeL SaFeTy NOTICE aLWayS keep the machine in proper running condition. DaNgeR Engine fuel exhaust gases contain poisonous carbon monoxide. This gas is colorless and odorless, and can cause death if inhaled. The engine of this equipment requires an adequate free flow of cooling air. NeveR operate this equipment in any enclosed or narrow area where free flow of the air is restricted.
Safety Information FueL SaFeTy DaNgeR DO NOT start the engine near spilled fuel or combustible fluids. Fuel is extremely flammable and its vapors can cause an explosion if ignited. aLWayS refuel in a well-ventilated area, away from sparks and open flames. aLWayS use extreme caution when working with flammable liquids. DO NOT fill the fuel tank while the engine is running or hot.
Safety Information NOTICE The easiest way to lift the trowel is to utilize the lift loops that are welded to the frame. These lift loops are located to the left and right sides of the operator’s seat. A strap or chain can be attached to these lift loops, allowing a forklift or crane to lift the trowel up onto and off of a slab of concrete. The strap or chain should have a minimum of 2,000 pounds (1,000 kg) lifting capacity and the lifting gear must be capable of lifting at least this amount.
Safety Information Trailer should be adjusted to a level position at all times when towing. Raise and lock trailer wheel stand in up position when towing. emISSIONS INFORmaTION NOTICE Place chock blocks underneath wheel to prevent rolling while parked. The gasoline engine used in this equipment has been designed to reduce harmful levels of carbon monoxide (CO), hydrocarbons (HC) and nitrogen oxides (NOx) contained in gasoline exhaust emissions.
specifications/dimensions C A B Figure 1. Dimensions Table 1. Trowel Specifications A–Length – in. (cm) 77.0 (195.6) B–Width – in. (cm) 39 (99) C–Height – in. (cm)1 46.75 (118.7) Weight – lbs. (kgs.) Operating 685 (311.3) Weight – lbs. (kgs.) Shipping 885 (402.27) Engine – H.P. 24 (HONDA) Fuel Tank – gallons (liters) 5 (19.23) Rotor – RPM (Dry Concrete) 180 Min Path Width – in. (cm) 75 (191) Engine Oil Capacity (w/new filter) 2 Quarts (1.9 Liters) Gear Box Oil Capacity 69 oz.
specifications/dimensions Table 2. Noise and Vibration Emissions for Model JWN24HTCSL Guaranteed ISO 11201:2010 Based 92 Sound Pressure Level at Operator Station in dB(A) Guaranteed ISO 3744:2010 Based 112 Sound Power Level in dB(A) Whole Body Vibration Per ISO 2631-1:1997 +A1:2010 0.15 in m/s2 ∑A(8) NOTES: 1. Sound Pressure and Power Levels are “A” weighted Measures per ISO 226:2003 (ANSI S1.4-1981).
General information JWN Series Ride-On Power Trowel Familiarization The JWN Series Ride-On Power Trowel is designed for the floating and finishing of concrete slabs. Take a walk around your trowel. Take notice of all the major components like the engine, blades, air cleaner, fuel system, fuel shut-off valve, ignition switch etc. Check that there is always oil in the engine, and gear oil in the gearbox assembly. Read all the safety instructions carefully.
components 1. Seat — Engine will not start unless operator is seated. DANGER 2. Steering Control Levers — Directs the unit forward, reverse, left, or right. Add fuel to the tank only when the engine is stopped and has had an opportunity to cool down. In the event of a fuel spill, DO NOT attempt to start the engine until the fuel residue has been completely wiped up and the area surrounding the engine is dry. 3.
components 17. Rear Light — The JWN-Series Ride-On Power Trowel has three 12 volt halogen lights. 23. Left-Side Spider — Consists of trowel arms, blades, wear plate, and thrust collar. 18. Lift Loops — Located on both sides of the main frame. Used to lift the trowel. 24. Document Box — Contains all product documentation. 19. Retardant Spray Tank — Holds 5 gallons of retardant. 25. Battery — Provides +12V DC power to the electrical system. 20.
basic engine 1 2 9 14 8 13 7 5 3 12 4 EN GIN EF UE LO NL Y 6 10 11 Figure 4. Engine Components INITIAL SERVICING The engine (Figure 4) must be checked for proper lubrication and filled with fuel prior to operation. Refer to the manufacturer's engine manual for instructions and details of operation and servicing. 1. Muffler — Used to reduce noise and emissions. WARNING Engine components can generate extreme heat.
set-up The purpose of this section is to assist the user in setting up a NEW trowel. If your trowel is already assembled, (seat, handles, knobs and battery), this section can be skipped. NOTICE The new trowel cannot be placed into service until the setup installation instructions are completed. Seat Assembly The seat is not installed on the trowel for shipping purposes. To attach the seat perform the following: 1. Remove the seat from the protective wrapping. 2.
inspection The following section is intended as a basic guide to the ride-on trowel operation, and is not to be considered a complete guide to concrete finishing. It is strongly suggested that all operators (experienced and novice) read “Slabs on Grade ” published by the American Concrete Institute, Detroit Michigan. Gearbox Oil Level DO NOT use your ride-on power trowel until this section is thoroughly understood. 2. Fill the gear box just to the level of the fill plug.
operation Important Information Before You Start 1. This ride-on trowel is equipped with a safety stop switch. This switch is located beneath the seat assembly. Remember the engine will not start unless an operator is sitting in the operator’s seat. The weight of an operator depresses an electrical switch which will allow the engine to start. CHOKE KNOB CLOSED WARNING OPEN NEVER disable or disconnect the safety stop switch.
operation Steering Two control levers located in front of the operator’s seat provide directional control for the JWN-SERIES Ride-On Power Trowel. Table 4 illustrates the various directional positions of the joysticks and their effect on the ride-on trowel. 1. Push both the left and right control levers forward. See Figure 12. 6. Pull both the left and right joysticks backward and repeat steps 3 through 5 while substituting the word reverse for forward. Table 4.
maintenance When performing any maintenance on the trowel or engine, follow all safety messages and rules for safe operation stated at the beginning of this manual. At the front of this manual there is a “Daily Pre-Operation Checklist”. Make copies of this checklist and use it on a daily basis. WARNING Accidental starts can cause severe injury or death. ALWAYS place the ON/OFF switch in the OFF position. Yearly (500-600 Hours) 1.
maintenance 9. Reinstall the foam air filter element in the air cleaner cover, then reinstall the paper air filter element and cover to the air cleaner case. Securely latch the four hook tabs on the air cleaner cover. CAUTION Operating the engine with a blocked grass screen, dirty or plugged cooling fins, and/or cooling shrouds removed will cause engine damage due to overheating. Changing Engine Oil (100 Hours) 1.
maintenance Belt GUARD REMOVAL NOTICE This section is intended to aid users in the maintenance of drive assemblies with the new style Multi-Clutch. 1. To gain access to the drive belt, remove Drive Belt Guard (Figure 16). Checking The Drive Belt The drive belt needs to be replaced as soon as it starts to show signs of wear. NEVER use a defective drive belt under any circumstances.
maintenance sPARE Drive Belt REMOVAL (Using Replacement Drive Belt) The JWN-SERIES Ride-On Power Trowel is equipped with a replacement drive belt (spare) carrier, which is mounted on the inboard side of the left-side gearbox . Make sure that there is ALWAYS a spare drive belt in the drive belt carrier before the trowel is placed on a slab to finish concrete.
maintenance 6. Place spare drive belt onto clutch as shown in Figure 20 CLUTCH GROOVES 2. Starting at the left-side gearbox, use a 1/4" allen wrench and remove the 3 bolts and lock washers that secure the CV-joint (Figure 21) to the left-side gearbox. Retain mounting hardware for later use. REMOVE 3 PLACES DRIVE BELT GAP LEFT-SIDE GEARBOX CV-JOINT COUPLER Figure 21. CV-Joint Removal Figure 20. Spare Drive Belt Placement (Clutch) 7. Reinstall belt guard assembly. Starting The Trowel/Testing 3.
maintenance CV-joint Assembly installation (left-side) How it works 1. Apply a thin coat of RVT silicone to mating surfaces of the CV-joint (Figure 23) and left-side gearbox coupler. The Multi-Clutch functions much like a standard CVT system. As the engine RPM’s increase, the drive or primary clutch closes, forcing the belt to ride outwards on the drive sheaves. The closing of the drive clutch also forces the belt to open the driven or secondary sheaves.
maintenance Blade Pitch DISENGAGED (ONE SIDE) OPERATING POSITION Matching Blade Pitch for Both Sets of Blades Sometimes it may be necessary to match blade pitch between the two sets of blades. There are some signs that this may be necessary. For example, the differences in pitch could cause a noticeable difference in finish quality between the two sets of blades, or, the difference in blade pitch could make the machine difficult to control.
maintenance Blade Pitch Adjustment Procedure Maintenance adjustment of blade pitch is made by adjusting a bolt (Figure 25) on the arm of the trowel blade finger. This bolt is the contact point of the trowel arm to the lower wear plate on the thrust collar. The goal of adjustment is to promote consistent blade pitch and finishing quality. Look for the following indications if blades are wearing unevenly. If so, adjustment may be necessary.
maintenance Clean-Up Never allow concrete to harden on the power trowel. Immediately after use wash any concrete off the trowel with water, be careful not to spray a hot engine or muffler. An old paint brush or broom may help loosen any concrete that has started to harden. Trowel Arm Adjustment Procedure NOTICE The following procedure should be followed to adjust trowel arms when it becomes apparent that the trowel is finishing poorly or in need of routine maintenance.
maintenance Trowel Arm Removal Trowel Blade Removal 1. Each trowel arm is held in place at the spider plate by a hex head bolt (with zerk grease fitting). Remove the hex head bolt/zerk grease fitting from the spider plate. (Figure 28) 1. Remove the trowel blades from the trowel arm by removing the three hex head bolts (Figure 30) from the trowel arm. Set blades aside. 2. Remove the trowel arm from the spider plate. SPIDER PLATE ZERK FITTING Figure 28. Removing Zerk Grease Fitting 3.
maintenance Checking Trowel Arm Straightness Trowel Arm Adjustment Trowel arms can be damaged by rough handling, (such as dropping the trowel on the pad), or by striking exposed plumbing, forms, or rebar while in operation. A bent trowel arm will not allow the trowel to operate in a smooth fluid rotation. If bent trowel arms are suspect, check for flatness as follows, refer to Figure 31 and Figure 32. 1. Locate the trowel arm adjustment tool (Figure 33) P/N 9177.
maintenance 3. Shown in Figure 35 is the adjustment fixture with a trowel arm inserted. As each trowel arm is locked into the fixture, the arm bolt is adjusted to where it contacts a stop on the fixture. This will consistently adjust all of the trowel arms, keeping the finisher as flat and evenly pitched as possible. 4. Unscrew the locking bolts on the adjustment tool and place the trowel arm into the fixture channel as shown in Figure 35.
maintenance Installing Pans Onto Finisher Blades These round discs sometimes referred to as “pans” attach to the spiders arms and allow early floating on wet concrete and easy movement from wet to dry areas. They are also very effective in embedding large aggregates and surface hardeners. WARNING Lifting/Crush Hazard. DO NOT lift trowel with pans attached. 2. Rotate blades into position under Z-Clips.
wiring diagram HONDA HARNESS 1 WHITEMAN HARNESS CONTROL BOX P2-A L B/W ST B/Y BLK BATT. W GND. G IGN. B P1-A L P2-B W3A L W4A Y W5A B/Y Y B/Y LO 17 B A B B FEMALE MALE P1-B L Y Y B/Y B/Y B B FEMALE MALE (W15A) Z1 GND. GND. 16 IGNITION SWITCH B/Y FUEL CUT-OFF SOLENOID GRN 5 T14 T4 3 B/Y W8A CONTROL PANEL GND W2A HOUR METER 2 W7A +12VDC W17A Z2 G (GRN) Y (YEL) L (BLUE) B/Y (BLK/YEL) T1 +12VDC W16A W13A W6A W1A W14A 30 AMP.
wiring diagram HARNESS DWG.
wiring diagram component locator 1 A Y L B/Y B L 2 Y B B/Y GN 8 D. 7 D 9 4 3 5 10 I 6 C 11 12 15 P/N L L 3609 9 Y B B/Y 16 G H 17 B 18 14 M K 13 REF. CONNECTOR DES.
troubleshooting Troubleshooting (engine) Symptom possible problem Solution Spark plug bridging? Check gap, insulation or replace spark plug. Carbon deposit on spark plug? Clean or replace spark plug. Short circuit due to deficient spark plug insulation? Check spark plug insulation, replace if worn. Improper spark plug gap? Set to proper gap. Fuel reaching carburetor? Check fuel line. Water in fuel tank? Flush or replace fuel tank. Fuel filter clogged? Replace fuel filter.
troubleshooting Troubleshooting (engine) - continued Symptom Weak in power, compression is proper and does not misfire. Weak in power, compression is proper but misfires. Engine overheats. Rotational speed fluctuates. Recoil starter malfunctions. (if applicable) Starter malfunctions. possible problem Air cleaner dirty? Clean or replace air cleaner. Improper level in carburetor? Check float adjustment, rebuild carburetor. Defective spark plug? Clean or replace spark plug.
troubleshooting Troubleshooting (Ride-On mechanical Trowel) Symptom Engine running rough or not at all. Safety stop switch not functioning. possible problem Stop switch malfunction? Make sure that the stop switch is functioning when the operator is seated. Replace switch if necessary. Fuel? Look at the fuel system. Make sure there is fuel being supplied to the engine. Check to ensure that the fuel filter is not clogged.
troubleshooting Troubleshooting (Ride-On mechanical Trowel) - continued Symptom Lights (optional) not working. Retardant spray (optional) not working. Steering is unresponsive. Operating position is uncomfortable. Power head on Electric Pitch (optional) not working. Linkage on Twin Pitch not working. Clutch slipping or sluggish response to engine speed change. possible problem Solution Wiring? Check all electrical connections in the lighting circuit.
notes JWN-SERIES RIDE-ON POWER TROWEL • operation manual — rev.
Operation Manual HERE’S HOW TO GET HELP PLEASE HAVE THE MODEL AND SERIAL NUMBER ON-HAND WHEN CALLING United StateS Multiquip Corporate Office 18910 Wilmington Ave. Carson, CA 90746 Contact: mq@multiquip.com MQ Parts Department Tel.