OPERATION MANUAL SERIES MODEL HTN-27K-TCSL MODEL HTN-28K-TCSL RIDE ON TROWEL (KOHLER GASOLINE ENGINE) Revision #0 (06/06/07) THIS MANUAL MUST ACCOMPANY THE EQUIPMENT AT ALL TIMES.
Engine exhaust and some of its constituents, and some dust created by power sanding, sawing, grinding, drillingandotherconstructionactivities contains chemicals known to the State of California to cause cancer, birth defects and other reproductive harm. Some examples of these chemicals are: Leadfromlead-basedpaints. Crystallinesilicafrombricks. Cementandothermasonryproducts. Arsenicandchromiumfromchemically treatedlumber.
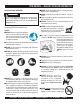
WARNING WARNING SILICOSIS WARNING RESPIRATORY HAZARDS Grinding/cutting/drilling of masonry, concrete, metal and other materials with silica in their composition may give off dust or mists containing crystalline silica. Silica is a basic component of sand, quartz, brick clay, granite and numerous other minerals and rocks. Repeated and/or substantial inhalation of airborne crystalline silica can cause serious or fatal respiratory diseases, including silicosis.
TABLE OF CONTENTS MQ WHITEMAN — HTN-SERIES RIDE-ON POWER TROWEL Proposition 65 Warning ............................................. 2 Silicosis/Respiratory Warnings .................................. 3 Table of Contents ...................................................... 4 Parts Ordering Procedures ....................................... 5 Training Checklist ...................................................... 6 Daily Pre-Operation Checklist ...................................
www.multiquip.com Effective: January 1st, 2006 PARTS ORDERING PROCEDURES Ordering parts has never been easier! Choose from three easy options: Best Deal! Order via Internet (Dealers Only): If you have an MQ Account, to obtain a Username and Password, E-mail us at: parts@multiquip.com. Order parts on-line using Multiquip’s SmartEquip website! ■ View Parts Diagrams ■ Order Parts ■ Print Specification Information To obtain an MQ Account, contact your District Sales Manager for more information.
TRAINING CHECKLIST TRAINING CHECKLIST This checklist lists some of the minimum requirements for machine operation. Please feel free to make copies for daily use. Use this checklist when training a new operator or use as a review for more experienced operators. TRAINING CHECKLIST NO. DESCRIPTION 1 Read Operator’s Manual completely. 2 Machine layout, location of components, checking of engine and fluid levels. 3 Fuel system, refueling procedure. 4 Operation of spray and lights.
DAILY PRE-OPERATION CHECKLIST DAILY PRE-OPERATION CHECKLIST DAILY PRE-OPERATION CHECKLIST 1 Engine Oil Level. 2 Gearbox Fluid Level. 3 Radiator Coolant Level. 4 Condition of Blades. 5 Blade Pitch Operation. 6 Safety-Stop Switch Operation. 7 Steering Control Operation. 8 Condition of Belts. COMMENTS: HTN- SERIES • RIDE-ON POWER TROWEL — OPERATION MANUAL — REV.
HTN-SERIES — SAFETY MESSAGE ALERT SYMBOLS FOR YOUR SAFETY AND THE SAFETY OF OTHERS! Safety precautions should be followed at all times when operating this equipment. Failure to read, understand and comply with the Safety Messages and Operating Instructions could result in injury to yourself and others. This Operation Manual has been developed to provide instructions for the safe and efficient operation of the HTN Series Ride-On Trowel.
HTN-SERIES — SAFETY MESSAGE ALERT SYMBOLS Accidental Starting Accidental starts can cause severe injury or death. ALWAYS place the ON/OFF switch in the OFF position. Disconnect and ground spark plug lead and disconnect negative battery cable from battery before servicing. Respiratory Hazard ALWAYS wear approved respiratory protection. Sight and Hearing hazard ALWAYS wear approved eye and hearing protection. Over Speed Conditions NEVER tamper with the factory settings of the engine governor or settings.
HTN-SERIES — RULES FOR SAFE OPERATION RULES FOR SAFE OPERATION WARNING Failure to follow instructions in this manual may lead to serious injury or even death! This equipment is to be operated by trained and qualified personnel only! This equipment is for industrial use only. The following safety guidelines should always be used when operating the HTN-Series Ride-On Trowel. SAFETY ■ DO NOT operate or service this equipment before you read, understand, and comply with all safety messages in this manual.
HTN-SERIES — RULES FOR SAFE OPERATION ■ NEVER run engine without air filter. Severe engine damage may occur. Service air filter frequently to prevent carburetor malfunction. ■ NEVER place your feet or hands inside the guard rings while starting or operating this equipment. ■ AVOID wearing jewelry or loose fitting clothing that may snag on the controls or moving parts as this can cause a serious injury. ■ ALWAYS keep clear of rotating or moving parts while operating the trowel.
HTN-SERIES — RULES FOR SAFE OPERATION Transporting ■ ALWAYS shutdown engine before transporting. ■ Tighten fuel tank cap securely and close fuel petcock to prevent fuel from spilling. ■ Use chock-blocks at each wheel when parked to prevent trailer from rolling. ■ Use the trailer's swivel jack to adjust the trailer height to a level position while parked. ■ Drain fuel when transporting trowel for long distances or over bad roads. ■ Avoid sudden stops and starts.
HTN-SERIES — RULES FOR SAFE OPERATION Maintenance Safety Emergencies ■ ALWAYS shut down the engine and disconnect battery before performing service or maintenance functions. Contact with moving parts can cause serious injury. ■ ALWAYS know the location of the nearest fire extinguisher. ■ Securely support any trowel components that must be raised. ■ NEVER lubricate components or attempt service on a running trowel. ■ ALWAYS allow the trowel a proper amount of time to cool before servicing.
HTN-SERIES — OPERATION AND SAFETY DECALS Machine Safety Decals The HTN-SERIES Ride-On Power Trowel is equipped with a number of operation and safety decals. These decals are provided for operator safety and maintenance information. Should any of these decals become unreadable, replacements can be obtained from your dealer. WARNING To avoid injury, you MUST read and understand operator’s manual before using this machine. This machine to be operated by qualified personnel only. Ask for training as needed.
HTN-SERIES— SPECIFICATIONS (TROWEL) Figure 1. HTN-SERIES Dimensions Table 1. HTN-Series Specifications Model HTN27KTCSL HTN28KTCSL A–Length – in. (cm) 95.0 (241.3) 95.0 (241.3) B–Width – in. (cm) 48.0 (122) 48.0 (122) C–Height – in. (c ) 46.0 (116.8) 46.0 (116.8) Weight – lbs. (kgs.) Operating 705 (320.5) 705 (320.5) Weight – lbs. (kgs.) Shipping 1130 (513.6) 1130 (513.6) Rotor – RPM (Dry Concrete) 150 150 Path Width – in.
HTN-SERIES— SPECIFICATIONS (ENGINE) Table 2. HTN-Series Engine Specifications Model HTN27KTCSL Kohler 27 HP Engine HTN28KTCSL Kohler 28 HP EFI Engine Type 4 Stroke, Overhead Valve V-Twin, gasoline engine. 4 Stroke, Overhead Valve V-Twin, EFI, gasoline engine. Piston Displacement 44.0 cu.in. (725 cc) 44.0 cu.in. (725 cc) Max. Output 27 bhp/3200 rpm (20.1 KW) 28 bhp/3200 rpm (20.9 KW) Max. Torque 42.7 lbf-ft at 2200 rpm 42.
HTN-SERIES — GENERAL INFORMATION HTN SERIES Ride-On Power Trowel Familiarization The HTN SERIES Ride-On Power Trowel is designed for the floating and finishing of concrete slabs. Take a walk around your trowel. Take notice of all the major components (see Figures 2 and 3, pages 18 and 19) like the engine, blades, air cleaner, fuel system, fuel shut-off valve, ignition switch etc. Ensure engine and gearbox oil levels are within proper operating range. Read all the safety instructions carefully.
HTN-SERIES — CONTROLS AND INDICATORS 1. Seat – Engine will neither start nor run unless operator is seated. 2. Steering Control Levers – Directs the unit forward, reverse, left, or right. 9. 3. Retardant Spray Control Button – Sprays retardant through the nozzle at the front of the machine. 10. Fuel Tank – Holds 5 gallons of unleaded gasoline. 4. Twin Pitch Control – Both pitch towers are linked together.
HTN-SERIES — CONTROLS AND INDICATORS 17. Safety Stop Switch – Shuts down engine when seat is empty. 25. EZ- Mover Boss – Rear attachment point for EZ Mover. Used to transport the trowel. 18. Rear Light – The HTN-SERIES Ride-On Power Trowel has three 12 volt halogen lights. 26. Spiders (Left/Right) – Consists of trowel arms, blades, wear plate, and thrust collar. 19. Lift Loops – Located on both sides of the main frame. Used to lift the trowel. 27. Document Box – Contains all product documentation. 20.
HTN-SERIES — BASIC ENGINE 3 2 8 1 9 7 10 6 11 5 4 12 Kohler 27 HP Engine Kohler 28 HP Engine Figure 4. Engine Controls and Components INITIAL SERVICING The engine must be checked for proper lubrication and the fuel tank filled with fuel prior to operation. Refer to the manufacturer's engine manual for instructions & details of operation and servicing. The engines shown above are Kohler engines. 1. 5. Oil Cooler – Helps keep engine oil cooler for longer engine life. 6.
HTN-SERIES — NEW MACHINE SETUP INSTRUCTIONS Trowel Pre-Set Up Instructions Seat Assembly The purpose of this section is to assist the user in setting up a NEW trowel. If your trowel is already assembled, (seat, handles, knobs and battery), this section can be skipped. The seat is not installed on the trowel for shipping purposes. To attach the seat perform the following: NOTE The new trowel cannot be put into service until the pre-setup installation instructions are completed.
HTN-SERIES — INITIAL START-UP The following section is intended as a basic guide to the ride-on trowel operation, and is not to be considered a complete guide to concrete finishing. It is strongly suggested that all operators (experienced and novice) read “Slabs on Grade ” published by the American Concrete Institute, Detroit Michigan. Table 3. Recommended Viscosity Grades DO NOT use your ride-on power trowel until this section is thoroughly understood.
HTN-SERIES — OPERATION 5. When starting a cold engine, pull the choke knob, if so equipped, (Figure 9) out to the closed position. In warm weather or when the engine is warm, the unit can be started with choke halfway or completely open. (27 HP engine) Figure 7. Fuel Gauge Important Information Before You Start 1. This ride-on trowel is equipped with a safety "safety stop switch". This switch is located beneath the seat assembly.
HTN-SERIES — OPERATION Steering 5. Two control levers located in front of the operator’s seat provide directional control for the HTN Series Ride-On Power Trowel. Table 5 (Page 24) illustrates the various directional positions of the joysticks and their effect on the ride-on trowel. Try adjusting the pitch of the blades. This can be done with the ride-on trowel stopped or while the trowel is moving, whatever feels comfortable.
HTN-SERIES — MAINTENANCE Maintenance When performing any maintenance on the trowel or engine, follow all safety messages and rules for safe operation stated at the beginning of this manual. WARNING Accidental starts can cause severe injury or death. ALWAYS place the ON/OFF switch in the OFF position. Disconnect and ground spark plug leads and disconnect negative battery cable from battery before servicing. Figure 12. Engine Service Areas MAINTENANCE SCHEDULE 1. Oil Level Dipstick 1. 2.
HTN-SERIES — MAINTENANCE Air Cleaner (Daily) The Kohler 27 hp and 28 hp EFI engines are equipped with a replaceable, high-density paper air cleaner element. Most are also equipped with an oiled-foam precleaner which surrounds the paper element. 1. Check the air cleaner daily or before starting the engine. Check for and correct heavy buildup of dirt and debris along with loose or damaged components. 2. 3. 4.
HTN-SERIES — MAINTENANCE Air Cleaner Components - See Figure 13. 1. Air Cleaner Cover 2. Latch Spring 3. Lever Latch 4. Latch Lever Pin 5. Wing Nut 6. Inner Air Cleaner Cover 7. Precleaner Element 8. Air Cleaner Element 9. seal Air Cleaner - Components to Check Whenever the air cleaner cover is removed, or the paper element or precleaner is serviced, check the following: ■ Air Cleaner Element Cover and Seal - Make sure the element cover is not bent or damaged.
HTN-SERIES — MAINTENANCE Changing Engine Oil And Filter 1. Change the engine oil after the first 5 hours of use, then change every 6 months or 100 hours. 2. Remove the oil filler cap (Figure 12, Item 5), and fill engine crankcase with recommended type oil as listed in Table 4. Fill to the upper limit of dipstick. 3. Crankcase oil capacity with oil filter replacement is 2.02 qts. (1.90 liters). Oil Filter (100 Hours) 1. Replace the engine oil filter (Figure 14) every oil change or 100 hours.
HTN-SERIES — MAINTENANCE Checking The Drive Belt 5 The drive belt needs to be replaced as soon as it starts to show signs of wear. Indications of excessive belt wear are fraying, squealing when in use, belts that emit smoke or a burning rubber smell when in use. Under normal operating conditions, a drive belt may last approximately 150 hours. If your trowel is not reaching this kind of life span for drive belt wear, check the drive belt for proper pulley alignment and spacing.
HTN-SERIES— MAINTENANCE 3. Insert the 3/4" X 1" X 3-1/4" block between the moveable face and the fixed face of the lower drive pulley. See Figure 19. This block will help keep the lower drive pulley faces open while installing the new drive belt. In the event of a drive belt failure, the spare (replacement) drive belt can be used for quick replacement at the job site to continue trowel operation. 1. If necessary, refer to Removing Drive Belt Instructions.
HTN-SERIES— MAINTENANCE 5 4 6 2 1 3 1 2 3 4 5 6 CV Joint Bolt (Remove 3 places) New Spare Drive Belt Bolt, Spare Drive Belt Carrier Spare Drive Belt Holder Left Side Gearbox Figure 21. Spare Drive Belt Replacement Spare Drive Belt Replacement It will be necessary to disconnect the CV-Joint from the left-side gearbox coupler. This means the removal of the three screws that secure the CVJoint to the gearbox. 3.
HTN-SERIES— MAINTENANCE Drive System Theory of Operation The HTN-SERIES Ride-On Power Trowel is equipped with a "Torque Converter" which supplies torque to both the left and right gearboxes. The function of the torque converter is to automatically deliver the correct amount of torque required by the trowel under all load conditions. This enables the trowel to deliver the necessary torque for float pan applications and the high rotor speeds required for burnishing concrete.
HTN-SERIES— MAINTENANCE How It Works (Figure 26) Condition A: Blade Pitch z Engine Idling z Drive Pulley: Small z Driven Pulley: Large z Belt: Loose and Stationary Condition B: z Engine Accelerating z Drive Pulley: Small But Increasing Sometimes it may be necessary to match blade pitch between the two sets of blades. There are some signs that this may be necessary. For example, the differences in pitch could cause a noticeable difference in finish quality between the two sets of blades.
HTN-SERIES — MAINTENANCE Trowel Arm adjustment Procedure NOTE Figure 30 below illustrates the "correct alignment " for a spider plate (as shipped from the factory). The following procedure should be followed to adjust trowel arms when it becomes apparent that the trowel is finishing poorly or in need of routine maintenance. A level, clean area to test the trowel prior to and after adjustement is essential.
HTN-SERIES — MAINTENANCE Trowel Arm Removal Trowel Blade Removal 1. Each trowel arm is held in place at the spider plate by a hex head bolt (with zerk grease fitting). Remove the hex head bolt/zerk grease fitting from the spider plate. (Figure 32) 1. Remove the trowel blades from the trowel arm by removing the three hex head bolts (Figure 34) from the trowel arm. Set blades aside. 2. Remove the trowel arm from the spider plate. Figure 34.
HTN-SERIES — MAINTENANCE Checking Trowel Arm Straightness Trowel arms can be damaged by rough handling, (such as dropping the trowel on the pad), or by striking exposed plumbing, forms, or rebar while in operation. A bent trowel arm will not allow the trowel to operate in a smooth fluid rotation. If bent trowel arms are suspect, check for flatness as follows, refer to Figures 35 and 36: 3.
HTN-SERIES — MAINTENANCE 4. Use an allen wrench to tighten the locking bolts securing the trowel arm in place. 5. Adjust the bolt "distance" shown in Figure 37 to match one of the arms. The other arms will be adjusted to match this distance. 6. Loosen the locking nut on the trowel arm lever, then turn the trowel arm adjusting bolt until it barely touches (.010") the fixture adjusting bolt. 7. Once the correct adjustment is made, tighten the lock nut on the trowel arm to lock in place. Figure 38.
HTN-SERIES — MAINTENANCE Installing Pans Onto Finisher Blades These round discs sometimes referred to as "pans" attach to the spiders arms and allow early floating on wet concrete and easy movement from wet to dry areas. They are also very effective in embedding large aggregates and surface hardeners. 1. Lift trowel just enough to slide pan under blades. Lower finisher onto pan with blades (item #1) adjacent to Z-Clips (item #4). 2. Rotate blades into position under Z-Clips.
HTN-SERIES — TROUBLESHOOTING (ENGINE) TABLE 5. ENGINE TROUBLESHOOTING SYMPTOM Engine Cranks But Will Not Start Engine Starts But Will Not Continue Running POSSIBLE PROBLEM SOLUTION Fuel tank is empty. Fill fuel tank. Shut-off valve is closed. Open fuel shut-off valve. Fuel line has suction leak or is restricted. Fuel filter, or fuel tank cap vent is obstructed. Check fuel line condition and fuel line clamps. Ensure that fuel line is not kinked.
HTN-SERIES — TROUBLESHOOTING (ENGINE) TABLE 5 CONT.. ENGINE TROUBLESHOOTING SYMPTOM Engine Lacks Power POSSIBLE PROBLEM SOLUTION Air filter is obstructed. Replace air filter. Altitude causes 3% loss of horsepower per 1000 feet of altitude. If available, install high altitude jets in carburetor. Choke is par tially closed. Open choke. Faulty spark plugs or spark plug leads. Spark plug lead disconnected. Replace spark plugs or spark plug leads if faulty. Reattach spark plug lead if disconnected.
HTN-SERIES— TROUBLESHOOTING (TROWEL) TABLE 6. TROUBLESHOOTING SYMPTOM Engine running rough or not at all. POSSIBLE PROBLEM SOLUTION Safety Stop Switch malfunction? Make sure that the Safety Stop Switch is functioning when the operator is seated; replace switch if necessary. Fuel? Look at the fuel system. Make sure there is fuel being supplied to the engine. Check to ensure that the fuel filter is not clogged. Ignition? Check to ensure that the ignition switch has power and is functioning correctly.
HTN-SERIES— TROUBLESHOOTING (TROWEL) TABLE 6. TROUBLESHOOTING (CONTINUED) SYMPTOM POSSIBLE PROBLEM SOLUTION Wiring? Check all electrical connections, including the master on/off switch and check to see if wiring is in good condition with no shorts. Replace as necessary. Lights? Check to see if light bulbs are still good. Replace if broken. Retardant? Check the tank to make sure retardant is present. Fill tank as necessary.
HTN-SERIES — NOTES HTN- SERIES • RIDE-ON POWER TROWEL — OPERATION MANUAL — REV.
TERMS AND CONDITIONS OF SALE — PARTS Effective: February 22, 2006 PAYMENT TERMS 5. Parts must be in new and resalable condition, in the original Multiquip package (if any), and with Multiquip part numbers clearly marked. 6. The following items are not returnable: Terms of payment for parts are net 30 days. FREIGHT POLICY All parts orders will be shipped collect or prepaid with the charges added to the invoice. All shipments are F.O.B. point of origin.
NOTE PAGE HTN- SERIES • RIDE-ON POWER TROWEL — OPERATION MANUAL — REV.
OPERATION MANUAL HERE'S HOW TO GET HELP PLEASE HAVE THE MODEL AND SERIAL NUMBER ON-HAND WHEN CALLING UNITED STATES Multiquip Corporate Office 18910 Wilmington Ave. Tel. (800) 421-1244 Carson, CA 90746 Fax (800) 537-3927 Contact: mq@multiquip.com Mayco Parts 800-306-2926 Fax: 800-672-7877 310-537-3700 Fax: 310-637-3284 Service Department 800-421-1244 Fax: 310-537-4259 310-537-3700 MQ Parts Department 800-427-1244 310-537-3700 MEXICO UNITED KINGDOM MQ Cipsa Carr. Fed. Mexico-Puebla KM 126.