CommPlete 4000 Communications Server Quick Start Guide
CommPlete 4000 Communications Server Quick Start Guide S000347A, Revision A This publication may not be reproduced, in whole or in part, without prior expressed written permission from Multi-Tech Systems, Inc. All rights reserved. Copyright © 2004, by Multi-Tech Systems, Inc. Multi-Tech Systems, Inc. makes no representations or warranties with respect to the contents hereof and specifically disclaims any implied warranties of merchantability or fitness for any particular purpose.
Contents System Overview .........................................................................................4 Product Overview .................................................................................................................................... 4 RASExpress and Auxiliary Software .................................................................................................. 4 Installing your CommPlete 4000 .................................................................
System Overview System Overview The CommPlete™ 4000 Communications Server is a single-segment, rack mountable communications server. It is customized for dedicated turnkey operation of LAN-based communications and remote access server functions. The CommPlete 4000 is a general purpose server that easily interfaces to any existing Novell, Windows NT, or IP network. Figure 1.
System Overview special software package bundled with the CommPlete 4000, RASExpress can also be interfaced to standard Radius authentication functionality (which resides on a separate PC). RADIUS authentication software (Remote Authentication Dial-In User Service) handles authentication and profile information about network users and secures against unauthorized server access. Built-in R log protocol support permits remote log-in to all hosts on the network.
Installing Your CommPlete 4000 Installing your CommPlete 4000 This chapter explains how to set up and connect cables for the CommPlete 4000. This product is ready to be connected to the end-user's Ethernet concentrator. It is preconfigured to operate as a communications server. The operator must make modem/terminal-adapter connections, link up the VGA monitor and keyboard, boot the system, and enter some basic information.
Installing Your CommPlete 4000 If the ISI4608PCI or ISI4608UPCI is used, connections between it and external modems are made via the supplied octopus cable going between the DB-78 connector on the ISI4608PCI board and the DB-25 connectors on the individual modems. (RJ-11 connectors connect the modems to the phone jacks.) If the ISIHP-4S or -4U are used, note that each ISIHP card accepts as many as four RJ-45 connectors to accommodate ISDN BRI lines.
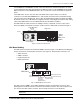
Installing Your CommPlete 4000 ISI Board Cabling Each Intelligent Serial Interface card (ISI5634PCI/8, ISI5634UPCI/8, ISI4608PCI, ISI4608UPCI or ISIHP-2S/2U) takes up one physical slot in the CommPlete 4000. Depending on your configuration, you may have as many as four of these cards (see Figure 3). Attach the line cords (RJ-12 for analog phone lines; RJ-45 for UPCI or ISDN phone lines) to the line connectors on the ISI card(s) at the back of your CommPlete 4000 as shown in Figure 5.
Installing Your CommPlete 4000 Serial Card Upgrades As shown in Figure 5c, installation of expansion cards is simpler in the outer slots than in the inner expansion slot. Shipped Configuration 120 120 Preferred expansion slots 120 Installing expansion card here requires removal of card cage. } Figure 5c.
Installing Your CommPlete 4000 Powering Up Note: This is pluggable equipment; the socket outlet must be installed near the equipment and must be easily accessible. Make sure that the voltage selector on the power supply is set to the proper voltage prior to connecting this equipment to the main power. If the voltage selector needs to be changed, an ordinary pencil can be used to change the switch to the position which best correlates with the known input voltage.
Installing Your CommPlete 4000 Quick Start with RASExpress MultiTech Systems has preinstalled RASExpress server software on your CommPlete 4000 to make configuration as simple as possible. For your convenience, a copy of the RASExpress Installation program is on the CD-ROM shipped with the CommPlete 4000. Complete the procedure below to put your CommPlete 4000 into operation as a Remote Access Server.
Getting Started with RASExpress Method A. Do All Configuration using Terminal or Auxiliary PC A1. Be sure that the CommPlete 4000 is connected to the LAN. Turn off the power for the CommPlete 4000. A2. Using the provided RS-232C serial cable, connect a terminal (or an auxiliary PC) to the CommPlete 4000’s serial port.
Getting Started with RASExpress A12. In the Primary Name Server field and the Secondary Name Server fields, type 000.000.000.000 unless you have made other arrangements. A13. In the IP Frame Type field, select TYPE_II (the default value). A14. If you set the Remote Client IP Address field to the value Configure Per Port, follow these steps when this present Quick Configuration procedure is done: i. From the terminal main menu, select Configuration of server ii. Select Communication Setup. iii.
Getting Started with RASExpress Method B. Start Configuration with Terminal, Finish Configuration on Client PC To enable remote configuration of the RASExpress server, you must first configure the server’s IP settings, including the server’s IP address. To do this, you must connect a terminal (or auxiliary PC) to the server’s serial port.
Getting Started with RASExpress B10. Using Telnet for access requires that a TCP/IP protocol stack be loaded on the client PC. Telnet access is possible both by dialing in through the RASExpress server and, more commonly , through the LAN or Internet. Client PC running Telnet session, web, or Windows MultiManager CommPlete 4000 RASExpress Server Figure 9.
WINMCSI Workstation Redirector WINMCSI Workstation Redirector Note: This material is for IP or IPX network users only. This section describes how a client PC can use the MCSI (pronounced miksee) software redirector to access the RASExpress server’s modems when using standard communications software. WINMCSI.EXE is a Windows application for use with either IPX or IP networks. COMMAP.EXE can be used with either IPX or IP networks.
WINMCSI Workstation Redirector with the default IP router matched with the local IP address of the RASExpress server. 12. Click Continue. 13. When the Installing Multi-Tech WINMCSI dialog box appears, click Install. 14. When installation is complete, the WINMCSI Installation dialog box appears. WinMCSI Installation Your SYSTEM.INI and WIN.INI files need to be modified. You can let Install make the changes now or save the changes to a file. The following changes are to be made to the SYSTEM.
RADIUS Authentication & User Profile Software Running the WINMCSI Workstation Software Before running data communications software, LAN users should use WINMCSI to log on to the communications server. To log on to the communications server from a workstation 21. ComMap should start automatically if the WIN.INI file was modified during installation. To start ComMap manually, double-click the ComMap icon in the Start menu. 22. If you have not previously done so, select the Setup menu to configure ComMap.
RADIUS Authentication & User Profile Software RADIUS Authentication & User Profile Software Requirements Radius Server requires a 486-66 MHz or faster computer, preferably running Microsoft Windows NT Server. The computer should have a hard disk, a CD-ROM drive, and LAN or WAN access. Radius Server requires approximately 420 kB on the hard disk and space for the user database.
RADIUS Authentication & User Profile Software Radius Server Properties When Radius Server is running, the Radius Server icon appears in the Taskbar tray. To configure Radius Server, right-click the icon and select Properties from the context menu. The following dialog box appears: Authentication The RADIUS server port number. The default port number (1813) is required for Radius Server to work with RASExpress. Accounting The RADIUS accounting port number.
RADIUS Authentication & User Profile Software Realms The name of the realms file. The realms file is an ASCII text file that lists authentication servers to which a specific authentication request can be forwarded. This name cannot be changed. Max Authentication Threads The maximum number of threads that can be run at one time to perform authentication operations. Max Accounting Threads The maximum number of threads that can be run at one time to perform accounting operations.
RADIUS Authentication & User Profile Software (i). Auth-Type. This field specifies whether the authentication is done locally or by the system (for WindowsNT only). Values: Local or System. (ii). Password = Indicates that PAP is the authentication protocol. (iii). CHAP-Password = Indicates that CHAP protocol is the authentication protocol. (iv). Prefix and Suffix.
RADIUS Authentication & User Profile Software CommPlete 4000 Communications Server Quick Start Guide 23
S000347A