Model MT10100ZLX/E
Owners Manual MultiMobileTM Model # MT10100ZLX/E P/N 82071601 This publication may not be reproduced, in whole or in part, without prior expressed written permission from Multi-Tech Systems, Inc. All rights reserved. Copyright © 1997 by Multi Tech Systems, Inc. Multi-Tech Systems, Inc. makes no representations or warranties with respect to the content hereof and specifically disclaims any implied warranties of merchantability or fitness for any particular purpose. Furthermore, Multi-Tech Systems, Inc.
Contents Contents Chapter 1 - Introduction and Description ............ 5 About This Manual ................................................. 5 About This Product ................................................ 6 Network Interface Specifications .......................... 6 System Requirements ............................................. 7 Ship Kit Contents .................................................... 8 Chapter 2 - Installation ..........................................
Contents Service .................................................................... 44 About the Multi-Tech BBS ................................... 45 How to Use the Multi-Tech BBS .......................... 45 About CompuServe/Internet ............................... 46 About the Multi-Tech Fax-Back System ............. 47 Appendix A - Regulatory Agency Information .. 48 Index ......................................................................
Introduction/Description Chapter 1 - Introduction and Description About This Manual This manual explains how to install and use your Fast Ethernet PC Card, model MT10100ZLX/E from MultiTech Systems. This manual is divided into 5 chapters and one appendix.
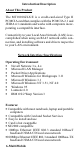
Introduction/Description About This Product The MT10100ZLX/E is a credit-card-sized Type II PCMCIA card that complies with the PCMCIA 2.1 and JEIDA 4.1 standards and works with computers incorporating a compatible interface. Connectivity to your Local Area Network (LAN) is accomplished when using an RJ-45 network cable connection, and installing software and drivers respective to your LAN environment. Network Interface Specifications Operating Environment: • Novell Netware 3.x, 4.
Introduction/Description •Auto-negotiation between all four operation modes •PCMCIA 2.0/2.1 and PC Card Standard compliant Type II PC Card Dimensions: •3.37 x 2.128 x 0.197 (86mm x 54mm x 5.
Introduction/Description Ship Kit Contents Your MT10100ZLX/E is shipped from the factory with the following: • Fast Ethernet PC Card Adapter • Media coupler with single RJ-45 connector for 10BASE-T and 100BASE-TX network • 3.
Hardware Installation Chapter 2 - Installation This chapter describes how to install the dual speed Fast Ethernet PC Card into your notebook computer and connect it to the network. The PC Card can connect to either 100Mbps Fast Ethernet or 10Mbps Ethernet over unshielded twisted pair (UTP) cable; and can automatically sense and operate at either speed without having to be manually reconfigured.
Hardware Installation 2. Plug the 15 pin connector into the 15 pin socket of the PC card. On the other end of the 15-pin cable, leave the RJ-45 network cable exposed until the LAN connection is made; hardware installation is now complete. The MT10100ZLX/E is powered directly from the PC. 3. Connect the MT10100ZLX/E to the network (LAN) using the bundled RJ-45 (8-pin) plug.
Hardware Installation Figure 2-2.
Software Installation CHAPTER 3 - SOFTWARE INSTALLATION 1. Insert the Driver diskette into the floppy drive and set the current drive to the floppy drive. 2. Run INSTALL to install the drivers (such as ODI or NDIS 2.x or Packet Drivers) onto the target disk. The NOS selection screen is displayed: Figure 3-1. NOS Selection Screen Novell NetWare There are two methods to install the NetWare client ODI driver: Menu Installation and NetWare 3.12 or 4.x Client Installation.
Software Installation Menu Installation 1.Run INSTALL.EXE from the root directory of driver diskette. 2.Select NetWare 3.x and 4.x Workstation item from the Installation menu. 3.If current settings are acceptable, select Start Installation and go to step 5. Otherwise, select Modify Parameters to make setting changes. 4. Move the cursor to highlight the settings you want to change and press Enter to select an appropriate value. When the configurations are set, press Enter on the OK field to exit the screen.
Software Installation Manual Driver Installation If you wish to install the ODI driver manually, perform the following: 1.Copy the files LE100ODI.COM and NET.CFG from the path \NETWARE and the file LANEN.EXE from the path \ENABLER in the driver diskette into the NetWare client directory containing Novells LSL.COM, IPXODI.COM and NETx.COM files. 2.Use a text editor to edit the NET.CFG file for setting the Frame Type. On the NetWare server, the Frame Type default is 802.3 for NetWare 3.11, and 802.
Software Installation administrator, or b. run the \NWCLIENT\INSTALL.EXE used in a previous Installation. 2. Answer Yes. The program then modifies your AUTOEXEC.BAT and CONFIG.SYS files accordingly and creates backup copies. The following message appears: Install support for MS Windows? (Y/N): . 3. Answer accordingly and provide a path if necessary. The program displays the following: Configure your workstation for backup by a NetWare server running software such as BACKUP? (Y/N): No 4.
Software Installation the file. STARTNET.BAT for the ODI workstation performs as the following LANEN /IOP=nnn /IRQ=n Card Enabler SET NWLANGUAGE=ENGLISH Set NetWare 4.X to English language LSL Link Support Layer Module provided by Novell LE100ODI Hardware Specific Module IPXODI IPX Protocol Stack Module provided by Novell VLM DOS Support Module provided by Novell F: Change to connected device LOGIN xxx Login to file server as user xxx 15.Run STARTNET to access the Novell network. MS LAN Manager 1.
Software Installation to exit the screen and go back to step 4. 6.The Installation program copies related files from the driver diskette to the destination directory and modifies CONFIG.SYS and PROTOCOL.INI under users agreement. 7. Reboot the computer to load driver and start LAN Manager in batch. 8. Highlight Start Installation and press Enter to start the LAN Manager in batch mode. Figure 3-3. Microsoft LAN Manager Installation Screen Example of PROTOCOL.
Software Installation [LE100NDS_NIF] ; protocol.ini session for LAN driver. IOADDRESS = 0x320 INTERRUPT = 11 DRIVERNAME = LE100NDS$ Packet Driver 1.Run INSTALL.EXE from root directory of driver diskette. 2.Select Packet Driver item on the Menu screen. 3.If current settings are acceptable, select Start Installation and go to step 5. Otherwise, select Modify Parameters to make setting changes. 4. Move the cursor to the field you want to change and press Enter to select a new value.
Software Installation 4.Click the Drivers... button to select network driver. 5.In the Network Drivers dialog box, press the Add Adapter... button to enter Add Network Adapter dialog box. Select Unlisted or Updated Network Adapter and press OK. 6.Windows prompts a Install Driver dialog box. At this time, place the driver diskette into floppy drive and press OK. 7.Select the Enhanced mode NDIS3 for.... string and press OK. 8.Follow Windows instructions to complete the installation and exit Windows 9.
Software Installation before Install Microsoft Windows Network and No Additional Network. Press OK to go back the Network Settings screen. 4.Click the Drivers... button to select network driver. 5.In the Network Drivers dialog box, press the Add Adapter... button to enter Add Network Adapter dialog box. Select Unlisted or Updated Network Adapter and press OK. 6.Windows will prompt a Install Driver dialog box. In this time, put the driver diskette into floppy drive and press OK. 7.
Software Installation Networks... button to select the network operating system. 3.In the Networks dialog box, check Install Microsoft Windows Network and Others, thereafer select Novell NetWare (Workstation Shell, 3.X) or Novell NetWare (Workstation 4.0 and above) and press OK to enter the screen of PXODI.COM and LSL.COM 4. Press OK to go back the Network Setup screen. 5.Click on the Drivers... button to select network driver. 6.In the Network Drivers dialog box, press Add Adapter...
Software Installation 15.Reboot the computer to have the selected driver take effect. Windows NT 3.51 1.In the Main Group of NT 3.51, open Control Panel and click on the Network icon. 2.In the Network Settings dialog box, push Add Adapter... button. The Add Network Adapter dialog box will appear. 3.Choose Others requires disk from manufacturer from the network adapter card list and press Continue.. 4.
Software Installation Windows 95 Installation 1. We assume that the PCMCIA Chipset drivers are loaded and functioning. The System Icon in the Control Panel can report on its functionality. Any questions on this layer must be taken up with the computers manufacturer. 2.Insert the PC Card into the slot. In New Hardware Found dialog box, select Driver from disk provided by hardware manufacturer. Figure 3-4. Windows 95 Driver Installation Screen 3. Type the full path (e.g.
Software Installation Artisoft Lantastic 6.0 Installation 1.Install LANTASTIC 6.0 first. 2.Run INSTALL.EXE from root directory of driver diskette. 3.Select LANTASTIC 6.0 in Network Operating System screen. 4.If current settings are acceptable, select Start Installation and go to step 6. Otherwise, select Modify Parameters to change settings. 5.Move cursor to highlight each field you want to change and press Enter to select a new value.
Software Installation 2.Double-click on the System Setup icon. 3.Double-click on the Selective Install icon. 4.Select the PCMCIA Support button. 5.Select PCMCIA system. For example : select IBM ThinkPad 750 6.Click OK. 7.Click Install 8.Select the source drive and directory For Example D:\OS2IMAGE 9.Click Install 10.Click OK Section B Install NDIS2 driver for IBM LAN Server 4.0 1.In the OS/2 Desktop group, double-click on the MPTS icon. 2.Click on the Configure button. 3.
Software Installation lation. If not, go to section A (Enable PCMCIA Service of OS/2 Warp) to install the PCMCIA Service. A. Enable PCMCIA Service of OS/2 Warp 1.In the OS/2 Desktop group, double-click on the OS/2 System icon. 2.Double-click on the System Setup icon. 3.Double-click on the Selective Install icon. 4.Select the PCMCIA Support button. 5.Select PCMCIA system. For example: select IBM ThinkPad 750 6.Click OK. 7.Click Install 8.Select the source drive and directory For Example D:\OS2IMAGE 9.
Software Installation 16.Click the Save button 17.Click OK 18.Click the Copy button 19.Insert diskette labeled WSOS2_2 and Click OK 20.Insert diskette labeled WSOS2_3 and Click OK 21.Insert diskette labeled OS2UTIL1 and Click OK 22.Insert diskette labeled WSDRV_1 and Click OK 23.Insert diskette labeled OS2DOC_1 and Click OK 24.Insert Fast Ethernet PC Card Ethernet Adapter driver diskette 25.Close Installation window to exit install 26.Copy following driver to C:\NETWARE directory COPY A:\OS2\ODI\LE100ODI.
Software Installation NOTES FOR NDIS DRIVER The following are examples of partial CONFIG.SYS file and AUTOEXEC.BAT for loading SystemSoft Card Services and NDIS2 driver: Examples of partial CONFIG.SYS file: DEVICE=C:\CARDSOFT\SS365SL.EXE DEVICE=C:\CARDSOFT\CS.EXE DEVICE=C:\CARDSOFT\CSALLOC.EXE C:\CARDSOFT\CSALLOC.INI DEVICE=C:\CARDSOFT\CARDID.EXE device=c:\lanman.dos\drivers\ethernet\le100\lanen.exe device=c:\lanman.dos\drivers\protman.dos /I:c:\lanman.dos device=c:\lanman.
Software Installation INTERRUPT - value where values is one of the following interrupts: 3, 4, 5, 7, 9, 10, 11, 12, 15. To have Card Services select an available interrupt resource then place a value of 0 at this location. NOTES FOR PACKET DRIVER The following are examples of partial CONFIG.SYS file for loading SystemSoft Card Services and Packet Driver: Examples of partial CONFIG.SYS file: DEVICE=C:\CARDSOFT\SS365SL.EXE DEVICE=C:\CARDSOFT\CS.EXE DEVICE=C:\CARDSOFT\CSALLOC.EXE C:\CARDSOFT\CSALLOC.
Software Installation DEVICE=C:\CARDSOFT\CARDID.EXE device=c:\wfw311\lanen.exe DEVICE=C:\WFW311\IFSHLP.SYS Examples of partial AUTOEXEC.
Troubleshooting Chapter 4 - Troubleshooting Introduction This chapter provides a number of examples of Questions (Q:), Causes (C:), and Answers (A:). If your Ethernet PC card is not working properly, look up the solution here; if unsuccessful, call Tech Support (see Chapter 5). Q:The Card Service does not enable my card. When I run LANEN, the error message displays Fail to enable PC card. Why? C:No memory space to map the attribute memory of PCMCIA card. A:If memory management software e.g.
Troubleshooting Q:How do you enable the FAST Ethernet PC card? A:1.The Fast Ethernet PC Card can be enabled by the Card Service installed in the laptop directly. The drivers associated with the card in the driver diskette can be run over Card Service directly. 2.In case the Card Service cannot enable the PCMCIA card, you can run LANEN to enable it. Q:How do you make the card work under Systemsoft Card Service? A:1.Copy across the LE100.CLB file. Copy FROM A:\PCMCIA\CARDSOFT\LE100.CLB TO C:\CARDSOFT\LE100.
Troubleshooting Lan1MemoryBase2=D4 Lan2Port=320 Lan2IRQ=11 Lan2MemoryBase1=D8 Lan2MemoryBase2=DC You may change the Lan1Port or Lan1IRQ to another value (e.g. Lan1Port=320, Lan1IRQ=11) to request Cardsoft allocate the resources you wanted. 4.If the resources cannot allocate properly, you may run \CARDSOFT\CONFIG or edit \CARDSOFT\CSALLOC.INI directly to set the system resources available for allocation. The file content of CSALLOC.
Troubleshooting Q:How do you make the card work under Phoenix Socket/Card Service? A:Add a card to PCM. Once the card is added, you may use PCM to modify the resources requested for the card. 1.Insert the MT10100ZLX/E into the computers PCMCIA slot with the 68-pin connector facing the PCMCIA slot and the label facing up and slide the card into the slot. 2.Execute PCM.EXE supported by Phoenix PCM. 3.Select the socket by the PageUp, Page Down keys. 4.Choose Configure item by ALT-C. 5.
Troubleshooting called LE100, go to step (11). 5.Select New Device under the Defined devices box. 6.Edit the new device to be named LE100. 7.Select IO range 1 Base (Hex) = 320, Length = 32 (16 bit). 8.Do not alter MEM range 1 or 2. 9.Select IRQ level 11. Select OK to make changes. 10.On the Edit card screen, highlight the LE100 device in the defined devices box. 11.Transfer the LE100 to the Associated box with the Include command. 12.Select OK to complete editing and return to Main screen. 13.
Troubleshooting type is not acceptable, edit NET.CFG to change the frame type at the client site or add the frame type that can be accepted at server site. Q:What to do should your Driver installation fail? A:1.Insert the MultiMobile PC Card into any one available PC Card Slot in your computer. The BIOS detects Plug and Play NIC. Place the Driver diskette into the computers floppy drive and Click NEXT. Figure 4-1. Update Driver Installation Display 2.
Troubleshooting Figure 4-1a. Update Driver Installation Display 3. Keystroke in your corresponding operating system (e.g., a:\Win95), or Figure 4-2.
Troubleshooting 3a. Click on BROWSE where other subdirectories exist, and other operating systems can be chosen. Figure 4-2a. Browse for Drivers Operating System 4. Upon choosing your corresponding operating system, Click FINISH to install the driver.
Troubleshooting Figure 4-3.
Service Chapter 5 - Service This chapter begins with the terms of your MT10100ZLX/Es warranty. Read carefully the next section, Tech Support, if you have questions or problems with your MT10100ZLX/E. It includes telephone numbers and an explanation of how to send in your MT10100ZLX/E should you require service. The final sections explain how to use our bulletin board service (BBS), and get support through CompuServe, the Internet and the Multi-Tech Fax-Back System.
Service MTS WILL NOT BE LIABLE FOR CONSEQUENTIAL DAMAGES AND UNDER NO CIRCUMSTANCES WILL ITS LIABILITY EXCEED THE PURCHASE PRICE FOR DEFECTIVE PRODUCTS. Software User License Agreement The MT10100ZLX/E software is licensed by MultiTech Systems, Inc. to the original end-user purchaser of the product, hereafter referred to as licensee. The License includes the distribution diskette, other accompanying programs, and the documentation.
Service The Licensee hereby agrees not to provide or otherwise make available any portion of this software in any form to any third party without the prior express written approval of Multi-Tech Systems, Inc. Licensee is hereby informed that this software contains confidential, proprietary and valuable trade secrets developed by or licensed to Multi-Tech Systems, Inc. and agrees that sole ownership shall remain with Multi-Tech Systems, Inc. The Software is copyrighted.
Service Tech Support Multi-Tech has an excellent staff of technical support personnel available to help you get the most out of your Multi-Tech product. If you have any questions about the operation of your Multi-Tech MT10100ZLX/E, please call 1-800-972-2439. The software version numbers are printed on the diskette labels.
Service Service If your tech support specialist decides that service is required, you may send your MT10100ZLX/E to our factory (freight prepaid). Return shipping charges will be paid by Multi-Tech Systems (with North America). Include the following with your MT10100ZLX/E: · A description of the problem. · Return billing and return shipping addresses. · Contact name and phone number. · Check or purchase order number for payment if the MT10100ZLX/E is out of warranty.
Service About the Multi-Tech BBS Multi-Tech Systems maintains a bulletin board system (BBS) for its customers. The information available via the BBS includes new product information, product upgrade data, problem-solving tips, and a message service you can use to request additional information. The phone number for the Multi-Tech BBS is (612) 7853702 or (800) 392-2432 (USA and Canada).
Service second L, you will list all of the files on the BBS. At the list of directories, select the number of the directory required. A list of files and a description for each of the files will be displayed. Select a file that you would like to download. If you already know the file name, type D at the Files Menu to download the selected file(s). Type V to view a text file. 6. At the Message Menu, you can leave a message to the sysop (you cannot read messages at this point).
Service About the Multi-Tech Fax-Back System Multi-Techs fax-back system provides 24-hour access to sales/marketing and technical literature. Dial (612) 717-5888, follow the voice prompts, and enter the document number for either the Sales and Marketing catalog or the Technical Support catalog of available documents. For convenience, have your fax number handy: _________________________.
Regulations APPENDIX A - REGULATORY AGENCY INFORMATION FCC REGULATORY STATEMENTS Consumer Instructions 1. This equipment complies with part 68 of the Federal Communications Commission Rules. On the outside surface of this equipment is a label that contains, among other information, the FCC registration number and ringer equivalence number (REN). If requested, this information must be provided to the telephone company. 2.
Regulations 6. The telephone company may make changes in its facilities, equipment, operations, or procedures that could affect the operation of the equipment. If this happens, the telephone company will provide advance notice in order for you to make necessary modifications in order to maintain uninterrupted service. 7. If trouble is experienced with this equipment (the model of which is indicated below) please contact Multi-Tech Systems, Inc.
Regulations In order to program this information into your fax machine please refer to the installation instructions. Manufacturer: Trade Name: Model Number: FCC Registration #: Modular Jack (USOC): Service Center in USA: Multi-Tech Systems, Inc. MultiMobile MT10100ZLX/E RJ45 Multi-Tech Systems, Inc.
Regulations Reorient or relocate the receiving antenna Increase the separation between the equipment and receiver. Connect the equipment into an outlet on a circuit different from that to which the receiver is connected. Consult the dealer or an experienced radio/TV technician for help.
Regulations This device complies with Part 15 of the FCC rules. Operation is subject to the following two conditions: (1) This device may not cause harmful interference. (2) This device must accept any interference that may cause undesired operation. Warning: Changes or modifications to this unit not expressly approved by the party responsible for compliance could void the users authority to operate the equipment.
Regulations the user to this equipment, or equipment malfunctions, may give the telecommunications company cause to request the user to disconnect the equipment. Users should ensure for their own protection that the electrical ground connections of the power utility, telephone lines and internal metallic water pipe system, if present, are connected together. This precaution may be particularly important in rural areas.
Regulations EMC, Safety, and Terminal Directive Compliance The CE mark is affixed to this Multi-Tech product to confirm compliance with the following European Community Directives: Council Directive 89/336/EEC of 3 May 1989 on the approximation of the laws of Member States relating to electromagnetic compatibility; and Council Directive 73/23/EEC of 19 February 1973 on the harmonization of the laws of Member States relating to electrical equipment designed for use within certain voltage limits; and Counci
Index Index A About This Manual ................................................. 5 About This Product ................................................. 6 Artisoft Lantastic 6.0 Installation ......................... 24 Award Socket/Card Service .................................. 34 B Browse for Drivers Operating System ................. 38 Bulletin board systems ............................................ 45 C Canadian Limitations Notice ................................ 52 Certifications .............
Index F FCC Regulatory Statements .................................. 48 Features ................................................................... 6 I IBM OS/2 Warp .................................................... Installation ....................................................... 9, Installing Card(s) ............................................. 9, Introduction and Description ............................ 5, 24 12 10 31 L LED Functions ......................................................
Index O ODI Driver for IBM OS/2 Warp ........................... 25 ODI Driver for Workgroups ................................. 20 ODI Driver/Netware server .................................. 35 On-line Warranty Registration .............................. 43 Operating Environment ........................................... 6 P PACKET DRIVER ......................................... 18, 29 PC Card Installation ................................................ 9 PCMCIA Service of OS/2 Warp ..................
Index Windows for Workgroups 3.11 ............................. WINDOWS FOR WORKGROUPS DRIVER ...... Windows NT 3.51 ................................................. Windows NT 4.0 ....................................................