
User guide


Cabling
11
Cabling Procedure
Step Procedure
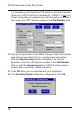
1. Connect one end of the power supply to a live AC outlet
and connect the other end to the DSU RouteFinder as
shown in Figure 6. The power connector is a 6-pin circular
DIN connector.
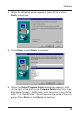
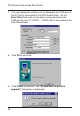
2. Connect the DSU RouteFinder to a PC using the RJ-45 to
DB-9 (female) cable provided with your unit. Plug the RJ-
45 end of the cable into the Command port of the DSU
RouteFinder and the other end into the PC’s COM port.
See Figure 6.
3. Connect a network cable to the ETHERNET 10BASET
connector on the back panel of the DSU RouteFinder.
Connect the other end of the cable to your network.
4. Connect one end of an RJ-45 cable to the 56K DSU
connector on the back of the DSU RouteFinder. Connect
the other end to your Digital Data Service (DDS) WAN
connection.
5. If you plan to use the optional RS232 port for dial backup,
connect one end of an RS232 cable to the RS232/V.35
connector on the back panel of the DSU RouteFinder and
connect the other end of the cable to an external DCE
device such as a modem or T1/E1 CSU/DSU.
6. Turn on power to the DSU RouteFinder by setting the ON/
OFF switch to the ON position. Wait for the FAIL LED on
the DSU RouteFinder to go OFF before proceeding. This
may take a couple of minutes to go OFF.
At this time your DSU RouteFinder is completely cabled.
Proceed to the next section to load the RouteFinder software.