
Specifications


6-1
Section 6
Options
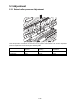
6.1 Memory Upgrade
An optional 8 MB document memory upgrade is available for the F-320.
An optional 8 MB or 24 MB document memory upgrade is available for the F-360.
Packaging contents:
(1) Memory PCB........................ 1
(2) Spacer .................................. 1
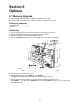
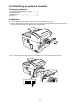
Installation
1. Turn the fax machine off and remove the power cord and telephone line cord.
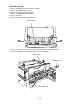
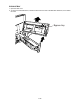
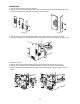
2. Remove the REAR COVER and then remove the SHIELD PLATE.
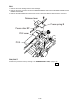
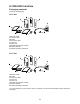
3. Attach the SPACER to the expansible MEMORY PCB.
4. Connect the MEMORY PCB to the connector (P16) on the unit’s Main control PCB.
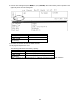
TBD
F-320 F-360
5. Plug the power cord and turn the unit on.
6. Clear the DRAM backup (Press MENU, *, 1, 6, ENTER.)
Important: The DRAM clear setting will erase all documents in memory.
7. Perform a DRAM check whenever an optional memory upgrade is added to the unit.
(Press MENU, *, 1, 1, then select “DRAM Check”, then press ENTER. See page 3-111 for more detail
of the DRAM check.)