Muratec MFX-2500 Operating Instructions Fax Reference
Trademarks Muratec, the Muratec logo and all Muratec fax product names contained herein are trademarks of Murata machinery, Ltd. and Muratec UK, Ltd. ENERGY STAR is a registered mark of the United States Environmental Protection Agency. Copyright Copyright © 2000 by Murata/Muratec; all rights reserved. As an Energy Star® partner, Muratec has determined that this product meets the Energy Star guidelines for energy efficiency.
Introduction Thank you for choosing the Muratec MFX-2500. The Muratec MFX-2500 is a multi-function machine, combining facsimile and copier features. The operating instructions for this machine are divided into three books. Please read the instructions you carefully. • “General reference” — Describes the basic operations and basic caring of your machine. Covers what you have to know to use your machine immediately. • “Fax reference”(This book) — Describes the various faxing features.
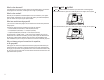
What’s a fax document? About A fax document is anything a fax user wants to fax to someone else. It can be one or more pages, and it can be text, a drawing or even a copy of a photograph. and symbol indicates the direction of your document or recording paper. When the document or paper has a width longer than its length, we use symbol and symbol . What’s a fax number? Because your fax operates on standard phone lines, a fax number is just a regular phone number.
Table of contents Introduction Symbol and terms (Operating tips) . . . . . . . . . . . . . . . . . . . . . . . . . . . . . . . . . . i About and symbol . . . . . . . . . . . . . . . . . . . . . . . . . . . . . . . . . . . . . . . . . . . ii Getting started Control panel . . . . . . . . . . . . . . . . . . . . . . . . . . . . . . . . . . . . . . . . . . . . . . . . . .1.1 Panel display (Liquid Crystal Display) . . . . . . . . . . . . . . . . . . . . . . . . . . . . .1.3 Fax standby display . . . . . . . . .
Audible alarm . . . . . . . . . . . . . . . . . . . . . . . . . . . . . . . . . . . . . . . . . . . . . .2.25 Call request . . . . . . . . . . . . . . . . . . . . . . . . . . . . . . . . . . . . . . . . . . . . . . .2.25 The power of multi access . . . . . . . . . . . . . . . . . . . . . . . . . . . . . . . . . . . .2.26 F-Code communication . . . . . . . . . . . . . . . . . . . . . . . . . . . . . . . . . . . . . . . . .2.27 F-Code: an introduction . . . . . . . . . . . . . . . . . . . . . . . . . . . . .
This page intentionally blank.
Getting started ControlControl panel . . . . . . . . . . . . . . . . . . . . . . . . . . . . . . . . . . . . . . . . . . . . . . . . . 1.1 Panel display (Liquid Crystal Display) . . . . . . . . . . . . . . . . . . . . . . . . . . . . . . . . . . . 1.3 Some guidelines . . . . . . . . . . . . . . . . . . . . . . . . . . . . . . . . . . . . . . . . . . . . . . . . . . . . . 1.5 Sending a fax . . . . . . . . . . . . . . . . . . . . . . . . . . . . . . . . . . . . . . . . . . . . . . . . . . . . . . . 1.
Getting started Control panel 3 4 23 22 21 5 6 7 8 9 1011 12 2 1 1 2 3 4 5 6 7 CONTRAST 20 — Press to adjust the contrast level. RESOLUTION — Press to toggle among the three resolution modes and 256level grayscale. REDUCE/ENLARGE — Press to choose one of several preset enlargement ratios for enlarge transmission. (In fax mode, the reduction ratios are not used.) Liquid crystal display (LCD) — Shows the machine’s status and lets you see what you’re programming into the machine.
Getting started 14 Soft keys — Shortcut keys. Any function that can be turned on or off can be programmed into these four keys. If the light above one of these keys glows, this indicates the setting that’s been programmed into it (see page 2.15) is turned on. These keys are programmed at the factory to turn the following functions on or off: Soft key 1: STAMP — Press this key to set the machine to stamp each original document or page automatically when the machine scans it successfully.
Getting started Panel display (Liquid Crystal Display) Fax standby display The LCD shows the machine’s status and messages you through operation. Note: Make sure the machine is in the fax mode. If the machine is not in the fax mode, press FAX change to the fax mode. Machine’s status. Fax reception mode. Amount of memory available. In this area, displays the operational status, items and any messages. Various items are displayed according to the operation.
Getting started Communication options menu display Machine setting menu display To access the communication options menu, press MENU. To access the machine setting menu, press MENU, [Mach Set]. (In “Beyond the basics,” beginning on page 2.1, we’ll explain these functions) Fax setting menu display To access the fax setting menu, press MENU, [Fax Set]. (In “Beyond the basics,” beginning on page 2.1, we’ll explain these functions) 1.4 (See “General reference” for details.
Getting started Some guidelines Acceptable document size The acceptable dimensions as follows: •In the Automatic Document Feeder(ADF) How to set the document •On the Flatbed Scanner(FBS) glass Feed direction When setting the documents in the Automatic Document Feeder 1 2 3 Align your document to the rear left corner. Adjust the document guide to fit your documents. Set your document face up into the document feeder. Note: You cannot set the different sized document at a time.
Getting started Resolution, grayscale and contrast Mixing resolution and contrast in a multiple page Reviewing resolution and grayscale: When you send the document with more than one page, you can select different resolutions and contrasts for each page. Place your document, select resolution and contrast for first page, dial and press START. Then follow one of the following two procedures. • Normal resolution is suitable for most typed documents and simple drawings.
Getting started TTI select Select scanning size to be sent When you send a fax message, your TTI is automatically printed at the top of documents you send. You can select one of three TTI you’ve stored in your machine. When you send or store your document, usually the machine automatically detects the size of your document when it is placed on the ADF or FBS glass. However, if you wish to override this and select scanning size manually, proceed to the following steps.
Getting started Sending a fax Using memory transmission Your fax machine has a great memory! Take advantage of it, and you could: Save Time. By using your fax machine’s memory, you won’t have to wait for your machine while it completes the transmission. Simply scan your document into your fax machine’s memory, and you can walk away with your original in hand. Save Money.
Getting started 7 Now, everything is up to the machines — yours and the one you’re dialling. • If the fax has been set for Quick Memory transmit, your machine scans the first page of your document into memory, then dials the other fax. When it makes contact, your machine transmits the stored document from memory while at the same time scanning the remaining pages of your document into memory. (To set Quick Memory transmission, see page 3.2.
Getting started 7 8 9 10 If you want to send more pages, proceed to step 8. Otherwise, press START to start the transmission, and skip to step 9. Place the next page, then press [Start] to start scanning. Sending a fax using monitor/call or a handset You also can fax a document using either the monitor speaker or the optional handset to dial the call. To send any more pages, repeat this step. Otherwise, press [Exit] to start the transmission, and skip to step 9. 1 Place the document in the ADF.
Getting started Redialling If your fax call fails, your machine automatically redials it. In the Auto Redial mode, your fax automatically redials the number every minute until one of the following happens: • It reaches the remote fax machine. • It has attempted the two redials and has still not connected. While in the Auto Redial mode, the machine can continue to receive faxes and can make as many as 100 fax transmissions.
Getting started Receiving faxes Answering calls manually Reception modes In any reception mode, you can always answer calls manually if you have an optional handset installed. Just pick it up, as you would if using a normal phone. Your fax machine has five different reception modes — Tel Ready, Fax Ready, Fax/Tel Ready, Tel/Fax Ready and Ans/Fax Ready. We’ll explain each of these in this section. If you hear someone speaking to you, use your optional handset to speak back.
Getting started Fax/Tel Ready mode Using an answering machine with your fax machine The Fax/Tel Ready mode is a combination of the Fax Ready and Tel Ready modes. To connect your answering machine to your fax machine: Use it if: An optional handset is installed on your fax machine and You’re using the machine as both a fax machine and a telephone In this mode: Your fax machine answers each call without ringing. If you receive a voice call, it alerts you with a special ring.
Beyond the basics Autodialer . . . . . . . . . . . . . . . . . . . . . . . . . . . . . . . . . . . . . . . . . . . . . . . . . . . . . . . . . . 2.1 Broadcasting . . . . . . . . . . . . . . . . . . . . . . . . . . . . . . . . . . . . . . . . . . . . . . . . . . . . . . . . 2.9 Delayed transmission . . . . . . . . . . . . . . . . . . . . . . . . . . . . . . . . . . . . . . . . . . . . . . . . 2.10 Batch transmission . . . . . . . . . . . . . . . . . . . . . . . . . . . . . . . . . . . . . . . . . . . . . . .
Beyond the Basics Autodialer Your fax machine’s autodialer stores your most frequently called phone and fax numbers for instant recall so you don’t have to remember them. It’s something like an electronic phone book. Autodialer basics Special Dialling Characters Your fax machine allows you to enter special dialling characters when programming the autodialer. These characters include hyphens and dashes, which make phone numbers easier to read, and special characters needed for international calls.
Beyond the Basics Using one-touch numbers Your fax machine stores up to 78 one-touch numbers using the keys marked 01–78. 6 Entering or changing a one-touch number 1 2 Press MENU, A, [Enter]. The LCD shows the one-touch number list. 3 4 Press [Enter]. 5 2.2 Select the one-touch key in which you want to store a number or change a previously stored number. Note: You can select the one-touch key by pressing that key on the control panel.
Beyond the Basics 10 To enter the Alternative number: Select the “Alt.No.” and press [Enter]. Note: If a alternative number is already registered in this one-touch key, it is shown on the LCD. If you wish to change alternative number, press the [Clear] to erase it and then enter another number. 11 12 13 Enter the alternative number using the numeric keypad. The number can be up to 40 characters long. Press MENU, A, [Enter]. The LCD shows the one-touch number list.
Beyond the Basics One-touch fax dialling Using speed-dial numbers To dial a fax call using a one-touch number: Your fax machine can store up to 222 speed-dial numbers, designated by three-digit identifier codes from 001 through 222. 1 2 3 Place the document and select resolution and contrast you require. Toggle between transmission from the feeder or from memory if necessary, by pressing MEMORY TRANSMIT. Press the one-touch key in which you’ve stored the number.
Beyond the Basics 6 Next, the LCD now displays (see right): You can also program the following three items: • Location ID (“Location” on the LCD) — The destination name. If you enter the name, you can use the EasyDial directory dialling function (see page 2.8). • Alternative number — After all redial attempts to the regular number fail, your fax machine will dial this alternative number. If the alternative number also fails, the fax alarm beeps to alert you of a problem.
Beyond the Basics Erasing a speed-dial number 1 2 3 4 Press MENU, B, [Enter]. The LCD shows the speed-dial number list. Select the speed-dial number in which you want to store a number or change a previously stored number. Note: You can select the speed-dial number by directly entering that threedigit identifier code. When entering the identifier code for speed-dial numbers less than 100, you must enter leading zeroes to make three digits. For example, 001-099.
Beyond the Basics Using call group Printing a group directory If you frequently send the same fax message to more than one location, store the group number into your autodialer. (If necessary, see “Using a one-touch dial” and “Using speed-dialling”, in previous page.) After you store the group number, you can send the same fax to many different locations.
Beyond the Basics EasyDial directory dialling If an EasyDial call fails EasyDial directory dialling makes your autodialer even more like an electronic phone book. EasyDial sorts and displays numbers alphabetically according to their Location IDs, so you can find them and dial them easily. To dial using EasyDial: If an EasyDial call fails, what happens next depends upon the kind of call it was. 1 For a fax call: Place the document and select resolution and contrast you require.
Beyond the Basics Broadcasting Broadcasting basics Delayed broadcasting The fastest way to fax one document to many recipients is to broadcast it. In an ordinary broadcast, you send the fax as you normally would, except you add more fax numbers. You can enter up to 330 numbers: • 30 manually-dialled numbers AND • 300 autodialer numbers OR 1 call group with all 300 autodialer numbers You can broadcast using any function that requires a fax number to be entered.
Beyond the Basics Delayed transmission Take advantage of lower evening and weekend long-distance rates with delayed transmission. Your fax machine can store up to 100 delayed commands, each of which you can program up to 31 days in advance. 6 Enter the fax number for the delayed transmission document. You can either press a one-touch key, enter a speed-dial number or use the numeric keypad to enter the fax number. Note: If you want to erase characters, press [Clear] to erase to the left.
Beyond the Basics Reviewing or cancelling delayed commands Reviewing or cancelling parts of a broadcast If you’ve stored a delayed command in your fax machine, it will hold it in memory until it either completes the command successfully or reaches its maximum number of redial attempts (see pages 1.11 and 3.6). Your machine can store up to 100 delayed commands. It identifies each by a three-digit command number ranging from 001 to 100.
Beyond the Basics Batch transmission Batch transmission allows you to store multiple documents in an electronic “basket” throughout the day and then fax that entire basket to one location. To do this, just tell the machine when and where the transmission should go. When that date and time arrives, your machine will transmit each document in the batch box to the remote fax machine.
Beyond the Basics Printing a list of batch boxes Storing a document for batch transmission You can easily print a list of your batch boxes. The list includes each box’s identifier number, the Location ID, fax number and date/time the transmission should start. To print the list, press MENU, M, [Box List]. Your fax machine can store up to 40 documents (each document can include one page or many pages) in each batch box until the date and time you designate the batch transmission to take place.
Beyond the Basics Printing a document stored in a batch box To print a document stored in a batch box: 1 2 3 4 5 Press MENU, M, [Enter]. Select the batch box storing the document you want to print. Press [Document]. Select the document’s file number (01–40). Press [PrintDoc]. Your fax machine prints the document, then returns to standby mode. Erasing a document stored in a batch box To erase a document stored in a batch box: 1 2 3 4 5 2.14 Press MENU, M, [Enter].
Beyond the Basics Special features Your fax machine has numerous special features to make your communication easier. We’ll cover them here. Soft Keys Soft Keys are shortcut keys. You can program the soft keys on the control panel to turn on or off any function with just the touch of a button. Your machine has four Soft Keys. If the light above any one of these keys glows, that means the setting programmed into that key is active.
Beyond the Basics Macros Note: One Macro key can hold only one job. It cannot combine two or more jobs. Note: Macro key can hold not only faxing job, but also it can hold the copier job. Communications functions: • Delayed transmission (explained on pages 2.10–2.11) • Regular polling (page 2.22) • Continuous polling (page 2.22) • Batch transmission (pages 2.12–2.14) • F-Code transmission (page 2.35) • F-Code polling (pages 2.35–2.36) Copy: • Copier settings (see page 2.12 on “Copy Reference”).
Beyond the Basics 5 6 Erasing a Macro key The LCD of copy standby mode appears, which means the machine is ready to register the steps into the Macro key. Note: It keeps beeping and blinking the COPY or FAX key during the job registration in order to make notice of the registration mode. A4 A4 Press the keys exactly as you operate the job you want to program into the Macro key. Note: If you want to program the fax function, first press FAX.
Beyond the Basics Fax dialling with the Macro key Setting the activity journal To dial a fax call using a Macro key: Just as a checkbook records your daily financial transactions, your fax machine keeps an activity journal which records its 100 most recent fax transactions.
Beyond the Basics Setting the reports: TCRs and RCRs Your fax machine can print reports of transmissions and receptions. There are two different reports: a transmit confirmation report (TCR) and a receive confirmation report (RCR). You can receive a TCR after sending a fax to any Group 3 fax machine, but the RCR function works only when you send a fax to a compatible Muratec machine. (Consult your authorized Muratec dealer with any questions about such compatibility.
Beyond the Basics Enlarge transmission Fax & Copy You can transmit your document with enlarging. With the Fax & Copy feature turned on, your machine asks if you want to make a copy of a document each time it transmits that document from memory. Note: You can select a preset enlargement ratio, or directly enter the ratio using the numeric keypad. Also, you can use cursor key to enter the ratio. Note: You can enter the enlargement ratio from 100% through 400% in 1% steps.
Beyond the Basics Cover page Your fax machine can store a cover page to send at the beginning of each outgoing fax. This page includes the current date and time, your Location ID and your fax number (as stored in the TTI) and a message of up to 40 characters in length. The information appears in a box similar to this: Fax Message From: 4 Nov 2000 14:00 Name: AABBCC Co. Fax Number: 123-4567 [We appreciate your business. Thank you!] Turning the cover page on 1 2 3 Press MENU, K, [Setting].
Beyond the Basics Polling Polling allows someone to fax a document to you without having to make the call or pay for it. There are several kinds of polling: • Regular polling — Your fax retrieves a document from a remote fax machine. • F-Code polling — Your fax retrieves a document stored as a file in the remote fax machine. To do this, you must be communicating with another F-code-compatible fax machine. For more information on F-Code polling, see “F-Code communication,” pages 2.35–2.36.
Beyond the Basics 8 9 Press [Enter] to save the number. Limiting polling access to your fax machine Press START. Your machine’s closed network setting (see page 2.48) works for polling, also. If a calling fax doesn’t “present” the proper passcode, it cannot poll from your fax. When your machine polls for documents, it dials each number and, upon making contact with the other machine, begins receiving the document as if the other machine had placed the call.
Beyond the Basics 6 To add more fax numbers, press [Broadcas] between each one to insert a comma, then enter the number as described in step 3. If [Broadcas] is not appeared on the LCD, press NEXT until it appears. You can specify up to 301 numbers for transferring. Note: You can enter only 1 location by using numeric keypad. Note: If you enter characters by mistake, press [Clear] to clear them.
Beyond the Basics Audible alarm Call request Whenever your fax machine receives a document from another fax machine, your machine will sound the alarm tone alerting the person for whom the document is intended. You can send or receive a fax message and have a regular phone conversation on the same call (although, not at the same time). This is called a call request. It doesn’t matter whether you’re sending the fax or receiving it. You may fax first and then talk, or talk first and then fax.
Beyond the Basics 2 3 Tell the person at the other fax machine to press START and to hang up his/her handset. Don’t hang up your handset yet! When you hear fax tones, press START and hang up your machine’s optional handset. Your machine will receive the document and print it out. Responding to a call request If someone requests a call from you during a fax communication, you’ll hear a long ring after the receiving machine has received each page.
Beyond the Basics F-Code communication F-Code: an introduction The ITU-T, the United Nations agency that standardizes international telecommunications, has created a fax industry standard for using sub-addressing and password-based communication. One name for this standard is F-Code, and that’s what we’ll call it in these instructions and on your machine’s display. How sub-addressing works To help understand sub-addressing, think about how someone in a large company receives mail.
Beyond the Basics To create or modify an F-Code box: 1 Keep pen and paper with you as you follow these steps. As you decide on a sub-address and enter it into your machine, write it down. Remember to: (1) write down which box goes with which sub-address, (2) write down any passwords or I.D. codes you enter, (3) keep these printed records in a safe place. 2 3 Press MENU, O [the letter O, not a zero], [Enter]. The LCD shows the F-Code box list. 4 Press [Set Box].
Beyond the Basics 10 Note: To erase characters, press [Clear] to erase to the left. To change just one character in the name, move the cursor to that character and then press [Clear] to erase it. Then re-enter the name correctly. 13 Press [Enter] to save the ITU-T sub-address and continue. 14 Use the numeric keypad to enter the four-digit I.D. code for this F-Code box. 15 Press ENTER to save the F-Code box information. Important: Do not use 0000 as an I.D. code.
Beyond the Basics 18 To enter the ITU-T sub-address: This is same procedure in step 9. Please refer to step 9. 19 To enter the ITU-T password: 20 To set the Rx Protect: 23 Select “Rx Protect” using the cursor key, and then press [Enter]. 24 Press [Exit]. The machine asks for your F-Code box’s fourdigit security I.D. code. This is the I.D.
Beyond the Basics If you chose Relay: 28 29 30 The bulletin box has the following settings: • Box Name – Same as in step 7. • ITU-T sub-adrress – Same as in step 7. • ITU-T password – Same as in step 7. • Location – You must enter the fax number of the remote unit. When your machine received document into the relay box, it dials to this number to relay the received document. • TTI Type – You can select the type of TTI you want to appear on the faxes that are relayed to other callers.
Beyond the Basics Printing a list of F-Code boxes The list of F-Code boxes includes: (1) Each box’s identifier number (2) Box name (if any) (3) Sub-address (4) Password (5) Box type (6) Each box’s settings To print a list of your F-Code boxes, press MENU, O [the letter O, not a zero], [BoxList].
Beyond the Basics Using a bulletin box Printing a document stored in a bulletin box Storing a document You can print a document stored in your machine’s F-Code bulletin boxes without erasing the document from memory. Your fax machine can store up to 30 documents in each bulletin box. To print a stored document: Note: For this operation to work, two things must be true: • The bulletin box must exist on your fax machine. • You must know the bulletin box’s two-digit number (01-50) and four-digit I.D.
Beyond the Basics 5 Select the file number (01-30) of the document you want to erase. If you want to erase the all documents in this bulletin box, select file number “00”. 6 Press [Enter]. The LCD shows (see right): Important: If you want to quit without erasing the document you’ve selected, press [Cancel]. The fax will return to step 2. 7 Press [Erase] to erase the document(s) and the machine will return to step 2. If you want to erase other document, repeat steps 2–7.
Beyond the Basics F-Code transmission and polling With F-Code, your machine can send secure transmissions, perform relay broadcast initiations and even poll from other ITU-T-equipped machines, regardless of manufacturer. You can do this two ways: • Using the programmable one-touch key (see pages 2.40–2.42) • Entering the ITU-T sub-address and password directly, which is what we’ll describe here.
Beyond the Basics 7 Enter the fax number either by pressing a one-touch key, entering a speed-dial number or dialling from the numeric keypad. Important: Do not press START, if you want to delay this transmission. 8 What you do now depends on when you want the transmission to begin. • To have it begin now, skip to step 11. • To delay it, go on to step 9. 9 Press MENU, select “Delayed Tx” and then press [Enter].
Beyond the Basics Programmable one-touch keys Using the power of programmable one-touch keys In order to complete some operations on your machine, you may have to follow several steps and press several different buttons. But programming your machine’s one-touch keys (79–84) can reduce those many steps to a simple press of a key. You can “teach” the one-touch keys to carry out any of the following operations: Communications functions: • Delayed transmission (explained on pages 2.10–2.
Beyond the Basics Programming a broadcast / group Programming a broadcast is very similar to programming a delayed transmission. But instead of sending to just one phone number, you set up multiple numbers for the transmission. To program a broadcast / group into a programmable one-touch key: 1 Press MENU, C, [Enter]. The LCD shows the programmable one-touch number list. 2 Select the programmable one-touch number that you want to program or change.
Beyond the Basics Programming regular polling 8 Note: You cannot program continuous polling into a programmable one-touch key. For more information on continuous polling, see page 2.22. Next, tell your fax to carry out this delayed command one of these ways: Option 1: Perform the command once at a certain time on a certain day of the month. (For example, “Do this at 5:05 PM on the 30th.”) To select this option, use the numeric keypad to enter the date and time when the fax should perform the command.
Beyond the Basics Programming a batch transmission Programming an F-Code transmission For this operation to work, two things must be true: • The batch box you’re using must exist on your fax machine. To program a batch transmission into a programmable one-touch key: For this operation to work, two things must be true: • You must know how the remote fax is using each F-Code box to which you’re transmitting — for example, as a security box or a relay box.
Beyond the Basics 9 10 11 Use the numeric keypad to enter the appropriate ITU-T password for the box. Note: If there isn’t a ITU-T password for this box, skip to step 10. Press [Enter]. If you want the F-Code transmission to begin immediately every time you press the key, press [Exit] and skip to step 14. If you want to delay the F-Code transmission, select “Delayed Tx” and press [Enter].
Beyond the Basics 9 10 11 Use the numeric keypad to enter the appropriate ITU-T password for the box. Note: If there isn’t a ITU-T password for this box, skip to step 10. 3 Press [Erase]. The LCD shows: Next, tell your fax to carry out this delayed command one of these ways: Option 2: Perform the command once at a certain time on a certain day of the month. (For example, “Do this at 5:05 PM on the 30th.
Beyond the Basics Fax dialling with programmable one-touch To dial a fax call using a programmable one-touch number: 1 2 Place the document and select resolution and contrast you require. Press the programmable one-touch key in which you’ve stored the fax communication command. Your fax will perform the operation now, or at whatever time you programmed. Note: To review the details of each operation, review the instructions for that operation. See page 2.
Beyond the Basics Security features Your machine has a number of security features to keep your private fax documents private, avoid unwanted outside communication and even protect against unauthorized use of your machine. These security features include: (1) security reception, (2) PIN mask, (3) security transmission, (4) closed network, (5) block junk fax, and (6) department codes.
Beyond the Basics To turn the security reception on by pressing a soft key: 1 2 Program a Soft key which is assigned security reception. (See page 2.15.) Press a Soft key that is assigned security reception. 3 Enter the protection passcode and then press [Enter]. The LED of the Soft key will light and the security reception begins immediately. Note: To turn the security reception off, see “Printing from security reception/Turning off security reception,” next column.
Beyond the Basics Autodialling while using the PIN mask If you chose “Mode 2” — as you autodial, load the code Note: The following instructions presume you understand how to set and use your machine’s autodialer. If you need to review, see pages 2.1–2.8. In this mode, you don’t have to add the PIN to the autodialer setting.
Beyond the Basics Performing batch transmission while using the PIN mask Setting security transmission Note: The following instructions presume you are familiar with how to set and use both your machine’s autodialer and its batch transmission feature. If you need to review, see pages 2.1–2.8 for more on the autodialer and/or pages 2.12–2.14 for more on batch transmission. Your fax’s security transmission feature provides extra assurance that your documents go where you’re sending them.
Beyond the Basics Setting for use with a closed network Setting Block Junk Fax For maximum communications security, use a closed network. This limits your machine to only communicating with other Muratec fax machines which can “present” the proper passcode. Your fax machine’s Block Junk Fax feature lets you bar the gates against unauthorized incoming faxes (“junk fax”). But before you block junk fax, first understand how this feature works, to determine if it’s right for you.
Beyond the Basics 4 5 Using department codes The LCD now shows blocked numbers list. If you want to enter or erase a number, go on to step 5. Otherwise, press [Enter] and skip to step 7. Use the numeric keypad to enter the last eight characters of a fax number you want to block. For example, if you want to block a fax from someone with a Subscriber ID of 972-555-3038, you should enter 5, 5, 5, [–], 3, 0, 3, 8.
Beyond the Basics Turning the department code setting on and off 1 2 Press MENU, L. 3 4 Select desired setting. Press [Setting]. Note: If department code operation is protected (see below), the fax beeps briefly and then returns to standby mode. You will have to turn off the protection first, then repeat this step. Press [Enter]. Turning department code protection on and off Important: This feature will work only if you’ve activated the passcode protection (see page 2.44).
Beyond the Basics This page intentionally blank. 2.
Entering settings for your machine Settings for transmission . . . . . . . . . . . . . . . . . . . . . . . . . . . . . . . . . . . . . . . . . . . . . . 3.1 Settings for reception . . . . . . . . . . . . . . . . . . . . . . . . . . . . . . . . . . . . . . . . . . . . . . . . . 3.4 Settings for dialling . . . . . . . . . . . . . . . . . . . . . . . . . . . . . . . . . . . . . . . . . . . . . . . . . . 3.6 Settings for operation . . . . . . . . . . . . . . . . . . . . . . . . . . . . . . . . . . . . . . . . .
Entering settings for your machine Settings for transmission Scan settings Setting ECM Default setting: Primary resolution: Normal, Primary contrast: Normal Default setting: ON. Four different settings tell your machine how to scan documents. The initial factory settings are probably right for most applications, so try using them before changing any of these settings: • Primary resolution mode — Sets the resolution for your documents.
Entering settings for your machine Memory transmission Quick Memory transmission Default setting: ON. Default setting: ON. Your fax machine has a great memory! Take advantage of it, and you could: Save Time. By using your fax machine’s memory, you won’t have to wait for your machine while it completes the transmission. Simply scan your document into your fax machine’s memory, and you can walk away with your original in hand. Save Money.
Entering settings for your machine Image rotate transmission Default setting: ON. When this feature is activated, if you set A4-sized document in the sideways direction( ), the image will be sent rotated by 90°. 1 2 3 Press MENU, J, 0, 3, [Enter]. Choose desired setting you want using the cursor key. Then press [Enter]. Press RESET to return to the standby mode. Setting the confirmation stamp Default setting: OFF.
Entering settings for your machine Settings for reception Print settings Reduction margin You can set three parameters for printing received fax messages: • Print reduction rate • Reduction margin • Paper save function You set all three in the same procedure, discussed on next page. Following is a explanation for each: Your fax machine’s reduction margin is measured in millimeters (mm).
Entering settings for your machine Adjusting the print settings Setting ECM Default setting: Rx reduction rate: Normal, Reduction margin: 24 mm, Paper saving:OFF. Default setting: ON. 1 2 3 4 5 6 Press MENU, J, 0, 2, [Enter]. Select item you want to set using the cursor key. Then press [Enter]. Select desired item and then press [Enter]. If you want to change other items, repeat step 2-3. When you finish, press [Exit]. Press RESET to return to the standby mode.
Entering settings for your machine Settings for dialling Changing the dialling pause length Changing redial settings Default setting: 2 sec. Default setting: Number of redial: 2 times, Redial interval: 3 minute. The pause is set by the factory to last two seconds, but you can set it to last as long as ten seconds if necessary.
Entering settings for your machine Settings for operation Setting of the silent mode Default setting: OFF. 2 Silent mode allows you to mute the ringer, the alarm and the key tones. To setting a silent mode: 1 Select “Silent Mode” and press [Enter]. Select “ON” and press [Enter]. Note: If you chose “OFF”, the machine will ring and beep as usual, skip to step 9. Press MENU, J, 2, 1, [Enter]. The LCD shows your fax’s current setting.
Entering settings for your machine If you turned off the alarm or the key tones in the steps above, your machine gives you the option of setting the volume for the alarm and key tones, proceed to step 9. If you didn’t turn any of these off, skip to step 11. 9 To set the “Alarm & Key Volume”: Select “Alarm & Key Volume” and press [Enter]. Set the desired volume using the cursor key. 10 11 Press [Enter] to save the setting. Press [Exit] to save the setting.
Entering settings for your machine Panel auto reset time Printing your fax settings Note: Default: After three minutes The machine returns to its initial condition automatically after a certain period of time. You can change this time from 1 to 10 minutes. Press MENU, J, 1, 7, [Enter]. After you’ve programmed settings into your machine, print a fax settings list. We recommend this, particularly if you’re sharing the machine with other users, who might change the settings.
Trouble Shooting Troubleshooting . . . . . . . . . . . . . . . . . . . . . . . . . . . . . . . . . . . . . . . . . . . . . . . . . . . . . 4.1 Common questions . . . . . . . . . . . . . . . . . . . . . . . . . . . . . . . . . . . . . . . . . . . . . . . . . . . 4.
Trouble Shooting Troubleshooting Occasionally, your machine encounters some trouble transmitting or receiving documents. When it does, it alerts you with an alarm. You can identify the problem with LCD messages and printed check messages and error reports, explained in the following pages. What you see on the LCD What it means/What to do 30 locations or less You tried to enter too many numbers for broadcast through the numeric keypad.
Trouble Shooting What you see on the LCD What it means/What to do What you see on the LCD What it means/What to do Commands full Your fax machine has all of its 100 possible delayed commands (automatic redialling counts as one) stored in memory and cannot accept another. Delete an existing command by using REVIEW COMMANDS, or wait until your fax has completed one of the delayed commands. Hang Up Phone The optional handset is off-hook.
Trouble Shooting What you see on the LCD What it means/What to do What you see on the LCD What it means/What to do Not store in Secure box You tried to store a document for polling in an F-Code box which is set to be a security box. Select an F-Code box which is set to be a bulletin box, then try again. Unable to reduce In enlargement transmission, you cannot select the reduction ratio.
Trouble Shooting Errors Reception errors When sending faxes, your machine occasionally runs into communication errors. These can be caused by anything from lightning to telephone line interference. (These same factors cause static, or line noise, you sometimes hear on phone calls.) They also can be caused by problems with the fax machine at the other end of the line. Often, simply trying your call again is all that’s necessary.
Trouble Shooting T.2.3 T.3.1 T.3.2 T.4.1 T.4.2 T.4.4 T.5.1, T.5.2, T.5.3 T.8.1 Bad phone line conditions made fax communication impossible. Conditions can change rapidly, so try the call again later. The page counter in your fax machine detected a document feeder error during transmission. Carefully re-insert the document into the feeder and re-try the call. The fax machine didn’t detect the silence indicating the call had ended.
Trouble Shooting Common questions General questions Sending faxes Q: Where do I add ink or toner to make my fax machine’s printouts darker? A: You can’t adjust the darkness of an incoming fax printout, but you can adjust the darkness of a copy or of a transmission. Insert a document and press CONTRAST to adjust the contrast setting. “Dark” prints at the darkest setting. The machine will reset automatically to normal contrast after you finish copying or sending the fax.
Trouble Shooting Q: Can I transmit a document that’s extra long? A: Yes, if the receiving fax machine is equipped to handle long documents. Many machines have a special setting which allows them to receive documents that exceed the normal length. Q: Can I transmit a page from a newspaper? A: No. A newspaper page can jam in your document feeder. First, use a copy machine to make an appropriately sized copy of the newspaper page, then transmit the copy.
Trouble Shooting Receiving faxes Polling Q: My fax never answers. What’s wrong? A: Check to make sure your fax machine is properly connected to a working AC power outlet and phone jack. If you’re using a second phone with your machine, make sure it’s connected properly. Q: What’s the purpose of polling? A: Polling lets you automatically “pull” a document which is set in another fax machine. You can poll whenever you need to retrieve information and don’t want the source to pay for the phone call.
Trouble Shooting This page intentionally blank. 4.
Appendix and index Glossary . . . . . . . . . . . . . . . . . . . . . . . . . . . . . . . . . . . . . . . . . . . . . . . . . . . . . . . . . . . AI.1 Index . . . . . . . . . . . . . . . . . . . . . . . . . . . . . . . . . . . . . . . . . . . . . . . . . . . . . . . . . . . . . . AI.
Appendix and index Glossary This glossary contains terms you may encounter when discussing or reading about fax machines. Please use these definitions for reference only. A list of definitions can also be found on the Muratec website at www.muratec.com. 24-hour format — Also called military format. A format for keeping time that does not use a.m. or p.m. to distinguish between morning and afternoon. In the 24-hour format, one o’clock in the morning marks 1:00, noon marks 12:00 and midnight marks 24:00.
Appendix and index Default — The setting your machine will always refer to if no other action has been programmed. For example, you can set the default for this machine to send a fax by using its memory. If you set this action as the default, that’s how your machine will always send a fax, until you tell it differently. Grayscale — Not a level of resolution, but a method of scanning and transmitting halftone images.
Appendix and index Memory — Internal document storage. In Muratec fax machines, random access memory in the form of computer chips is used to store and hold documents for transmission and to hold some documents that have been received. Memory overflow — A message that appears on the machine’s LCD when the current operation requires more of the machine’s electronic memory than what is available. MH — Modified Huffman, the standard ITU-T Group 3 data compression method.
Appendix and index Redialling — The dialling again, either manually or automatically controlled, of the most recently dialled fax or phone number. Automatic redialling follows an unsuccessful dialling attempt. Super Group 3 — An extension of Group 3 fax technology standards, allowing the use of high-speed v.34 bis modems for 33.6 Kbps transmission and high-speed protocols for rapid handshaking.
Appendix and index Index A E Activity journal . . . . . . . . . . . . . . . . . . . . . . . . . . . . . . . . . . . . . . . . . . . . . . . . . . . . . . . . . . . . . 2.18 Audible alarm . . . . . . . . . . . . . . . . . . . . . . . . . . . . . . . . . . . . . . . . . . . . . . . . . . . . . . . . . . . . . . 2.25 Auto reset time . . . . . . . . . . . . . . . . . . . . . . . . . . . . . . . . . . . . . . . . . . . . . . . . . . . . . . . . . . . . . .3.9 Autodialer . . . . . . . . . . . . . . . . . . . .
Appendix and index N Number of rings . . . . . . . . . . . . . . . . . . . . . . . . . . . . . . . . . . . . . . . . . . . . . . . . . . . . . . . . . . . . . 3.5 Numbering pages . . . . . . . . . . . . . . . . . . . . . . . . . . . . . . . . . . . . . . . . . . . . . . . . . . . . . . . . . . . 2.21 O One-touch numbers . . . . . . . . . . . . . . . . . . . . . . . . . . . . . . . . . . . . . . . . . . . . . . . . . . . . . . . 2.2-2.9 Out of paper reception . . . . . . . . . . . . . . . . . . . . . . . .
Appendix and index This page intentionally blank. AI.
Appendix and index This page intentionally blank. AI.
Muratec (UK) Ltd No.1 Stoke Road Guildford, Surrey GU1 4HW Tel (01483) 302100 Fax (01483) 301900 http://www.muratec.co.uk Copyright© 2000 by Murata/Muratec; all rights reserved. Printed in Japan.