
Specifications


Falcon II Outdoor series printers – Maintenance Manual
127
AP-74065, Rev. 1.0, 21/11/03
Notes :
¾ Do not touch the cleaner with your bare hands. Oil or grease adhering to the
surface of the nozzles can cause the nozzles to fall out.
¾ When removing and installing the cleaner, be sure to remove the hook. Failure to
do so could deform the cleaner.
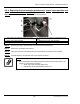
¾ Install the cleaner to the following positions:
50 or 64 inch model: The third, fourth, fifth, sixth from the left
87 inch model: The first, third, fifth, seventh from the left
¾ Be sure to install the cleaner with the rubber part toward the rear.
Step 4 : Reinstall all parts in the opposite order of the removal procedure.
4.8.3. Replacing the SLIDE motor assembly (wiper arm)
Caution :
The motor is hot after the product has been operated, so be careful not to burn yourself.
Step 1 : Follow the instructions in "Replacing the maintenance assembly" to remove the maintenance assembly.
Step 2 : Remove the 2 screws fixing the SLIDE motor assembly.
1 = SLIDE motor assembly 2 = Screws (M3x6) fixing the SLIDE motor assembly
Step 3 : Replace the SLIDE motor assembly.
Step 4 : Reinstall all parts in the opposite order of the removal procedure.