ATSC Digital Receiver v0.0.1.4 (185) 320.564.4807 User Guide mvtvwireless.
SAFETY PRECAUTIONS SAFETY PRECAUTIONS CAUTION: The lightning flash with arrowhead symbol, within an equilateral triangle, is intended to alert the user to the presence of dangerous voltage and to prevent from risk of electric shock. Warning: To reduce the risk of electric shock, don’t open the cover or cabinet. Refer servicing to qualified personnel only. The exclamation point within an equilateral triangle is intended to alert the user to important operating and maintenance (servicing).
SAFETY PRECAUTIONS WARNING: The STB should not be exposed to dripping or splashed liquids. No objects filled with liquids, such as vases, should be placed on the STB. WARNING: Do not put a candle or lamp on the housing, as this can cause a risk of fire. WARNING: The unit should be connected to a power supply only of the type described in the operating instructions or as marked on the unit. If you are not sure of the type of power supply to your home, consult your local dealer or power company.
SAFETY PRECAUTIONS Object and Liquid Entry: Never put objects of any kind into this STB through openings, as they may touch dangerous voltage points or short-out parts that could result in a fire or electric shock. Never spill any liquid on the STB. Note: Moisture may be formed inside the unit in the following conditions: When the unit is suddenly moved from a cold environment or an air-conditioned room to a warm place. Immediately after a heater has been turned on. In a steamy or very humid room.
Table of Contents Table of Contents SAFETY PRECAUTIONS................................................................................................................ i I. Unit & Remote Control Hardware .............................................................................................. 3 1. Front Panel .................................................................................................................................... 3 2. Rear Panel................................................
Table of Contents 4.2. TV System ..............................................................................................................................19 4.3. Display Settings .....................................................................................................................19 4.4. Local Time..............................................................................................................................19 4.5. Timer Settings ............................................
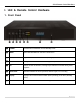
Unit & Remote Control Hardware I. Unit & Remote Control Hardware 1.
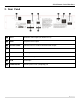
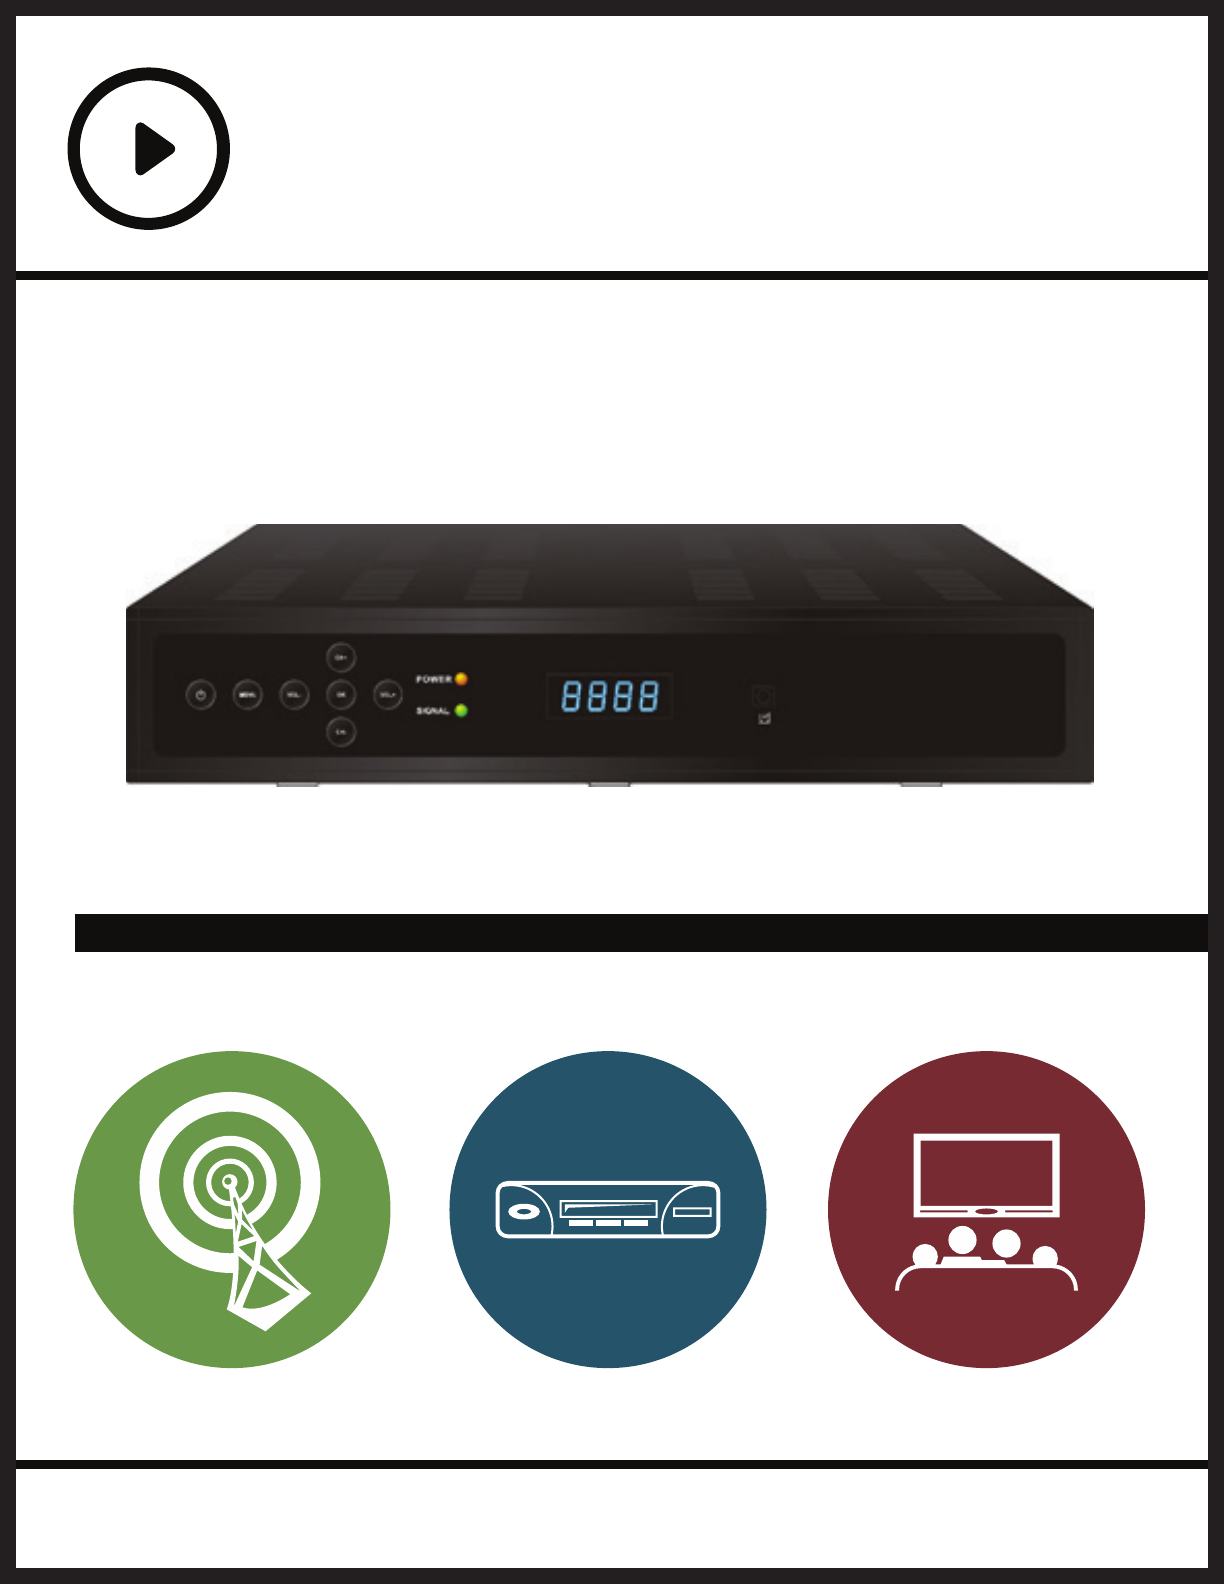
Unit & Remote Control Hardware 2.
Unit & Remote Control Hardware 3.
Basic Operations II. Basic Operations 1. Off/Standby/On Modes Your Set Top Box (STB) has three power modes: 1. Off mode: This is when the power cable is unplugged, and/or the Power On/Off Switch on the rear panel is in the Off position. The STB will not be operational in this power mode. 2. Standby mode: This is when the power cable is plugged into a wall outlet, the Power On/Off Switch on the rear panel is in the On position, and the user has not pressed [POWER].
Basic Operations Figure 1: Scanning channels via ATSC Auto Scan Figure 2: Live TV with information window 7|P a g e
Basic Operations 3.2. Controlling Playback with Timeshift When watching live TV, pressing [PLAY/PAUSE ►II] will start Timeshift, which allows the user to pause the current program, buffering it to an attached USB storage device. This allows the user to control live content. To use Timeshift, the Timeshift setting must be set to ON in the PVR Setting menu and a USB storage device must be attached to the STB. 3.3.
Basic Operations 3.4. Favorite Groups Figure 4: The TV Channel List menu With your STB, you can create custom lists of channels called Favorite Groups. When watching live TV, you can switch from complete channel list (All TV) to these Favorite Groups to display only specific channels in your TV Channel List and EPG. To add channels to your Favorite Groups: 1. Open the Main Menu by pressing [MENU] and navigate to Edit Channel > TV Channel List.
Basic Operations Figure 6: Adding Channels to Favorite Groups Figure 5: Switching between Favorite Groups 10 | P a g e
Basic Operations To switch between Favorite Groups: 1. Press [FAV] while watching live TV to open the Favorite window. 2. Navigate your Favorite Groups using [CH ▲/▼] and press [OK] to open the channel list of the highlighted group. 3. With [VOL ◄/►], you can switch between the complete channel list (All TV) and each Favorite Group. To switch to a channel, navigate to it with [CH ▲/▼] and select it with [OK]. 4. Press [BACK] to close the Favorite Group window. To rename your Favorite Groups: 1.
Basic Operations Because your service provider is providing subscription-based services, and the STB must always be authorized to receive these services, at least one tuner must be tuned to a channel that is provided directly from your service provider at all times. Therefore, you cannot simultaneously watch and record two programs that are not from your service provider. 5.
Basic Operations Figure 8: Recorded video with the video navigation window 13 | P a g e
Advanced Operations III. Advanced Operations In the Main Menu, you can configure the unit and perform advanced operations. To access the Main Menu: 1. Press [MENU] during video playback to enter the Main Menu 2. Press [VOL ◄/►] to switch between tabs. 3. Press [CH ▲/▼] to select the menu item. 4. Press [OK] to open the menu screen for the selected item. 1. Media Player Figure 9: The Media Player menu In this menu, you can choose between the following menu items: PVR, Video, Music, and Image. 1.1.
Advanced Operations • Lock: select a recording and press [Green/GUIDE] bring up the password box. Input your password to lock or unlock the recording (the lock status will be indicated by a lock icon to the right of the line) • Delete: select a recording and press [Yellow/AUDIO] to mark or unmark it for deletion (this will be indicated by an X icon to the right of the line.) Press [BACK] on the remote to save your changes and return to the main menu. 1.2.
Advanced Operations Figure 10: The Edit Channels menu 2.2. Delete All To delete all channels: 1. Enter your password. The default password is 0000. 2. You will see a prompt asking whether you would like to delete all channels. Select OK to delete all channels or Cancel to cancel the operation. 3. Pressing [Menu] at any time before selecting OK to delete all channels will bring you back to the Menu screen without saving. 3.
Advanced Operations Figure 11: The Installation menu Figure 12: The ATSC Channel Scan menu 17 | P a g e
Advanced Operations • Scan Mode: Use [VOL ◄/►] to choose between the following scan methods: o By Channel: This option will allow you to edit the Channel No. option in this menu. Once you’ve highlighted the Channel No. option, use [VOL ◄/►] to cycle through the each channel detected by the STB. o This option will allow you to edit the Frequency option in this menu. Once you’ve highlighted the Channel No. option, use [VOL ◄/►] to cycle through frequencies in 1 KHz increments.
Advanced Operations 4.1. Language In this menu, you can change the following settings: 1. Menu Language: Use [VOL ◄/►] to choose between English and Spanish for the language of system menus. 2. First Audio: Use [VOL ◄/►] to choose between the following languages for the default language of program audio: English, French, German, Italian, Spanish, Portuguese, Russian, Turkish, Polish, Arabic, and Persian. 3.
Advanced Operations setting is determined automatically from the Time Zone setting, though it can still be adjusted manually. 4. Date: Use [VOL ◄/►] and the numeric keypad on the remote to manually set the date if GMT Usage is set to Off. 5. Time: Use [VOL ◄/►] and the numeric keypad on the remote to manually set the time if GMT Usage is set to Off. 6. Daylight Savings Time: Use [VOL ◄/►] to switch between On and Off. Figure 14: The Local Time menu 4.5.
Advanced Operations Figure 15: The Timer Settings menu 3. Wakeup Channel: Press [OK] to enter the channel list, and highlight the channel you want to activate with the timer with [CH ▲/▼]. Select with [OK] to confirm. 4. Wakeup Date: Use the numeric keypad on your remote to input the date on which the timer will activate. 5. On Time: Use the numeric keypad on your remote to input the time at which the timer will activate.
Advanced Operations 2. U.S. TV Rating (V-Chip): Select with [OK] to open the U.S. TV Rating (V-Chip) menu. Here, you can set which V-Chip ratings will trigger the STB’s lock function, requiring the viewer to enter the current STB password to continue playback. You will see a table which shows the settings which are currently locked, as indicated by the Lock symbol. You can toggle the lock for a cell by navigating to that cell using the navigation buttons and selecting with [OK]. Figure 16: The U.S.
Advanced Operations with that row’s TV rating. • D: When set to Lock, the STB will lock whenever content with suggestive Dialogue is detected during programs with that row’s TV rating. Press [MENU] or [BACK] to return to the Parental Lock menu, 3. MPAA: Select with [OK] to open the MPAA menu. You will see a table which shows the MPAA ratings which are currently locked. Navigate between cells using [CH ▲/▼] and toggle the Lock using [OK]. The MPAA ratings available are G, PG, PG13, R, NC17, X, and NR.
Advanced Operations • DVR Set: press [Blue/CC] button to open the DVR Set window. For DVR Type, choose between Record, Timeshift, and REC & TMS (Record & Timeshift) using [VOL ◄/►]. Select the OK button to confirm. Figure 17: The PVR Storage menu 4.10. PVR Settings In this menu, you can change the following settings: Timeshift: Use [VOL ◄/►] to switch between ON or OFF.
Advanced Operations 5. Tools Figure 18: The Tools menu In this menu, you can choose between the following menu items: Information, Factory Setting, S/W Upgrade by OTA, Upgrade By USB, and Remove USB Device Safely. 5.1. Information In this menu, you can view information about the STB. 5.2. Factory Settings In this menu, you can restore all settings on your STB to their factory defaults. After entering your password (the default password is 0000), answer Yes for the next prompt to factory reset the STB.
Advanced Operations 5.3. Software Upgrade by OTA Figure 19: The Software Upgrade by OTA menu In this menu, you can upgrade your STB via ATSC over the air (OTA). To do so: 1. Select ATSC OTA with [OK]. This will open the ATSC OTA window. 2. Set the Frequency provided by the manufacturer using [VOL ◄/►] or the numeric keypad. 3. Set the Download PID provided by the manufacturer using [VOL ◄/►] or the numeric keypad. 4. Highlight to the Start option and select with [OK] to begin download. 5.4.
Advanced Operations 6. Conditional Access Figure 20: The Conditional Access menu In this menu, you can choose between the following menu items: Token Status, and About CA. If the smartcard is not being read properly, these menu items will be greyed out 6.1. Token Status In this menu, you can find information about current tokens status. This information may assist a technician while troubleshooting. 6.2. About CA In this menu, you can find information about the currently inserted smartcard.
Troubleshooting IV. Troubleshooting If you run into problems with the STB, use the procedures described below to troubleshoot your unit. If you can’t solve your problem after following these procedures, please contact the dealer. Under any circumstances, do not open the STB cover, as it will void the warranty and could cause electrical shock.
Troubleshooting Recording does not work. The smartcard is not inserted properly. Remove and insert the smartcard with the chip side facing up. No USB storage device is detected. Open the Remove USB Device Safely menu (under the Main Menu > Tools). If the USB device is listed, select OK to safely eject the device, unplug it from the USB port, and plug it back it. The USB storage device is full. Delete media from the USB device via the Media Player menu (PVR, Video, Music, Image).
Technical Specifications V.
Technical Specifications USB: A Type, USB2.0 Smartcard: Verimatrix POWER SUPPLY Type Switching Mode Input Voltage 100 to 240V, 50/60Hz Consumption Max. 15W Protection Internal Fuse PHYSICAL SPECIFICATIONS Size: (W x H x D) 10.8” x 8.6” x 2.1” Net weight: 3 lbs. Operation Temp.: 32° - 104° F Storage Temp.