
Installation Guide


18 www.mylenstairs.com
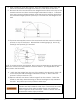
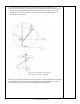
Line Rail Baluster Installation
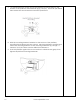
1. Slide a baluster (15) through the platform and tread below. Fasten
baluster line rail mounts (22) to the baluster with hardware (X). The line rail
mounts will prevent the baluster from falling through the hole in the tread.
Plumb the baluster by rotating the tread below before moving to the next
baluster.
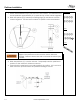
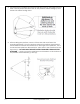
NOTE: Make sure the baluster line rail mounts on the correct side of the baluster
for your specific installation. The angled profile on top of the baluster should
angle upward toward the top of the stair. There are small marks on each side of
the baluster to position the line rail mounts. Secure the baluster while installing
the hardware(X).
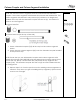
2. Repeat Step 1 until you reach the final baluster that goes from the bottom
tread to the floor. This baluster must be cut to size.
a. Metal treads - cut 5/8” off the bottom of this final baluster.
b. Laminate treads cut 1-7/8” off the bottom of this final baluster.
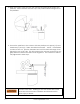
3. Slide the final baluster through the bottom tread. Use the level to plumb
the baluster while it is resting on the floor. Mark the floor in the location of
the final baluster and remove the final baluster.
4. Lift the second to last baluster to allow the final tread to swing out of the
way. Position the baluster cup (16) on the location marked in Step 3 and
fasten it to the floor with hardware (K).
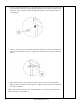
5. Swing the last tread back into position and slide the final baluster through
the tread and into the baluster cup. Fasten the line rail mounts (22) to this
baluster with hardware (U). At this point all the balusters should be in
location but able to rotate freely.
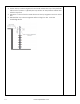
Hardware
ⒾⒿⓀⓍ
Parts
⑮⑯ 22 23
24
Tools