
Installation Guide

25 www.mylenstairs.com
Aluminum Handrail Installation
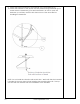
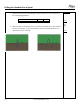
1. Once the Handrail has been shaped, dry fit the rail to the baluster tips.
NOTE: The handrail may be slightly kinked on both ends. This is normal and
the handrail should be positioned so that these ends can be cut off after
installation.
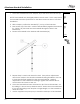
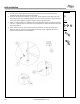
2. With a helper, position the handrail (17) on top of the balusters.
3. Start at the top of the stair. Hold the handrail firmly against the baluster
tip. Drill a 1/8” pilot hole into the handrail through the hole in the
baluster tip.
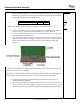
4. Secure the handrail to the baluster with hardware (M).
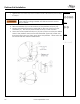
5. Repeat Step 2-4 and work down the stair. If any minor adjustments
need to be made to the aluminum handrail during installation, be sure
to hold the rail firmly against the last secured baluster. Making
adjustments to the rail without holding it against the baluster above
could cause the screw to tear out.
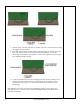
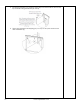
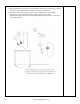
6. Once the handrail has been attached to all of the main balusters, cut
the railing 3” above the top baluster and 3” below the bottom baluster.
If your local building code requires a longer length, cut the handrail to
meet the code.
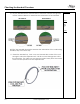
7. Use the supplied two-part epoxy to bond the endcaps to the handrail.
Hardware
Ⓜ
Parts
⑰
Tools