.Precautions------------------------------------------------------------------6.
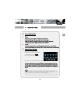
When the radio is initially turned on the radio source is the default. To enter the MAIN Menu press the icon on the top left of the touch screen. Each source icon corresponds to the actual source as described. If a source icon is pressed and “Device not connected” is displayed the radio does not see a connection with the outside source.
Turn the volume knob to the left or right to adjust the volume level
If while in the DVD mode and OPEN is displayed the radio is ready to accept a disc. Please insert the the disc with the label facing up If there is a disc in the DVD drive press the eject button to remove the disc.
While fast forwarding touch the rewind button to start playing the disc again While rewinding press the fast forward button to start palying the disc again Touch the screen for more than 2 seconds to open the control menu.
To insert an SD insert the card into the slot designated by the SD emblem until it clicks into place To remove the SD card exit from the SD card source then gently press it in to unlock it and the card will eject automatically
This radio is equipped with a USB mini port that can connect to portable USB devices To insert a USB device to this radio simply plug it in. To remove the USB device exit from the USB mode and then remove the USB device. After the USB device is read, the operation is the same as the Mp3 operation. Please refer to the “MP3 instructions” for more operation instructions. USB manufacturers might have different standards that can cause the radio to not perform correctly.
This radio provides a Bluetooth hands free communication function. If your mobile phone is bluetooth enabled, it can establish a point to point connection with the system providing telephone dial and call answering, Call history, and Bluetooth music streaming. Note: As the Bluetooth modules and software of cell phones with different brands are different, some functions may be different or even not compatible with this radio.
To use the Bluetooth hands free function the Radio needs to be paired with the Bluetooth enabled cell phone. While in the Bluetooth menu press the tab HISTORY HISTORY Touch the icon to start the pairing process. The radio will display “PAIRING”. While this is displayed the end user will have to go into the cell phones Bluetooth menu pick select the “MD” option. At this time the end user will have to enter the 1234 as the code.
To change the name of the radio that the phone will see simply press the icon . Once the name has been selected press the icon to confirm the name change. If there has been an error with changing the name simply press the Press the icon to exit. button. Changing the password is similar to modifying the name.
HISTORY HISTORY During a call press the button to switch between the hands free and the hand set. When there is an incoming call the radio will automatically switch to this screen. The ring tone on the phone will play through.
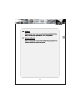
Call History HISTORY HISTORY The call history screen will appear. This screen displays incoming, outgoing and missed call. The 5 most recent in all categories will be displayed. While in the call history screen the end user can select a number form any of the categories and then press the button to make a call.
Bluetooth Music Streaming Pair and Connect the Cellular Phone If the cellular phone supports A2DP music streaming the radio can play music that is stored on the cell phone through Bluetooth.
Saving to Memory While playing a cd press and hold the screen for more than 2 seconds. When the menu appears press the SAVE button. This screen will appear. The user will have to select which location they would like to save the cd to.
This function is only available when connected to a Satellite Radio receiver.
When in the MAIN menu touch the icon to enter into the navigation source. The “NAV” button can also be pressed on the outside trim of the radio. The user can select a route on the navigation system then switch back to another source. At this time the end user can listen to any other source while still receiving audio prompts from the navigation system.
NAV VOICE NAV VOICE NAV VOICE 46
NAV VOICE Back Up Camera NAV VOICE 47
This display is shown only if there is a back up sensor connect and no camera.
NAV VOICE Touch the “NAV VOICE” button to the ON position to hear the navigation voice while in any source. If turned OFF the navigation voice will not be heard in any source.
Touch the lower left corner Use the stylus to touch the center point of the “+” icon to move to the next location Touch the lower right corner Touch the upper right corner Touch the upper left corner
Touch the center IF the touch screen becomes inaccurate this calibration technique should be employed. Make sure that while in the touch screen calibration that the center point of the “+” icon is touched, otherwise the accuracy will be off.
Camera Only
STOP
58
59
60