NEFL32FH / NEFL42FH / NEFL50FH / NEFL60FH / NEFL72FH / NEFL100FH MULTIPLE PRODUCT CODES (LEAVE BLANK IF N/A) ENGLISH FRENCH PG.
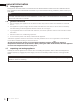
EN safety information ! WARNING • If equipped with a heater, this appliance can be hot when operated and can cause severe burns if contacted. • Do not operate appliance before reading and understanding operating instructions. Failure to operate appliance according to operating instructions could cause fire or injury. • Do not install damaged, incomplete or substitute components. • Do not burn wood or other materials in this appliance.
• It is normal for your electric appliance to produce noise, especially when installed in a quiet space such as a bedroom. ! WARNING safety information • To prevent a possible fire, do not block air intakes or exhaust in any manner. Do not use on soft surfaces, like a carpet, where openings may become blocked. • Always plug appliances directly into a wall outlet/receptacle. Never use an extension cord or relocatable power tap (outlet/power strip).
EN table of contents 1.0 general information 5 2.0 locating appliance 9 3.0 installation 10 4.0 finishing 17 5.0 operating instructions 19 6.0 maintenance 21 7.0 8.0 9.0 10.0 wiring diagram replacement parts troubleshooting warranty 22 24 26 27 1.1 1.2 1.3 1.4 1.5 1.6 1.7 dimensions product information general instructions listing approvals unpacking and testing appliance hardware parts list rating plate information 2.1 grounding appliance 3.1 3.2 3.3 3.3.1 3.4 3.
1.1 1.0 general information dimensions EN side SIDEview VIEW front view FRONT VIEW C D B F G A top view TOP VIEW E 1.2 product information DIMENSIONS MODEL NO.
EN general information 1.4 listing approvals This appliance has been tested in accordance with the CSA Standards for fixed and location-dedicated electric room appliances in the United States and Canada. If you need assistance during installation, please contact your local dealer.
1.6 general information hardware parts list Ref.
EN general information 1.7 rating plate information CERTIFIED UNDER CANADIAN AND AMERICAN NATIONAL STANDARD: CSA 22.2 NO. 46 AND UL 2021 / HOMOLOGUÉ SELON LES NORMES NATIONALES CANADIENNES ET AMÉRICAINES:CSA 22.2 NO. 46 UL 2021 E L P ELECTRIC FIREPLACE. SUITABLE FOR BEDROOM AND BED-SITTING ROOM INSTALLATION. SUITABLE FOR MOBILE HOME INSTALLATION. MASTER CONTRACT: 161746 M A S NEFL32FH NEFL42FH NEFL50FH FOYER À ÉLECTRIQUE.
• • • • • 2.1 2.0 locating appliance ! WARNING EN Due to high temperatures, this electric appliance should be located out of traffic. Keep combustible materials, such as furniture, pillows, bedding, papers, clothes and curtains, at least 36" (91.4cm) from the front of the appliance. Never locate this electric appliance where it may fall into a bathtub or other water container. Wear safety gloves and safety glasses for protection during installation and maintenance.
EN 3.0 installation ! WARNING • • • • • • • • Risk of fire! The power cord must not be pinched against a sharp edge. Secure cord to avoid tripping or snagging to reduce the risk of fire, electric shock, or personal injury. Do not run cord under carpeting. Do not cover cord with throw rugs, runners, or similar items. Arrange cord away from traffic areas and where it will not be tripped over. Risk of fire! To prevent a possible fire, do not block air intake or exhaust in any manner.
3.3 installation installing the appliance onto the wall Due to the many different materials used on different walls, it is highly recommended that you consult your local builder before you install this appliance on the wall. A. EN BODY GLASS FRONT Select a location that is not prone to moisture and is located at least 36" (91.4cm) away from combustible materials such as curtain drapes, furniture, bedding, paper, etc. SIDE VIEW 21 5/8" 55cm B.
EN installation 3.3.1 framing Measurements are taken from the body: Sides, back and top 0" Finishing Material A A B B JUNCTION JUNCTION (NON-LOAD BEARING) 3 1/2" [89mm] MIN. 3 1/2" 89mm MIN 5" 5" 127mm MAX [127mm] MAX. MODEL NO. 12 W415-1542 / E / 08.09.
3.4 recessing the appliance into the wall installation EN Due to the many different finish materials used on walls, it is highly recommended that you consult your local builder before you install this appliance in the wall. Select a location that is not prone to moisture and is located at least 36" (91.4cm) away from combustible materials such as curtain drapes, furniture, bedding, paper etc. A. Measure the appliance and create a rough in with electrical. B.
installation EN note: The appliance tabs come bent. You must bend the tab flat by hand when fully recessing the appliance into the wall (Fig. 4). Fig. 3 Fig. 4 3.4.1 installing the appliance into a mantel 14 A. Remove the glass front (see "front glass removal" section). B. Install the rubber feet onto the bottom of the appliance for stability (see "rubber feet installation" section). C. Install the top and bottom brackets provided. D.
3.4.2 rubber feet installation installation A. Place the appliance face down on a soft surface. B. Using a screw driver, remove the screws on the bottom of the appliance. C. Install the 4 rubber feet (6 rubber feet for NEFL60/72/100FH) onto the bottom of the appliance using the screws from Step B. See illustrations below. EN note: The screws for installing the rubber feet are secured to the appliance. Removal of the screws is necessary for installing the rubber feet.
EN installation 3.5 • hard wiring installation ! WARNING Turn off the appliance completely and let cool before servicing. Only a qualified service person should service and repair this electric appliance. HARD WIRING CONNECTION If it is necessary to hard wire this appliance, a qualified electrician must remove the cord connection, and wire the appliance directly to the house hold wiring. This appliance must be electrically connected and grounded in accordance with local codes, if hard wired.
• • 4.1 4.0 finishing ! WARNING EN Power supply service must be completed prior to finishing to avoid reconstruction. Heat vents and air openings cannot be covered in any circumstances. front glass installation ! WARNING • • • • Glass may be hot. Do not touch glass until cooled. If equipped with door latches that are part of a safety system, they must be properly engaged. Do not operate the appliance with latches disengaged.
finishing EN FIG. 3 4.2 4.3 18 front glass removal FOR WALL MOUNT, PARTIAL RECESS AND MANTEL INSTALLED APPLIANCES ONLY: A. Remove the 2 screws from the top of the appliance, as shown below. B. Have 2 people lift the glass up and away from the appliance, holding the glass vertical not flat while carrying. Place the glass face down onto a soft, non-abrasive surface, careful not to flex the glass. C. Install the crystal embers (see "crystal ember installation" section).
• ! WARNING 5.0 operating instructions EN While the appliance is operating, do not remove the glass panel. This will cause the remote control and touch panel to malfunction. Once the appliance has been plugged into a grounded electrical outlet, it is ready to operate. note: Ensure the house circuit breakers for the power supply are turned on. In the event of a power failure, the appliance will lose its memory function and will reset to factory mode when the power returns. 5.
EN operating instructions 5.2 • operating touch display panel and remote control ! WARNING Do not move or remove the glass panel, when the appliance is plugged in and operating. This will cause the remote control and touch panel to no longer function. The touch display panel is shown by LED's on the front bottom right of the appliance. The LED's will disappear after 10 seconds of no function change. The Main Power button will be dim. POWER Turns the appliance ON/OFF.
• • • • 6.1 ! WARNING 6.0 maintenance EN In preparation for maintenance, always disconnect the power and allow the electric appliance to cool before performing any cleaning, maintenance or relocation of this electric appliance. Turn controls to off and remove plug from outlet or turn off the house circuit breaker to electric appliance receptable. Do not install replacement lamps that exceed specified maximum watts. The halogen lamps in your appliance can become extremely hot.
EN 7.0 wiring diagram ! WARNING • 22 Turn off the appliance completely and let cool before servicing. Only a qualified service person should service and repair this electric appliance. W415-1542 / E / 08.09.
wiring diagram W415-1542 / E / 08.09.
EN 8.0 replacement parts ! WARNING • Failure to position the parts in accordance with this manual or failure to use only parts specifically approved with this appliance may result in property damage or personal injury. Contact your dealer for questions concerning prices and policies on replacement parts. Normally, all parts can be ordered through your Authorized dealer / distributor. For warranty replacement parts, a photocopy of the original invoice will be required to honour the claim.
replacement parts 1 2 3 4 5 6 7 8 9 10 11 12 13 14 15 EN 16 Items may not appear exactly as illustrated. Ref.
EN 9.0 troubleshooting ! WARNING • Turn off the appliance completely and let cool before servicing. Only a qualified service person should service and repair this electric appliance. symptom Dim or no flame. solution Flame brightness not selected. See “operation” section. Flame LEDs are burnt out. Inspect the LED and replace, if necessary. Main PCB board is burnt out. Inspect the main PCV board and replace, if necessary. Ember bed is not glowing or dimming. Brightness not selected.
10.0 warranty EN Napoleon electric appliances are manufactured under the strict Standard of the world recognized ISO 9001 : 2015 Quality Management System. Napoleon products are designed with superior components and materials and assembled by trained craftsmen who take great pride in their work.
NAPOLEON CELEBRATING OVER 40 YEARS OF HOME COMFORT PRODUCTS 7200, Route Transcanadienne, Montréal, Québec H4T 1A3 24 Napoleon Road, Barrie, Ontario, Canada L4M 0G8 214 Bayview Drive, Barrie, Ontario, Canada L4N 4Y8 103 Miller Drive, Crittenden, Kentucky, USA 41030 Phone: 1-866-820-8686 napoleonproducts.
NEFL32FH / NEFL42FH / NEFL50FH / NEFL60FH / NEFL100FH MULTIPLE PRODUCT/ NEFL72FH CODES (LEAVE BLANK IF N/A) FRANÇAIS FRANÇAIS MANUEL D'INSTALLATION ADD MANUAL TITLE ET D'OPÉRATION Product / Code SérieName Allure™ (NEFL50FH (MUST use title from PriceIllustrée) Book) ADD PRODUCT CODE (IF MULTIPLE, _____ ILLUSTRATED) ADD PRODUCT IMAGE WARNING! CONSIGNES DE SÉCURITÉ ! AVERTISSEMENT A WARNING - KEEP BATTERIES OUT OF REACH OF CHILDREN AVERT ENFANTS RISQUE D’INCENDIE OU D’EXPLOSION Si ces instructions n
FR consignes de sécurité ! AVERTISSEMENT • • • • • • • • • • • • • • • • • Si équipé avec un chauffage, cet appareil peut être chaud lorsqu’il fonctionne et peut causer de graves brûlures en cas de contact. Ne faites pas fonctionner l’appareil avant d’avoir lu et compris les instructions d’utilisation. L’incapacité de respecter les instructions pourrait causer un incendie ou des blessures corporelles. N’installez pas de composants endommagés ou incomplets, ni des composants de substitution.
! AVERTISSEMENT consignes de sécurité • Pour prévenir les risques d’incendie, ne bloquez pas les entrées d’air et les sorties d’air de quelque manière que ce soit. Ne placez pas cet appareil sur une surface molle telle qu’un tapis où les ouvertures pourraient se bloquer. • Toujours brancher l’appareil directement dans une prise murale. N’utilisez pas de cordons d’alimentation ou une robinet d’alimentation relogeables (alimentation/multiprise).
FR table de matières 1.0 information générales 33 2.0 emplacement de l'appareil 37 3.0 installation 38 4.0 finition 45 5.0 instructions de fonctionnement 47 6.0 entretien 49 7.0 8.0 9.0 10.0 11.0 12.0 schéma de câblage pièces de rechanges guide de dépannage garantie historique de service notes 50 52 54 56 57 58 1.1 1.2 1.3 1.4 1.5 1.6 1.
1.1 1.0 information générales dimensions vue de côté vue face VUE DEde FACE FR C D B F G A vueVUE duDUsommet SOMMET E 1.2 information produit DIMENSIONS NO.
FR information générales 1.5 les approbations d'inscription Cet appareil a été testé selon les normes CSA pour foyers électriques installés de façon permanente aux États-Unis et au Canada. Si vous avez besoin d'assistance durant l'installation, veuillez contacter votre détaillant local.
1.6 information générales liste des pièces Réf.
FR information générales 1.7 information à propos de la plaque d'homologation CERTIFIED UNDER CANADIAN AND AMERICAN NATIONAL STANDARD: CSA 22.2 NO. 46 AND UL 2021 / HOMOLOGUÉ SELON LES NORMES NATIONALES CANADIENNES ET AMÉRICAINES:CSA 22.2 NO. 46 UL 2021 L IL MASTER CONTRACT: 161746 NEFL32FH NEFL42FH NEFL50FH N O FOYER À ÉLECTRIQUE. HOMOLOGUE POUR INSTALLATION DANS UNE CHAMBRE A COUCHER, UNE SALLE DE BAIN ET UN STUDIO. APPROPRIE POUR INSTALLATION DANS UNE MAISON MOBILE. ELECTRIC FIREPLACE.
• • • • • 2.1 2.0 emplacement de l'appareil ! AVERTISSEMENT FR En raison des températures élevées, l'appareil devrait être placé loin des endroits passants. Gardez tous les articles combustibles tels que les meubles, les oreillers, la literie, le papier, les vêtements, et les rideaux à une distance d'au moins 36" (91,4cm) de la façade de l'appareil. Ne placez jamais l'appareil électrique à un endroit où il risque de tomber dans une baignoire ou tout autre réservoir contenant de l'eau.
3.0 installation ! AVERTISSEMENT FR • • • • • • • • Risque d’incendie! Le cordon d’alimentation ne doit pas être coincé contre une arrète vive. Fixez le cordon pour éviter les chutes ou les accrochages afin de réduire le risque d’incendie, de choc électrique ou de blessures corporelles. Ne passez pas le cordon d’alimentation sous un tapis. Ne recouvrez pas le cordon avec des carpettes, des tapis de couloir ou autres revêtements similaires.
3.3 installation l'installation de l'appareil sur le mur Puisque les murs peuvent être recouverts de divers matériaux, nous vous conseillons fortement de retenir les services d’un professionnel qualifié pour ces travaux. A. Choisissez un endroit non sujet à l’humidité et situé à au moins 36" (91,4cm) des articles combustibles, tels que les rideaux, meubles, literie, papier, etc. B. Demandez à 2 personnes d’appuyer et de maintenir l’appareil contre le mur pour en déterminer l’emplacement définitif. C.
FR installation 3.3.1 ossature Les mesures sont prises du corps: Côtés, l'arrière et le sommet 0" Matériels de Finition A A B B JUNCTION JONCTION (PALIER NON PORTEUR) 3 1/2" [89mm] MIN. 40 W415-1542 / E / 08.09.18 3 1/2" 89mm MIN 5" 5" 127mm MAX [127mm] MAX. NO.
3.4 encastrement de l'appareil dans le mur installation FR En raison de trops de matériels finis différentes utilisé sur les murs, il est extrêmement recommandé que vous consultez votre constructeur local avant que vous installez cet appareil dans le mur. Choisissez un endroit non sujet à l’humidité et situé à au moins 36 pouces (91,4cm) des articles combustibles, tels que les rideaux, meubles, literie, papier, etc. A. Mesurez l’appareil et créez une esquisse pour le câblage électrique. B.
installation note: Les onglets de l’appareil sont pliés. Vous devez plier l’onglet plat quand vous encastré entièrement l’appareil dans le mur (Fig. 4). FR Fig. 3 Fig. 4 3.4.1 l'installation de l'appareil dans une tablette A. B. C. D. E. F. 42 Enlevez le verre avant (voir la section « l'enlèvement de verre avant »). Installez les pieds en caoutchouc sur le bas de l'appareil pour la stabilité (voir la section « l'installation des pieds en caoutchouc »).
3.4.2 l'installation des pieds en caoutchouc A. B. C. installation Placez l'appareil face vers le bas sur une surface douce. À l'aide d'un tournevis, enlevez les vis sur le fond de l'appareil. Installez les 4 pieds en caoutchouc (6 pieds en caoutchouc pour NEFL60/72 /100FH) sur le fond de l'appareil à l'aide des vis de l'étape B. Voir les illustrations ci-dessous. FR note: Les vis pour le montage des pieds en caoutchouc sont fixées sur l'appareil.
FR installation 3.5 • branchement par câble ! AVERTISSEMENT Coupez l'alimentation électrique à l'appareil et laissez-le refroidir avant d'effectuer un entretien. Seul un technicien de service qualifié peut effectuer l'entretien ou la réparation de cet appareil électrique. Si c'est nécessaire de faire un branchement par câble, un électricien qualifié peut retirer le cordon d’alimentation de l'appareil et brancher ce dernier directement au câblage de la maison.
! AVERTISSEMENT • • 4.1 4.0 finition FR Le raccordement par câble doit être complété avant la finition afin d'éviter toute reconstruction. Les entrées d'air et les sorties d'air de l'apapreil ne doivent jamais être couvertes. l'installation de verre avant ! AVERTISSEMENT • • • • La vitre peut être chaude. Ne touchez pas la vitre jusqu’à ce qu’elle ait refroidi. Si équipé avec les loquets de porte qui font partie d’un dispositif de sécurité, ils doivent être adéquatement verrouillés.
finition FR Fig. 3 4.2 l'enlèvement de verre avant POUR MONTAGE MURALE, RECESS PARTIELLE ET TABLETTE INSTALLÉ APPAREIL UNIQUEMENT A. B. C. 4.3 Retirez les 2 vis du haut de l'appareil, comme illustré ci-dessous. À l'aide de 2 personnes, soulevez le verre haut et loin de l'appareil, tenant le verre vertical pas à plat pendant tout le transport. Placez la face du verre vers le bas sur une surface douce et non abrasive. Assurez-vous de ne pas fléchir le verre.
• ! AVERTISSEMENT 5.0 instructions de fonctionnement FR Alors que l'appareil fonctionne, ne pas enlever le panneau de verre. Cela parce que la télécommande et l'écran tactile de dysfonctionnement. L'appareil est prêt à fonctionner dès qu'il est correctement branché dans une prise de courant mise à la terre. note: Assurez-vous que les disjoncteurs de la maison pour l'alimentation sont allumés.
FR instructions de fonctionnement 5.2 • utilisation du panneau de contrôle et télécommande ! AVERTISSEMENT Ne pas déplacer ou retirer le panneau de verre lorsque l'appareil est branché et fonctionne. Cela provoquera la télécommande et l'écran tactile de ne plus fonctionner. Le panneau d'affichage tactile est indiqué par les DEL en bas à droite en face de l'appareil. Les DEL vont disparaître après 10 secondes s’il n’y a aucun changement de fonction. Le bouton d'alimentation principale sera affaibli.
• • • • 6.1 6.0 entretien ! AVERTISSEMENT FR En préparation pour l'entretien, débranchez toujours l'alimentation électrique et laissez l'appareil refroidir avant de le nettoyer, de procéder à son entretien ou de le relocaliser. Tournez les contrôles à « off » et retirez la fiche de la prise de courant ou fermez le disjoncteur du circuit de votre appareil. Ne pas installer d'ampoules de rechange qui excèdent la puissance (watts) maximale spécifiée.
7.0 schéma de câblage FR ! AVERTISSEMENT • 50 Coupez l'alimentation électrique à l'appareil et laissez-le refroidir avant d'effectuer un entretien. Seul un technicient de service qualifié peut effectuer l'entretien ou la réparation de cet appareil électrique. W415-1542 / E / 08.09.
schéma de câblage W415-1542 / E / 08.09.
8.0 pièces de rechanges FR ! AVERTISSEMENT • Omettre de positionner les pièces conformément à ce manuel ou d’utiliser uniquement des pièces spécifiquement approuvées pour cet appareil peut causer des dommages matériels ou des blessures corporelles. Contactez votre détaillant pour les questions concernant les prix et la disponibilité des pièces de remplacement. Normalement, toutes les pièces peuvent être commandées chez votre détaillant autorisé.
pièces de rechanges 1 2 3 4 5 6 7 8 9 10 11 12 13 14 15 FR 16 Ces articles peuvent différer de celles illustrées. Réf.
9.0 guide de dépannage FR ! AVERTISSEMENT • Coupez l’alimentation électrique à l’appareil et laissez-le refroidir avant d’effectuer un entretien. Seulement un technicien de service qualifié peut effectuer l’entretien ou la réparation de cet appareil électrique. symptôme solution La luminosité du jeu de flammes est fiable ou inexistante. Éclat de flamme n’est pas sélectionné Voir la section « opération ». Les DEL sont brûlées. Vérifiez les DEL et remplacez-les au besoin.
La télécommande ne fonctionne pas. Les piles sont faibles. Remplacez les piles de la télécommande. Dysfonctionnement du récepteur à distance. S’assurez que le récepteur à distance n’est pas bloqué. Replacer le panneau. La chauffage s’éteint automatiquement. La température ambiante est trop élevée. L’appareil est équipé d’un thermostat intégré et s’éteindra automatiquement lorsque la température programmée sera atteinte.
FR 10.0 garantie Les appareils électriques Napoléon sont fabriqués conformément aux normes strictes du Système de Gestion de la Qualité mondialement reconnu ISO 9001 : 2015. Les produits Napoléon sont conçus avec des composants et des matériaux de qualité supérieure, assemblés par des artisans qualifiés qui sont fiers de leur travail.
Date Détaillant Nom du Technicien Travail Effectué Cet appareil doit être entretenu annuellement selon son usage. Historique de service de l’appareil Problèmes Particuliers 11.0 historique de service W415-1542 / E / 08.09.
FR 12.0 notes 58 29.1 W415-1542 / E / 08.09.
notes 29.1 W415-1542 / E / 08.09.
NAPOLÉON CÉLÈBRE PLUS DE 40 ANS D’EXISTENCE CONSACRÉS À LA CONCEPTION DE PRODUITS DE CONFORT 7200, Route Transcanadienne, Montréal, Québec H4T 1A3 24 Napoleon Road, Barrie, Ontario, Canada L4M 0G8 214 Bayview Drive, Barrie, Ontario, Canada L4N 4Y8 103 Miller Drive, Crittenden, Kentucky, USA 41030 Téléphone: 1-866-820-8686 napoleonproducts.