Measurement Studio TM User Manual Subtitle Measurement Studio User Manual April 2008 373392C-01
Support Worldwide Technical Support and Product Information ni.
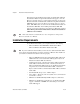
Important Information Warranty The media on which you receive National Instruments software are warranted not to fail to execute programming instructions, due to defects in materials and workmanship, for a period of 90 days from date of shipment, as evidenced by receipts or other documentation. National Instruments will, at its option, repair or replace software media that do not execute programming instructions if National Instruments receives notice of such defects during the warranty period.
Contents About This Manual How To Use This Manual..............................................................................................ix Conventions ...................................................................................................................x Chapter 1 Introduction to Measurement Studio Installation Requirements ..............................................................................................1-2 Driver Support ....................................................
Contents Numeric Controls ............................................................................................ 2-27 Numeric Edit Control...................................................................................... 2-29 Switch and LED Controls ............................................................................... 2-30 Property Editor Control................................................................................... 2-32 Windows Forms Array Controls .........................
Contents Additional Operations .......................................................................3-21 Knob Control ...................................................................................................3-21 Numeric Edit Control ......................................................................................3-22 Slide Control....................................................................................................3-23 Utility .................................................
About This Manual The Measurement Studio User Manual introduces the concepts associated with the Measurement Studio class libraries and development tools. This manual assumes that you have a general working knowledge of Microsoft Visual Studio and the .NET Framework for .NET application development or MFC for unmanaged C++ application development. How To Use This Manual Measurement Studio 8.5 includes two Visual Studio support CDs—one with support for Visual Studio .
About This Manual Use this manual as a starting point to learn about Measurement Studio. Refer to the NI Measurement Studio Help within the Visual Studio environment for function reference and detailed information about the Measurement Studio class libraries, wizards, assistants, and other features. Conventions The following conventions appear in this manual: <> Text enclosed in angle brackets represents directory names and parts of paths that may vary on different computers, such as .
Introduction to Measurement Studio 1 Measurement Studio is an integrated suite of tools and class libraries that are designed for developers using Microsoft Visual Basic .NET, Visual C#, ASP.NET, and Visual C++ to develop measurement and automation applications.
Chapter 1 Introduction to Measurement Studio This manual documents Measurement Studio for Visual Studio 2005 and Visual Studio 2008. For help with Visual Studio 6.0 support, refer to the Measurement Studio Support for Visual Studio 6.0 Readme located on the Measurement Studio for Visual Studio 6.0 CD. For help with Visual Studio .NET 2003 support, refer to the Measurement Studio Support for Visual Studio .NET 2003 Readme located on the CD for Measurement Studio for Visual Studio .NET 2003.
Chapter 1 • Microsoft-compatible mouse • Microsoft Internet Explorer 6.0 or later Introduction to Measurement Studio Optional Installation—In order for links from Measurement Studio help topics to .NET Framework help topics to work, you must install the Microsoft .NET Framework SDK 2.0 or Microsoft .NET Framework SDK 3.5. Driver Support To use .NET class libraries that interface to National Instruments device drivers, NI-DAQmx, NI-VISA and NI-488.
Chapter 1 Introduction to Measurement Studio Note There are separate installers for Measurement Studio support for Visual Studio 2005 and Measurement Studio support for Visual Studio 2008. Repeat the installation instructions to install support for both. When installing support for more than one version of Visual Studio, you can reduce installation time by running the Device Drivers CD installer only once.
Chapter 1 Introduction to Measurement Studio To install support for NI-DAQmx: 1. In the NI Measurement Studio 8.5 installer, enable the VS2008 Driver Support».NET Framework 3.5 Languages Support for NI-DAQmx feature. 2. In the NI Device Drivers installer, enable the Data Acquisition» NI-DAQmx feature. To install support for NI-VISA: 1. In the NI Measurement Studio 8.5 installer, enable the VS2008 Driver Support».NET Framework 3.5 Languages Support for NI-VISA feature.
Chapter 1 Introduction to Measurement Studio Installing the Current Version of Measurement Studio over Previous Versions of Measurement Studio You can have only one version of Measurement Studio installed on a system for each version of Visual Studio or the .NET Framework installed on the system. For example, you can have Measurement Studio 8.1.2 for Visual Studio 2005 installed on the same system as Measurement Studio 8.5 for Visual Studio 2008, but you cannot have Measurement Studio 8.1.
Chapter 1 Introduction to Measurement Studio Table 1-1. Measurement Studio Package Comparison Chart for Visual C# and Visual Basic .NET Feature Standard Edition Professional Edition Enterprise Edition Project Wizards ✔ ✔ ✔ Windows Forms User Interface Controls ✔ ✔ ✔ Standard Analysis Libraries1 ✔ ✔ ✔ NI-488.2 Class Libraries2 ✔ ✔ ✔ NI-VISA Class Libraries2 ✔ ✔ ✔ NI-DAQmx Class Libraries2 ✔ ✔ ✔ .
Chapter 1 Introduction to Measurement Studio Table 1-1. Measurement Studio Package Comparison Chart for Visual C# and Visual Basic .
Chapter 1 Introduction to Measurement Studio Learning Measurement Studio As you work with Measurement Studio, you might need to consult additional resources. For detailed Measurement Studio help, including function reference and in-depth documentation on developing with Measurement Studio, refer to the NI Measurement Studio Help within the Visual Studio environment. The NI Measurement Studio Help is fully integrated with the Visual Studio help.
Chapter 1 Introduction to Measurement Studio For more information on example locations, refer to Where To Find Examples. Measurement Studio User Manual • NI Technical Support—Refer to Appendix A, Technical Support and Professional Services, for more information. • Measurement Studio Web site, ni.com/mstudio—Contains Measurement Studio news, support, downloads, white papers, product tutorials, and evaluation software. • NI Developer Zone, zone.ni.
Measurement Studio .NET Class Libraries 2 This chapter provides overview information about the .NET class libraries included with Measurement Studio support for Visual Studio 2005 and Visual Studio 2008. Refer to the Using the Measurement Studio .NET Class Libraries section of the NI Measurement Studio Help for detailed information about these libraries. Refer to Chapter 5, Getting Started with Measurement Studio, for step-by-step instructions on developing applications with these libraries.
Chapter 2 Measurement Studio .NET Class Libraries Analysis The Measurement Studio Analysis .NET class library is in the NationalInstruments.Analysis namespace. The Analysis class library includes a set of classes that provides digital signal processing, signal filtering, signal generation, peak detection, and other general mathematical functionality. Use this library to analyze acquired data or to generate data.
Chapter 2 Measurement Studio .
Chapter 2 Measurement Studio .NET Class Libraries Table 2-1. Analysis .NET Library Measurement Types included in the Professional and Enterprise Packages (Continued) Analysis .
Chapter 2 Measurement Studio .NET Class Libraries Table 2-1. Analysis .NET Library Measurement Types included in the Professional and Enterprise Packages (Continued) Analysis .
Chapter 2 Measurement Studio .NET Class Libraries Table 2-1. Analysis .NET Library Measurement Types included in the Professional and Enterprise Packages (Continued) Analysis .
Chapter 2 Measurement Studio .NET Class Libraries Table 2-1. Analysis .NET Library Measurement Types included in the Professional and Enterprise Packages (Continued) Analysis .
Chapter 2 Measurement Studio .NET Class Libraries Table 2-1. Analysis .NET Library Measurement Types included in the Professional and Enterprise Packages (Continued) Analysis .
Chapter 2 Measurement Studio .NET Class Libraries Table 2-1. Analysis .NET Library Measurement Types included in the Professional and Enterprise Packages (Continued) Analysis .
Chapter 2 Measurement Studio .NET Class Libraries Table 2-1. Analysis .NET Library Measurement Types included in the Professional and Enterprise Packages (Continued) Analysis .
Chapter 2 Measurement Studio .NET Class Libraries Table 2-1. Analysis .NET Library Measurement Types included in the Professional and Enterprise Packages (Continued) Analysis .
Chapter 2 Measurement Studio .NET Class Libraries Table 2-1. Analysis .NET Library Measurement Types included in the Professional and Enterprise Packages (Continued) Analysis .
Chapter 2 Measurement Studio .NET Class Libraries Table 2-1. Analysis .NET Library Measurement Types included in the Professional and Enterprise Packages (Continued) Analysis .NET Library Professional Package Enterprise Package Spherical Bessel 1st ✔ Spherical Bessel 2nd ✔ Stirling ✔ Struve ✔ Tricomi ✔ Zeta ✔ For more information about analyzing or generating data with the Analysis class library, refer to the Using the Measurement Studio Analysis .
Chapter 2 Measurement Studio .NET Class Libraries • An EngineeringFormatInfo class that defines a custom formatter to format numeric values as strings with engineering notation and International System of Units (SI) prefixes and symbols. • A PrecisionWaveformTiming class that you can use to represent the timing of an analog or digital waveform that is accurate to the nearest 2-64 second.
Chapter 2 Measurement Studio .NET Class Libraries Use the features in the Network Variable class library to perform the following operations: • Exchange different types of data between Measurement Studio, LabVIEW, LabWindows/CVI, and other applications that support NI-Publish Subscribe Protocol (psp:) and OLE for Process Control (opc:) servers. Exchanging data between Measurement Studio applications and OPC servers requires LabVIEW DSC.
Chapter 2 Measurement Studio .NET Class Libraries transfer protocol servers (ftp:), file systems (file:), and OLE for Process Control (opc:) servers. • Specify data sources and targets using a URL, the same way you access Web pages in a Web browser. • Use DataSocket Transfer Protocol (DSTP) to exchange different types of data. • Expose DataSocket data items as data sources that you can bind to properties of a Windows Forms control.
Chapter 2 Measurement Studio .NET Class Libraries Use the NI-DAQmx class library to perform the following types of tasks: • Analog signal measurement • Analog signal generation • Digital I/O • Counting and timing • Pulse generation • Signal switching Tip For more information about the NI-DAQmx class library, refer to the Using the Measurement Studio NI-DAQmx.NET Library topic in the NI Measurement Studio Help. For more information about DAQ, visit ni.com/dataacquisition. NI-SCOPE The .
Chapter 2 Measurement Studio .NET Class Libraries • PXI • Serial (RS-232 and RS-485) • TCP/IP • USB • VXI For information about creating a Measurement Studio NI-VISA application using the Instrument I/O Assistant, refer to the Creating an Instrument Control Application section in Chapter 4, Measurement Studio Integrated Tools and Features or the Walkthrough: Creating a Measurement Studio Instrument I/O Application in Chapter 5, Getting Started with Measurement Studio.
Chapter 2 Measurement Studio .NET Class Libraries Table 2-2. Measurement Studio User Interface Controls (Continued) User Interface Controls Windows Forms Web Forms Numeric edit ✔ ✔ Switch ✔ ✔ LED ✔ ✔ Property editor ✔ Array controls ✔ ✔ AutoRefresh control ✔ InstrumentControlStrip control Windows Forms Controls The Windows Forms .NET class library is in the NationalInstruments.UI.WindowsForms namespace.
Chapter 2 Measurement Studio .NET Class Libraries Use this class library to add measurement-specific user interface controls to your application. You can configure the controls programmatically at design time, through the Properties window in the Windows Forms Designer, or at run time with the property editor control. The following sections describe each of the Measurement Studio Windows Forms user interface controls. For more information about using the .
Chapter 2 Measurement Studio .NET Class Libraries With the waveform graph and scatter graph controls and the classes that interface with the controls, you can perform the following operations: Plot Operations • Plot and chart arrays of double-precision floating point values, analog waveforms, and complex waveforms. • Configure a graph to contain multiple plots to show separate but related data on the same graph. • Draw lines or fills from a plot to an X value, Y value, or another plot.
Chapter 2 Measurement Studio .NET Class Libraries Cursor Operations • Use cursors to identify key points in plots and the plot area. • Configure cursor snap modes to be fixed, floating, nearest point, or to plot. • Use cursor labels to display X and Y data coordinates in a customized format that the cursor crosshair points to, and customize the text font and colors of the label. • Create custom point and line styles for cursors.
Chapter 2 Measurement Studio .NET Class Libraries Digital Waveform Graph Control Use the Measurement Studio digital waveform graph control, as shown in Figure 2-2, to display DigitalWaveform data on a Windows Forms user interface. Figure 2-2. Digital Graph Windows Forms Control With the digital waveform graph control and the classes that interface with the control, you can perform the following operations: Plot Operations • Plot digital waveform data.
Chapter 2 Measurement Studio .NET Class Libraries Waveform Sample and Signal State Operations • Simultaneously display waveforms and signals or display signals only. • Create custom waveform sample and signal state styles. • Configure the appearance of sample and state labels. • Create custom waveform sample and signal state labels. Axis Operations • Configure the axis modes to fixed, exact autoscaling, or loose autoscaling.
Chapter 2 Measurement Studio .NET Class Libraries Complex Graph Control Use the Measurement Studio complex graph control, as shown in Figure 2-3, to display ComplexDouble data on a Windows Forms user interface. A ComplexDouble consists of a real part and an imaginary part. You can use a waveform graph to plot complex waveform data. Figure 2-3.
Chapter 2 Measurement Studio .NET Class Libraries Axis Operations • Configure a graph to include multiple axes or independent ranges so that plot data fits the graph plot area. • Configure the axis modes to: fixed; autoscaling, including autoscaling based on the visible data only; strip chart; or scope chart. • Interactively change the range of an axis and invert the axis at run time by clicking on the axis end labels. • Display origin lines and grid lines.
Chapter 2 Measurement Studio .NET Class Libraries Additional Operations • Pan and zoom interactively. • Copy the graph as a BMP, GIF, JPEG, or PNG image to the clipboard or a file. For more information about using the complex graph control, refer to the Using the Measurement Studio Windows Forms Complex Graph .NET Control section in the NI Measurement Studio Help.
Chapter 2 Measurement Studio .NET Class Libraries • Configure the format of value labels to engineering or date/time. • Display tooltips reflecting the current value of the pointer. • Interactively change the value of the control by clicking or dragging and moving the pointer with the mouse. • Interactively change the range of an axis and invert the axis at run time by clicking on the axis end labels. • Programmatically move the pointer to previous or next value.
Chapter 2 Measurement Studio .NET Class Libraries Use the Measurement Studio slide, tank, and thermometer controls, as shown in Figure 2-5, to input and display numeric data on your interface. Figure 2-5. .NET Slide, Tank, and Thermometer Controls With the slide, tank, and thermometer controls and the classes that interface with them, you can perform the following operations: • Fill to the minimum or maximum value of the scale.
Chapter 2 Measurement Studio .NET Class Libraries With the numeric edit control and the classes that interface with the control you can perform the following operations: • Use up and down buttons for easy incrementing and decrementing. • Perform range checking. • Set the minimum range value to negative infinity and the maximum range value to positive infinity. • Create custom formats or use built-in numeric formats including generic, engineering, and simple double.
Chapter 2 Measurement Studio .NET Class Libraries You typically use an LED control, as shown in Figure 2-8, to indicate a Boolean value on an application user interface. Figure 2-8. LED Windows Forms Control in Square 3D Style With the switch and LED controls and the classes that interface with the controls, you can perform the following operations: • Receive notification before or after the state of the control changes.
Chapter 2 Measurement Studio .NET Class Libraries Property Editor Control Use the Measurement Studio property editor control, as shown in Figure 2-9, to configure properties for Windows Forms controls at run time. Figure 2-9. Property Editor Windows Forms Control for the Knob Control Scale Arc Property With the property editor control and the classes that interface with the control, you can perform the following operations: Measurement Studio User Manual • Edit any .
Chapter 2 Measurement Studio .NET Class Libraries For more information about using the property editor control, refer to the Using the Measurement Studio Property Editor Control topic in the NI Measurement Studio Help. Tip Windows Forms Array Controls You can create an array of Measurement Studio controls that behave as a single unit. For example, you can use these array controls to visualize and control ports of a digital line or values of an array.
Chapter 2 Measurement Studio .NET Class Libraries • Make the control background transparent. • Configure the LED controls to blink while they are on or off and configure the rate at which the LED controls blink. • Configure the layout of the control to be horizontal or vertical. • Bind the value of the control to a data source. • Mark an array of Boolean controls so that only one can be true at a time.
Chapter 2 Measurement Studio .NET Class Libraries • Set the interaction mode to keyboard and mouse, keyboard only, mouse only, or none. • Use the edit box to select text programmatically and to validate text values. • Configure the layout of the control to be horizontal or vertical. • Bind the value of the control to a data source. For more information about using the numeric edit array control, refer to the Using the Measurement Studio Control Array .
Chapter 2 Measurement Studio .NET Class Libraries Figure 2-12. InstrumentControlStrip Control For more information about the InstrumentControlStrip control, refer to Using the Measurement Studio Windows Forms Instrument Control Strip .NET Control topic in the NI Measurement Studio Help. Tip Measurement Studio User Manual 2-36 ni.
Chapter 2 Measurement Studio .NET Class Libraries ASP.NET Web Forms Controls The Measurement Studio ASP.NET user interface controls are in the Web Forms .NET class library. The Web Forms .NET class library is in the NationalInstruments.UI.WebForms namespace.
Chapter 2 Measurement Studio .NET Class Libraries Waveform Graph and Scatter Graph Controls Use the Measurement Studio waveform graph and scatter graph controls, as shown in Figure 2-13, to display two-dimensional data on a Web-based user interface. Use the waveform graph to display two-dimensional linear data. You explicitly specify each value in one dimension and provide an initial value and interval to implicitly specify the values in the other dimension.
Chapter 2 Measurement Studio .NET Class Libraries • Draw lines or fills from a plot to an X value, Y value, or another plot. • Specify plots in the scatter graph control as X and Y data. Specify plots in the waveform graph control as X or Y data and optionally with date and time scaling. • Use the extensible plot and plot area drawing capabilities and events to customize the graph appearance. • Create custom point and line styles for plots. • Specify anti-aliased plots for plot lines.
Chapter 2 Measurement Studio .NET Class Libraries Additional Operations • Zoom interactively as well as programatically. • Specify the image format of the control as BMP, GIF, JPEG, or PNG. For more information about using the waveform and scatter graph controls, refer to the Using the Measurement Studio Web Forms Scatter and Waveform Graph .NET Controls section in the NI Measurement Studio Help.
Chapter 2 Measurement Studio .NET Class Libraries With the digital waveform graph control and the classes that interface with the control, you can perform the following operations: Plot Operations • Plot digital waveform data, including digital signal state data and timing information. • Configure plot labels on the y-axis. • Configure plot templates to customize plots that are implicitly created from plotted data. • Specify anti-aliased digital plots.
Chapter 2 Measurement Studio .NET Class Libraries For more information about using the digital waveform graph control, refer to the Using the Measurement Studio Web Forms Digital Waveform Graph .NET Control section in the NI Measurement Studio Help. Tip Complex Graph Control Use the Measurement Studio complex graph control, as shown in Figure 2-15, to display ComplexDouble data on a ASP.NET Web application. A ComplexDouble consists of a real part and an imaginary part.
Chapter 2 Measurement Studio .NET Class Libraries • Create custom point and line styles for plots. • Specify anti-aliased plots for plot lines. • Calculate and display error bands. • Configure plot to specify how data is saved and restored across HTTP requests. Axis Operations • Configure a graph to include multiple axes or independent ranges so that plot data fits the graph plot area.
Chapter 2 Measurement Studio .NET Class Libraries • Annotate and label a magnitude value. • Annotate and label a range of magnitude values for a particular phase. Additional Operations • Zoom interactively as well as programmatically. • Specify the image format of the control as BMP, GIF, JPEG, or PNG. For more information about using the complex graph control, refer to the Using the Measurement Studio Web Forms Complex Graph .NET Control section in the NI Measurement Studio Help.
Chapter 2 Measurement Studio .NET Class Libraries • Customize the appearance of the control using 3D lab styles or classic 2D styles and change the color and length of ticks and labels. • Configure the format of value labels to engineering or date/time. • Specify the image format of the control as BMP, GIF, JPEG, or PNG. • Interactively change the range of an axis and invert the axis at run time by clicking on the axis end labels. • Display tooltips reflecting the current value of the pointer.
Chapter 2 Measurement Studio .NET Class Libraries Use the Measurement Studio slide, tank, and thermometer controls, as shown in Figure 2-17, to input and display numeric data on your interface. Figure 2-17. Slide, Tank, and Thermometer Web Forms Controls With the slide, tank, and thermometer controls and the classes that interface with them, you can perform the following operations: • Fill to the minimum or maximum value of the scale.
Chapter 2 Measurement Studio .NET Class Libraries Numeric Edit Control Use the Measurement Studio numeric edit control, as shown in Figure 2-18, to display numeric values and to provide a way by which end users can edit numeric values. Typically, you use a numeric edit control to input or display double numerical data instead of using a Web Forms TextBox control. Figure 2-18.
Chapter 2 Measurement Studio .NET Class Libraries Switch and LED Controls Use the Measurement Studio switch and LED controls as Boolean controls in an ASP.NET Web application. You typically use a switch control to receive and control Boolean input in an ASP.NET Web application. You typically use an LED control to indicate a Boolean value on an ASP.NET Web application. The switch and LED controls are shown in Figure 2-19. Figure 2-19.
Chapter 2 Measurement Studio .NET Class Libraries AutoRefresh Control Use the AutoRefresh control to update a Web control or a group of Web controls on the client at a specified interval. The AutoRefresh control uses the ASP.NET client callback architecture to update a control or a group of controls at a specified interval. The AutoRefresh control sets up a timer inside the browser using Javascript. When the timer elapses, the AutoRefresh updates the controls in the AutoRefresh group.
Measurement Studio Visual C++ Class Libraries 3 This chapter provides overview information about the Visual C++ class libraries that are available with Measurement Studio. Measurement Studio Visual C++ support for Visual Studio .NET 2003 and Visual Studio 2005 is the same, except where noted. Refer to the Using the Measurement Studio Visual C++ Class Libraries section of the NI Measurement Studio Help for detailed information about these libraries. Measurement Studio 8.
Chapter 3 Refer to the following sections for information about each Measurement Studio Visual C++ class library. ActiveX Controls in Visual C++ ActiveX controls are specialized COM servers that implement a specific set of interfaces. The Measurement Studio Visual C++ button, graph, knob, numeric edit, slide, and 3D graph are ActiveX controls. Measurement Studio includes classes that provide native C++ interfaces to the ActiveX controls.
Chapter 3 Plot Operations • Plot three-dimensional data, including curves and surfaces. • Use multiple plot styles—point-line, line-point, hidden-line, contour, surface, surface-line, surface-contour, and surface-normal. • Create multiple plots with individual properties, such as name, line and point style, width, and base value. • Configure the control to render directly to OpenGL-enabled hardware accelerator cards.
Chapter 3 Standard Analysis The Standard Analysis class library, which ships with Measurement Studio Standard Edition, includes the sawtooth, sine, square, triangle, and basic function wave generators.
Chapter 3 Refer to Table 3-1 to determine the type of measurements available in the Professional and Enterprise Analysis Visual C++ libraries. Table 3-1.
Chapter 3 Table 3-1.
Chapter 3 Table 3-1.
Chapter 3 Table 3-1.
Chapter 3 Table 3-1.
Chapter 3 Table 3-1.
Chapter 3 Table 3-1.
Chapter 3 Table 3-1.
Chapter 3 Table 3-1.
Chapter 3 Table 3-1.
Chapter 3 Common The Measurement Studio Common Visual C++ class library provides data types and classes that other Measurement Studio Visual C++ class libraries use. The classes that are implemented natively in Visual C++ include the CNiVector and CNiMatrix classes. The Common class library includes the following data types: • CNiScalarVector—Implements a vector object that contains scalar numbers. • CNiScalarMatrix—Implements a matrix object that contains scalar numbers.
Chapter 3 transfer protocol servers (ftp:), file systems (file:), and OLE for Process Control (opc:) servers. • Specify data sources and targets using a URL, the same way you access Web pages in a Web browser. • Use DataSocket Transfer Protocol (DSTP) to exchange different types of data. • Interactively browse to quickly locate and select data items on other computers and servers.
Chapter 3 NI-488.2 Use the Measurement Studio NI-488.2 Visual C++ class library to communicate with and control instruments on a GPIB interface. This class library is included when you install the NI-488.2 driver. Use this class library to configure and communicate with GPIB devices using the CNi4882Device and CNi4882Board classes. You can use the NI-488.2 class library to create programs that interface with a device that is using GPIB and programs that interface with the GPIB device directly.
Chapter 3 NI-Reports Use the Measurement Studio NI-Reports Visual C++ class library to generate printed reports from Measurement Studio Visual C++ applications. This class library is included only in the Measurement Studio Enterprise package. For information about generating printed reports using the NI-Reports class library, refer to the NI-Reports Visual C++ Class Library Overview topic in the NI Measurement Studio Help.
Chapter 3 User Interface Use the Measurement Studio User Interface Visual C++ class library to add user interface controls to your application. You can configure the user interface controls programmatically or through the property pages in the Visual C++ resource editor. Measurement Studio includes the following Visual C++ user interface controls: • Button • Graph • Knob • Numeric edit • Slide The following sections describe each of the Measurement Studio Visual C++ user interface controls.
Chapter 3 Tip For more information about using the button control, refer to the Using the Measurement Studio Button Visual C++ Control section in the NI Measurement Studio Help. Graph Control Use the Measurement Studio ActiveX graph control, as shown in Figure 3-3, to plot and chart two-dimensional data. The CNiGraph class provides the Visual C++ interface to the ActiveX graph control. Figure 3-3.
Chapter 3 Axis Operations • Use the CNiAxis class to interface to a single axis of a graph control. This feature allows you to modify the appearance and behavior of the axis. • Automatically label axes with log or inverted numeric scales. • Configure the axis modes for manual scaling or autoscaling. Additional Operations • Configure cursor snap modes to be fixed, floating, nearest point, and to plot. • Pan and zoom interactively. • Configure the graph for fixed, strip, or scope charting.
Chapter 3 With the knob control and the classes that interface with the control, you can perform the following operations: • Use different display styles—knobs, dials, and meters. • Use multiple control pointers, each representing one scalar value. A control pointer indicates the current value of the knob. • Use the CNiAxis class to interface to a single axis of a knob control. This feature allows you to modify the appearance and behavior of the axis.
Chapter 3 For more information about easily using the numeric edit control, refer to the Using the Measurement Studio Numeric Edit Visual C++ Control section in the NI Measurement Studio Help. Tip Slide Control Use the Measurement Studio ActiveX slide control, as shown in Figure 3-6, to display numerical data. CNiSlide is the class that provides the Visual C++ interface to the ActiveX slide control. Figure 3-6.
Chapter 3 Utility Use the Measurement Studio Utility Visual C++ class library to easily access Windows operating system functionality. Table 3-2 lists classes in the Utility class library and their functionality. Table 3-2. Utility Class Names and Functionalities Utility Class CNiFile Functionality CNiFile extends the MFC CStdioFile class by adding streaming operators for standard Visual C++ data types.
Chapter 3 Table 3-2. Utility Class Names and Functionalities (Continued) Utility Class Functionality CNiTempFile CNiTempFile extends the functionality of CNiFile to add temporary file creation and manipulation. CNiTimer CNiTimer objects use the Windows multimedia timer to generate high-resolution, asynchronous tick events. Respond to tick events when you want to perform an action at a discrete interval. Additionally, you can count the tick events to calculate elapsed time.
Measurement Studio Integrated Tools and Features 4 When you use Measurement Studio in the Visual Studio environment, you have access to measurement and automation tools and features for Visual Basic .NET, Visual C#, ASP.NET, and Visual C++. These integrated tools and features are designed to help you quickly and easily build measurement and automation applications. These integrated tools and features are included in support for both Visual Studio 2005 and Visual Studio 2008.
Chapter 4 Measurement Studio Integrated Tools and Features Measurement Studio User Manual • Add/Remove .NET Class Libraries Wizard—Use the Measurement Studio Add/Remove Class Libraries wizard to add or remove Measurement Studio class libraries or assemblies in existing Visual Basic .NET, Visual C#, or Visual C++ projects. • Refresh Project License File—Use the Refresh Project License File to update the licenses.
Chapter 4 Measurement Studio Integrated Tools and Features that the communication with an instrument is correct. Select NI Tools»NI Spy to access this menu item. The NI Spy menu item is available only if you have NI Spy installed.
Chapter 4 Measurement Studio Integrated Tools and Features • Measurement Studio Online Resources»NI Developer Zone—NI Developer Zone, zone.ni.com, provides access to online example programs, tutorials, technical news, and a Measurement Studio Discussion Forum where you can participate in discussion forums for Visual Basic 6.0, Visual C++, and .NET Languages. Select Measurement Studio Online Resources»NI Developer Zone to access this menu item.
Chapter 4 Measurement Studio Integrated Tools and Features Figure 4-1. New Project Dialog Box in Visual Studio 2005 Tip For more information about using project templates to create a new Measurement Studio project, refer to the Creating a New Measurement Studio Project section in the NI Measurement Studio Help. Note For information about converting Measurement Studio projects, refer to the Converting Measurement Studio Projects section in the NI Measurement Studio Help.
Chapter 4 Measurement Studio Integrated Tools and Features When you exit the wizard, the wizard adds or removes the appropriate references to or from the project, thus adding or removing the functionality associated with the class library. Figure 4-2. Measurement Studio Add/Remove Class Libraries Wizard for Visual Studio 2005 For more information about using the Add/Remove .NET Class Libraries wizard to add or remove Measurement Studio .
Chapter 4 Measurement Studio Integrated Tools and Features The DAQ Assistant is available only if you have installed NI-DAQmx and either the Measurement Studio Professional or Measurement Studio Enterprise package. Note Refer to Chapter 5, the Walkthrough: Creating a Measurement Studio NI-DAQmx Application section, for step-by-step instructions on how to create DAQ applications. Figure 4-3.
Chapter 4 Measurement Studio Integrated Tools and Features The DAQ Assistant interactively assists you in performing the following operations: • Creating an NI-DAQmx task class • Configuring an NI-DAQmx task class • Generating a Visual Basic .
Chapter 4 Measurement Studio Integrated Tools and Features For more information on how to create an NI-DAQmx user interface, refer to the Using a .NET DAQ Component in a Project topic in the NI Measurement Studio Help. Tip Creating NI-DAQmx User Code in Visual C++ Measurement Studio 8.5 support for Visual Studio 2008 does not include support for Visual C++. Note You can create NI-DAQmx user code in Visual C++.
Chapter 4 Measurement Studio Integrated Tools and Features Refer to Chapter 5, the Walkthrough: Creating a Measurement Studio Instrument I/O Application section, for step-by-step instructions on how to use the Instrument I/O Assistant. Figure 4-5.
Chapter 4 Measurement Studio Integrated Tools and Features Selecting a Measurement Studio Parameter Value To access I/O devices or resources, you must specify string constants or scalar values for many method parameters and property values. Use the Measurement Studio Parameter Assistant, on the Measurement Studio menu, to discover and insert into your code valid parameter values for methods and various Measurement Studio class libraries, such as NI-DAQmx, NI-488.2, and NI-VISA.
Chapter 4 Measurement Studio Integrated Tools and Features Using the Instrument Driver Wizard To use an IVI or VXI plug&play instrument driver with a C DLL in a Measurement Studio .NET application, use the Measurement Studio .NET Instrument Driver wizard to create .NET entry points to the C DLL functions you need to call from your application. Use the Add New Item wizard to select the .NET Instrument Driver Wizard. The Measurement Studio .NET Instrument Driver wizard, as shown in Figure 4-7, generates a .
5 Getting Started with Measurement Studio The following sections include overview information and step-by-step instructions on developing applications with Measurement Studio tools and features. Refer to the Developing with Measurement Studio section and the Getting Started with the Measurement Studio Class Libraries section of the NI Measurement Studio Help for more information about the functionality of these tools and features.
Chapter 5 Getting Started with Measurement Studio Walkthrough: Creating a Measurement Studio Application with Windows Forms Controls and Analysis To complete this walkthrough, you must have either the Measurement Studio Professional or Measurement Studio Enterprise package installed for Visual Studio 2005 or later. This walkthrough will not work with the Measurement Studio Standard package.
Chapter 5 Getting Started with Measurement Studio Setting up the project 1. Select Start»All Programs»Microsoft Visual Studio 2005» Microsoft Visual Studio 2005 or Start»All Programs»Microsoft Visual Studio 2008»Microsoft Visual Studio 2008. 2. Select File»New»Project. The New Project dialog box launches. 3. In the Project Types pane, select Measurement Studio under Visual C# or Visual Basic, depending on which language you want to create the project in. 4.
Chapter 5 Getting Started with Measurement Studio If you are working with an existing project, you can access the Add/Remove Class Libraries dialog box by selecting Measurement Studio»View .NET Class Library Wizard. Tip 7. Click Finish to display Form1 in the Windows Forms Designer. Adding user interface controls to the project Measurement Studio User Manual 1. Select View»Toolbox to display the Toolbox. The Toolbox contains components and controls that you can add to your project. 2.
Chapter 5 Getting Started with Measurement Studio 6. Expand the Measurement Studio group in the Toolbox. 7. Select the WaveformGraph control and drag and drop it onto the form. 8. Right-click the waveform graph and select Edit Plots to display the WaveformPlot Collection Editor dialog box. You use the WaveformPlot Collection Editor dialog box to add or remove plots and to configure plot properties.
Chapter 5 Getting Started with Measurement Studio You can also access the WaveformPlot Collection Editor dialog box by clicking the waveform graph smart tag. To access the smart tag, left click on the control to select it and then left click on the arrow button in the upper right corner of the control. Note 9. Type Plot for the Name. Click OK. 10. Before you add the Measurement Studio legend, numeric edit, and gauge controls, you need to resize the form to accommodate them.
Chapter 5 Getting Started with Measurement Studio 15. Type gauge for the name of the gauge. The following screenshot shows Form1 with the user controls.
Chapter 5 Getting Started with Measurement Studio Generating, plotting, and analyzing the data 1. Double-click the button control to display the Form1 code, with the cursor inside the click event handler of the button control. 2. Add the following code to generate random data, plot the data, calculate the mean of the data, and display the mean on the gauge. [VB.NET] ' Declare and initialize an instance of WhiteNoiseSignal.
Chapter 5 Getting Started with Measurement Studio Customizing your user interface 1. Right-click the legend and select Edit Items to display the LegendItem Collection Editor dialog box. You use the LegendItem Collection Editor dialog box to add or remove legend items and to configure legend item properties. 2. Select Plot in the Source drop-down list and enter Signal in the Text box. Click OK.
Chapter 5 Getting Started with Measurement Studio 4. Select Points Only. Click OK. Notice that the legend changed automatically to match the formatting of the graph. 5. Click the gauge smart tag to display the Gauge Tasks. 6. Select Auto Format to display the Auto Format dialog box. 7. Select Dark and click OK. 8. Right-click the gauge and select Properties to display the Properties window. 9. Set the Range property for the gauge with the drop-down Range type editor. Type -0.
Chapter 5 Getting Started with Measurement Studio 15. Select Debug»Start Without Debugging to run the application. 16. After your program builds, click Start. Notice the graph shows the data plot, and the gauge and the numeric edit display the mean of the data.
Chapter 5 Getting Started with Measurement Studio • Generating, plotting, and analyzing the data—Using NationalInstruments.Analysis.SignalGeneration.White NoiseSignal and NationalInstruments.Analysis.Math. Statistics.Mean, you will generate data, plot the generated data on a waveform graph, and calculate the mean of the data.
Chapter 5 3. Getting Started with Measurement Studio In the Templates pane, select NI ASP.NET Web Site. Select File System and specify a file path of your choice. 4. Use the drop-down box to select Visual C# or Visual Basic, depending on which language you want to create the project in. 5. Click OK. The Measurement Studio ASP.NET Web Site Wizard launches. 6. Select Analysis Library and Web Forms User Interface Control Library.
Chapter 5 Getting Started with Measurement Studio If you are working with an existing project, you can access the Add/Remove Class Libraries dialog box by selecting Measurement Studio»Add/Remove .NET Class Libraries Wizard. Tip Measurement Studio User Manual 7. Click Finish to display Default.aspx in the Web Forms Designer. 8. You can change the title of your Web page. Click inside the
tag and rename the title to Measurement Studio Web Forms Controls and Analysis Walkthrough. 5-14 ni.</p></li><li><h6><a class="text-decoration-none text-link fw-bold" href=/manual/national-instruments/373392c-01/user-s-manual-english/page-119.html>PAGE 119</a></h6><p>Chapter 5 Getting Started with Measurement Studio Adding user interface controls to the project In this section, you will build a Web page that looks like the following screenshot. 1. Click Design in the lower left corner to switch from Source View to Design View. 2. Select View»Toolbox to display the Toolbox. The Toolbox contains components and controls that you can add to your project. 3. Expand the HTML group on the Toolbox.</p></li><li><h6><a class="text-decoration-none text-link fw-bold" href=/manual/national-instruments/373392c-01/user-s-manual-english/page-120.html>PAGE 120</a></h6><p>Chapter 5 Getting Started with Measurement Studio 7. Select the Button control and drag and drop it into the lower right table cell. 8. Right-click the button and select Properties to display the Properties window. You configure the properties of the control in the Properties window. 9. Scroll to the Text property in the Properties window. Type Start for the button text. 10. Expand the Measurement Studio group on the Toolbox. 11.</p></li><li><h6><a class="text-decoration-none text-link fw-bold" href=/manual/national-instruments/373392c-01/user-s-manual-english/page-121.html>PAGE 121</a></h6><p>Chapter 5 Getting Started with Measurement Studio 13. Select the Legend control and drag and drop it into the bottom left table cell. 14. Select the NumericEdit control and drag and drop it into the bottom center table cell. 15. On the numeric edit smart tag, type numericedit for the name of the numeric edit ID. 16. Select the Gauge control and drag and drop it into the top table cell, to the right of the waveform graph. Resize controls and table cells as necessary. 17.</p></li><li><h6><a class="text-decoration-none text-link fw-bold" href=/manual/national-instruments/373392c-01/user-s-manual-english/page-122.html>PAGE 122</a></h6><p>Chapter 5 Getting Started with Measurement Studio The following screenshot shows Default.aspx with the user controls. Generating, plotting, and analyzing the data 1. Double-click the button control to display the Default.aspx.cs code, with the cursor inside the click event handler of the button control. 2. Add the following code to generate random data, plot the data, calculate the mean of the data, and display the mean on the gauge. [VB.NET] ' Declare and initialize an instance of WhiteNoiseSignal.</p></li><li><h6><a class="text-decoration-none text-link fw-bold" href=/manual/national-instruments/373392c-01/user-s-manual-english/page-123.html>PAGE 123</a></h6><p>Chapter 5 Getting Started with Measurement Studio [C#] // Declare and initialize an instance of WhiteNoiseSignal. WhiteNoiseSignal whiteNoise = new WhiteNoiseSignal(); // Store the generated data in a double array named data. double[] data = whiteNoise.Generate(1000.0, 256); // Use the PlotY method to plot the data. graph.PlotY(data); // Use the Mean method to calculate the mean of the data. double mean = Statistics.Mean(data); // Display the mean on the numeric edit. numericedit.</p></li><li><h6><a class="text-decoration-none text-link fw-bold" href=/manual/national-instruments/373392c-01/user-s-manual-english/page-124.html>PAGE 124</a></h6><p>Chapter 5 Getting Started with Measurement Studio 3. Select Plots[0] in the Source drop-down list and enter Signal in the Text box. Click OK. Now that you have specified a legend item for the plot, changes you make to the plot will be reflected on the legend. 4. Right-click the graph and select Auto Format to display the Auto Format dialog box. The Auto Format dialog box provides a set of pre-configured control styles.</p></li><li><h6><a class="text-decoration-none text-link fw-bold" href=/manual/national-instruments/373392c-01/user-s-manual-english/page-125.html>PAGE 125</a></h6><p>Chapter 5 Getting Started with Measurement Studio 11. Select File»Save Default.aspx to save your application. 12. Select Debug»Start Without Debugging to run the application. 13. After your program builds, click Start. Notice the graph shows the data plot, and the gauge and the numeric edit display the mean of the data. The following screenshot shows Default.aspx in its final form.</p></li><li><h6><a class="text-decoration-none text-link fw-bold" href=/manual/national-instruments/373392c-01/user-s-manual-english/page-126.html>PAGE 126</a></h6><p>Chapter 5 Getting Started with Measurement Studio Walkthrough: Creating a Measurement Studio Application with Windows Forms Controls and Network Variable To complete this walkthrough, you must have either the Measurement Studio Professional or Measurement Studio Enterprise package installed for Visual Studio 2005 or later. This walkthrough will not work with the Measurement Studio Standard package.</p></li><li><h6><a class="text-decoration-none text-link fw-bold" href=/manual/national-instruments/373392c-01/user-s-manual-english/page-127.html>PAGE 127</a></h6><p>Chapter 5 Getting Started with Measurement Studio Writing an array of data to the server 1. Select Start»All Programs»Microsoft Visual Studio 2005» Microsoft Visual Studio 2005 or Start»All Programs»Microsoft Visual Studio 2008»Microsoft Visual Studio 2008. 2. Select File»New»Project. The New Project dialog box launches. 3. In the Project Types pane, select Visual C# or Visual Basic, depending on which language you want to create the project in. 4. In the Templates pane, select Console Application.</p></li><li><h6><a class="text-decoration-none text-link fw-bold" href=/manual/national-instruments/373392c-01/user-s-manual-english/page-128.html>PAGE 128</a></h6><p>Chapter 5 Getting Started with Measurement Studio 7. Select NetworkVariable Communication Library. Click Finish. 8. In Program.cs, add the following code to write an array of data to the server: You should choose the appropriate code depending on whether you created a VB or C# project. Note [VB.NET] Imports System Imports System.Collections.Generic Imports System.Text Imports System.Threading Imports NationalInstruments.</p></li><li><h6><a class="text-decoration-none text-link fw-bold" href=/manual/national-instruments/373392c-01/user-s-manual-english/page-129.html>PAGE 129</a></h6><p>Chapter 5 Getting Started with Measurement Studio Return values End Function Sub Main() Const location As String = "\\localhost\system\double" Dim bufferedWriter As NetworkVariableBufferedWriter(Of Double()) = New NetworkVariableBufferedWriter(Of Double())(location) bufferedWriter.Connect() Dim phase As Integer = 0 While (True) Dim values As Double() = GenerateDoubleArray(phase) Console.WriteLine("Writing Array") bufferedWriter.WriteValue(values) Thread.</p></li><li><h6><a class="text-decoration-none text-link fw-bold" href=/manual/national-instruments/373392c-01/user-s-manual-english/page-130.html>PAGE 130</a></h6><p>Chapter 5 Getting Started with Measurement Studio bufferedWrite.WriteValue(value); Thread.Sleep(500); phase++; } } } } 9. Select Debug»Start Without Debugging to run the application. 10. Minimize the console, but keep the application running. Measurement Studio User Manual 5-26 ni.</p></li><li><h6><a class="text-decoration-none text-link fw-bold" href=/manual/national-instruments/373392c-01/user-s-manual-english/page-131.html>PAGE 131</a></h6><p>Chapter 5 Getting Started with Measurement Studio Setting up a Windows Forms project 1. Select Start»All Programs»Microsoft Visual Studio 2005» Microsoft Visual Studio 2005. 2. Select File»New»Project. The New Project dialog box launches. 3. In the Project types pane, select Measurement Studio under Visual C# or Visual Basic, depending on which language you want to create the project in. 4. In the Templates pane, select NI Windows Application.</p></li><li><h6><a class="text-decoration-none text-link fw-bold" href=/manual/national-instruments/373392c-01/user-s-manual-english/page-132.html>PAGE 132</a></h6><p>Chapter 5 Getting Started with Measurement Studio 6. Select Network Variable Communication Library and Windows Forms User Interface Control Library. If you are working with an existing project, you can access the Add/Remove Class Libraries dialog box by selecting Measurement Studio»Add/Remove Class Libraries Wizard. Tip 7. Measurement Studio User Manual Click Finish to display Form1 in the Windows Forms Designer. 5-28 ni.</p></li><li><h6><a class="text-decoration-none text-link fw-bold" href=/manual/national-instruments/373392c-01/user-s-manual-english/page-133.html>PAGE 133</a></h6><p>Chapter 5 Getting Started with Measurement Studio Configuring the network variable data source control 1. Select View»Toolbox to display the Toolbox. The toolbox contains components and controls that you can add to your project. 2. Expand the Measurement Studio group on the Toolbox. 3. Select the NetworkVariableDataSource control in the toolbox and drag and drop it on the form. The NetworkVariableDataSource control is a data source control with functionality similar to System.Web. UI.WebControls.</p></li><li><h6><a class="text-decoration-none text-link fw-bold" href=/manual/national-instruments/373392c-01/user-s-manual-english/page-134.html>PAGE 134</a></h6><p>Chapter 5 Getting Started with Measurement Studio 6. For the Location, browse to the \\localhost\System\double location in the Select Network Item dialog box. 7. Click OK to return to the NetworkVariableBinding Collection Editor dialog box. 8. After you configure the binding properties, click OK to return to the Windows Forms Designer. Displaying the array of data on a Windows form Measurement Studio User Manual 1. Select WaveformGraph in the Toolbox and drag and drop it on the form. 2.</p></li><li><h6><a class="text-decoration-none text-link fw-bold" href=/manual/national-instruments/373392c-01/user-s-manual-english/page-135.html>PAGE 135</a></h6><p>Chapter 5 Getting Started with Measurement Studio Walkthrough: Creating a Measurement Studio Application with Web Forms Controls and Network Variable To complete this walkthrough, you must have either the Measurement Studio Professional or Measurement Studio Enterprise package installed for Visual Studio 2005 or later. This walkthrough will not work with the Measurement Studio Standard package.</p></li><li><h6><a class="text-decoration-none text-link fw-bold" href=/manual/national-instruments/373392c-01/user-s-manual-english/page-136.html>PAGE 136</a></h6><p>Chapter 5 Getting Started with Measurement Studio • Displaying the array of data on a Web page—Using the Toolbox, you will add and configure an NationalInstruments.UI. WebForms.AutoRefresh control and a NationalInstruments. UI.WebForms.WaveformGraph control to display the data. Before you begin The following components are required to complete this walkthrough: • Microsoft Visual Studio 2005 or Visual Studio 2008 • Measurement Studio 8.0.</p></li><li><h6><a class="text-decoration-none text-link fw-bold" href=/manual/national-instruments/373392c-01/user-s-manual-english/page-137.html>PAGE 137</a></h6><p>Chapter 5 3. 4. Getting Started with Measurement Studio In the Project Types pane, select Visual C# or Visual Basic, depending on which language you want to create the project in. In the Templates pane, select Console Application. Specify NetworkVariableWriter for Name and specify a Location of your choice. 5. Click OK. 6. Select Measurement Studio»Add/Remove .NET Class Libraries. The Measurement Studio Add/Remove Class Libraries wizard launches.</p></li><li><h6><a class="text-decoration-none text-link fw-bold" href=/manual/national-instruments/373392c-01/user-s-manual-english/page-138.html>PAGE 138</a></h6><p>Chapter 5 Getting Started with Measurement Studio 8. In Program.cs, add the following code to write an array of data to the server: [VB.NET] Imports NationalInstruments.NetworkVariable Imports System.Threading Imports System Module Module1 Private Function GenerateDoubleArray(ByVal phase As Double) As Double() Dim values(999) As Double Dim x As Integer For x = 0 To 999 values(x) = Math.Sin(((2 * Math.</p></li><li><h6><a class="text-decoration-none text-link fw-bold" href=/manual/national-instruments/373392c-01/user-s-manual-english/page-139.html>PAGE 139</a></h6><p>Chapter 5 Getting Started with Measurement Studio } static void Main(string[] args) { const string Location = @"\\localhost\system\double"; NetworkVariableBufferedWriter<double[]> bufferedWriter = new NetworkVariableBufferedWriter<double[]>(Location); bufferedWriter.Connect(); int phase = 0; while (true) { double[] value = GenerateDoubleArray(phase); Console.WriteLine("Writing array"); bufferedWriter.WriteValue(value); Thread.Sleep(500); phase++; } } } } 9.</p></li><li><h6><a class="text-decoration-none text-link fw-bold" href=/manual/national-instruments/373392c-01/user-s-manual-english/page-140.html>PAGE 140</a></h6><p>Chapter 5 Getting Started with Measurement Studio Setting up a Web Forms project 1. Select Start»All Programs»Microsoft Visual Studio 2005» Microsoft Visual Studio 2005 or Start»All Programs»Microsoft Visual Studio 2008»Microsoft Visual Studio 2008. 2. Select File»New»Web Site. The New Web Site dialog box launches. 3. In the Templates pane, select NI ASP.NET Web Site. Select File System for Location and specify a file path of your choice. Measurement Studio User Manual 4.</p></li><li><h6><a class="text-decoration-none text-link fw-bold" href=/manual/national-instruments/373392c-01/user-s-manual-english/page-141.html>PAGE 141</a></h6><p>Chapter 5 6. Getting Started with Measurement Studio Select Network Variable Communication Library and Web Forms User Interface Control Library. If you are working with an existing project, you can access the Add/Remove Class Libraries dialog box by selecting Measurement Studio»Add/Remove Class Libraries Wizard. Tip 7. Click Finish to display Default.aspx in the Web Forms Designer. 8. You can rename the title of your Web page.</p></li><li><h6><a class="text-decoration-none text-link fw-bold" href=/manual/national-instruments/373392c-01/user-s-manual-english/page-142.html>PAGE 142</a></h6><p>Chapter 5 Getting Started with Measurement Studio Configuring the network variable data source control Measurement Studio User Manual 1. Click Design in the lower left corner to switch from Source View to Design View. 2. Select View»Toolbox to display the Toolbox. The toolbox contains components and controls that you can add to your project. 3. Expand the Measurement Studio group on the Toolbox. 4. Select the NetworkVariableDataSource control in the toolbox and drag and drop it on the form.</p></li><li><h6><a class="text-decoration-none text-link fw-bold" href=/manual/national-instruments/373392c-01/user-s-manual-english/page-143.html>PAGE 143</a></h6><p>Chapter 5 Getting Started with Measurement Studio 6. Select Add. You add a binding to create a connection with the underlying network variable, and you use the NetworkVariableBinding Collection Editor to configure the binding properties. Select Object for the BindingType. You select Object because this walkthrough binds to NationalInstruments.UI.WebForms. WaveformGraph.BindingData. Enter 0 as the DefaultReadValue. 7.</p></li><li><h6><a class="text-decoration-none text-link fw-bold" href=/manual/national-instruments/373392c-01/user-s-manual-english/page-144.html>PAGE 144</a></h6><p>Chapter 5 Getting Started with Measurement Studio 8. Click OK to return to the NetworkVariableBinding Collection Editor dialog box. 9. After you configure the binding properties, click OK to return to the ASP.NET Designer. Displaying the array of data on a Web page Measurement Studio User Manual 1. Select WaveformGraph in the Toolbox and drag and drop it on the form. 2. Select AutoRefresh in the Toolbox and drag and drop it on the form. 3. In the AutoRefresh smart tag, check Enabled.</p></li><li><h6><a class="text-decoration-none text-link fw-bold" href=/manual/national-instruments/373392c-01/user-s-manual-english/page-145.html>PAGE 145</a></h6><p>Chapter 5 Getting Started with Measurement Studio 4. Select Add. Select WaveformGraph1 for the ItemID and click OK. 5. Double-click the AutoRefresh control. Add the following code to the AutoRefresh event handler to bind the waveform graph control to the network variable data source control: [VB.NET] WaveformGraph1.BindingData = NetworkVariableDataSource1.Bindings(0).GetValue() [C#] WaveformGraph1.BindingData = NetworkVariableDataSource1.Bindings[0].</p></li><li><h6><a class="text-decoration-none text-link fw-bold" href=/manual/national-instruments/373392c-01/user-s-manual-english/page-146.html>PAGE 146</a></h6><p>Chapter 5 Getting Started with Measurement Studio 6. Select File»Save Default.aspx to save your application. 7. Select Debug»Start Without Debugging to run the application. The waveform graph displays the array of data. Note You can also use the System.Web.UI.WebControls.FormView control to bind to NationalInstruments.NetworkVariable.WebForms. NetworkVariableDataSource. Refer to Using the Measurement Studio Network Variable Data Source in Web Forms for more information.</p></li><li><h6><a class="text-decoration-none text-link fw-bold" href=/manual/national-instruments/373392c-01/user-s-manual-english/page-147.html>PAGE 147</a></h6><p>Chapter 5 Getting Started with Measurement Studio • Configuring your task—Using the DAQ Assistant, you will interactively configure and save your task. The wizard then generates code to reflect your configuration settings. The wizard also generates a component that provides common operations for your task and integration with the Windows Forms designer.</p></li><li><h6><a class="text-decoration-none text-link fw-bold" href=/manual/national-instruments/373392c-01/user-s-manual-english/page-148.html>PAGE 148</a></h6><p>Chapter 5 Getting Started with Measurement Studio 3. 4. In the Project types pane, expand the Visual C# or Visual Basic node, depending on which language you want to create the project in, and select Measurement Studio. Code generation works in both languages. In the Templates pane, select NI DAQ Windows Application. Specify MyDAQmxProject for Name and specify a Location of your choice. Click OK. The Measurement Studio DAQ Application Wizard launches. Measurement Studio User Manual 5-44 ni.</p></li><li><h6><a class="text-decoration-none text-link fw-bold" href=/manual/national-instruments/373392c-01/user-s-manual-english/page-149.html>PAGE 149</a></h6><p>Chapter 5 5. Getting Started with Measurement Studio In the Add DAQ Component dialog box, you can choose to create a new project task, create a new MAX task, create a reference to a MAX task, copy a MAX task to a project task, or copy an existing .mxb. For this walkthrough, select Create a new project task and click Finish. The Measurement Studio DAQ Application Wizard automatically sets up your data acquisition project and launches the DAQ Assistant.</p></li><li><h6><a class="text-decoration-none text-link fw-bold" href=/manual/national-instruments/373392c-01/user-s-manual-english/page-150.html>PAGE 150</a></h6><p>Chapter 5 Getting Started with Measurement Studio To configure your task Measurement Studio User Manual 1. In the Create New dialog box of the DAQ Assistant, you can begin to interactively define your DAQ task. Select Acquire Signals, and then Analog Input as the measurement type for your task. 2. Next, select Voltage. 5-46 ni.</p></li><li><h6><a class="text-decoration-none text-link fw-bold" href=/manual/national-instruments/373392c-01/user-s-manual-english/page-151.html>PAGE 151</a></h6><p>Chapter 5 3. Getting Started with Measurement Studio From the Supported Physical Channels tree in the Physical tab, select the physical channel, such as ai1, on the DAQ device to which you connected the voltage signal. Click Finish. You can also use a simulated device in this walkthrough. For more information, refer to Creating NI-DAQmx Simulated Devices in the Measurement & Automation Explorer Help for NI-DAQmx.</p></li><li><h6><a class="text-decoration-none text-link fw-bold" href=/manual/national-instruments/373392c-01/user-s-manual-english/page-152.html>PAGE 152</a></h6><p>Chapter 5 Getting Started with Measurement Studio 4. Measurement Studio User Manual In the Edit DAQ Task dialog box, you can edit the configuration of your DAQ task. If the embedded DAQ Assistant help is not open by default, click the Show Help button in the upper-right corner of the window to display the help. 5-48 ni.</p></li><li><h6><a class="text-decoration-none text-link fw-bold" href=/manual/national-instruments/373392c-01/user-s-manual-english/page-153.html>PAGE 153</a></h6><p>Chapter 5 Getting Started with Measurement Studio 5. To complete the DAQ configuration, select the N Samples Acquisition Mode in the Timing Settings section. For more information on timing, refer to Timing in the NI-DAQmx Help. 6. Next, click the Run button in the toolbar near the top of the Edit DAQ Task dialog box. The test runs automatically. You can run the test in the DAQ Assistant to test the task and make sure you connected the signal properly.</p></li><li><h6><a class="text-decoration-none text-link fw-bold" href=/manual/national-instruments/373392c-01/user-s-manual-english/page-154.html>PAGE 154</a></h6><p>Chapter 5 Getting Started with Measurement Studio To create a custom user interface for the task Measurement Studio User Manual 1. In the Configure DAQ Component UI wizard, you can customize and preview a user interface and code for your task. 2. Click Finish to generate the task user interface in your project form. 5-50 ni.</p></li><li><h6><a class="text-decoration-none text-link fw-bold" href=/manual/national-instruments/373392c-01/user-s-manual-english/page-155.html>PAGE 155</a></h6><p>Chapter 5 Getting Started with Measurement Studio The wizard also generates event handlers and code to acquire data and present it on your generated user interface.</p></li><li><h6><a class="text-decoration-none text-link fw-bold" href=/manual/national-instruments/373392c-01/user-s-manual-english/page-156.html>PAGE 156</a></h6><p>Chapter 5 Getting Started with Measurement Studio 3. Press <f5> to run the application. 4. After you have started the application, click the Read button to begin acquiring data from your DAQ device. What’s next To learn more about tasks, channels, and other NI-DAQmx concepts, refer to the NI-DAQmx Help located at Start»All Programs»National Instruments»NI-DAQ»NI-DAQmx Help. For more information about creating and using tasks in Measurement Studio, refer to Using the Measurement Studio NI-DAQmx .</p></li><li><h6><a class="text-decoration-none text-link fw-bold" href=/manual/national-instruments/373392c-01/user-s-manual-english/page-157.html>PAGE 157</a></h6><p>Chapter 5 Getting Started with Measurement Studio The National Instruments Instrument I/O Assistant organizes instrument communication for a serial, Ethernet, or GPIB instrument into ordered steps.</p></li><li><h6><a class="text-decoration-none text-link fw-bold" href=/manual/national-instruments/373392c-01/user-s-manual-english/page-158.html>PAGE 158</a></h6><p>Chapter 5 Getting Started with Measurement Studio Measurement Studio User Manual 3. In the Project Types pane, select Measurement Studio under Visual C# or Visual Basic, depending on which language you want to create the project in. This walkthrough refers to Visual C#, but you can follow the same process if you use Visual Basic .NET. 4. In the Templates pane, select NI VISA Windows Application. Specify MyIIOAProject for Name and select a Location of your choice. 5. Click OK.</p></li><li><h6><a class="text-decoration-none text-link fw-bold" href=/manual/national-instruments/373392c-01/user-s-manual-english/page-159.html>PAGE 159</a></h6><p>Chapter 5 Getting Started with Measurement Studio Performing a query on the instrument This walkthrough was created using the NI Instrument Simulator. Any identification information or sample code generated for this device will be different depending on the instrument actually used. Note 1. The Select Instrument step automatically appears in the Step Sequence window when you launch the Instrument I/O Assistant.</p></li><li><h6><a class="text-decoration-none text-link fw-bold" href=/manual/national-instruments/373392c-01/user-s-manual-english/page-160.html>PAGE 160</a></h6><p>Chapter 5 Getting Started with Measurement Studio Measurement Studio User Manual 5. If there are more than two tokens in the token list, remove them for this example. To remove a token, right-click on it in the response window and select Remove. The response window displays data in binary form, ASCII form, or binary form and ASCII form together. If there is only one token in the token list, split the token into two tokens for this example.</p></li><li><h6><a class="text-decoration-none text-link fw-bold" href=/manual/national-instruments/373392c-01/user-s-manual-english/page-161.html>PAGE 161</a></h6><p>Chapter 5 Getting Started with Measurement Studio 10. Click the Show All Files icon and expand the VisaTask.mxb node. 11. Double-click the VisaNSTask1 file to view the code that the Instrument I/O Assistant generated for you. Displaying Instrument I/O Assistant data on your user interface 1. Double-click the Form1 file in the Solution Explorer to open your main application form. 2. Select View»Toolbox to display the Toolbox. 3. Expand the All Windows Forms group on the Toolbox. 4.</p></li><li><h6><a class="text-decoration-none text-link fw-bold" href=/manual/national-instruments/373392c-01/user-s-manual-english/page-162.html>PAGE 162</a></h6><p>Chapter 5 Getting Started with Measurement Studio 7. Add the following code to display the vendor and model name of your instrument in the text boxes. [VB.NET] ' Declare an instance of VisaTask Dim myTask As New VisaTask() Dim results As VisaTaskResults 'Display the data in the text boxes results = myTask.Run() textBox1.Text = results.Vendor textBox2.Text = results.</p></li><li><h6><a class="text-decoration-none text-link fw-bold" href=/manual/national-instruments/373392c-01/user-s-manual-english/page-163.html>PAGE 163</a></h6><p>Technical Support and Professional Services A Visit the following sections of the award-winning National Instruments Web site at ni.com for technical support and professional services: • Support—Technical support resources at ni.com/support include the following: – Self-Help Technical Resources—For answers and solutions, visit ni.</p></li><li><h6><a class="text-decoration-none text-link fw-bold" href=/manual/national-instruments/373392c-01/user-s-manual-english/page-164.html>PAGE 164</a></h6><p>Appendix A Technical Support and Professional Services If you searched ni.com and could not find the answers you need, contact your local office or NI corporate headquarters. Phone numbers for our worldwide offices are listed at the front of this manual. You also can visit the Worldwide Offices section of ni.com/niglobal to access the branch office Web sites, which provide up-to-date contact information, support phone numbers, email addresses, and current events. Measurement Studio User Manual A-2 ni.</p></li><li><h6><a class="text-decoration-none text-link fw-bold" href=/manual/national-instruments/373392c-01/user-s-manual-english/page-165.html>PAGE 165</a></h6><p>Glossary A ActiveX Set of Microsoft technologies for reusable software components. Formerly called OLE. ActiveX control Reusable software component that adds functionality to any ActiveX control container through exposed properties, methods, and events. The Measurement Studio data acquisition, user interface, and analysis controls are examples of ActiveX controls.</p></li><li><h6><a class="text-decoration-none text-link fw-bold" href=/manual/national-instruments/373392c-01/user-s-manual-english/page-166.html>PAGE 166</a></h6><p>Glossary B button A control used to input or display Boolean information or to initiate an action in a program. C channel 1. Physical—a terminal or pin at which you can measure or generate an analog or digital signal. A single physical channel can include more than one terminal, as in the case of a differential analog input channel or a digital port of eight lines.</p></li><li><h6><a class="text-decoration-none text-link fw-bold" href=/manual/national-instruments/373392c-01/user-s-manual-english/page-167.html>PAGE 167</a></h6><p>Glossary coercion Automatic conversion that Measurement Studio controls perform to change the numeric representation of a data element. COM Component Object Model. Microsoft specification for architecting and developing reusable software components. complex graph A control that displays a ComplexDouble data type; the ComplexDouble data type represents a complex number of type Double that is composed of a real part and an imaginary part.</p></li><li><h6><a class="text-decoration-none text-link fw-bold" href=/manual/national-instruments/373392c-01/user-s-manual-english/page-168.html>PAGE 168</a></h6><p>Glossary DataSocket Technology that simplifies live data exchange between applications and HTTP, FTP, OPC, logos (Lookout objects) and file servers over the Internet. It provides one common API to a number of different communication protocols. device An instrument or controller you can access as a single entity that controls or monitors real-world I/O points. A device is often connected to a host computer through some type of communication network. See also DAQ device and measurement device.</p></li><li><h6><a class="text-decoration-none text-link fw-bold" href=/manual/national-instruments/373392c-01/user-s-manual-english/page-169.html>PAGE 169</a></h6><p>Glossary E Ethernet Standard connection type for networks, where computers are connected by coaxial or twisted-pair cable. event Object-generated response to some action or change in state, such as a mouse click or a completed acquisition. The event calls an event procedure that processes the event. executable Program file with a .exe extension that you can run independently of the development environment in which it was created.</p></li><li><h6><a class="text-decoration-none text-link fw-bold" href=/manual/national-instruments/373392c-01/user-s-manual-english/page-170.html>PAGE 170</a></h6><p>Glossary I IEEE 488 Shortened notation for ANSI/IEEE Standards 488-1978, 488.1-1987, and 488.2-1987. See also GPIB. IMAQ Vision National Instruments image acquisition and analysis software that you can use to acquire images from National Instruments image acquisition (IMAQ) boards, display them in your program, perform interactive viewer operations, and analyze the images to extract information. indicator A control in read-only mode.</p></li><li><h6><a class="text-decoration-none text-link fw-bold" href=/manual/national-instruments/373392c-01/user-s-manual-english/page-171.html>PAGE 171</a></h6><p>Glossary L LabVIEW Laboratory Virtual Instrument Engineering Workbench. Graphical development environment used for developing test and measurement applications. LabWindows/CVI ANSI C development environment for building test and measurement applications. LED Light-Emitting Diode. An indicator that emits a light when current passes through it. For example, an LED shows if your computer or printer is turned on.</p></li><li><h6><a class="text-decoration-none text-link fw-bold" href=/manual/national-instruments/373392c-01/user-s-manual-english/page-172.html>PAGE 172</a></h6><p>Glossary N NI-488.2 Driver-level software to control and communicate with National Instruments GPIB hardware. NI-DAQ Driver-level software to control and communicate with DAQ hardware. NI-DAQ is an extensive library of VIs and functions you can call from an application development environment (ADE) to program all the features of an NI measurement device, such as configuring, acquiring and generating data from, and sending data to the device.</p></li><li><h6><a class="text-decoration-none text-link fw-bold" href=/manual/national-instruments/373392c-01/user-s-manual-english/page-173.html>PAGE 173</a></h6><p>Glossary P PCI Peripheral Component Interconnect. High-performance expansion bus architecture commonly found in PCs. PID Proportional-Integral-Derivative. A three-term control mechanism combining proportional, integral, and derivative control. You might use a PID algorithm to control processes such as heating and cooling systems, fluid level monitoring, flow control, and pressure control. plot 1. Trace (data line) on a graph representing the data in one row or column of an array. 2.</p></li><li><h6><a class="text-decoration-none text-link fw-bold" href=/manual/national-instruments/373392c-01/user-s-manual-english/page-174.html>PAGE 174</a></h6><p>Glossary R range Region between the limits within which a quantity is measured, received, or transmitted. The range is expressed by stating the lower and upper range values. S scalar Number that a point on a scale can represent. The number is a single value as opposed to an array. scale Part of graph, chart, and some numeric controls and indicators that contains a series of marks or points at known intervals to denote units of measure.</p></li><li><h6><a class="text-decoration-none text-link fw-bold" href=/manual/national-instruments/373392c-01/user-s-manual-english/page-175.html>PAGE 175</a></h6><p>Glossary TCP/IP Transmission Control Protocol/Internet Protocol. A standard format for transferring data in packets from one computer to another. The two parts of TCP/IP are TCP, which deals with the construction of data pockets, and IP, which routes them from computer to computer. TestStand Ready-to-run test executive from National Instruments for organizing, controlling, and executing your automated prototype, validation, or manufacturing test systems.</p></li><li><h6><a class="text-decoration-none text-link fw-bold" href=/manual/national-instruments/373392c-01/user-s-manual-english/page-176.html>PAGE 176</a></h6><p>Index A B ActiveX controls in Visual C++, 3-2 Add/Remove Class Libraries wizard, 4-5 adding or removing Measurement Studio class libraries, 4-5 Analysis .</p></li><li><h6><a class="text-decoration-none text-link fw-bold" href=/manual/national-instruments/373392c-01/user-s-manual-english/page-177.html>PAGE 177</a></h6><p>Index D instrument drivers (NI resources), A-1 Instrument I/O Assistant, 4-9 DAQ Assistant, 4-6 data acquisition (DAQ), 2-16, 3-17 DataSocket, .NET class library, 2-15 deployment requirements, 1-3 developing with Measurement Studio, 4-1 diagnostic tools (NI resources), A-1 digital waveform graph control, 2-23, 2-40 documentation conventions used in the manual, x how to use manual set, ix NI resources, A-1 drivers (NI resources), A-1 K knob .NET control, 2-28 .</p></li><li><h6><a class="text-decoration-none text-link fw-bold" href=/manual/national-instruments/373392c-01/user-s-manual-english/page-178.html>PAGE 178</a></h6><p>Index Common, 2-13 NI-488.2, 2-16 NI-DAQmx, 2-16 NI-SCOPE, 2-17 NI-VISA, 2-17 overview, 2-1 User Interface, 2-18, 2-37 deployment requirements, 1-3 Network Variable .NET class library, 2-14 NI DAQ Assistant, 4-6 NI Developer Zone, 4-4 NI Discussion Forums, 4-3 NI Instrument Driver Network, 4-3 NI Spy, 4-2 NI support and services, A-1 NI-488.2 .NET class library, 2-16 Visual C++ class library, 3-17 NI-DAQmx creating a DAQ application, 4-6 .</p></li><li><h6><a class="text-decoration-none text-link fw-bold" href=/manual/national-instruments/373392c-01/user-s-manual-english/page-179.html>PAGE 179</a></h6><p>Index Microsoft Word Interface, 3-16 NI-488.</p></li></ul></nav></div></section></section></main><footer class=page-footer><div class="container flex-column py-3 py-sm-4"><div class="row mb-1 mb-sm-2 mb-md-5"><a href=/ class="brand offset-sm-0 col-sm-4 col-md-3 col-lg-2 offset-2 col-8 text-center text-md-start"><img class=logo-small src=/assets/img/brand-large.png alt=Manualshelf></a></div><div class=row><dl class="text-center text-sm-start col-sm-3"><dt class=fw-bold>Who We Are</dt><dd><a class=text-decoration-none href=/about>About Us</a></dd><dd><a class=text-decoration-none href=/company>Company</a></dd><dd><a class=text-decoration-none href=/careers>Careers</a></dd><dd><a class=text-decoration-none href=/terms>Terms & Privacy</a></dd></dl><dl class="text-center text-sm-start col-sm-3"><dt class=fw-bold>Resources</dt><dd><a class=text-decoration-none href=/brands>List of Manufacturers</a></dd><dd><a href=/ class=text-decoration-none>Support</a></dd><dd><a class=text-decoration-none href=/press>For the Press</a></dd><dd><a class=text-decoration-none href=/press#assets>Media assets</a></dd><dd><a class=text-decoration-none href=/faq>FAQ</a></dd></dl><dl class="text-center text-sm-start col-sm-3"><dt class=fw-bold>Get in touch</dt><dd><a class=text-decoration-none href=#>Blog</a></dd><dd><a class=text-decoration-none href=#>Email</a></dd><dd><a class=text-decoration-none href=/dmca>DMCA</a></dd></dl></div><div class=row><div class="text-center text-sm-start col-sm-4 pe-sm-0"><a href=https://www.facebook.com/pages/ManualShelf/1488826334681423 class="fs-5 text-center d-inline-block social rounded-2 align-middle text-decoration-none me-2"><i class="fab fa-facebook-f"></i></a><a href=https://www.twitter.com/ManualShelf class="fs-5 text-center d-inline-block social rounded-2 align-middle text-decoration-none me-2"><i class="fab fa-twitter"></i></a><a href=https://plus.google.com/+ManualShelf class="fs-5 text-center d-inline-block social rounded-2 align-middle text-decoration-none me-2"><i class="fab fa-google-plus-g"></i></a><a href=http://www.pinterest.com/ManualShelf class="fs-5 text-center d-inline-block social rounded-2 align-middle text-decoration-none"><i class="fab fa-pinterest-p"></i></a></div><div class="col col-sm-8 d-flex flex-column align-items-center flex-sm-row flex-wrap flex-sm-nowrap justify-content-center justify-content-sm-end"><div class="copy w-auto d-flex align-items-center justify-content-center justify-content-sm-end mt-2 mt-sm-0 me-2">ManualShelf © 2013-2025</div><select class="form-select form-select-sm w-auto mt-2 mt-sm-0"><option value=usa>USA</option></select><div></div></div><div id=pixel><script>
googletag.cmd.push(function() { googletag.display('pixel'); });
</script></div></footer><script src=/assets/js/jquery-3.3.1.min.js></script><script src=/assets/js/bootstrap.bundle.min.js></script><script src=/assets/js/jquery.autocomplete.min.js></script><script type=text/javascript>
$.extend({
redirectPost: function(location, args) {
var form = '';
$.each(args, function(key, value) {
form += '<input type="hidden" name="' + key + '" value="' + value + '">';
});
form = '<form id="s1" action="' + location + '" method="POST">' + form + '</form>';
$(document.body).append(form);
$("#s1").submit();
}
});
$(document).ready(function(){
$("#query").autocomplete({
minChars: 3,
groupBy: 'type',
paramName: 'q',
dataType: 'json',
serviceUrl: '/autocomplete',
noCache: true,
showNoSuggestionNotice: true,
noSuggestionNotice: 'Zarro results found',
onSelect: function (suggestion) {
$.redirectPost(suggestion.data.url, {highlight: encodeURIComponent(JSON.stringify(suggestion.data.hls))});
}
});
var toc = $('.toc-selector');
if (toc.length) {
var slideParams = { duration: 800, easing: 'linear' };
toc.click(function() {
$(this).toggleClass('open');
var section = $('.toc-content');
var isCollapsed = section.attr('data-collapsed') === 'true';
if (isCollapsed) {
section.slideDown(slideParams)
section.attr('data-collapsed', 'false')
} else {
section.slideUp(slideParams);
section.attr('data-collapsed', 'true')
}
});
}
});
var lastSmall = $(window).width() < 576;
$(window).resize(function() {
var newSmall = $(window).width() < 576;
if (lastSmall != newSmall) {
lastSmall = newSmall;
window.location.href = window.location.href;
}
});
</script></body></html>