Version 5.1 Addendum LabVIEW 5.
Internet Support E-mail: support@natinst.com FTP Site: ftp.natinst.com Web Address: http://www.natinst.
Important Information Warranty The media on which you receive National Instruments software are warranted not to fail to execute programming instructions, due to defects in materials and workmanship, for a period of 90 days from date of shipment, as evidenced by receipts or other documentation. National Instruments will, at its option, repair or replace software media that do not execute programming instructions if National Instruments receives notice of such defects during the warranty period.
Contents About This Addendum Chapter 1 Required Configuration, Installation, and Upgrade Information Required System Configuration.....................................................................................1-1 Operating System Patches .............................................................................................1-4 Concurrent PowerMAX...................................................................................1-4 Distribution Changes in LabVIEW 5.1..............................
Contents Chapter 2 New Features in LabVIEW 5.1 Dialog Box, Menu, and Window Enhancements .......................................................... 2-1 Scaling Front Panel Objects............................................................................ 2-1 Saving for a Previous Version ........................................................................ 2-4 Accessing Recently Opened Files................................................................... 2-4 Searching in LabVIEW ....................
Contents Appendix A Manual Clarifications and Additions Multithreading ...............................................................................................................A-1 ActiveX ..........................................................................................................................A-1 Instrumentation ..............................................................................................................A-2 General Interface Features ..................................
Contents Tables Table 1-1. Table 1-2. Installation Requirements .................................................................... 1-2 Common LabVIEW Launch Errors on UNIX ..................................... 1-13 Table 2-1. Table 2-2. Table 2-3. Table 2-4. Table 2-5. Table 2-6. Table 2-7. Table 2-8. Table 2-9. Table 2-10. Table 2-11. HiQ and MATLAB Datatypes in LabVIEW ....................................... 2-21 Script Node Runtime Error Messages ..................................................
About This Addendum This addendum describes all of the new LabVIEW 5.1 features, compatibility issues, and configuration, installation, and upgrade information. Upgrade issues pertain to LabVIEW 5.1 only. Note LabVIEW 5.1 ships with the same manual set that shipped with LabVIEW 5.0. This addendum updates that documentation. However, enhancements to LabVIEW 5.1 have rendered some information in the manuals incorrect.
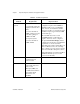
Required Configuration, Installation, and Upgrade Information 1 This chapter describes the system requirements for the LabVIEW software and contains installation instructions and updated documentation information. Read the Required System Configuration section, then follow the instructions in the Installing LabVIEW section of this chapter. Required System Configuration Table 1-1 describes the minimum system requirements needed to run LabVIEW 5.1. © National Instruments Corporation 1-1 LabVIEW 5.
Chapter 1 Required Configuration, Installation, and Upgrade Information Table 1-1. Installation Requirements Platform All Windows Versions Media and System Requirements Important Notes Distributed on CD-ROM. A separate CD contains the complete instrument driver library. You need a minimum of 60 MB of disk storage space for the Base package or 85 MB for the Full Development System. You need a minimum of 16 MB of RAM. The LabVIEW Online Tutorial default configuration requires the LabVIEW 5.
Chapter 1 Required Configuration, Installation, and Upgrade Information Table 1-1. Installation Requirements (Continued) Platform Power Macintosh Media and System Requirements Important Notes Distributed on CD. LabVIEW requires System 7 or 8. You need a minimum of 24 MB of RAM and at least 100 MB of disk storage space for the minimal installation of LabVIEW or 120 MB for the full installation. All UNIX Versions LabVIEW requires an X Window System server, such as OpenWindows 3.x, HP-VUE, or X11R6.
Chapter 1 Required Configuration, Installation, and Upgrade Information Table 1-1. Installation Requirements (Continued) Media and System Requirements Platform HP-UX Important Notes Distributed on CD. HP workstations limit the size of a process such as LabVIEW to 64 MB. You may need to increase this setting to accommodate your LabVIEW application. For information on changing this setting, see the HP-UX 10.x section under Installing LabVIEW.
Chapter 1 Required Configuration, Installation, and Upgrade Information Distribution Changes in LabVIEW 5.1 This section explains changes in platform support and installation media with this and subsequent versions of LabVIEW. LabVIEW 5.1 Platforms LabVIEW 5.1 is now available with limited support on Linux/x86. For more information, see http://www.natinst.com/linux. LabVIEW 5.1 and planned future versions of LabVIEW are not available on the following platforms: • Windows 3.
Chapter 1 Required Configuration, Installation, and Upgrade Information Installing LabVIEW If you are upgrading from an earlier version of LabVIEW, read the Upgrading to LabVIEW 5.1 section later in this chapter before installing LabVIEW. (Windows) For an introduction to the LabVIEW environment, complete the LabVIEW Online Tutorial. Launch the tutorial by clicking LabVIEW Tutorial in the LabVIEW dialog box.
Chapter 1 Note Required Configuration, Installation, and Upgrade Information The installer gives you the option of performing a full installation or a minimal installation. If you do not have sufficient disk space (approximately 85 MB), choose the minimal installation and use your LabVIEW CD to access the remaining components. 3. After you choose an installation, follow the instructions that appear on your screen. 4. After you have completed the installation, LabVIEW is ready to run.
Chapter 1 Required Configuration, Installation, and Upgrade Information 3. If your CD was mounted automatically, type the following command: pkgadd -d /cdrom/cdrom0/solaris2 4. If you used the mount command in step 2, type the following command: pkgadd -d /cdrom/solaris2 Note See the README file in /cdrom/cdrom0/solaris2 or /cdrom/solaris2 for instructions on custom installation or other additional information. 5. Follow the instructions on your screen. HP-UX 10.
Chapter 1 3. Required Configuration, Installation, and Upgrade Information To change the current directory to the mounted CD-ROM, type the following command: cd /mnt/cdrom. 4. To run the installation script, type the following command: ./INSTALL. The INSTALL script prompts you to enter the directory where you want to install LabVIEW (typically /usr/local or /opt). The script uses RPM to install the RedHat package on RedHat Linux 5.0 or later systems, or it extracts the .tar.
Chapter 1 Required Configuration, Installation, and Upgrade Information For More Information about LabVIEW After you have installed LabVIEW completely, it is ready to run. The LabVIEW User Manual and the LabVIEW Online Reference, which you can access by selecting Help»Online Reference…, provide activities that illustrate basic LabVIEW concepts. If you want to complete these activities, copy the Activity directory from the LabVIEW directory to your home directory.
Chapter 1 Required Configuration, Installation, and Upgrade Information You can find further information about the NI-DAQ driver in the NI-DAQ Read Me File. To view this file, click the Start button and select Programs»LabVIEW»NI-DAQ Read Me File. Macintosh The LabVIEW installation program installs a control panel and various extensions in your system folder: • For GPIB, LabVIEW installs the NI-488 Config control panel, which contains the driver code that communicates with your GPIB devices.
Chapter 1 Required Configuration, Installation, and Upgrade Information Installing HiQ for Windows The Windows CD includes HiQ, a mathematics application from National Instruments. If you install HiQ from the LabVIEW installation CD, a registration dialog box prompts you to enter a registration number. Use your LabVIEW registration number in the HiQ registration dialog box. The latest version of LabVIEW includes functionality that supports HiQ.
Chapter 1 Required Configuration, Installation, and Upgrade Information Low-Level Register I/O for Windows 95/98 LabVIEW is very similar on all Windows operating systems. Unless your application communicates with hardware that is not supported by one of the operating systems, you can transfer VIs to other operating systems without any problems or having to make any modifications. LabVIEW has two VIs named In Port and Out Port that you can use to read or write hardware registers.
Chapter 1 Required Configuration, Installation, and Upgrade Information Configuring LabVIEW Windows on UNIX This section describes procedures for configuring LabVIEW windows on UNIX operating systems. Configuring LabVIEW with the Tab Window Manager If you use the Tab Window Manager (twm), you can change environment settings so that twm interacts better with LabVIEW. Notice that with twm, you cannot close the floating palette menus in LabVIEW if these windows do not have title bars.
Chapter 1 Required Configuration, Installation, and Upgrade Information (Motif) To change the behavior of mwm, use the xrdb command to set two mwm settings: mwm.clientAutoPlace: False mwm.positionIsFrame: False (CDE) To change the behavior of dtwm, use the xrdb command to set two dtwm settings: dtwm.clientAutoPlace: False dtwm.positionIsFrame: False (Motif and CDE) To add the two entries, you also can edit the following file manually: $HOME/.
Chapter 1 Required Configuration, Installation, and Upgrade Information 3. At the ok prompt, type: module-info You then see information similar to the following lines: CPU FMI,MB86904 Rev. 2.5 : 70.0 MHz SBus (Divide By 3) 4. : 23.3 MHz Type go to exit the monitor and resume operation of your system. If your CPU Revision number (2.5 in this example) is earlier than 3.2, and your CPU clock speed (70.0 MHz in this example) is less than 110 MHz, then your computer has this problem.
Chapter 1 Required Configuration, Installation, and Upgrade Information previous versions. For more information about the new ActiveX functionality, refer to the Improvements to ActiveX Automation section in Chapter 2, New Features in LabVIEW 5.1. Additional Resources The LabVIEW documentation set, including the Code Interface Reference Manual and the VXI VI Reference Manual, is available in Portable Document Format (PDF) on the LabVIEW CD in the manuals directory.
Chapter 1 Required Configuration, Installation, and Upgrade Information Converting VIs Upgrading LabVIEW is an automated process. When you open a VI created in a previous version, LabVIEW automatically converts and compiles the VI. Conversion is a memory-intensive operation. When LabVIEW loads a VI saved in an earlier version, it loads all components of the converted VI (front panel, block diagram, and data) into memory, then compiles the VI in memory.
Chapter 1 Required Configuration, Installation, and Upgrade Information You must upgrade the following add-ons for compatibility with LabVIEW 5.1: • LabVIEW Application Builder—You must upgrade to LabVIEW Application Builder 5.1. This upgrade is free to existing users of the LabVIEW Application Builder. If you have the Professional Development System, the new version of the application builder libraries is included in the installation.
2 New Features in LabVIEW 5.1 This chapter describes the features added and the significant changes made between versions 5.0 and 5.1. To help you learn more about LabVIEW, version 5.1 offers extensive online documentation, which you can access by choosing Help»Online Reference.... Dialog Box, Menu, and Window Enhancements This section describes changes to LabVIEW dialog boxes, menu items, and behavior or appearance of front panel objects and windows. Scaling Front Panel Objects With LabVIEW 5.
Chapter 2 New Features in LabVIEW 5.1 • Once an object scales itself automatically, it might not scale back to its exact original size, when you size the window back to its original position. However, you can use the Undo command to restore the original size. • When scaling arrays, you can set scaling either on the array itself, or on the objects within the array. – When you set scaling on the array, you adjust the number of rows and columns you can see within the array.
Chapter 2 New Features in LabVIEW 5.1 Setting All Objects on a Front Panel to Scale You can designate an entire front panel so that all of its objects scale automatically to match changes to the front panel window. Note 1. From the front panel of the VI, select VI Setup. 2. Under Window Options, select Scale All Objects on Panel. With this option selected, resizing the front panel automatically causes all objects on the front panel to resize and reposition themselves accordingly.
Chapter 2 New Features in LabVIEW 5.1 Saving for a Previous Version With LabVIEW 5.1, you can save your VIs for the previous version of LabVIEW (LabVIEW 5.0). This makes upgrading LabVIEW very convenient, and helps you to maintain your VIs in multiple versions of LabVIEW when necessary. You can upgrade to new versions and always have the capability to go back to your previous version, should you ever need to.
Chapter 2 New Features in LabVIEW 5.1 When you choose File»Recently Opened Files, a submenu appears that contains the list of recently opened files. Select the file name to open it. The files are listed in chronological order, with the most recently opened file listed first. If the list is empty, the Recently Opened Files option is dimmed. The Recently Opened Files list displays up to 10 file names.
Chapter 2 New Features in LabVIEW 5.1 To find all instances of an object, right-click the object for which you want to find references: • If you are searching for a reference to a type definition, select Find»All Instances. (For more information about type definitions, refer to the Type Definitions section in Chapter 24, Custom Controls and Type Definitions, of the G Programming Reference Manual.
Chapter 2 New Features in LabVIEW 5.1 New VIs, Functions, and Controls This section describes the new functionality in LabVIEW 5.1 for advanced mathematics, picture control, report generation, and image management. Changes to Controls and Indicators LabVIEW 5.1 has improved the appearance of controls and indicators. Some controls in LabVIEW 5.1 look slightly different than in previous versions when you drop them on the front panel.
Chapter 2 New Features in LabVIEW 5.1 Dialog Controls All the dialog controls are now grouped together in a new Dialog palette, shown in Figure 2-1 below. You can reach this palette from the front panel by selecting Controls»Dialog. Figure 2-1. Dialog Palette This palette includes the dialog controls listed below. You can still find these controls in the same palettes as in previous versions of LabVIEW.
Chapter 2 New Features in LabVIEW 5.1 platform. The Dialog Recessed Frame control behaves like other decoration objects found in the Decorations palette. You can use it as a grouping border to put around other dialog controls. 3D Graph Controls for Windows LabVIEW 5.1 adds a new way to represent data on your front panel: the 3D graph. The LabVIEW 3D graph uses ActiveX technology and new VIs that handle three-dimensional representation.
Chapter 2 New Features in LabVIEW 5.1 With LabVIEW 5.
Chapter 2 • History»Prompt for Comments at Save • History»Record Application Comments • History»Use Defaults New Features in LabVIEW 5.1 Ring Enhancements All ring and enum constants include a down arrow, which distinguishes them from numeric constants. Also, rings and enums on panels or block diagrams have scroll bars when the menus include many items. LabVIEW 5.1 menus, like listboxes, now support type completion. Just type the first few characters and LabVIEW finds a matching item in the list.
Chapter 2 New Features in LabVIEW 5.1 IVI Instrument Drivers and ActiveX Some parameters for ActiveX and IVI take a discrete list of valid values. Previously, when building ActiveX and IVI applications, you used numeric values to set parameters for properties and methods that control devices or programs. You had to enter a particular numeric value in a numeric control or constant, which required you to know which numeric values corresponded to which settings. With LabVIEW 5.
Chapter 2 New Features in LabVIEW 5.1 To access the ring constant when building an ActiveX or IVI application, right-click the parameter that accepts data values and select Create Constant. To see the corresponding numeric data value, right-click the ring constant and select Show»Digital Display. ActiveX Enhancements for Windows This section describes the ActiveX enhancements in LabVIEW 5.1. Ring Enhancements With LabVIEW 5.
Chapter 2 New Features in LabVIEW 5.1 3. Wire the Automation refnum from the container terminal or an Automation function to the Create ActiveX Event Queue VI. 4. Place the Wait On ActiveX Event VI on the block diagram. 5. Wire the event queue to the Wait On ActiveX Event VI. 6. Dispose of the event queue using the Destroy ActiveX Event Queue VI. ActiveX Event Functions for Windows You can use the other ActiveX Server Event functions to pass an event queue from one task to another separate task.
Chapter 2 New Features in LabVIEW 5.1 HiQ and MATLAB Functionality for Windows HiQ and MATLAB are software packages that help you organize and visualize real-world math, science, and engineering problems. You can use HiQ and MATLAB to express numeric formulas elegantly. Now with LabVIEW you can load and edit HiQ and MATLAB scripts into your block diagram code so LabVIEW works with their advanced mathematics functionality. Note You must have HiQ 4.1 or MATLAB 5.
Chapter 2 New Features in LabVIEW 5.1 Creating a HiQ Script Complete the following instructions to create and run a VI that uses a HiQ script. 1. From the block diagram, choose Functions»Mathematics» Formula»HiQ-Script. Place the node on the block diagram, and size it according to the amount of script you want to include in the window. The HiQ script node appears as shown below. 2. With the operating tool, enter the script in the HiQ script node.
Chapter 2 New Features in LabVIEW 5.1 7. To add inputs and outputs for variables, right-click the right side of the node frame and select Add Input or Add Output. Type in a to add an output for the a variable that is included in your HiQ script. By default, your node already includes one input and one output terminal for the error in and error out parameters. 8. Verify the datatype of the inputs and/or outputs. The error-checking input and output are already the correct datatype.
Chapter 2 New Features in LabVIEW 5.1 Creating a MATLAB Script Complete the following instructions to create and run a VI that uses a MATLAB script. 1. From the block diagram, choose Functions»Mathematics» Formula»MATLAB Script. Place the node on the block diagram, and size it according to the amount of script you want to include in the window. The MATLAB script node appears as shown below. 2. With the operating tool, enter the script in the MATLAB script node.
Chapter 2 7. New Features in LabVIEW 5.1 Run the VI. LabVIEW launches MATLAB and a new MATLAB window appears, labeled Figure No. 1, that displays the matrix. The values that make up this matrix are displayed in the a indicator of your front panel in LabVIEW. Importing or Exporting a Script Complete the following steps to import a script into a script node in LabVIEW. 1. Right-click the HiQ or MATLAB script node. 2. Select Import…. 3. Choose the file you want to import and click Open.
Chapter 2 New Features in LabVIEW 5.1 Scrolling through a HiQ or MATLAB Script Just as with a regular formula node, you can display a scrollbar within your script node by right-clicking the node and selecting Show»Scrollbar. A scrollbar appears on the right side of your script node. Configuring the Datatype of a Terminal Both HiQ and MATLAB are loosely typed script languages and do not determine the datatype of a variable until after the script executes.
Chapter 2 New Features in LabVIEW 5.1 Table 2-1.
Chapter 2 New Features in LabVIEW 5.1 Error Codes The following table explains error messages you might receive at runtime when working with a script node. Table 2-2. Script Node Runtime Error Messages Error Code Error Code Message Description 1046 edScriptCantInitServer LabVIEW failed to initiate a new session with the server. 1047 edScriptCantSetValue LabVIEW failed to set the value of a variable to the server.
Chapter 2 New Features in LabVIEW 5.1 For function and reference information about the Mathematics VIs and functions, refer to the Mathematics VIs topic in the LabVIEW Online Reference. Mathematics Palette Table 2-3 lists the subpalettes you find in the Functions»Mathematics palette, and lists the previous location of the VIs or functions in LabVIEW 5.0. Table 2-3. Mathematics VIs Current and Previous Locations Mathematics Subpalettes Previously Located in...
Chapter 2 New Features in LabVIEW 5.1 Signal Processing Palette For function and reference information about the Signal Processing VIs, refer to the Signal Processing VIs topic in the LabVIEW Online Reference. Table 2-4 lists the subpalettes you find in the Functions»Signal Processing palette, and lists the previous location of the VIs or functions in LabVIEW 5.0. Table 2-4. Signal Processing VIs Current and Previous Locations Signal Processing Subpalettes Previously Located in...
Chapter 2 Note New Features in LabVIEW 5.1 The Picture Control VIs are available on all platforms and versions with the exception of the Windows base version. You can find examples of the Picture Control VIs in the Examples\Picture directory. Sound VIs for Windows and Macintosh You can use the Sound VIs to integrate sound into your VIs. Some of the things you can do are create a beep to alert the user of an error, play a .wav file, and read and write sound data.
Chapter 2 New Features in LabVIEW 5.1 To create reports using the Report Generation VIs, go to the Functions»Report Generation palette.
Chapter 2 New Features in LabVIEW 5.1 See the Easy Text Report VI description in the Report Generation VI Descriptions section later in this chapter for information on this VI’s parameters. Tip See the block diagram of the Easy Text Report VI for a good example of how you can use the other VIs in the Report Generation palette to create a report. Report In/Report Out Parameters The Report in and Report out parameters link the VIs used to create a report.
Chapter 2 New Features in LabVIEW 5.1 Table 2-5. Token Descriptions (Continued) Token Description Current date in the form xx/xx/xx. Example: 10/5/98 The month, date, and year order defaults to the date settings of your operating system. Current date in the form Day, Month and Date, Year. Example: Monday, October 05, 1998 The month, date, and year order defaults to the date settings of your operating system.
Chapter 2 New Features in LabVIEW 5.1 The Report Generation palette has two subpalettes: • Functions»Report Generation»Report Layout • Functions»Report Generation»Advanced Reports You can find examples of the Report Generation VIs in the Examples\Reports\TextReportExample.llb directory. Report Generation Parameter Descriptions This section describes the parameters used by the Report Generation VIs.
Chapter 2 New Features in LabVIEW 5.1 Font Settings indicates what font settings currently are used in a report. Charset indicates the character set used in the report (such as the set for a specific language). Weight indicates how dark bold characters appear. Name indicates the font used in the report. Size indicates the size of the font in number of points. Footers allows you to set up what information appears in the footer of each page of the report.
Chapter 2 New Features in LabVIEW 5.1 left is the information you want to appear in the left side of the header. center is the information you want to appear in the center portion of the header. right is the information you want to appear in the right side of the header. left footer text is the information you want to appear in the left side of the footer. left header text is the information you want to appear in the left side of the header.
Chapter 2 New Features in LabVIEW 5.1 orientation specifies how the report appears when it is printed. You can choose from portrait, which prints the report widthwise, or landscape, which prints the report lengthwise. Printer Name specifies the name of the printer that you want to print this report. If you do not enter a printer name, then this VI uses the default printer set up on your computer. If you do specify a printer name, you must have that printer configured for use with your computer.
Chapter 2 New Features in LabVIEW 5.1 Text Options specifies how the text appears in the report. Italic determines whether subsequent text appears in italics in the report. Strike Through determines whether subsequent text appears with strikethroughs in the report. Underline determines whether subsequent text appears underlined in the report. Bold determines whether subsequent text appears bold in the report. Text Options indicates what text options currently are set in a report.
Chapter 2 New Features in LabVIEW 5.1 You might find using tokens with this VI helpful, particularly in the Headers and Footers parameters. For example you might want to give the report a time stamp. See the Tokens topic, earlier in this chapter, for more information on some common tokens for this VI. Append File to Report Appends the text from a text file (.txt) into the current report. You must wire the file path (including its path) to the VI. The text is appended within the report.
Chapter 2 New Features in LabVIEW 5.1 Append Numeric Table to Report Takes a 2D array of numbers and appends it to a report as a table with the given column widths. Append Text Table to Report Takes a 2D array of strings and appends it to a report as a table with the given column widths. Clear Report Clears the report of all text, headers, footers, and formatting information. Clear Report Text Clears the text and related formatting information from the report.
Chapter 2 New Features in LabVIEW 5.1 Dispose Report Closes the report and releases its interface, which saves memory. No further operations are permitted on the report. However, you can create a new report. You can use this VI only as the last VI in the report function you are creating. Get Report Settings Retrieves information about the current font and text settings of a given report. The information is displayed on the front panel. New Report Creates a new report.
Chapter 2 New Features in LabVIEW 5.1 New Report Page Adds a new page in the report to which you can append text or append another file. Print Report Prints the report to a designated printer or to the default printer set up on your computer. Set Report Font Sets the font properties for the report, including those in the headers and footers. The available options include italic, bold, strikethrough, underline, color, font name, font size, character set and weight.
Chapter 2 New Features in LabVIEW 5.1 Set Report Header Text Sets the text for the VI header. You might find that using tokens with this VI is helpful, particularly in the Headers and Footers parameters. For example, you might want to give the report a time stamp in the header. See the Tokens topic, earlier in this chapter, for more information on some common tokens for this VI. Set Report Margins Sets the margins of the specified report.
Chapter 2 New Features in LabVIEW 5.1 Set Report Tab Width Sets the tab width in the report. To place a tab in your text, insert the token in the text string. Alternatively, you can use the Concatenate String function and insert a tab constant to build the text string. Enhancements to DAQ This section describes the data acquisition (DAQ) enhancements in LabVIEW 5.1. DAQ Solution Wizard You can now use the DAQ Solution Wizard even if you have no DAQ devices configured on your computer.
Chapter 2 New Features in LabVIEW 5.1 If you are scanning modules, you can scan an arbitrary number of channels for each module using channel list elements that are components of the SCXI channel syntax. Previously, however, the channels of each module needed to be scanned in consecutive, ascending order. Now, with LabVIEW 5.1, you can scan modules randomly, provided that the module is capable of random scanning.
Chapter 2 New Features in LabVIEW 5.
Chapter 2 New Features in LabVIEW 5.1 Building an Application Complete the following instructions to build an application in LabVIEW. 1. 2. 3. 4. LabVIEW 5.1 Addendum Select Project»Build Application…. The Build Application dialog box appears. The Build Application dialog box contains the following tabs: Target, Source Files, VI Settings, App Settings, and Installer. You can create a new build or load a build file that you created previously.
Chapter 2 New Features in LabVIEW 5.1 c. If you want to add support files, click Add Support File…. When you use this option, data files copy over to your application directory automatically. In addition to VI files (VIs, controls, menus, external subroutines, and so on), you can determine the set of DLLs referenced by your application. Because there are DLLs you might not want to redistribute, LabVIEW includes only those DLLs that are within the source hierarchy directories and the LabVIEW directory.
Chapter 2 New Features in LabVIEW 5.1 ActiveX server. When you build an application myapp.exe, an ActiveX type library myapp.tlb is also created along with the executable. The type library defines a createable class, Application, and a dispatch class, Virtual Instrument, and exports the properties and methods for these classes. You can find the Help for these properties and methods in lvcomm.hlp in the LabVIEW Help directory.
Chapter 2 Note New Features in LabVIEW 5.1 This completes the build application process on the UNIX and Macintosh platforms. The steps described in the following section apply to Windows only. Creating an Installer (Windows only) 1. From the Installer tab, click the Create installer checkbox. Verify the following sections of this tabbed page. If you create an installer, the installer is written to the directory that contains your application.
Chapter 2 New Features in LabVIEW 5.1 file or a registry file. Install the file as part of your installation and then run it afterwards to make the necessary modifications. The file that you run must be one of the files that you install. 4. If you choose to run an executable after the installation completes, you can use the Command line arguments to specify arguments passed to the program.
Chapter 2 New Features in LabVIEW 5.1 Enhancements to Networking This section describes the networking enhancements in LabVIEW 5.1. DataSocket VIs for Windows DataSocket technology facilitates the exchange of data and information between an application and a number of different data sources and targets. These sources and targets include files and HTTP/FTP servers. In LabVIEW 5.1, new VIs provide a simple yet intuitive way to access and use DataSocket technology within LabVIEW.
Chapter 2 New Features in LabVIEW 5.1 The Web Server With the Web Server in LabVIEW, you can publish your VI front panels on the World Wide Web along with HTML documents. The built-in Web Server is intended for users that need to make the panels of their running VIs visible on the Internet, but do not require sophisticated security features nor want to control VIs through the Internet. The Web Server Configuration Dialog Box You use the Web Server Configuration dialog box to set up the Web Server.
Chapter 2 New Features in LabVIEW 5.1 The Web Server Browser Access Dialog Box The Web Server Browser Access dialog box lists the remote computers on the Internet that are allowed to access the Web Server. Access the Web Server Browser Access dialog box by selecting Edit»Preferences and selecting Web Server: Browser Access in the drop-down menu. Figure 2-6. Web Server Browser Access Dialog Box © National Instruments Corporation 2-49 LabVIEW 5.
Chapter 2 New Features in LabVIEW 5.1 Table 2-7 describes the available options. Table 2-7. Web Server Browser Access Dialog Box Options Option Description Browser Access List Lists computers or domains that have access to the Web Server. Click and drag an entry in this list to move it in the access list. If an entry permits access to the Web Server from an address, a check mark appears next to its name. If an entry denies access to the Web Server, an X appears next to its name.
Chapter 2 New Features in LabVIEW 5.1 For example, if you give a.test.site.com and b.test.site.com access, but do not extend access to all addresses ending in .test.site.com (where the * wildcard indicates all), the two computers still have access. If no entry matches the client address, access is denied. (See Table 2-8 for more information on the * wildcard and permitting matching access entries). To specify an Internet host address, enter its domain name or IP address.
Chapter 2 New Features in LabVIEW 5.1 The Web Server Visible VIs Dialog Box Because the Web Server publishes front panels to the Web, it is best to specify which VI front panels you allow to be published. Through the Web Server: Visible VIs dialog box, you specify which front panels can be published to the Web. You access the Web Server Visible VIs dialog box by selecting Edit»Preferences and selecting Web Server: Visible VIs in the drop-down menu. Figure 2-7.
Chapter 2 New Features in LabVIEW 5.1 Table 2-9 describes the available options. Table 2-9. Web Server Visible VIs Dialog Box Options Option Description Visible VIs Specifies the VIs or groups of VIs whose front panels may be published by the Web Server. Click and drag an entry in this list to move it in the Visible VIs list. If an entry permits a VI or group of VIs to be seen, a check mark appears next to its name. If an entry denies such access, an X appears next to its name.
Chapter 2 New Features in LabVIEW 5.1 how that entry is set up. If a subsequent entry also matches the VI, its access permission is used in place of the previous permission. If there is no VI in the list that matches the requested VI, access to the VI’s image is denied. You can use wildcard characters in the Visible VIs list so an entry in the list matches more than one VI. Use the wildcard characters shown in Table 2-10. Table 2-10.
Chapter 2 New Features in LabVIEW 5.1 the string srvr_ and ends with the string .vi is exported. No VI that begins with the string local_ and ends with the string .vi is exported, even if it is located within the c:\labview\server directory. By default, the front panel image of all VIs are visible. Configuring the Web Server Complete the following steps to configure the Web Server. 1. Select Edit»Preferences and choose Web Server: Configuration in the drop-down menu.
Chapter 2 New Features in LabVIEW 5.1 Publishing Front Panel Images on the Web Complete the following steps to publish a VI front panel image on the World Wide Web. 1. Run the Web Server by checking Enable Web Server in the Preferences»Web Server: Configuration dialog box. 2. Launch the VI(s) you want to publish to the web so they are in your system’s memory. Retrieving a Static Image of a VI Front Panel Note To retrieve an HTML-Readable Image of a VI front panel, the VI must be in memory.
Chapter 2 New Features in LabVIEW 5.1 Viewing an Animated Version of a Front Panel Complete the following steps to view an animated version of a front panel. 1. Open a Web browser. 2. Type in a URL that includes the address of the LabVIEW Web Server, the command for an animated image (.monitor), a question mark (?) to separate the URL from the parameters, and the name of the VI. The URL takes the following form: http://web.server.addr/.
Chapter 2 New Features in LabVIEW 5.1 What URLs Can I Use with My Front Panel Images? With the Web Server, you can publish images of your VI front panels on the World Wide Web. You do not need to modify the VIs to display their front panels. Front Panel Image Formats The Web Server can generate images of VI front panels in the Joint Photographic Experts Group (JPEG) and Portable Network Graphics (PNG) image formats. The JPEG image format is a public domain image format that all current browsers support.
Chapter 2 New Features in LabVIEW 5.1 The syntax to use in the URL for static front panel images is as follows (parameters in brackets [ ] are optional): .snap?VI_Name [&type=type] [&depth=depth] [&quality=quality] [&compression=compression] [&refresh=refresh] [&full=full] VI_Name is the name of the returned VI front panel. You must encode the VI name according to HTTP conventions. Replace special characters with %xx, where xx is the hexadecimal value of the character.
Chapter 2 New Features in LabVIEW 5.1 The following are some examples on how you would use this syntax: • To return the front panel image of the VI My VI.vi from the computer foo using the default image type, depth, and quality, use the following code: http://foo/.snap?My%20VI.vi • To return the front panel image of the VI Test 1.vi from the computer foo using image depth=24 and image type=PNG, use the following code: http://foo/.snap?Test%201.
Chapter 2 New Features in LabVIEW 5.1 The syntax to use in the URL for static front panel images is as follows (parameters in brackets [ ] are optional): .monitor?VI_Name [&type=type] [&depth=depth] [&quality=quality] [&compression=compression] [&refresh=refresh] [&full=full] [&lifespan=lifespan] VI_Name is the name of the returned VI front panel. You must encode the VI name according to HTTP conventions. Replace special characters with %xx, where xx is the hexadecimal value of the character.
Chapter 2 New Features in LabVIEW 5.1 Lifespan is the number of seconds the front panel animation lasts. Setting Lifespan=0 implies that the animation continues until the browser cancels it. If no lifespan is specified, the default lifespan is used. Note When using client-pull animations, the lifespan is ignored. The following are some examples on how you would use this syntax: • To generate an animated front panel image of the VI My VI.
Manual Clarifications and Additions A This appendix clarifies and corrects information in the LabVIEW manual set. Because these manuals were not revised for the version 5.1 release of LabVIEW, this appendix contains information relevant only to the previous release. Enhancements to LabVIEW 5.1 have rendered some information in these manuals incorrect, particularly illustrations of palettes and navigation paths to functions and controls, including those in activities.
Appendix A Manual Clarifications and Additions Data Format—The compatibility VIs for the LabVIEW 4.x Automation functions require that you pass flattened data in the LabVIEW 4.x format. LabVIEW 5.x loads your LabVIEW 4.x VIs and automatically selects the Convert 4.x Data option for the Flatten To String and Unflatten From String functions, which are found in the Advanced»Data Manipulations palette.
Appendix A Manual Clarifications and Additions palettes are skipped. Unlike icon palettes, you cannot tack down text palettes or subpalettes. In All Text mode, LabVIEW displays text palettes in the Project menu and the Find dialog box. In Standard or All Icons mode, LabVIEW displays icon palettes. Standard is the default mode. In Standard mode, all palettes default to icon palettes, but you can edit individual palettes to display them as text palettes.
Appendix A Manual Clarifications and Additions Figure A-1. File Manager Tool Dialog Box If you select an LLB, you can click Convert LLBs to Dirs to convert it to a directory. If you select a directory and click this button, the tool scans for all LLBs within that directory and gives you the option to convert them to directories. The new directory is created in the same location as the original LLB.
Appendix A Manual Clarifications and Additions contain characters that are invalid on some platforms. By scanning within LLBs, this tool helps you detect potential problems if you move your files out of VI libraries. Use the Show dates option at the bottom of the dialog box to display file modification dates next to each file. You can choose to sort the files alphabetically or by date and disable files with the same name and date in both directory listings.
Appendix A Manual Clarifications and Additions Configuration File VIs —The Configuration File VIs, which you can access from the Functions»File I/O»Configuration File VIs palette, provide tools for reading from and writing to a platform-independent configuration file similar in format to a Windows initialization (.ini) file. Macintosh Open Transport Support—LabVIEW 5.x supports Open Transport on Power Macintosh machines. Open Transport is a PowerPC-native networking driver.
Appendix A Manual Clarifications and Additions Support for Template VIs and Controls You can save commonly used VIs and controls as templates. To create a template VI, save a VI with a .vit extension (or .ctt extension for typedefs). When you open a template VI or control, the new file you create is named automatically using your template name and a number corresponding to the number of times it has been opened.
Appendix A Manual Clarifications and Additions • The LabVIEW priority system is reflected in the way the kernel runs LWPs. Higher-priority execution threads (LWPs) take over the system, not allowing lower-priority system tasks to execute. • Switching between threads might require more time because LabVIEW runs through the system scheduler. (PowerMAX) LabVIEW for Concurrent PowerMAX always binds threads to LWPs.
Appendix A Manual Clarifications and Additions • In Chapter 6, Strings and File I/O, the block diagram in Activity 6-3, String Subsets and Number Extraction, shows the From Exponential/Fract/Eng function. The block diagram should show the Scan From String function, as described in the text. • In Chapter 7, Getting Started with a LabVIEW Instrument Driver, the Interactively Testing Component VIs section describes how to access open VISA sessions.
Appendix A Manual Clarifications and Additions Error Code Error Name Description 1073676421 VI_WARN_UNKNOWN_STATUS The status code passed to the operation could not be interpreted. 1073676420 VI_WARN_NSUP_ATTR_STATE Although the specified state of the attribute is valid, it is not supported by this resource implementation. 1073676418 VI_WARN_NULL_OBJECT The specified object reference is uninitialized.
Appendix A Error Code Error Name Manual Clarifications and Additions Description -1073807252 VI_ERROR_ASRL_OVERRUN An overrun error occurred during transfer. A character was not read from the hardware before the next character arrived. -1073807253 VI_ERROR_ASRL_FRAMING A framing error occurred during transfer. -1073807254 VI_ERROR_ASRL_PARITY A parity error occurred during transfer. -1073807263 VI_ERROR_NSYS_CNTLR The interface associated with this session is not the system controller.
Index Numbers C 3D graph controls for Windows, 2-9 CDE (Common Desktop Environment) Window Manager, configuring, 1-14 to 1-15 compatibility issues between versions 4.1 and 5.
Index E converting VIs, 1-18 CVI Functional Panel Converter, manual changes for, A-2 Easy Text Report VI, 2-26, 2-33 enhancements. See features and enhancements.
Index G HiQ and MATLAB functionality for Windows, 2-15 to 2-22 integration of mathematics and signal processing VIs, 2-22 to 2-24 integration of Picture Control VIs, 2-24 to 2-25 property and invoke nodes, 2-9 Report Generation VI descriptions, 2-28 to 2-38 ring enhancements, 2-11 to 2-13 sound VIs for Windows and Macintosh, 2-25 VI server properties in reserved VIs and runtime systems, 2-9 to 2-11 VISA enhancements, 2-40 to 2-41 File Manager tool, manual changes for, A-3 to A-5 files, recently opened, ac
Index running the Web Server, 2-55 static front panel image (.
Index Motif Window Manager, configuring, 1-14 to 1-15 multithreading, manual additions for, A-1 Power Macintosh installation requirements (table), 1-3 sound VIs, 2-25 support for NI-DAQ for Windows and Macintosh, 2-39 Macintosh Navigation Services, 2-6 Macintosh Open Transport support, A-6 manual clarifications and additions, A-1 to A-11 about this addendum, ix ActiveX, A-1 to A-2 adding VIs to Project and Help menus, A-7 clarifications, A-8 to A-9 general interface features, A-2 to A-6 Configuration File
Index Dispose Report, 2-36 Easy Text Report, 2-26, 2-33 Get Report Settings, 2-36 New Report, 2-36 New Report Line, 2-36 New Report Page, 2-37 parameter descriptions, 2-29 to 2-33 Print Report, 2-37 Set Report Font, 2-37 Set Report Footer Text, 2-37 Set Report Header Text, 2-38 Set Report Margins, 2-38 Set Report Orientation, 2-38 Set Report Tab Width, 2-39 required system configuration (table), 1-1 to 1-4 ring enhancements, 2-11 to 2-13 ActiveX, 2-13 IVI instrument drivers and ActiveX, 2-12 to 2-13 ring c
Index U Find All Instances and Search Results dialog box, 2-5 to 2-6 Find dialog box, 2-5 server functionality compatibility VIs for, 1-16 VI server properties in reserved VIs and runtime systems, 2-9 to 2-11 Signal Generator by Duration VI, A-2 signal processing VIs integration with mathematics VIs, 2-22 to 2-23 Mathematics palette, 2-23 Signal Processing palette, 2-24 Solaris 2 installing LabVIEW, 1-7 to 1-8 thread allocation, A-7 to A-8 solutions and examples, 1-12 sound VIs for Windows and Macintosh,
Index maintaining proportions with monitor resolution, 2-3 Windows operating systems ActiveX enhancements, 2-13 to 2-14 Automation Open function, 2-14 Event functions, 2-14 ring enhancements, 2-13 support for ActiveX events, 2-13 HiQ and MATLAB, 2-15 to 2-22 choosing script server, 2-19 configuring data type of terminal, 2-20 creating HiQ scripts, 2-16 to 2-17 creating MATLAB scripts, 2-18 to 2-19 debugging scripts, 2-21 error codes (table), 2-22 importing or exporting scripts, 2-19 scrolling through scrip