Lookout Operator’s Manual Lookout Operator’s Manual August 1999 Edition Part Number 322391A-01
Worldwide Technical Support and Product Information www.natinst.
Important Information Warranty The media on which you receive National Instruments software are warranted not to fail to execute programming instructions, due to defects in materials and workmanship, for a period of 90 days from date of shipment, as evidenced by receipts or other documentation. National Instruments will, at its option, repair or replace software media that do not execute programming instructions if National Instruments receives notice of such defects during the warranty period.
Conventions The following conventions appear in this manual: » The » symbol leads you through nested menu items and dialog box options to a final action. The sequence File»Page Setup»Options directs you to pull down the File menu, select the Page Setup item, and select Options from the last dialog box. This icon denotes a note, which alerts you to important information. This icon denotes a caution, which advises you of precautions to take to avoid injury, data loss, or a system crash.
Contents Chapter 1 Installing Lookout Hardware and Software Requirements ..........................................................................1-1 TCP/IP Networking .......................................................................................................1-2 Installing Lookout..........................................................................................................1-2 Installing from the CD.....................................................................................
Contents Lookout Application Files............................................................................................. 2-8 Process File ..................................................................................................... 2-8 Source Code File ............................................................................................. 2-8 State File .........................................................................................................
Contents Window Commands ......................................................................................................3-18 Window»Arrange Icons...................................................................................3-18 Window»Minimize All....................................................................................3-18 Window»nTitle ................................................................................................3-18 Window»More Windows ............................
1 Installing Lookout This chapter explains how to install and configure the runtime Lookout software. This manual explains how to install, configure, and use the Lookout runtime software. It assumes that you are already familiar with your operating system.
Chapter 1 Installing Lookout TCP/IP Networking You must be properly set up on a network with TCP/IP protocols installed if you want to use the networking capabilities of Lookout 4. If TCP/IP is not working properly on your computer, consult your system administrator. Installing Lookout Installing from the CD 1. Before installing, make sure you have shut down all applications that may currently be using ODBC.
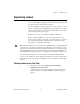
Chapter 1 Installing Lookout Registering Lookout Be sure to register your Lookout package to receive your permanent unlock code. As an unregistered package, Lookout is limited to 50 I/O points and one client connection and only runs for 30 days. If you are installing a free client run-time version of Lookout only, you do not have to register.
Chapter 1 Installing Lookout 2. Enter your name in the Name field. 3. Enter the Organization name exactly as it appears on the key code fax sent in response to your registration, including punctuation marks. This text is used in combination with the key code, and so it must be exact. (If you have not yet received your key code from National Instruments, you can enter your registration data later. Select OK and Lookout will inform you that you have not registered your package yet.
Chapter 1 Installing Lookout If you are certain that you typed the information correctly and Lookout does not accept it, call the National Instruments technical support line for help. Changing Registration Information If you want to change the number of Lookout I/O points you are using, or make other changes in system capabilities, National Instruments must send you a new Lookout keycode. To change your registration information, select Options»System»Change Registration Info.
Chapter 1 Installing Lookout To add or change client connection information in Lookout, Select Options»System from the menu, and click on the Change Client License button. The following dialog box appears. Click on the Add button. The following dialog box appears. Enter your Organization name as you reported it in your registration request for a client keycode. Enter the Serial Number of your copy of Lookout, and the License Code your received. Click on OK.
Chapter 1 Installing Lookout Setting System Options The first time you open Lookout is a good time to set some of the Lookout system options. In Lookout, select Options»System from the menu bar. The System Options dialog box appears as shown in the following illustration. Figure 1-1. System Options Dialog Box Note Only users logged on with security levels or 9 or greater can access the System Options dialog box.
Chapter 1 Installing Lookout Citadel Database Settings The Citadel Database fields set the default destination for Citadel data logged by Lookout. All processes running under a single instance of Lookout will use this data path to log data to Citadel, unless you override this setting when you create the process. You set the Default path and the Default computer separately. Use the complete path name for the Default path setting, and the fully qualified computer name for the Default computer setting.
Chapter 1 Installing Lookout Startup Process File Setting If your computer runs Lookout 24 hours a day, you may want to ensure that, if the computer temporarily loses power, it will automatically reboot and begin executing your processes when power returns. To get startup processes, select Options»Startup, and the following dialog box appears. To add a file to your list of startup processes, click on the Add button. A dialog box you can use to browse for a file appears.
Chapter 1 Installing Lookout To make sure Lookout loads and runs when your computer boots or reboots, consult your operating system documentation instructions on how to set a default startup application. Lookout Operator’s Manual 1-10 www.natinst.
2 Lookout Basics This chapter explains how to start and get around within Lookout. Basically, you use the mouse, keyboard, touch screens, and similar tools to manipulate controls on Lookout control panels. Most of what you do is as simple as throwing a switch or adjusting a control knob. Some operations require you to use Lookout menu items, covered in Chapter 3, Lookout Runtime Menu Commands. For specific information regarding the processes you are using, consult your Lookout administrator.
Chapter 2 Lookout Basics Your system administrator should have assigned you a user account name and password. Enter your user name and password. The Idle time field determines how long a period of inactivity Lookout will wait before logging off the current user. When set to 0, Lookout leaves the current user logged in until that user logs off, a new user logs on, or Lookout is shut down. The first time you start Lookout, you should see the following display if Lookout is not running any processes.
Chapter 2 Lookout Basics Opening a Process File 1. If you have a Lookout process file available, select the File»Open menu item from the Lookout menu bar. 2. In the File name data field, enter the name of a Lookout process file (they have a .l4p file extension), or choose a process file from the list and select OK. If you select a valid process file, Lookout opens the file and immediately begins executing the process.
Chapter 2 Lookout Basics 3 2 1 4 11 5 6 10 1 2 3 Menu Bar Title Bar Process Containing Current Active Panel 9 4 5 6 8 Lookout Control Panel Alarm Window Active Alarms 7 8 9 Control Panel Navigation Arrows Organization User Logged In 7 10 Time and Date 11 Minimized Control Panel Figure 2-1. The Lookout Screen Title Bar The title bar at the top of the Lookout window displays the program name and the name of the currently active process.
Chapter 2 Lookout Basics Menu Bar The menu bar displays the currently available menu commands. Some of these commands may or may not be available to you, depending on your security level. Status Bar The status bar is at the bottom of the Lookout window. When in run mode, the status bar is gray and the time and date are displayed on the left end of the bar. The account name of the currently logged on operator comes next.
Chapter 2 Lookout Basics a pop-up state or minimized. When a pop-up control panel is displayed, it remains on top of all other panels until you minimize it. Control panels do not have a standard appearance. Some control panels may only display information, while others combine control and display information. The information displayed always represents the most current values available to Lookout through its communications with your I/O devices.
Chapter 2 Lookout Basics You can have the same sort of synchronous operation between controls in different processes running on your computer, or between controls running in processes on different computers in your network. Lookout networking makes this possible. Alarm Window In Figure 2-1 the alarm window is at the bottom of the screen. You can choose how the alarm window is displayed by selecting Alarms»Display Options. In Figure 2-1 the alarm window is set to display at the bottom of the workspace.
Chapter 2 Lookout Basics Virtual Keyboard Lookout also has a virtual keyboard you can use with a touch-sensitive screen or a mouse. To enable the virtual keyboard, select Options»System and then check Left Mouse Click or Right Mouse Click in the Virtual Keyboard Pops Up section of the dialog box. When this feature is enabled, clicking in a data entry field or touching the field on a touch-sensitive screen displays the virtual keyboard.
Chapter 2 Lookout Basics To compile a source file inside Lookout, select File»Open. The following dialog box opens. Set the Files of type to Lookout Source Files (*.lks) and select the source file you want to compile. State File The state file contains the actual values of object data members. These values include setpoints and other important data held within and used by objects. You might think of the state file as permanent memory for Lookout setpoints and real-time trends.
Chapter 2 Lookout Basics Lookout Windows Services Lookout requires three background services that run in Windows outside of the Lookout application itself to be running on your computer while it is running: Lookout Citadel Server, Lookout Classified Ads, and Lookout Time Synchronization. In your Windows NT task manager, these services appear as Classifieds, TimeService, and CitadelService. Under Windows NT, these services run automatically as NT services.
3 Lookout Runtime Menu Commands This chapter describes Lookout menu bar pull-down commands available in run mode. Some menu items may be disabled, depending on your security level. Every menu command has a predetermined security level associated with it. Only operators whose security levels are equal to or greater than that of a particular command can access that menu command. Contact your Lookout administrator to find out what security level you have.
Chapter 3 Lookout Runtime Menu Commands If for some reason Lookout refuses to load a .l4p process file, you can attempt to recompile by opening a Lookout .lks file. Select Lookout Source Files (*.lks) in the Files of Type combo box. File»Reopen Security Level: 8 Shortcut Keys: none The File»Reopen command reloads the currently executing process from disk. This in turn clears all alarms from the alarm window. All trends and setpoints, however, retain their previous values.
Chapter 3 Lookout Runtime Menu Commands The File»Close command shuts down process execution—be sure that this is what you want to do before selecting this command. Your Lookout application may be controlling critical processes, and shutting it down could cause serious problems. Caution File»Close All Security Level: 8 Shortcut Keys: none The File»Close All command halts execution of all currently loaded processes.
Chapter 3 Lookout Runtime Menu Commands File»Log on Security Level: 1 Shortcut Keys: Use the File»Log on command to log on to Lookout as the current operator/integrator with your predefined account name and password. Only one person can log on at a time. You can also initiate this command by clicking on the account box in the status bar near the bottom left corner of the screen, where the account name appears.
Chapter 3 Lookout Runtime Menu Commands File»Log off Security Level: 1 Shortcut Keys: The File»Log off command instantly logs off the current account name and leaves (nobody) logged onto the system. You can also initiate this command by clicking on the account box near the bottom left corner of the screen, where the account name appears. When the Welcome to Lookout dialog box appears, click on the Log Off button.
Chapter 3 Lookout Runtime Menu Commands Option Commands Options»System Security Level: 9 Shortcut Keys: none The Options»System command is used to configure various system-level operating parameters. See the Setting System Options section of Chapter 1, Installing Lookout, for further information on configuring Lookout. Options»User Manager Security Level: 10 Shortcut Keys: none Use the Options»User Manger command to create, revise, and delete system user accounts.
Chapter 3 Lookout Runtime Menu Commands Options»Serial Ports Security Level: 9 Shortcut Keys: none Use the Options»Serial Ports command to configure your computer serial port communication topology. Each serial port can have a unique setting: Hardwired, Dial-up, or Radio (RTS/CTS). Configure your serial port using the following instructions. Figure 3-1. Serial Port Settings Dialog Box 1. In the Serial port data field, select the communication port you are defining (in this example, COM1). 2.
Chapter 3 Lookout Runtime Menu Commands Selecting the Serial Port The Serial port data field is a drop-down listbox. Use it to select the communication port you are defining. While software may allow many serial ports, most computers support only two serial ports without additional hardware. Setting Receive Gap The Receive gap setting is available for all serial connection types.
Chapter 3 Lookout Runtime Menu Commands When you select RTS/CTS hardware handshaking, Lookout controls the RTS, or request-to-send pin, and monitors the CTS, or clear-to-send pin, during data transmission (pins 4 and 5 on a 25-pin RS-232 connector). Therefore, you must have at least the RTS pin (pin 4) wired straight through on your RS-232 cable. The CTS pin (pin 5) is optional. Lookout initiates a serial transmission on an RTS/CTS port by first asserting RTS to key the radio.
Chapter 3 Lookout Runtime Menu Commands If you set the RTS delay off setting too high, the remote device begins transmitting its response before the local radio is unkeyed, causing a communication alarm in Lookout. Dial-Up Modem Settings Use the Dial-up serial connection when you use a modem in conjunction with a switched telephone line (not leased line). You can customize the dial-up settings for your particular modem and phone line.
Chapter 3 Lookout Runtime Menu Commands The Hayes Corporation standard command for configuring the modem to hang up and enter command mode upon loss of DTR is &D2. You can use a terminal program to make this setting permanent on most modems by entering the modem command AT&D2&W to store the setting permanently in nonvolatile modem memory. Or you can just add &D2 into the Dialing prefix. The default Dialing prefix is ATX4MVEDT, so you might change it to AT&D2X4MVEDT.
Chapter 3 Lookout Runtime Menu Commands Alarm Commands Alarms»Show Security Level: 1 Shortcut Keys: The Alarms»Show command instantly displays the alarm window as a floating style window if it is not already being displayed. You can select this command when you want to quickly and easily locate the alarm window from any location on any control panel. Notice the shortcut keystroke, .
Chapter 3 Lookout Runtime Menu Commands than can be displayed in the alarms window at once, a scroll bar appears along the right side of the window. The following illustration shows an alarms window with Window style set to Bottom, and Window height set to 4. Alarms»Filter Options Security Level: 2 Shortcut Keys: none Use the Alarms»Filter Options command to filter the alarms displayed in the alarm window by group, priority, and occurrence. The following dialog box appears.
Chapter 3 Lookout Runtime Menu Commands Setting Ack User Name restricts your alarm monitoring to alarms acknowledged by that particular user. You can only enter one user name at a time, but you can use wild card characters to widen the scope of the alarms reported. The Ack Comment filter restricts your alarms displayed to those with the specified acknowledgement comment. Setting Object Name restricts your alarm monitoring to alarms involving the name you enter.
Chapter 3 Lookout Runtime Menu Commands The following dialog box appears. Select the time range you want to print alarms and events from with the items in the Print Range section of the dialog box. Notice that when defining your own range you use month and day followed by hour and minute. The Printouts selections determine the exact alarm information included in your printout.
Chapter 3 Lookout Runtime Menu Commands Set the format for printing times in the Time Format list. You can adjust your alarm filters for printing by clicking on the Filter Options button to access the alarm filter options Note You can print alarms as they happen by specifying a printer port in the Log alarms to field of the System Options dialog box, accessed by selecting Options»System from the menu bar. This works well for a printer directly connected to your computer.
Chapter 3 Lookout Runtime Menu Commands print out the day’s alarms based on comments, so using certain standard comments (in addition to circumstantial comments) can make the filtering process easier. Alarms»Acknowledge All Security Level: 2 Shortcut Keys: none Select the Alarms»Acknowledge All command to acknowledge all currently active alarms. Alarms»Properties Security Level: 2 Shortcut Keys: none Select the Alarms»Properties to see detailed information about a selected alarm.
Chapter 3 Lookout Runtime Menu Commands Right-click on an alarm and select Properties. The following dialog box listing specific information about the alarm or event appears. You can scroll through alarms and events using the Previous and Next buttons of this dialog. Window Commands Window»Arrange Icons Window»Arrange Icons arranges the control panel icons across the bottom of the Lookout workspace in neat columns and rows.
Chapter 3 Lookout Runtime Menu Commands Window»More Windows If you have too many control panels to fit in the Window menu, the More Windows command appears at the bottom of the Window menu. The Window»More Windows command pops up a dialog box you can use to scroll through the control panel titles and select the window to display by double-clicking on the panel title. Run Commands Run»Add Security Level: 9 Shortcut Keys: none The Run»Add command adds up to ten DOS-style commands to the run submenu list.
Chapter 3 Lookout Runtime Menu Commands Run»Revise Security Level: 9 Shortcut Keys: none Use the Run»Revise command to modify previously configured run commands. Run»Delete Security Level: 9 Shortcut Keys: none Use the Run»Delete to remove previously configured run commands. Help Commands Help»Contents Select Help»Contents to access the Lookout help system.
Technical Support Resources A This appendix describes the comprehensive resources available to you in the Technical Support section of the National Instruments Web site and provides technical support telephone numbers for you to use if you have trouble connecting to our Web site or if you do not have internet access. NI Web Support To provide you with immediate answers and solutions 24 hours a day, 365 days a year, National Instruments maintains extensive online technical support resources.
Appendix A Technical Support Resources Software-Related Resources • Instrument Driver Network—A library with hundreds of instrument drivers for control of standalone instruments via GPIB, VXI, or serial interfaces. You also can submit a request for a particular instrument driver if it does not already appear in the library. • Example Programs Database—A database with numerous, non-shipping example programs for National Instruments programming environments.
Glossary Prefix Meaning Value m- milli- 10 –3 k- kilo- 10 3 M- mega- 10 6 A alarm Software notification of a condition in a process. This alarm may call attention of a value that has exceeded or fallen below certain levels, set in the object database or in an Alarm object. C Citadel The Lookout historical database that stores your data for access later. client A Lookout process that monitors a Lookout server process.
Glossary D data member Data source or sink associated with a Lookout object. A readable data member, or source, may be used in expressions or as inputs to other objects. A writable data member, or sink, may have at most one connection into it, created using the Object»Edit Connections dialog box. A data member may be both readable and writable. database Collection of data stored for later retrieval, display, or analysis. dialing prefix Part of the Hayes AT command set for use with modems.
Glossary F frame Sequence of bytes sent from a computer to a device or vice versa. The syntax of the frame depends on the protocol being used. A read frame contains enough information to specify a set of variables whose values the device should return. A write frame specifies a variable in the device and a new value to write into that variable. Some protocols support the writing of multiple variables in a single frame.
Glossary L .l4p files File extension for Lookout process files. These are the compiled files Lookout runs when it runs a process. .l4t files File extension for a Lookout state file, which stores the values for Lookout controls and other objects with state information. .lka files File extension for Lookout security files. .lkp files File extension for Lookout process files in versions of Lookout earlier than Lookout 4. .
Glossary R receive gap A serial communications setting that determines the number of empty bytes (or amount of time) a driver receives before recognizing the end of a message frame and requesting another message. RTS Request to Send, part of a handshaking protocol for certain devices that connect the serial port of a computer. S security accounts Also called user and group accounts, Lookout uses security accounts to define what users or group of users have different operation privileges in Lookout.
Index A D About Lookout command, 3-20 Acknowledge command, Alarm menu, 3-16 to 3-17 Acknowledge All command, Alarm menu, 3-17 Add command, Run menu, 3-19 adding client connections, 1-5 to 1-6 Alarm commands, 3-12 to 3-18 Acknowledge, 3-16 to 3-17 Acknowledge All, 3-17 Deselect All, 3-16 Display Options, 3-12 to 3-13 Filter Options, 3-13 to 3-14 Print, 3-14 to 3-16 Properties, 3-17 to 3-18 Select All, 3-16 Show, 3-12 alarm window, 2-7 application files, 2-8 to 2-9 process file, 2-8 source code file, 2-8 to
Index Help commands About Lookout, 3-20 Contents, 3-20 starting Lookout for first time, 1-3 to 1-5 setting system options, 1-7 to 1-8 starting, 2-1 to 2-3 startup process file setting, 1-9 to 1-10 TCP/IP networking, 1-2 Windows services, 2-10 Lookout Citadel Server, 2-10 Lookout Classified Ads, 2-10 Lookout screen, 2-3 to 2-7 alarm window, 2-7 control panels, 2-5 to 2-7 menu bar, 2-5 process in place in run mode (figure), 2-4 status bar, 2-5 title bar, 2-4 workspace, 2-5 Lookout Time Synchronization, 2-10
Index Option commands, 3-6 to 3-11. See also system options, setting.
Index T W TCP/IP networking, 1-2 technical support resources, A-1 to A-2 title bar, 2-4 nTitle command, Window menu, 3-18 Web support from National Instruments, A-1 to A-2 online problem-solving and diagnostic resources, A-1 software-related resources, A-2 Window commands, 3-18 to 3-19 Arrange Icons, 3-18 Minimize All, 3-18 More Windows, 3-19 nTitle, 3-18 Windows services, 2-10 workspace for Lookout, 2-5 Worldwide technical support, A-2 U User Manager command, 3-6 V virtual keyboard operating, 2-8 set