01Title.fm Page 1 Friday, February 28, 1997 3:19 PM Getting Started with VirtualBench™ Getting Started with VirtualBench March 1997 Edition Part Number 321518A-01 © Copyright 1997 National Instruments Corporation. All rights reserved.
01Title.fm Page 2 Friday, February 28, 1997 3:19 PM Internet Support support@natinst.com E-mail: info@natinst.com FTP Site: ftp.natinst.com Web Address: http://www.natinst.com Bulletin Board Support BBS United States: (512) 794-5422 BBS United Kingdom: 01635 551422 BBS France: 01 48 65 15 59 Fax-on-Demand Support (512) 418-1111 Telephone Support (U.S.
02Warr.fm Page 3 Friday, February 28, 1997 3:19 PM Important Information Warranty The media on which you receive National Instruments software are warranted not to fail to execute programming instructions, due to defects in materials and workmanship, for a period of 90 days from date of shipment, as evidenced by receipts or other documentation.
GSVBTOC.fm Page v Friday, February 28, 1997 3:20 PM Contents About This Manual Conventions Used in This Manual...................................................................................vii Customer Communication ...............................................................................................viii Chapter 1 Welcome to VirtualBench VirtualBench Installation for Windows ...........................................................................1-1 Minimum System Requirements ..........
GSVBTOC.fm Page vi Friday, February 28, 1997 3:20 PM Contents Chapter 6 VirtualBench-DMM Front Panel Features ........................................................................................................ 6-1 Measuring a Signal .......................................................................................................... 6-3 Chapter 7 VirtualBench-Arb Waveform Generator Front Panel Features.....................................................................
05ATM.fm Page vii Friday, February 28, 1997 3:20 PM About This Manual The VirtualBench suite of tools is a high-performance, easy-to-use virtual instruments application program for Microsoft Windows 3.1x, Windows 95, or Windows NT. Getting Started with VirtualBench gives you step-by-step instructions on how to use each instrument. It also includes a description of the front panel of each instrument.
05ATM.fm Page viii Friday, February 28, 1997 3:20 PM About This Manual paths Paths in this manual are denoted using backslashes (\) to separate drive names, directories, and files, as in C:\dir1name\dir2name\filename. This icon to the left of bold, italicized text denotes a note, which alerts you to important information. Customer Communication National Instruments wants to receive your comments on our products and manuals.
06Chap01.fm Page 1 Friday, February 28, 1997 3:20 PM Chapter 1 Welcome to VirtualBench Welcome to VirtualBench, a suite of high-performance, easy-to-use virtual instruments for Microsoft Windows 3.1x, Windows 95, and Windows NT. This document contains installation instructions, lists of system requirements and new features, and updated information to help you get started with VirtualBench.
06Chap01.fm Page 2 Friday, February 28, 1997 3:20 PM Chapter 1 Welcome to VirtualBench • NI-DAQ 4.9.0 if you plan to use an AT-DSP2200, AT-A2150, or EISA-A2000 DAQ device • NI-DAQ 5.0 or later if you plan to use Microsoft Windows NT 4.
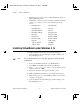
06Chap01.fm Page 3 Friday, February 28, 1997 3:20 PM Chapter 1 Note: Welcome to VirtualBench It is recommended that you not run other applications while you install VirtualBench. 3. Insert Disk 1 into your 3.5-inch floppy disk drive. 4. Select Run from the File menu in the Program Manager. 5. Enter A:setup or B:setup (depending on the pathname of your floppy disk drive) in the input box and click on OK. 6. Follow the instructions that appear in the dialog boxes.
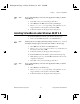
06Chap01.fm Page 4 Friday, February 28, 1997 3:20 PM Chapter 1 Welcome to VirtualBench What Is Installed by the Setup Program If you purchased the full VirtualBench suite, the setup program installs the VirtualBench engine and nine virtual instruments: the oscilloscope (Scope), dynamic signal analyzer (DSA), digital multimeter (DMM), function generator (FG), logger, arbitrary waveform generator (Arb), DC analog output controller (AODC), digital input/output controller (DIO), and device calibrator.
06Chap02.fm Page 1 Friday, February 28, 1997 3:21 PM Chapter 2 VirtualBench-Scope In Windows 3.1x, you launch VirtualBench-Scope by double-clicking on the Scope icon in the VirtualBench window within the Program Manager. In Windows 95/NT 4.0, you launch VirtualBench-Scope by selecting Start»Programs»VirtualBench»VirtualBench-Scope.
06Chap02.fm Page 2 Friday, February 28, 1997 3:21 PM Chapter 2 VirtualBench-Scope The front panel of VirtualBench-Scope has the following features: Note: • Channel Selector— selects a waveform for display on the Graphics display. • Channel Settings—adjusts the vertical sensitivity of the selected channel. Turning the knob clockwise increases the sensitivity (each vertical division represents a smaller voltage value). • Timebase —allows you to change the timebase setting.
06Chap02.fm Page 3 Friday, February 28, 1997 3:21 PM Chapter 2 VirtualBench-Scope Acquiring Data You can start acquiring signals with VirtualBench-Scope by completing the following steps: 1. Connect a signal to the Channel 0 input of your National Instruments DAQ device. See the user manual of your DAQ device for details. For example, on a 68-pin MIO E-series device, connect a signal to pins 68 (ACH0) and 67 (AIGND) for a Referenced Single Ended input. 2. Configure VirtualBench-Scope.
06Chap02.fm Page 4 Friday, February 28, 1997 3:21 PM Chapter 2 VirtualBench-Scope d. 3. Note: Note: Click on OK to use these settings. Save your settings by selecting Edit»Save Settings from the pull-down menu on the front panel. Enter the name of the file you want to save, for example MyScope.set. When you launch VirtualBench-Scope, it automatically uses the settings from when you last used VirtualBench-Scope. 4. Enable the CH 1 button in the Channel Selector (Acquire) group.
06Chap03.fm Page 1 Friday, February 28, 1997 3:21 PM Chapter 3 VirtualBench-Logger In Windows 3.1x, you launch VirtualBench-Logger by double-clicking on the Logger icon in the VirtualBench program group. In Windows 95/NT 4.0, you launch VirtualBench-Logger by selecting Start»Programs»VirtualBench»VirtualBench-Logger.
06Chap03.fm Page 2 Friday, February 28, 1997 3:21 PM Chapter 3 VirtualBench-Logger The front panel of VirtualBench-Logger has the following features: • Strip Chart Display— displays the logged data. • Y-Axis Select Controls— selects which channel Y scale to display on either the left or right Y axis of the Strip Chart Display. • Status Display— shows the Current Time, Start Time, and Stop Time of the current data acquisition.
06Chap03.fm Page 3 Friday, February 28, 1997 3:21 PM Chapter 3 VirtualBench-Logger Acquiring Data You can start acquiring data with VirtualBench-Logger by following these steps: 1. Connect several known voltage signals to the input channels of your DAQ device. See the user manual of your DAQ device for details. It is recommended that you use known reference signals to verify proper operation of VirtualBench-Logger and your DAQ device. 2. Configure VirtualBench-Logger.
06Chap03.fm Page 4 Friday, February 28, 1997 3:21 PM Chapter 3 VirtualBench-Logger Getting Started with VirtualBench d. Set the channel attributes for each channel from the Start to End Channel. Give each channel an appropriate label for easy identification on the Strip Chart display. e. Click on the File Config button. Specify the name of the Log file where the logged data is stored on disk. Specify the location of this file by using the Browse button.
06Chap03.fm Page 5 Friday, February 28, 1997 3:21 PM Chapter 3 g. Note: VirtualBench-Logger Click on OK in the Logger Settings dialog box to return to the front panel. 3. Select the channels that you want to display on the strip chart using the Channel Select Control. 4. Use the right and left Y-axis Controls to select the display channels Y scale to display on the strip chart. 5. Click on Start in the Data Acquisition Controls area.
06Chap04.fm Page 1 Friday, February 28, 1997 3:21 PM Chapter 4 VirtualBench-DSA In Windows 3.1x, you launch VirtualBench-DSA (Dynamic Signal Analyzer) by double-clicking on the DSA icon in the VirtualBench program group. In Windows 95/NT 4.0, you launch VirtualBench-DSA by selecting Start»Programs»VirtualBench»VirtualBench-DSA.
06Chap04.fm Page 2 Friday, February 28, 1997 3:21 PM Chapter 4 VirtualBench-DSA log/linear mode, phase unit, and markers in this control. You can refer to the online help for a detailed description of each component. Note: • Display 1/Display 2 Controls—changes the marker positions and display attributes of the respective displays. • Main Control Bar Buttons— contains the Run, Single, and Source controls. – Run—acquires data continuously. When clicked off, the DSA is in idle mode.
06Chap04.fm Page 3 Friday, February 28, 1997 3:21 PM Chapter 4 VirtualBench-DSA Acquiring and Measuring Signals You can start acquiring and measuring signals with VirtualBench-DSA by following these steps: 1. Connect a signal to the Channel 0 or 1 input of your DAQ device. Please refer to the user manual of your DAQ device for details. 2. Configure the DSA. © National Instruments Corporation a. Select Settings from the Edit menu on the front panel. b.
06Chap04.fm Page 4 Friday, February 28, 1997 3:21 PM Chapter 4 VirtualBench-DSA Getting Started with VirtualBench f. Click on the Acquisition tab in the DSA Settings dialog box. g. Set the Frame Size control to 1024. VirtualBench-DSA will analyze data in blocks of 1024 points. h. Select a Sample Rate that is at least twice the maximum frequency that you are trying to measure. i. Select the Averaging Type as OFF and Window Type as None (Uniform).
06Chap04.fm Page 5 Friday, February 28, 1997 3:21 PM Chapter 4 VirtualBench-DSA j. Click on the Triggering tab in the DSA Settings dialog box. k. Set the Trigger Type to none. This setting puts the acquisition in a Freerun mode. l. Click on OK. 3. Change the display indicator (left and right arrow buttons) to Display 1, in the Display Settings control. 4. Select Channel A or B (depending on where you connected your signal), in the Channel Selector of the Display Settings control. 5.
06Chap04.fm Page 6 Friday, February 28, 1997 3:21 PM Chapter 4 VirtualBench-DSA Display Control. Check your signal connections if data is still not visible. 10. Click on Run. VirtualBench-DSA continuously acquires and displays frames of data. 11. Click on Run again to stop acquisition. Note: Please refer to the VirtualBench-DSA Online Help for additional help on configuring VirtualBench-DSA for your specific application.
06Chap05.fm Page 1 Friday, February 28, 1997 3:22 PM Chapter 5 VirtualBench-FG In Windows 3.1x, you launch VirtualBench-FG (Function Generator) by double-clicking on the FG icon in the VirtualBench program group. In Windows 95/NT 4.0, you launch VirtualBench-FG by selecting Start»Programs»VirtualBench»VirtualBench-FG.
06Chap05.fm Page 2 Friday, February 28, 1997 3:22 PM Chapter 5 VirtualBench-FG • • Note: Waveform Modifier Controls—modifies some of the properties of the waveform. – Duty Cycle —adjusts the duty cycles of the Sine Wave, Square Wave, and Triangle Wave. – Offset —adjusts the DC offset of the waveform. – Amplitude —adjusts the peak amplitude of the generated waveform. Run—starts or stops waveform generation.
06Chap05.fm Page 3 Friday, February 28, 1997 3:22 PM Chapter 5 Note: VirtualBench-FG 2. Connect a device or scope to the output of the analog output device that you specified in step one. See your DAQ device user manual for details. 3. Click on Run. VirtualBench-FG continuously generates an analog waveform at the output pin. 4. Click on Run again to stop the waveform generation.
06Chap06.fm Page 1 Friday, February 28, 1997 3:22 PM Chapter 6 VirtualBench-DMM In Windows 3.1x, you launch VirtualBench-DMM (Digital Multimeter) by double-clicking on the DMM icon in the VirtualBench program group. In Windows 95/NT 4.0, you launch VirtualBench-DMM by selecting Start»Programs»VirtualBench»VirtualBench-DMM.
06Chap06.fm Page 2 Friday, February 28, 1997 3:22 PM Chapter 6 VirtualBench-DMM Note: Current AC — measures the AC component of a current source. – Ohms— measures resistance. – Temperature — measures temperature. – Diode — measures the voltage drop across a diode. Diode mode is only available when you are using the DAQCard-4050. • Range Selector— determines the measurement range. This range is different for each measurement mode. AutoRange mode selects the best range to fit the input signal.
06Chap06.fm Page 3 Friday, February 28, 1997 3:22 PM Chapter 6 VirtualBench-DMM Measuring a Signal You can start measuring signals with VirtualBench-DMM by following these steps: 1. 2. © National Instruments Corporation Configure VirtualBench-DMM. a. Select Settings from the Edit menu on the front panel. b. Select the General tab. c. Select the Device and SCXI Module that you want to use. The SCXI Module list is not visible when no SCXI modules are configured for the selected device.
06Chap06.fm Page 4 Friday, February 28, 1997 3:22 PM Chapter 6 VirtualBench-DMM 3. Getting Started with VirtualBench c. Click on Run. VirtualBench-DMM continuously acquires and displays voltage measurements in the display window. d. Check to see that the input signal does not exceed the range of your DAQ device, and that the input signal does not exceed the selected range, when the DMM display shows +CLIP or -CLIP. e. Click on Run again to stop the measurement. Measure current.
06Chap06.fm Page 5 Friday, February 28, 1997 3:22 PM Chapter 6 4. 5. © National Instruments Corporation VirtualBench-DMM i. Check to see that the input signal does not exceed the range of your DAQ device, and that the input signal does not exceed the selected range, when the DMM display shows +CLIP or -CLIP. j. Click on Run again to stop the measurement. Measure resistance.
06Chap06.fm Page 6 Friday, February 28, 1997 3:22 PM Chapter 6 VirtualBench-DMM Note: c. Select the Temperature tab. d. Select the type of sensor that you connected to the channel specified in step one, in substep "a", from the Temperature Sensor list. e. Select the Temperature Units you want the temperature to be displayed. f. Select the cold junction sensor type from the Source list, when you are using a thermocouple. Select the channel to which the cold junction sensor is connected. g.
06Chap06.fm Page 7 Friday, February 28, 1997 3:22 PM Chapter 6 6. © National Instruments Corporation VirtualBench-DMM Measuring a diode. If you are using a DAQCard-4050 device, you may measure the voltage drop across a diode, up to two volts. a. Connect the diode to the terminals of the DAQCard-4050. b. Click on the sixth (diode) button in the move selector. c. Click on Run. d. Click on Run again to stop the measurement.
06Chap07.fm Page 1 Friday, February 28, 1997 3:22 PM Chapter 7 VirtualBench-Arb In Windows 3.1x, you launch VirtualBench-Arb (Arbitrary Waveform Generator) by double-clicking on the Arb icon in the VirtualBench program group. In Windows 95/NT 4.0, you launch VirtualBench-Arb by selecting Start»Programs»VirtualBench»VirtualBench-Arb.
06Chap07.fm Page 2 Friday, February 28, 1997 3:22 PM Chapter 7 VirtualBench-Arb • Amplitude Control— scales the waveform by a specified amount. • Offset Control—adds a voltage offset to the waveform. • Phase Control— shifts the waveform buffer by a certain phase, specified in degrees. • Play/Stop Control— starts or stops waveform generation for one channel.
06Chap07.fm Page 3 Friday, February 28, 1997 3:22 PM Chapter 7 VirtualBench-Arb The Waveform Editor front panel of VirtualBench-Arb has the following features: Note: • View Control— selects the waveform view displayed on the graph. Waveform displays the entire waveform. Segment displays the first of the selected segments. Component displays only the first selected component. • X Axis Control— selects the X-axis units. Time displays the waveform as a function of time.
06Chap07.fm Page 4 Friday, February 28, 1997 3:22 PM Chapter 7 VirtualBench-Arb Generating a Waveform You can start generating waveforms with VirtualBench-Arb by following these steps: 1. 2. Getting Started with VirtualBench Configure VirtualBench-Arb. a. Select Settings from the Edit menu on the front panel. b. Select the Channels tab. c. Select the Device that you want to use for waveform generation.
06Chap07.fm Page 5 Friday, February 28, 1997 3:22 PM Chapter 7 3. 4. 5. © National Instruments Corporation VirtualBench-Arb c. Click on New Component. By default, every time you click on New Component, a new library component is added to any existing waveform. d. Select the type of component: Library, Expression, or Sketch. The following steps further describe how to use these options. Creating a Waveform using the Library Functions. a. Enter the duration of the waveform in the Duration control.
06Chap07.fm Page 6 Friday, February 28, 1997 3:22 PM Chapter 7 VirtualBench-Arb c. Select Sketch from the Component Type control. d. Click on Draw. Notice that this changes from View to Component mode, so that only the current component is displayed. e. Click and drag over the graph to create a waveform using the mouse. Change the mode to line by clicking on the Mode button. This mode allows you to draw straight lines. f. Click on Draw again to finish editing. 6.
06Chap08.fm Page 1 Friday, February 28, 1997 3:23 PM Chapter 8 VirtualBench-AODC In Windows 3.1x, you launch VirtualBench-AODC (Analog Output Direct Current) by double-clicking on the AODC icon in the VirtualBench program group. In Windows 95/NT4.0, you launch VirtualBench-AODC by selecting Start»Programs»VirtualBench»VirtualBench AODC.
06Chap08.fm Page 2 Friday, February 28, 1997 3:23 PM Chapter 8 VirtualBench-AODC Controlling Analog Output You can start controlling analog output with VirtualBench-AODC by following these steps: 1. Getting Started with VirtualBench Configure VirtualBench-AODC. a. Select Settings from the Edit menu on the front panel. b. Click on the General tab in the AODC Settings dialog box. c. Select the Device and SCXI Module that you want to use.
06Chap08.fm Page 3 Friday, February 28, 1997 3:23 PM Chapter 8 Note: VirtualBench-AODC d. Click on the AO Channels tab on the AODC Settings dialog box. e. Select the Range and Initial Voltage (V) or Current (mA) for each channel in the Channels list. f. Click on OK to use these settings. 2. Use the Channel control to assign an analog output channel from your DAQ device to that particular AO Level control. 3. Use the slider or digital controls in the AO Level control to set the output level. 4.
06Chap09.fm Page 1 Friday, February 28, 1997 3:23 PM Chapter 9 VirtualBench-DIO In Windows 3.1x, you launch VirtualBench-DIO (Digital Input/Output) by double-clicking on the DIO icon in the VirtualBench program group. In Windows 95/NT 4.0, you launch VirtualBench-DIO by selecting Start»Programs»VirtualBench»VirtualBench DIO.
06Chap09.fm Page 2 Friday, February 28, 1997 3:23 PM Chapter 9 VirtualBench-DIO Note: • Hex Control— sets the digital state, in hexadecimal form, of the assigned digital port. The state of the digital port is not actually changed until the Write button is clicked on. • Hex Indicator— shows the current state, in hexadecimal form, of the assigned digital port. • Write Control— sets the assigned digital port to the state shown on the On/Off checkboxes or Hex Control.
06Chap09.fm Page 3 Friday, February 28, 1997 3:23 PM Chapter 9 Note: VirtualBench-DIO c. Select the Device and SCXI Module that you want to use. The SCXI Module list is disabled if no SCXI modules are configured for the selected device. The device must be successfully configured in the NI-DAQ Configuration Utility to appear in this list. d. Click on the Ports tab in the DIO Settings dialog box. e.
06Chap10.fm Page 1 Friday, February 28, 1997 3:23 PM Chapter VirtualBenchDevice Calibrator 10 In Windows 3.1x, you launch the VirtualBench-Device Calibrator by double-clicking on the Calibrate icon in the VirtualBench program group. In Windows 95/NT4.0, you launch the VirtualBench-Device Calibrator by selecting Start»Programs»VirtualBench»VirtualBench Device-Cal.
06Chap10.fm Page 2 Friday, February 28, 1997 3:23 PM Chapter 10 Virtual Bench-Device Calibrator Calibrating a DAQ Device You can calibrate your device with VirtualBench-Device Calibrator by following these steps: Note: 1. Wait at least 15 minutes after both your computer and device are powered on before calibrating your device. 2. Select the device you want to calibrate from the Device List. 3. Click on Calibrate. Calibration of your device may take some time.
09CCAppx.fm Page 1 Friday, February 28, 1997 3:23 PM Appendix Customer Communication For your convenience, this appendix contains forms to help you gather the information necessary to help us solve your technical problems and a form you can use to comment on the product documentation. When you contact us, we need the information on the Technical Support Form and the configuration form, if your manual contains one, about your system configuration to answer your questions as quickly as possible.
09CCAppx.fm Page 2 Friday, February 28, 1997 3:23 PM Fax-on-Demand Support Fax-on-Demand is a 24-hour information retrieval system containing a library of documents on a wide range of technical information. You can access Fax-on-Demand from a touch-tone telephone at (512) 418-1111. E-Mail Support (currently U.S. only) You can submit technical support questions to the applications engineering team through e-mail at the Internet address listed below.
09CCAppx.fm Page 3 Friday, February 28, 1997 3:23 PM Technical Support Form Photocopy this form and update it each time you make changes to your software or hardware, and use the completed copy of this form as a reference for your current configuration. Completing this form accurately before contacting National Instruments for technical support helps our applications engineers answer your questions more efficiently.
09CCAppx.fm Page 5 Friday, February 28, 1997 3:23 PM VirtualBench Hardware and Software Configuration Form Record the settings and revisions of your hardware and software on the line to the right of each item. Complete a new copy of this form each time you revise your software or hardware configuration, and use this form as a reference for your current configuration.
09CCAppx.fm Page 7 Friday, February 28, 1997 3:23 PM Documentation Comment Form National Instruments encourages you to comment on the documentation supplied with our products. This information helps us provide quality products to meet your needs. Title: Getting Started with VirtualBench™ Edition Date: March 1997 Part Number: 321518A-01 Please comment on the completeness, clarity, and organization of the manual.