
User Manual


Table Of Contents
- Title Page
- Disclaimer
- Contact
- Table of Contents
- 1 Welcome to MASCHINE!
- 2 Basic Concepts
- 2.1 Names and Concepts You Should Know
- 2.2 Adjusting the MASCHINE User Interface
- 2.3 Common Operations
- 2.4 Stand-Alone and Plug-in Mode
- 2.5 Preferences
- 2.6 Audio and MIDI Settings
- 2.7 Integrating MASCHINE into Your MIDI Setup
- 2.8 Using Footswitches with Your MASCHINE STUDIO Controller
- 3 Browser
- 3.1 Browser Basics
- 3.2 Searching and Loading Files from the Library
- 3.3 Additional Browsing Tools
- 3.4 Editing the Files’ Tags and Properties
- 3.5 Loading and Importing Files from Your File System
- 3.6 Locating Missing Samples
- 3.7 Using Quick Browse
- 4 Managing Sounds, Groups, and Your Project
- 4.1 Overview of the Sounds, Groups, and Master
- 4.2 Managing Sounds
- 4.3 Managing Groups
- 4.4 Exporting MASCHINE Objects and Audio
- 4.5 Importing Third-Party File Formats
- 5 Playing on Your Controller
- 6 Working with Plug-ins
- 6.1 Plug-in Overview
- 6.1.1 Plug-in Basics
- 6.1.2 First Plug-in Slot of Sounds: Choosing the Sound’s Role
- 6.1.3 Loading, Removing, and Replacing a Plug-in
- 6.1.4 Adjusting the Plug-in Parameters
- 6.1.5 Bypassing Plug-in Slots
- 6.1.6 Using Side-Chain
- 6.1.7 Moving Plug-ins
- 6.1.8 Alternative: the Plug-in Strip
- 6.1.9 Saving and Recalling Plug-in Presets
- 6.2 The Sampler Plug-in
- 6.3 Using Native Instruments and External Plug-ins
- 6.1 Plug-in Overview
- 7 Working with Patterns
- 7.1 Pattern Basics
- 7.1.1 Pattern Editor Overview
- 7.1.2 Navigating the Event Area
- 7.1.3 Following the Playback Position in the Pattern
- 7.1.4 Jumping to Another Playback Position in the Pattern
- 7.1.5 Group View and Keyboard View
- 7.1.6 Adjusting the Pattern Grid and the Pattern Length
- 7.1.7 Adjusting the Step Grid and the Nudge Grid
- 7.2 Recording Patterns in Real Time
- 7.3 Recording Patterns with the Step Sequencer
- 7.4 Editing Events
- 7.5 Recording and Editing Modulation
- 7.6 Creating MIDI Tracks from Scratch in MASCHINE
- 7.7 Managing Patterns
- 7.8 Importing/Exporting Audio and MIDI to/from Patterns
- 7.1 Pattern Basics
- 8 Audio Routing, Remote Control, and Macro Controls
- 9 Controlling Your Mix
- 10 Using the Drumsynths
- 11 Using Effects
- 11.1 Applying Effects to a Sound, a Group or the Master
- 11.2 Applying Effects to External Audio
- 11.3 Creating a Send Effect
- 11.4 Creating Multieffects
- 12 Effect Reference
- 13 Creating a Song Using Scenes
- 13.1 Arranger Basics
- 13.2 Managing Scenes
- 13.3 Playing with Scenes
- 13.4 Triggering Scenes via MIDI (MASCHINE Plug-in Only)
- 14 Sampling and Sample Mapping
- 14.1 Opening the Sample Editor
- 14.2 Recording a Sample
- 14.3 Editing a Sample
- 14.4 Slicing a Sample
- 14.5 Mapping Samples to Zones
- 15 Troubleshooting – Getting Help
- 16 Appendix: Tips for Playing Live
- 17 Glossary
- Index
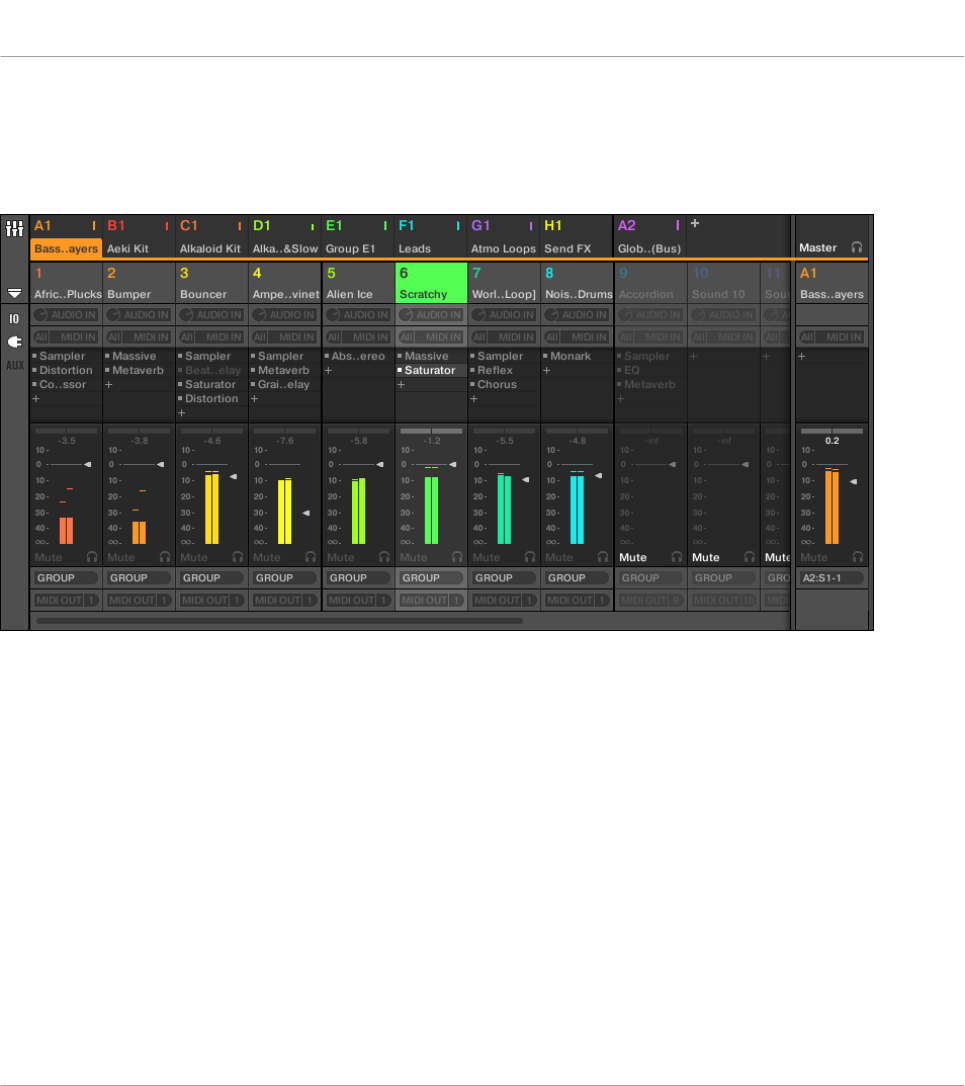
When the software is in Mix view, Sounds, Groups, and the Master are represented by channel
strips in the Mixer. This view provides you with an intuitive control on both the audio and MIDI
routings of any Sound, Group, and the Master. Please refer to section ↑9.2, The Mixer for more
information.
The Mixer displaying the channel strips for all Sounds in a Group.
4.1.2 Similarities and Differences in Handling Sounds and Groups
Sounds and Groups are handled in very similar ways — see section ↑4.2, Managing Sounds
and ↑4.3, Managing Groups below for all details. We list here the main differences between
both:
▪ In each Group you always have a fixed number of Sound slots — namely 16. Some of these
Sound slots might be empty, and you can have gaps in your slots (i.e. some empty Sound
slots between other slots containing Sounds), depending on how you prefer to play your
Sounds from your pads. You cannot create Sound slots, but instead you can load/unload
Sounds to/from the 16 existing Sound slots in each Group.
Managing Sounds, Groups, and Your Project
Overview of the Sounds, Groups, and Master
MASCHINE STUDIO - Manual - 137