
Manual
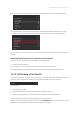
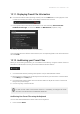


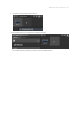
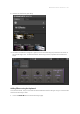


Table Of Contents
- Table of Contents
- 1. Disclaimer
- 2. Welcome to KOMPLETE KONTROL
- 3. Accessibility
- 4. The KOMPLETE KONTROL Workflow
- 5. Setting up KOMPLETE KONTROL
- 6. Software Overview
- 7. Keyboard Overview
- 8. Global Controls and Preferences
- 9. MIDI Communication
- 10. Using the MIDI Assignment Editor
- 11. Host Integration
- 12. Browsing the Library
- 12.1. Browser Basics
- 12.2. Opening the Browser
- 12.3. Loading Preset Files
- 12.4. Choosing Between Factory Content and User Content
- 12.5. Filtering Preset Files by Product
- 12.6. Filtering Preset Files by Bank
- 12.7. Resetting the Product Selection
- 12.8. Types and Characters Tags
- 12.9. Working with Favorites
- 12.10. Performing a Text Search
- 12.11. Displaying Preset File Information
- 12.12. Auditioning your Preset Files
- 13. Working with Effects
- 14. Working with Loops and One-Shot Samples
- 15. Managing the Library
- 15.1. Saving Preset Files to the User Library
- 15.2. Deleting User Preset Files from the User Library
- 15.3. Editing the Tags and Properties of User Preset Files
- 15.4. Syncing Multiple Instances
- 15.5. Working with the Files Pane
- 15.6. Loading VST Plug-ins
- 15.7. Installing NKS Instruments
- 15.8. Importing KOMPLETE KONTROL-Compatible User Files
- 16. Controlling Instrument, Loop, One-shot and Effect Parameters
- 17. Smart Play – Playing and Editing Scales and Chords
- 18. Smart Play – Playing and Editing Arpeggiator Sequences
- 18.1. Playing Arpeggiator Sequences
- 18.2. Using a Sustain Pedal to Control the Arpeggiator
- 18.3. Using Arpeggiator Snapshots on the Keyboard
- 18.4. Editing the Arpeggiator
- 18.5. MAIN Parameters
- 18.6. RHYTHM Parameters
- 18.7. OTHER Parameters
- 18.8. ADVANCED Parameters
- 18.9. RANGE Parameters
- 18.10. HOLD Parameter
- 19. Envelopes

2. Press Button 6 until you select the empty Plug-in slot.
3. Press the BROWSE button to open the Browser.
→ The label below Button 1 shows the current Product Type EFFECTS.
4. Select an Effect together with a Preset le.
5. Press Button 8 or the 4-D encoder to load the selection.
→ The Effect is added to the second Plug-in slot in the Plug-in chain. To add more Effects to the
Plug-in chain, repeat these steps.
13.3. Selecting Plug-in Slots
When you have several Effects added to the Plug-in chain you can directly jump to a Plug-in slot in
order for adjusting the included Effect.
In order to jump to another Plug-in slot and display the Effect’s controls:
▶ Click on the Plug-in slot you want to select.
Selecting another Plug-in Slot using the Keyboard
In order to select another Plug-in slot in the Plug-in chain using the keyboard:
1. Press PLUG-IN to show the Plug-in page.
WORKI NG W ITH EFFE CTS 131