
Owner manual

Manual.1&
Instruction&Manual&
&
&
Imp ortant!&Please&rea d&instruct ions&befo re&operating.&
&
Model/Number:&Natu re'Power'8'Amp'Charge'Controller'/60008&
Electrical:'Handles'up'to'8'Amps'='130'Watts'of'Solar'Power'
Cut‐in&Voltage: 13Volts'
Cut‐Out& Voltage:'14.2'Volt s'
'
Includes:&
• 8'Amp'C harge'Control ler'
'
'
'
'
'
'
&
To&&Install:&
Mounting:&
Consider'the'location'–'ideally'placed'w ithin '2'‐5'fe et'of 'batt ery,'
in'a'well 'protected'dry'place,'free'from'moisture'and'weat her.'
This'product'is'design ed'to'be'flush'mounted'or' wall' mou nted.'
&
Connection:&&
Step&1:'co nnect&the&charge&contr oller &to&the&battery'
Using'“to''Battery”'wire,'connect'the''battery'clamp'adapt ers'to'
the' charge'controller.'(J‐Plug'to'J‐Plug'shown'Fig. &1).'Next,'
Connect 'red'positive(+)'ba ttery'clamp'to'the'positive(+)'battery'
terminal .'Then'connect'the'negative(‐)'battery'clamp'to'the'
negative '(‐)'battery'terminal.''
'
Step&2:''co nnect&the&charge&contr oller &to&the&so lar&panel &
Using'“to'Sol ar'Panel” 'wire'on'the'c harge'controller.''Connect'J‐
Plug'to'the'solar'pane l'J‐'Plug.'(J‐Plug'to'J‐Plug'sh own'Fig.& 1).'
'
WARNING:&C onnections&must&be&placed& in&order&and&ensure&
that &the&posit ive&(+)&matches&the&positive(+)&and&the&negative&
(‐)&matches&the&negative&(‐).&(Connections &are& in&Parallel)&
Wrong&connect ions&may&cause&da mage&to&parts&or&all&of&the&
system.&
&
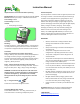
Fig.&1&–&J‐Plug& Connection&&
'
Confirm'that'connections'are'tight'and'secure.&
&&
&
Connecting&Multiple&Solar&Panels?&&
Contact' Nature'Power'for'3'‐in‐1'J‐Plug''connection'wire,'or'
more'information'on'connecting'm ultip le'so lar'panels.'
&
&
&
Product&Description:&&
Any'so lar'panel'that'is'ra ted'12'watts'or'higher'requ ires'the'use'
of'a 'charge'controller. '''Nature'Power'Solar'panels'and'charge'
controllers'come'equipped'wit h'easy'j‐plug'adapters.'The'8'
Amp'Charge'controller'is'designed'to'protect'your'12' Volt'
batteries'from'being'overcharge''by 'high'voltage'surges'and'
prevents'discharg ing'of'the'battery'overnight.'LED'lights'd ispla y'
battery'“Charged”'or'battery'“Charging”.''Never'deeply'
disc harge'your'battery;'never'let'your'battery'voltage'pass'
below'11.0'volts.'It'wi ll'cause'permanent'damage'to'the'
battery.' Use'a'DMM'(Digital'Multi‐Meter)'to'mea sure'your'
battery’s'volt age.'When'connecting'and'during'operation'it'is'
normal'for'both'lights 'to'fl icker 'for'a'short'time.''
'
IMPORTANT:&
• Obs erve'manufac turer’s'safety'procedures'when'
working' arou nd'b atter ies'and'o ther' electrical'
equ ipment'
• Always'c onnect'charge'controll er'to 'the'battery'first'
and 'remove'last.''
• This'product'is'designed'to'be'used'on'12'volt'
configurations'in'parallel,'(optional'6'volt'in'series)'
• This'product'is'designed'to'receive'charges'from'12'
Volt'Solar'Pa nels'
• This'product'should'be'placed'in'a'well'ventilated'dry'
area,'free'fro m'flammable'gases,'weather,'and'moiste r'
Cha rge'c ontroller'is'NOT'weatherproof'
• Cha rge'c ontroller'should'n ot'be'installed'further'than '2'
to'5 'ft.'way'from'the'battery.''Solar'Panel'length'must'
not'reach'further'than'20'ft'wa y'from'battery'or'loss'of'
curr ent'may'occur.'
• LED'light'indicate s'a'full'battery'charge'“green”'at'14.2'
Volts,'at'this'time'the'char ge'controller'will'cut'out'to '
prevent'overcharging'
• LED'light'indicate s'battery' charging'“yellow”' when'
battery'r eaches'below '13'Volts,'charge'c ontroller'will'
cut'in'and''allow'solar'panel'to'being'charging'
• Cha rge'c ontroller'can'handle'up'to'130'Watts'of'solar'
power'
Limited&Warranty:&Proof'of'Pur chase'is'Requ ired'(Receipt)'
1&Year:'Free'from 'defects'in'material'and'workmanship'
&
1‐800‐588‐0590&
info@nature powerproducts.com'
www.naturepowerproducts.com'