
Instructions/Assembly Guide


31
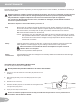
Contact your doctor for more information about Body Mass Index (BMI) and the weight that is appropriate
for you. Use the values calculated or measured by the machine’s computer for reference purposes only.
8. Push the Increase(c) button to move to the “SA9E TO USB OK"” prompt. Push OK and the “ARE YOU SURE"
NO” prompt will display. Push the Increase(c) button to change it to yes and push OK. The Console will display the
“INSERT USB” prompt. Insert a USB Flash Drive into the USB Port. The Console will record the Statistics to the USB
Flash Drive.
The Console will display “SA9ING”, and then “REMO9E USB” when it is safe to remove the USB Flash Drive.
Note: Push the PAUSE/END button to force an e[it from the “SA9ING” prompt.
9. Push the Increase(c) button to move to the “CLEAR WORKOUT DATA OK"” prompt. Push OK, and the “ARE YOU
SURE" NO” prompt will display. Push the Increase(c) button to change to the “ARE YOU SURE" YES” display, and
push OK. The user workouts have been reset.
10. Push GOAL TRACK to return to the PowerUp screen.
When a User performs a workout that surpasses the “LONGEST WORKOUT” or “CALORIE RECORD” of the previous
workouts, the Console will congratulate with an audible sound and tell the User the new achievement. The corresponding
Achievement Indicator Light will also be active.
Console Setup Mode
The Console Setup Mode lets you input the date and time, set the units of measurement to either English or Metric, control
the sound settings ( on/ off), or see maintenance statistics (Error Log and Run Hours ± for service technician use only).
1. To go into the Console Setup Mode
For the later version of the console, hold down the PAUSE/END button and Increase (c) button together for 3 sec
onds while in the PowerUp Mode.
For the earlier version of the console, hold down the PAUSE/END button and Left button together for 3 seconds
while in the PowerUp Mode.
Note: Push PAUSE/END to e[it the Console Setup Mode and return to the PowerUp Mode screen.
2. The Console display shows the Date prompt with the current setting. To change, the Increase/Decrease buttons to
adjust the currently active value (Àashing). Push the Left/Right buttons to change which segment is the currently
active value (month / day / year).
3. Push OK to set.
4. The Console display shows the Time prompt with the current setting. Push the Increase/Decrease buttons to adjust
the currently active value (Àashing). Push the Left/Right buttons to change which segment is the currently active value
(hour / minute / AM or PM).
5. Push OK to set.
. The Console display shows the Units prompt with the current setting. To change, push OK to start the Units option.
Push the Increase/Decrease buttons to change between “MILES” (Imperial English units) and “KM” (metric units).
Note: If the units change when there is data in User Statistics, the statistics convert to the new units.
7. Push OK to set.
8. The Console display shows the Sound Settings prompt with the current setting. Push the Increase/Decrease buttons
to change between “ON” and “OFF”.
9. Push OK to set.
10. The Console display shows the TOTAL RUN HOURS for the machine.
11. For the ne[t prompt, push the OK button.
12. The Console display shows the Software 9ersion prompt.
13. For the ne[t prompt, push the OK button.
14 . The Console will display the PowerUp Mode screen.
CONSOLE SETUP MODE