
User Manual


44
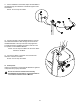
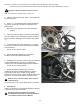
6. Tiethelengthofstringtotheend(A)oftheDataCable
at the base of the Mast. Hold the other end of the Data Cable
(B) and carefully pull it out of the Mast so that the string
extendsthroughthelengthoftheMast.Untiethestringfrom
the old Data Cable and discard the old cable.
NOTICE: Do not crimp the HR cable (C) and Resistance
Cable (D).
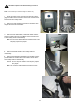
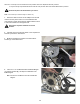
7. Tie the end of the string at the base of the Mast to one
end of the replacement Data Cable. Hold the other end of
the string and carefully pull the new Data Cable through the
Mast.
NOTICE: Do not crimp the cables.
8. Untie the string from the Data Cable and connect the
cable to the Data Cable from the Main Frame.
. NOTICE: Do not crimp the cables. This step may require
two people.
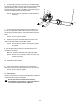
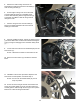
9. Put the Mast back in position in the Main Frame and
reinstall the Hardware.
Note: Do not let the cables fall down inside the Mast.
NOTICE: Be sure not to crimp any cables. This step may
require two people.
10. Reinstall the Mast Gasket.
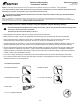
11. Connect the cables to the back of the Console and
attach the Console to the Mast with the screws from Step 2.
NOTICE: Do not crimp the cables.
12. Final Inspection
Inspect your machine to ensure that all hardware is tight and
components are properly assembled.
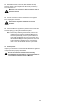
!
Do not use until the machine has been fully
assembled and inspected for correct performance
in accordance with the Owner’s Manual.
A
B
C
D