Be Strong.
PREFACE Thank you for purchasing the Nautilus® Commercial Series S912 gym. For more than 30 years Nautilus has been producing the world’s finest fitness equipment used in health clubs and homes around the globe. We hope this product exceeds your expectations and is a valuable tool for your facility. Please carefully read through this manual to familiarize yourself with the operation of your new Nautilus strength system.
TABLE OF CONTENTS Safety Requirements ............................................................. 4 Leg Extension .........................................................................21 General Guidelines For Safe Operation ................................. 5 Leg Press ................................................................................22 Seated Calf Raise ..................................................................23 Stations .....................................................
SAFETY REQUIREMENTS: SAVE THESE INSTRUCTIONS! The following definitions apply to the words “Danger” and “Warning” found throughout this manual: DANGER! Used to call attention to IMMEDIATE hazards which, if not avoided, will result in immediate, serious personal injury or loss of life. WARNING! Used to call attention to POTENTIAL hazards that could result in personal injury or loss of life. READ ALL INSTRUCTIONS BEFORE USING THE MACHINE. Read this manual in full before operating the S912 gym.
SAFETY REQUIREMENTS: SAVE THESE INSTRUCTIONS! The safety level provided by the design of this equipment can only be maintained when the equipment is regularly examined for damage and wear. Inoperable components should be replaced immediately or the equipment be put out of use until it is repaired. Failure to follow the guidelines may compromise the effectiveness of the exercise experience, expose you (and possibly others) to injury, and reduce the longevity of the machine.
PRODUCT FEATURES Stations • Prone Leg Curl/Seated Leg Extension • Dual Handle Lat Pull • CX Plus™ Press Arm • Nitro® Press Handles • Nautilus® Commercial Ab Crunch • Nautilus® Commercia Dual Pivot Chest Fly • Leg Press with 4-bar linkage • Dual Handle Low Row Dual Handle Lat Pull Nitro® Press Handle Prone Leg Curl/Seated Extension Seat Adjustments 6 Weight stack
PRODUCT FEATURES Adjustment points • Leg Curl/Ext seat adjustment • Foot pad adjustment • Converging Press arm adjustment handle • Ab crunch/Chest fly seat adjustment Weight stack Leg Press Abdominal Crunch Foot Pad Dual Pivot Pec Fly Pec Fly Adjustment Dual Handle Low Row Nautilus® Commercial Vertical Series S912 Owner’s Manual 7
S912 FEATURES Weight Selection and Adjustment To adjust weight, make certain weight stack is not in use or lifted. Simply pull the weight pin from the weight stack and select the desired weight. Insert pin completely and make certain it is fully inserted in place before lifting (the magnetized pin will stick onto the selected weight). In general, always start with lower weights and work up to find the weight most appropriate for your goals and capacity.
S912 FEATURES Converging Press Arm Adjustment The converging press arm is adjustable on this machine to allow you to perform various exercises including chest press, shoulder press, and incline press. To adjust, hold one of the press arm support handles with one hand and pull down the adjustment handle to release the spring adjustment with your other hand. Rotate the press arms up or down to the desired position. Release the handle to lock into position.
S912 FEATURES Seat Adjustment (Pec Fly/Abdominal Crunch exercises) Pull up on the adjustment handle located directly under the front of the seat. Slide seat forward or backward to desired position. Make sure the seat is completely locked into position before performing any exercises. Hand Grips Grasp the handle to form a grip as shown in the photo.
S912 FEATURES Dual Handle Grips These handgrips offer two length adjustments. For the longer length adjustment simply attach the longer of the two D-rings to the cable attachment clip. For the shorter adjustment, attach the shorter D-ring as shown.
STRENGTH GUIDELINES General Strength Guidelines Determine your goal: • Power/Speed: Ability to do something in short bursts and be stronger and more powerful performing that task, like jumping or pushing. • Hypertrophy: Larger muscle size • Endurance: Ability to work with a moderate load over a longer period of time without getting fatigued. Once you have determined the goal for training you can make informed decisions about your training regimen.
STRENGTH GUIDELINES 3. 4. If control is still a challenge, adding another form of challenge is inappropriate (this means that adding more weight or more sets to an exercise that is already difficult or more complex is a bad idea). To progress in one area you may have to temporarily regress or stay the same in others.
EXERCISES Core Exercises The following pages contain information on how to correctly perform core S912 exercises. Be sure to follow the instruction labels on the machine for each exercise station’s equipment settings.
EXERCISES Chest Press Muscles Worked This exercise emphasizes the chest muscles (pectoralis major), also involving the front shoulder muscles (anterior deltoid) and the triceps, muscles on the back of the upper arm. Starting Position • Adjust the seat back to the Chest Press position, as noted on the seat back label. • Adjust the seat bottom to the appropriate height as shown in the Start position below. • Adjust the press arm to the Chest Press setting.
EXERCISES Incline Press Muscles Worked: This exercise emphasizes the chest muscles (pectoralis major), also involving the front shoulder muscles (anterior and middle deltoids) and the triceps, muscles on the back of the upper arm. Starting Position: • Adjust the seat back to the Incline Press position, as noted on the seat back label. • Adjust the seat bottom to the appropriate height as shown in the Start position below. • Adjust the press arm to the Incline Press setting.
EXERCISES Shoulder Press Muscles Worked This exercise emphasizes the chest muscles (pectoralis major), the front shoulder muscles (anterior deltoid), the back shoulder muscles (posterior deltoid and upper trapezius) and the triceps muscles on the back of the upper arm. Starting Position • Adjust the seat back to the Shoulder Press position, as noted on the seat back label. • Adjust the seat bottom to the appropriate height as shown in the Start position below.
EXERCISES Triceps extension Muscles Worked This exercise emphasizes the triceps muscles located on the back of the upper arms. These muscles are responsible for straightening your arms and assist in any upper body pushing or pressing motion. Starting Position • Adjust the seat back to the vertical position, as shown in the Start photo below. • Adjust the seat bottom to the declined as shown in the Start photo below. • Adjust the press arm to the Chest Press setting.
EXERCISES Lat Pulldown Muscles Worked This exercise emphasizes the latissimus dorsi, teres major and rear deltoid which make up the large pulling muscles of the upper back. It also involves the biceps, muscles of the front of the upper arm which are responsible for bending the elbow. Starting Position • Adjust the seat back to the vertical position, as shown in the Start photo below. • Adjust the seat bottom to the declined as shown in the Start photo below.
EXERCISES Leg Curl Muscles Worked: This exercise emphasizes the hamstring muscle group (biceps femoris, semimembranosus, semitneonosus) on the back of the thigh as well as the gluteals. Starting Position: • Adjust the seat bottom and seat back to the Leg Curl position as noted on the seat position labels. • Adjust press arm to rearmost position as shown in the photos below. • Lie face down with your upper thigh on the seat pad, knees near the pivot point and ankles under the upper roller pads.
EXERCISES Leg Extension Muscles Worked: This exercise emphasizes the muscles on the front of the upper thigh, the quadriceps muscle group, which are responsible for straightening your leg against resistance. This powerful muscle group helps provide stability for the knee joint and is essential for producing power in running, jumping and lifting activities. Starting Position: • Adjust the seat back to the Incline Press position as shown in the photos below.
EXERCISES Leg Press Muscles Worked: This exercise emphasizes the large muscles of the upper front of the leg, the quadriceps muscle group, gluteus maximus and the hamstrings. Starting Position: • Determine the proper bench position by adjusting the seat so when the feet are placed on the foot plate, the knees are bent slightly past 90 degrees or a position that can be controlled. For future reference, note your seat number position.
EXERCISES Seated Calf Raise Muscles Worked: Emphasizes the muscles of the lower leg, the gastrocnemius and soleus. Starting Position: • Place the balls of your feet on the foot plate. • Lift your chest, tighten your abs and maintain a very slight arch in your lower back. • Push back and straighten your legs, but do not lock out your knees, and maintain this position. Motion: • Slowly press the balls of your feet onto the foot plate and pull your heels toward your knees.
EXERCISES Pec Fly Muscles Worked: This exercise emphasizes the large muscles of the chest (pectoralis major) and the front shoulder muscles (anterior deltoid). Starting Position: • Adjust the seat to its rearmost position (#10 on seat position label). • Adjust the pec arm to get the desired amount of pre-stretch. Pop pin is on the base on your right when you are seated. • Sit on the bench with the arms bent around the pec fly pad and palms facing down.
EXERCISES Abdominal Crunch Muscles Worked: This exercise emphasizes the abdominal area including the upper and lower front abs (rectus abdominus). Starting Position: • Adjust the seat to its rearmost position (#10 on seat position label). • Sit on the seat pad with feet restin on the footpads. • Grasp the handles with palms facing in. • Keep the back against the bench pad. Motion: • Tighten your abs and only curl your torso, slowly moving your ribs toward your hips.
EXERCISES Mid Row Muscles Worked: This exercise emphasizes the large pulling muscles of your upper back (trapezius) as well as the deltoids and rhomboids. The biceps muscles on the front of the upper arm are also involved in this movement. Also emphasizes the core for stability. Starting Position: • Stand with feet shoulder width apart facing the low pulley assembly. • Grasp the handles with both hands palms facing each other.
EXERCISES Arm Curl Muscles Worked: This exercise emphasizes and develops the biceps muscles (as well as the brachialis and brachioradialis), which are located on the front of your upper arms and are primarily responsible for bending your elbows. Starting Position: • Facing the machine, bend down and grasp the handles of the low row pulley assembly with your palms facing forward. • Stand with your upper arms by your sides.
EXERCISES Seated Row Muscles Worked This exercise emphasizes the latissimus dorsi, teres major and rear deltoid muscles which make up the large pulling muscles of your upper back as well as the trapezius and rhomboids. The biceps muscles on the front of the upper arm are also involved in this movement. Starting Position • Sit on the floor facing the machine. • Place your feet against the foot plate. • Grasp the handles with both hands in a palm down position.
Nautilus® Commercial Vertical Series S912 Owner’s Manual 29
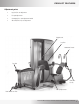
MAINTENANCE Machine Maintenance Recommendations Congratulations on choosing the Nautilus® S912 Strength System. We know that keeping your equipment in the best working condition is important to you and your customers, so please take a few minutes to read the following maintenance instructions. Parts & Services Regular and scheduled maintenance will prolong the life of your Nautilus® equipment. Should you have to replace parts, use only genuine Nautilus® parts.
MAINTENANCE Cleaning 1. UPHOLSTERY CLEANING AND PROTECTION • Keep pads free of perspiration at all times. • Clean and disinfect upholstery at the end of each day, especially areas where perspiration and scalp oil collect. • Clean all outside surfaces with non-abrasive, non-chlorinated household cleaners. 2. CLEANING AND CARE OF PAINTED SURFACES • Wipe painted surfaces with a damp cloth and car wax. • Let dry and buff with a dry cloth. 3.
LIMITED WARRANTY All Nautilus ® exercise products are warranted to the commercial market purchaser to be free from defects in materials and workmanship. Warranty coverage valid to the original purchaser only and proof of the purchase will be required. Any product sold or placed in an application not recommended by Nautilus will void any warranty coverage set forth by Nautilus ® warranty policies and procedures. above, whichever is longer.
IMPORTANT CONTACT NUMBERS If you need assistance, please have both the serial number of your machine and the date of purchase available when you contact the appropriate Nautilus office listed below. INTERNATIONAL CUSTOMER SERVICE WORLDWIDE CUSTOMER SERVICE • NORTH AMERICA OFFICE Nautilus, Inc. World Headquarters 16400 S.E. Nautilus Drive Vancouver, Washington, USA 98683 Phone: 800-NAUTILUS (628-8458) Fax: 877-686-6466 e-mail: cstech@nautilus.com • SWITZERLAND OFFICE Nautilus International S.A.
Be Strong.™ For more information about our Commercial Series machines or other Nautilus ® equipment for your home, visit www.Nautilus.com. © 2006 Nautilus, Inc. All rights reserved. Nautilus, the Nautilus logo, My Nautilus, and Be Strong are either registered trademarks or trademarks of Nautilus, Inc. Nautilus, Inc. World Headquarters, 16400 SE Nautilus Drive, Vancouver, Washington, USA 98683, 1-800-628-8458, www.Nautilus.com.