
Instructions / Assembly

Make sure your individual baseboard heaters are the correct size
for NeatHeat. Common brands include Slant Fin series #15, #30,
and #2000, Sterling series petite 7, Suntech, and Weil Mclain; how-
ever there are also many lesser know brand names so it is always
best to check your specic measurements.
A = The measurement from the wall to the front edge of the
metal enclosure attached to the wall. This measurement must
be 2” or less.
B = The measurement from the wall to the front edge of the
heating element with the original face panel removed. This
measurement must be 3” or less.
C = The measurement from the oor to the top of the original
cover. This measurement must be 6 ¾” or greater; if not back
plate must be raised.
D = The measurement from the bottom of the front cover (or
bottom of the heating core if front cover is missing)to the top
of the original cover. This measurement must be 6” or less, if
not the taller version of NeatHeat must be used which will be
available early 2018.
Please read all instructions prior to installation. Baseboard heaters have sharp metal edges which can cause serious injury. Use of personal
protective equipment such as heavy gloves and safety glasses is imperative when working on or around baseboard heaters.
Step 1
Remove existing metal end caps and discard. Measure the
length of the existing baseboard heater enclosure (the metal
part that is attached to the wall) from left to right. **NOTE: If
the measurement is greater than 6 feet (72 inches) long, you
will need to install more than one length of NeatHeat joined
with optional splice part # SP-30/07 BW.
Step 2
Measure, mark lightly with a pencil, and cut the NeatHeat front
cover (part #’s FC-30/07-06 BW or FC-30/07-04 BW) as needed.
Cutting NeatHeat can be done easily with a ne tooth hacksaw,
sheet metal snips, carpet shears, or even heavy scissors.
**NOTE: Generally, NeatHeat can be installed either over existing front
covers and/or dampers (front covers and/or dampers still installed), or
in place of them (front covers and/or dampers removed or missing). The
existing metal back plate that attaches to the wall is required to attach
the NeatHeat front cover.
Step 3
Hook the bottom of the NeatHeat front cover under the bottom
of the existing metal front cover (or if the existing front cover
has been removed hook the NeatHeat on the bracket where
the metal cover would be installed), then lift slightly while
pushing the top of the NeatHeat cover back towards the wall
snapping the back tab of the NeatHeat between the existing
metal enclosure and the wall. **NOTE: if the existing metal
back plate has been caulked to the wall, it will be necessary to
remove the caulking to facilitate the tab on the NeatHeat cover
sliding between the existing metal enclosure and the wall.
Repeat steps 1 through 6 for all remaining front covers.
Step 4a
Measure the height of the end cap from the top of the
NeatHeat cover to the top of the oor below (this should match
measurement ‘C’ on the “How to Measure for NeatHeat” guide).
Step 4b
The end caps (part #’s REC-30/07 BW and LEC-30/07 BW)
measure 7 7/8 inches high from the factory. The height of the
end cap can be adjusted as necessary using the same tools
and/or method used for trimming the front cover.
Step 4c
Reliefs are provided on the inside of the end cap to shorten
height by ½ and 1” respectively; if less is needed the metal back
plate of the existing enclosure will be needed for proper airow
through the heater, and this will accommodate the proper end
cap height.
Step 4d
Sometimes the copper pipe connected to the heating
element is connected horizontally through the side of the end
cap. There is a relief in the end cap to accommodate these
installations. Simply trim out the relief on the outside edge of
the end cap prior to installing. The relief is intended as a guide,
specic applications may require more or less trimming.
Step 5
Install the end cap from the top sliding the back left tab on
the end cap behind the existing metal enclosure, and the front
edge of end cap outside of the front cover. When fully seated,
the top tab on the back of the end cap will slide between
the tab on the rear of the front cover and the face of the wall.
Gently squeeze the bottom of the front cover and the end
cap together; you should hear a slight click as the front cover
snaps into the retainer on the inside front edge of the end cap.
Repeat steps 5 and 6 for all end caps.
Step 6 (when needed)
Splice Plates (part # SP-30/07 BW) are installed similar to front
cover installation in step 4. The front covers should abut one
another, DO NOT OVERLAP the front covers when installing
splice plates. Hook the bottom of the splice plate under the
bottom of the front cover, and then lift slightly while pushing
the top of the splice plate back towards the wall snapping the
back tab between the back tab of the NeatHeat front cover and
the wall. Repeat step 7 for all remaining splice plates.
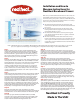
NeatHeat Is Proudly
Made In The USA!
Installation and How to
Measure Instructions for
NeatHeat Baseboard Covers: