Empowered by Innovation Introduction Telephone Features Features DSX Telephone Feature Handbook P/N 1093099 Rev 2, June 2006 Printed in U.S.A. 01.00.
This manual has been developed by NEC Unified Solutions, Inc. It is intended for the use of its customers and service personnel, and should be read in its entirety before attempting to install or program the system. Any comments or suggestions for improving this manual would be appreciated. Forward your remarks to: NEC Unified Solutions, Inc. 4 Forest Parkway Shelton, CT 06484 www.necunifiedsolutions.
Table of Contents Table of Contents Introduction . . . . . . . . . . . . . . . . . . . . . . . . . . . . . . . . . . . . . . . . . . . . . . . . . . . . . . . . . . Using the DSX Feature Handbook. . . . . . . . . . . . . . . . . . . . . . . . . . . . . . . . . . . . . . . . . . . Charts . . . . . . . . . . . . . . . . . . . . . . . . . . . . . . . . . . . . . . . . . . . . . . . . . . . . . . . . . . . . . . . . . Telephone Illustrations. . . . . . . . . . . . . . . . . . . . . . . . . . . . . . . . . . .
Table of Contents Direct Line Access . . . . . . . . . . . . . . . . . . . . . . . . . . . . . . . . . . . . . . . . . . . . . . . . . . . . . . 43 Direct Station Selection (DSS) . . . . . . . . . . . . . . . . . . . . . . . . . . . . . . . . . . . . . . . . . . . . 44 User Programmable Feature . . . . . . . . . . . . . . . . . . . . . . . . . . . . . . . . . . . . . . . . . . . . . 45 Direct Station Selection (DSS) Console . . . . . . . . . . . . . . . . . . . . . . . . . . . . . . . . . . . . .
Table of Contents Hold Recall Display . . . . . . . . . . . . . . . . . . . . . . . . . . . . . . . . . . . . . . . . . . . . . . . . . . . 88 Hotline . . . . . . . . . . . . . . . . . . . . . . . . . . . . . . . . . . . . . . . . . . . . . . . . . . . . . . . . . . . . . . . 90 Hotline Automatic Transfer . . . . . . . . . . . . . . . . . . . . . . . . . . . . . . . . . . . . . . . . . . . . . 90 User Programmable Feature . . . . . . . . . . . . . . . . . . . . . . . . . . . . . . . . . . . . . . . . . . .
Table of Contents Park . . . . . . . . . . . . . . . . . . . . . . . . . . . . . . . . . . . . . . . . . . . . . . . . . . . . . . . . . . . . . . . . 119 Distinctive Flash Rate on Recall. . . . . . . . . . . . . . . . . . . . . . . . . . . . . . . . . . . . . . . . . 119 Personal Park Orbit Recall Display . . . . . . . . . . . . . . . . . . . . . . . . . . . . . . . . . . . . . . 120 System Park Orbit Recall Display . . . . . . . . . . . . . . . . . . . . . . . . . . . . . . . . . . . . . . .
Table of Contents Call Forwarding to Voice Mail. . . . . . . . . . . . . . . . . . . . . . . . . . . . . . . . . . . . . . . . . . Leaving a Message . . . . . . . . . . . . . . . . . . . . . . . . . . . . . . . . . . . . . . . . . . . . . . . . . . . Transferring to Voice Mail . . . . . . . . . . . . . . . . . . . . . . . . . . . . . . . . . . . . . . . . . . . . . Conversation Record. . . . . . . . . . . . . . . . . . . . . . . . . . . . . . . . . . . . . . . . . . . . . . . . . .
Table of Contents vi ◆ Table of Contents DSX Feature Handbook
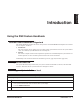
Using the DSX Feature Handbook Using the DSX Feature Handbook How the Feature Handbook is Organized This feature handbook describes the features and operation of the DSX Multibutton Telephone. It is divided into two chapters, as follows: ❥ Introduction This is the chapter you are reading now. It provides a handy quick reference chart for the system feature codes, as well as key layout illustrations for each telephone.
Charts Charts DSX Dial Codes by Feature (Page 1 of 2) For this feature Dial this code Barge In (Intrusion) 4 Barging-In on a co-worker’s call Call Forwarding INTERCOM + *30 Canceling Call Forwarding at an extension INTERCOM + *32 + Extension or 0 (for the operator) INTERCOM + *33 INTERCOM + *34 + Extension or 0 When you are Enabling Call Forwarding Busy/No Answer Setting up Call Forwarding Off Premise Enabling Call Forwarding All Calls (for the operator) INTERCOM + *36 + Extension or 0 Enablin
Charts DSX Dial Codes by Feature (Page 2 of 2) For this feature Night Service / Night Ring Paging Park When you are 6 Setting up Monitor after calling a busy co-worker ** + UNA code (01-04) INTERCOM + *1 + Page zone (1-7 or 0 for All Call) INTERCOM + * + System Park Orbit (60-69) INTERCOM + ** + Extension (e.g.
Telephone Illustrations Telephone Illustrations Ring/Message Lamp 1093100 - 2 Thu June 8 11:52 AM Pat Smith x301 Menu Dir VM:00 CL:00 Alpanumeric Display CHECK CLEAR Speed Dial Bin keys Soft keys Feature keys Line 1 Line 2 Line 3 Line 4 Line 5 Line 6 Line 7 Line 8 Line 9 Line 10 Line 11 Line 12 In DSX-40: Keys 1-8 are line keys. Keys 9-12 are undefined. In DSX-80/160: Keys 1-12 are line keys.
Telephone Illustrations Introduction Ring/Message Lamp 1093100 - 1 Thu June 8 11:52 AM Pat Smith x301 Menu Dir VM:00 CL:00 Alpanumeric Display CHECK CLEAR Speed Dial Bin keys Soft keys Feature keys Line 1 Line 2 Line 3 Line 4 Line 5 Line 6 Line 7 Line 8 Line 9 Line 10 Line 11 Line 12 ABC DEF GHI JKL MNO PQRS TUV WXYZ TRANSFER INTERCOM FLASH V-MAIL REDIAL DND MUTE CONF SPEAKER HOLD In DSX-40: Keys 1-8 are line keys. Keys 9-24 are undefined.
Telephone Illustrations Ring/Message Lamp CHECK 1093100 - 4 Thu June 8 Pat Smith 11:52 AM x301 Menu Directory V-Mail 00 Calls 00 Page Soft keys CLEAR Alpanumeric Display Soft keys SP Dial 1 SP Dial 2 Feature keys Line 1 Line 2 Line 3 Line 4 Line 5 Line 6 Line 7 Line 8 Line 9 Line 10 Line 11 Line 12 ABC DEF GHI JKL MNO PQRS TUV WXYZ TRANSFER INTERCOM FLASH V-MAIL REDIAL DND MUTE CONF SPEAKER HOLD In DSX-40: Keys 1-8 are line keys. Keys 9-24 are undefined.
Telephone Illustrations Introduction 1093100 -3 300 301 302 303 304 305 306 307 308 309 310 311 312 313 314 315 316 317 318 319 320 321 322 323 324 325 326 327 328 329 330 331 332 333 334 335 336 337 338 339 340 341 342 343 344 345 346 347 Page 1 Page 2 Page 3 ALL CALL Park 60 Park 61 Park 62 Park 63 Park 64 Park 65 Park 66 Night ANSWER RELEASE TRANSFER 60-Button DSS Console DSX Feature Handbook Introduction ◆ 7
Telephone Illustrations 8 ◆ Introduction DSX Feature Handbook
Introduction Introduction How To Use This Chapter This chapter provides detailed information on the system’s features. The features in this chapterare in alphabetical order, like a dictionary, and are subdivided into headings as follows: ❥ Description Read Description to get an overview of the feature. ❥ Operation Refer to this heading for convenient, compact, yet detailed operation charts for using each feature.
Account Codes Account Codes Description Use Account codes to categorize and/or restrict outside calls. Account Codes are user-dialed codes that help categorize and/or restrict outside calls. Account Codes are from 2-10 digits long, using any combination of the digits 0-9.
Account Codes Account Codes and Emergency Calls Account Codes are never enforced for emergency (911 and 1+911) calls. Operation Optional (Unforced) Account Codes [Super Display Soft Key] - [Keyset Soft Key] For keysets, Optional Account Codes apply to both incoming and outgoing calls. For outgoing calls, you can enter the Account Code before or after dialing the outside number. For Single Line sets, Optional Account Codes apply only to outgoing calls.
Alphanumeric Display Alphanumeric Display Description The Alphanumeric Display messages help the display telephone user process calls, identify callers and customize features. The 22- and 34-Button Display Telephones have a three-line, 24-character per line alphanumeric display. The first line displays the date and time (while idle) and feature status messages. The second line is used extensively by IntraMail. The third line displays the Soft Key definitions.
Attendant Call Queuing Attendant Call Queuing Description Attendant Call Queuing helps minimize call congestion in systems that use the attendant as the overflow destination for unanswered calls. An unlimited number of callers can queue for the attendant. The callers hear ringback while they wait for the attendant to answer — not busy tone. If you have the attendant as the overflow destination for Direct Inward Lines, for example, unanswered DILs will “stack up” at the attendant until they are answered.
Attendant Position Attendant Position Description The attendant is the system’s call processing focal point. The attendant is the focal point for call processing within the system. The system can have up to four attendants. In addition to the features of a standard keyset, the attendant also has the following unique capabilities (refer to the respective feature for details): ❥ Attendant Call Queuing (page 13) Incoming Intercom calls from co-workers queue for the attendant.
Auto Redial Auto Redial Description Instead of redialing, have Auto Redial periodically retry a busy outside number. Auto Redial periodically redials a busy outside number. If a keyset user places an outside call and the call recipient is busy, the user can press a soft key to enable Auto Redial. The keyset user doesn’t have to retry the number, hoping it will go through.
Automatic Handsfree Automatic Handsfree Description Automatic Handsfree is a convenience for workers who don’t have a free hand to answer a call or use a feature. Automatic Handsfree allows a keyset user to place or answer a call Handsfree by just pressing a key — without lifting the handset or pressing SPEAKER first.
Background Music Background Music Description Broadcast music through the telephone speaker for a more pleasing work environment. Background Music (BGM) sends music from a customer-provided music source to speakers in keysets. If an extension user activates it, BGM plays whenever the extension is idle. Incoming calls and Paging announcements temporarily override (turn off) Background Music. Background Music requires a customer-provided external music.
Barge In (Intrusion) Barge In (Intrusion) Description In an emergency, use Barge In to get through to a co-worker right away. Barge In permits an extension user to break into another extension user’s established call. This sets up a three-way conversation between the intruding extension and the two parties on the initial call. The user can Barge In on an Intercom call or outside call. CAUTION Unauthorized intrusion on calls using this feature may be interpreted as an invasion of privacy.
Call Coverage Keys Call Coverage Keys Description Call Coverage keys allow an extension user to cover a co-worker’s calls from their own telephone. Call Coverage Key Busy Lamp Indications When the key is: The covered extension is: Off Idle or not installed On Busy Slow Flash Ringing Medium Flash Covered extension is in DND for outside calls (option 1). Fast Flash Covered extension is in DND for Intercom calls (option 2) or All Calls (option 3).
Call Coverage Keys Operation In these instructions: [Super Display Soft Key] [Keyset Soft Key] Answering Call Coverage Keys [Super Display Soft Key] - [Keyset Soft Key] To answer a call ringing or flashing a Call Coverage key: Press the flashing Call Coverage key. 1. Using Call Coverage Keys to Place Calls [Super Display Soft Key] - [Keyset Soft Key] In these instructions: [Super Display Soft Key] [Keyset Soft Key] To place a call from an idle Call Coverage key to the covered extension: 1.
Call Forwarding Call Forwarding Description Call Forwarding ensures that the user’s calls are covered when they are away from their work area. You can set up Call Forwarding to reroute all calls or just outside calls. If an extension with forwarding set for outside calls only receives a screened Transfer, the initial voice-announcement broadcasts at the extension. When the caller hangs up to complete the transfer, the outside call forwards as programmed.
Call Forwarding Call Forwarding Toggle in a Personal Speed Dial Bin If an extension doesn’t have an available Feature Key for a Call Forwarding key, the user can program a Personal Speed Dial bin for similar operation (without the BLF). To do this: ❥ While on hook, dial #77. ❥ Press the key for the Personal Speed Dial bin you want to program + HOLD. ❥ For LINE/GRP/ICM, press INTERCOM + HOLD. ❥ For NUM, dial *3 + HOLD. ❥ For NA, enter a name of your choosing + HOLD. ❥ Press SPEAKER to exit.
Call Forwarding Operation Activating or Canceling Call Forwarding In these instructions: [Super Display Soft Key] [Keyset Soft Key] To activate Call Forwarding: 1. Select the Call Forwarding options. 2. Alternately do one of the following: • Press INTERCOM and dial *3. • Press your Call Forwarding Feature Key. Select or cancel a Call Forwarding type. [Immediate] [Immed] Select Call Forwarding Immediate. • Alternately dial 4. [Ring/No Ans] [RNA] Select Call Forwarding when Not Answered.
Call Forwarding Off Premises Call Forwarding Off Premises Description When a user is out of the office, they can send their calls to their home office or cell phone. Off Premises Call Forwarding allows a keyset user to forward their calls to an off-site location (such as a cell phone or remote office) if allowed by their Class of Service. Keyset users can stay in touch by having Off Premises Call Forwarding automatically forward their calls while they are away from the office.
Call Forwarding Off Premises Activating or Canceling Call Forwarding Off Premises [SPEED DIAL BIN] [Bin] In these instructions: [Super Display Soft Key] [Keyset Soft Key] Select the bin option. When you see BIN#: • Enter the Personal Speed Dial bin you want to use (701-720) + HOLD. b. To store a new Off Premises Call Forwarding number: • The system automatically stores this number in bin 720. Select the number option. When you see LINE/GRP/ICM: • Enter the line number (e.g.
Call Timer Call Timer Description Call Timer helps users that must keep track of their time on the phone. Call Timer lets a keyset user with a Call Timer key time their outside calls on the telephone display. There are two types of Call Timer keys: ❥ Manual Call Timer Any time while placing a call or while on a call, a display keyset user can press their Manual Call Timer key to start the Call Timer. The Call Timer will continue until the user hangs up or presses their Manual Call Timer key again.
Call Timer Stopping and Restarting the Call Timer for Your Call In these instructions: [Super Display Soft Key] [Keyset Soft Key] To stop the Call Timer: 1. 2. Do one of the following. a. [Timer] [Time] b. Press the Manual or Automatic Call Timer key. Press the Call Timer soft key. The Call Timer disappears from the display. Features To restart the Call Timer: • The timer will restart from 00:00. 1. Do one of the following. a. [Timer] [Time] b. Press the Manual or Automatic Call Timer key.
Call Waiting / Camp-On Call Waiting / Camp-On Description Call Waiting helps busy extension users know when they have additional waiting calls. It also lets callers wait in line for a busy extension without being forgotten. With Call Waiting, an extension user may call a busy extension and wait in line (Camp-On) without hanging up. When the user Camps-On (by dialing 2), the system signals the busy extension with two beeps indicating the first waiting call.
Callback Callback Description With Callback, a user does not have to repeatedly call a busy extension back, hoping to find it idle. An extension user can leave a Callback at many extensions simultaneously. The system processes the Callbacks as the extensions become free. In addition, many extensions can leave a Callback at the same extension. The system processes these Callbacks on a first-in/first-out (FIFO) basis.
Caller ID Caller ID Description Caller ID automatically displays the phone number and optional name for incoming outside calls. Caller ID allows a display keyset to show an incoming caller’s telephone number (called Directory Number or DN) and optional name as the call is ringing. Caller ID supports the telco’s Called Number Identification (CNI) and Called Number Delivery (CND) service, when available. These services provide the Caller ID information (i.e.
Caller ID Logging Caller ID Logging Description An extension can store the caller’s name and phone number for easy review and redialing. Operation Reviewing the Caller ID Log In these instructions: [Super Display Soft Key] [Keyset Soft Key] To review your Caller ID log: 1. Select the Caller ID log. • Your Ring/Message Lamp will wink on (green) when you have Caller ID records that you have not yet reviewed. [Calls XX] [CLXX] Select to review all your Caller ID records.
Central Office Calls, Answering Central Office Calls, Answering Description The system allows outside calls to ring and be answered at any combination of system extensions. The system provides flexible routing of incoming CO calls to meet the exact site requirements. Answering Priority When multiple calls ring an extension simultaneously, the system services the ringing calls in the following order: 1. Ringing Intercom call 2.
Central Office Calls, Placing Central Office Calls, Placing Description Customize the call placing options to meet the site requirements and each individual’s needs. Store and Forward Store and Forward is an alternate method of placing outside calls in which the system stores (“collects”) the digits a user dials, waits for the user to finish dialing, and then redials the digits on the selected line.
Central Office Calls, Placing Operation In these instructions: [Super Display Soft Key] [Keyset Soft Key] Placing Outside Calls Using Line Keys To place an outside call over a specific line using a line key: 1. Lift handset. 2. Press line key. • You hear dial tone on the line you select and the line key lights green. • To use loop keys for placing calls, see Loop Keys (page 103). 3. Dial outside number.
Central Office Calls, Placing Using Store and Forward Feature Name In these instructions: [Super Display Soft Key] [Keyset Soft Key] To place an outside call using Store and Forward: 1. Do one of the following. Press INTERCOM and dial 9. • You may optionally be able to dial 90-98. b. Press a Switched Loop key + Dial Line Group number (90-98). c. Press Fixed Loop key. 2. Dial the outside telephone number. 3.
Check Key Check Key Description Quickly check keyset and DSS Console Feature Key assignments. A keyset user can use the CHECK key to check keyset and DSS Console Feature Key assignments and Personal Speed Dial bin names. Operation Checking Feature Key Assignments In these instructions: [Super Display Soft Key] [Keyset Soft Key] To check a Feature Key assignment: 1. Press CHECK. 2. Press the Feature Key on keyset or DSS Console. 3. Do one of the following. a. Press another Feature Key to check.
Conference Conference Description A user can set up a multiple-party telephone meeting without leaving the office. Conference lets an extension user add additional inside and outside callers to their conversation.
Conference Exiting a Conference In these instructions: [Super Display Soft Key] [Keyset Soft Key] To exit a Conference without affecting the other parties: Hang up. • The remaining parties can continue their conversation uninterrupted. • If you were in Conference with two outside lines, this may set up a tandem call. Refer to Tandem Calls / Unsupervised Conference (page 157) for more. 1.
Cordless Telephone Cordless Telephone Description Provides cordless mobility and a rich feature set for employees away from their desks. DSX Feature Handbook Features ◆ Features The DSX Cordless Lite II Telephone (P/N 730087) is a 900 Mhz digital narrow band FM cordless telephone that provides mobility, flexibility and convenience for those who spend much of the workday away from their desk.
Dial Number Preview Dial Number Preview Description Dial Number Preview helps the user avoid dialing errors. Dial Number Preview lets a display keyset user dial and review a number before the system dials it out. Operation In these instructions: [Super Display Soft Key] [Keyset Soft Key] Using Dial Number Preview To dial using Dial Number Preview: 1. Do not lift the handset and do not press SPEAKER or INTERCOM. 2. Dial *. • Your display shows: DIAL PREVIEW. 3. Dial the number you want to call.
Dial Number Preview Dial Number Preview Editing Example In these instructions: [Super Display Soft Key] [Keyset Soft Key] To replace 2049265410 with 2039265400: Dial * followed by 2049265410. You see: 2049265410- 2. Press Volume Up until you see: 20-9265410 3. Dial 3. You see: 203-265410 4. Press Volume Down until you see: 20392654-0 5. Dial 0. You see: 203926540- 6. Press Volume Down until the entire number displays to the left of the cursor. You see: 2039265400- 7.
Direct Inward Line Direct Inward Line Description A DIL lets an employee know which calls are just for them. A Direct Inward Line (DIL) is a line that rings an extension directly. Since DILs only ring one extension, employees always know which calls are for them. For example, a company operator can have a Direct Inward Line for International Sales Information. When outside callers dial the DIL’s phone number, the call rings the operator on the International Sales line key.
Direct Line Access Direct Line Access Description Priority users can access lines directly. Direct Line Access also lets maintenance personnel access and test individual lines. Direct Line Access lets an extension user access (seize) an individual line. After seizing the line, the user can dial any outside telephone number without restriction. An extension’s Class of Service allows or denies Direct Line Access.
Direct Station Selection (DSS) Direct Station Selection (DSS) Description Quickly place and Transfer calls to co-workers, without having to look up or dial your coworker’s extension numbers. Important • If you enable an extension’s DSS Keys and leave the extension’s default Prime Line programming intact, the line keys automatically change to DSS keys when the user lifts the handset.
Direct Station Selection (DSS) Operation In these instructions: [Super Display Soft Key] [Keyset Soft Key] Placing a Call using a DSS Key To place a call to a co-worker using a DSS key: Lift the handset. 2. Press INTERCOM. • Your DSS keys show the status of the assigned extension: Off = Idle On = Busy or ringing Fast flash = in Do Not Disturb 3. Press DSS key for the co-worker you want to call. Features 1.
Direct Station Selection (DSS) Console Direct Station Selection (DSS) Console Description DSS Consoles provide one-touch access to extensions, lines, and system features. The DSS Console (P/N 1090024 for black and P/N 090029 for white) gives a keyset user one-button access to extensions, lines, and selected features. This saves time for users that do a lot of call processing such as operators or dispatchers). The system allows you to install 4 DSS Consoles maximum per system.
Direct Station Selection (DSS) Console Default DSS Console Key Assignments The following illustration shows the default DSS Console key assignments.
Direct Station Selection (DSS) Console DSS Console Feature Key Assignments DSS Console Feature Key Assignments (Page 1 of 4) Key Type Undefined Line (page 100) Description Key Code and Data Operation 0 N/A Use this option to designate a Feature Key as undefined (no function). 3 + nn (line number 1-64) Use this option to assign a Feature Key as a line key. • Press the key to place or answer call. Busy Lamp Field (BLF) Off . . . . . . . . . . . . . . Line is idle or not installed. On (red) . . .
Direct Station Selection (DSS) Console DSS Console Feature Key Assignments (Page 2 of 4) Key Type Call Coverage No Ring (page 19) Description Use this option to assign a Feature Key as a lamp only (no ring) Call Coverage Key. Key Code and Data 7 + nnn (extension number) Operation • Press key to call covered extension or pick up ringing call. Call Coverage Delay Ring (page 19) Use this option to assign a Feature Key as a delayed ringing Call Coverage Key.
Direct Station Selection (DSS) Console DSS Console Feature Key Assignments (Page 3 of 4) Key Type Description Key Code and Data System Speed Dial Use this option to assign a Feature Key as a System Speed Dial key. You assign the key to specific System Speed Dial bin. • There is no BLF for this key type. 14 + nnn (bin 001999) • Press key to dial stored number. Use this option to assign a Feature Key as a Personal Speed Dial key. You assign the key to a specific Personal Speed Dial bin.
Direct Station Selection (DSS) Console DSS Console Feature Key Assignments (Page 4 of 4) Key Type Save Number Dialed (page 138) (page 10) Key Code and Data Operation Use this option to assign a Feature Key as a Save Number Dialed key. • There is no BLF for this key type. 25 While on a call: • Press key to save the number you just dialed. While idle: • Press key to redial a previously saved number. Use this option to assign a Feature Key as an Account Code key. 26 1. Place or answer outside call.
Direct Station Selection (DSS) Console Operation See DSS Console Feature Key Assignments (page 48). In these instructions: [Super Display Soft Key] [Keyset Soft Key] Using the Speed Processing Keys on the DSS Console To use the ANSWER key: Press ANSWER to answer any call ringing your extension. 1. To use the RELEASE key: Press RELEASE to hang up (disconnect) your active call. 1. To use the TRANSFER key: Press TRANSFER on your DSS Console instead of the TRANSFER key on your extension. 1.
Directed Call Pickup Directed Call Pickup Description Directed Call Pickup allows co-workers to answer each other’s calls. Operation Using Directed Call Pickup In these instructions: [Super Display Soft Key] [Keyset Soft Key] To intercept a call ringing a co-worker’s extension: 1. Lift the handset. 2. Dial * *. 3. Dial the number of the extension whose call you want to intercept. • To intercept a call ringing an attendant, dial the attendant’s extension number (e.g., 300). Do not dial 0 or 01-04.
Directory Dialing Directory Dialing Description Allows users to place Intercom or Speed Dial calls from a displayed list of names. Directory Dialing allows a display keyset user to select a co-worker or outside call from a list of names, rather than dialing the phone number. There are three types of directory Dialing: ❥ System (Company-Wide) Speed Dial names. ❥ Intercom names (including extension, Ring Group and UCD Group names). ❥ Personal Speed Dial names.
Distinctive Ringing Distinctive Ringing Description Allows users to customize their telephone’s ringing so they’ll know when calls are just for them. The Distinctive Ringing Hierarchy An extension’s Distinctive Ringing uses the following hierarchy: 1. Key Ring Override 2. Extension Ring Override 3. Line Override 4. Default ringing assigned by the system This means that Line Override will replace the default ringing assigned by the system.
Distinctive Ringing Understanding Ring Types The Ring Types determine how different types of calls rings extensions. Each Ring Type sounds unique because it uses one of the 10 available ring tones. The first four Ring Types are assigned by default (see the table below). The last two (B and C) are unassigned by default but you can assign on your phone using Extension Override and Key Ring Override.
Distinctive Ringing Operation Distinctive Ring Configuration In these instructions: [Super Display Soft Key] [Keyset Soft Key] Using Distinctive Ring Configuration To customize a Ring Set for your extension: [Menu + Ring [Menu + MORE + Ring] Select the Distinctive Ringing options. 2. [Config] [Cnfg] Select Distinctive Ring Configuration. 3. Do one of the following. a. Features 1. Select a Ring Type to customize. [Intercom] [Icm] Select to change the Intercom Ring Type.
Distinctive Ringing Extension Override Using Extension Override In these instructions: [Super Display Soft Key] [Keyset Soft Key] To customize ringing for your extension’s outside calls: 1. [Menu + Ring] [Menu + MORE + Ring] Select the Distinctive Ringing options. 2. [Assign] [Asgn] Select Extension Override. 3. Select the ringing mode you want to change. a. 58 ◆ Features [Day Ring] [Day] Select day ring. [Night Ring] [Nght] Select night ring. [Delay Ring] [Dely] Select delay ring.
Distinctive Ringing Key Ring Override Using Key Ring Override In these instructions: [Super Display Soft Key] [Keyset Soft Key] To assign a Ring Type to a Call Coverage, Group Call Pickup, or line key: 1. [Menu + Ring] [Menu + MORE + Ring] Select the Distinctive Ringing options. 2. [Key] [Key] Select Key Ring Override. Select a key type to customize. [Call Coverage] [Cck] Select your Call Coverage keys. • Your Call Coverage keys light. [Pickup] [Pkup] Select your Group Call Pickup keys.
Do Not Disturb Do Not Disturb Description DND permits an extension user to work by the phone undisturbed by incoming calls and announcements. Do Not Disturb (DND) blocks incoming calls, Off-Hook Signaling and Paging announcements. An extension user can activate DND anytime while on a call or while their phone is idle. Once activated, incoming outside calls still flash the line keys. The user may use the phone in the normal manner for placing and processing calls.
Do Not Disturb Call Coverage Key Busy Lamp Indications The covered extension is: Off Idle or not installed On Busy Slow flash Ringing Medium flash In DND for outside calls (option 1) Fast Flash In DND for Intercom calls (option 2) or All Calls (option 3) Note: When transferring an outside call to an extension in DND, the Transfer will be blocked if the extension has enabled DND for all calls (type 3) or DND for outside calls (type 1).
Do Not Disturb Override Do Not Disturb Override Description Easily override a co-worker’s Do Not Disturb. Do Not Disturb Override lets an extension user override another extension’s Do Not Disturb. This allows a priority employee (such as a supervisor or executive) to get through to a co-worker right away while the coworker’s phone is in Do Not Disturb. DND Override is available to all extensions that have DND Override set in their Class of Service.
Door Box Door Box Description Use a Door Box to remotely monitor an entrance door. Door Box Relays Any keyset extension that receives Door Box chimes or ringing can control a control relay, which in turn typically enables an electric strike on an entrance door next to the Door Box. Door Box Alerts The system uses Ring Groups to control Door Box alerts.
Door Box Controlling the Door Strike In these instructions: [Super Display Soft Key] [Keyset Soft Key] To activate the Door Box relay (which in turn controls the door strike): • Once set up in programming, this option is available to any member of the Door Box Ring Group as well as any extension with a Call Coverage key for the Door Box Ring Group. 1. Place or answer a Door Box call. 2. Do one of the following. 64 ◆ a. [Open] [Open] Select to open the Door Box relay (if closed/activated).
Extended Ringing Extended Ringing Description Lets calls ring longer that usual to assist co-workers that can’t readily get to their phones. Operation None DSX Feature Handbook Features ◆ 65 Features Extended Ringing forces an unanswered call to ring a telephone an extended number of times before rerouting. This helps a users that cannot get to their phone quickly to pick up calls (such as a warehouse worker).
Extension Hunting Extension Hunting Description Automatically route calls to co-workers that work closely together. Extension Hunting routes calls to a predefined group of hunt group member extensions. A call rings in sequence through the hunt group until answered at a member extension. Extension Hunting is helpful, for example, for a group of co-workers that share responsibility for answering calls. Each call cycles through the group until an available member picks it up.
Extension Hunting Operation Sending a Call to a Terminal or Circular Hunting Group In these instructions: [Super Display Soft Key] [Keyset Soft Key] To send a call to a Terminal or Circular Hunting Group: 1. Do one of the following. Transfer an outside call to a hunt group member. b. Set up a DIL to a hunt group member. c. Place a ringing Intercom call to a hunt group member. d. Set up a hunt group member as a line’s overflow destination. Sending a Call to a UCD Group Features a.
Extension Locking Extension Locking Description When they leave the office, a keyset user can secure their phone to prevent unauthorized use. Extension Locking allows a keyset extension user to secure their phone when they leave the office. The user may want to do this if their phone has Toll Restriction and Class of Service options enabled that could be easily abused. While locked, the restrictions set up in Class of Service 15 and Toll Level 7 are in force at the extension.
Extension Locking Entering or Changing Your PIN Number 4. In these instructions: [Super Display Soft Key] [Keyset Soft Key] When you see NEW PIN ACCEPTED: [Exit] [Exit] To change your PIN number (if you already have one assigned): Press INTERCOM and dial ##6. 2. When you see ENTER PIN CODE: • Enter your current PIN number + HOLD. 3. When you see ENTER NEW PIN: • Enter your new PIN number + HOLD. • When entering your PIN number: - CLEAR erases your entire entry.
Feature Keys Feature Keys Description Feature Keys simplify feature operation. Each keyset has Feature Keys. These Feature Keys simplify placing calls, answering calls and using certain features. You can customize the function of any keyset’s Feature Keys from the system program and the User Programmable Features. The 22-Button Standard and Display Telephones feature 12 Feature Keys. The 34-Button Display Telephone features 24 Feature Keys.
Feature Keys • Headset key • Night key • Split • Hotline • Page Zones • Voice Mail Conversation Record Extension Feature Key Assignments Extension Feature Key Assignments (Page 1 of 5) Description Key Code and Data Operation N/A Undefined Use this option to designate a Feature Key as undefined (no function). 00 Loop Key (Switched) Use this option to assign a Feature Key as a Switched Loop key.
Feature Keys Extension Feature Key Assignments (Page 2 of 5) Key Type Hotline (page 90) Description Use this option to assign a Feature Key as a Hotline key. Key Code and Data 05 + nnn (extension number) Operation • Press key to call Hotline partner. A keyset user can use the #HL user-programmable procedure to change the Hotline assignments on their console. Busy Lamp Field (BLF) Off . . . . . . . . . . . . . . Partner extension is idle. On . . . . . . . . . . . . . .
Feature Keys Extension Feature Key Assignments (Page 3 of 5) Key Type Group Pickup No Ring (page 79) Description Use this option to assign a Feature Key as a lamp only (no ring) Group Call Pickup key. Key Code and Data 10 + nn (Pickup Group 1-16) Operation Press key to answer call ringing Pickup Group. • Press key to answer call ringing Pickup Group. • Press key to Page into assigned zone. Busy Lamp Field (BLF) Off . . . . . . . . . . . . . . No call is ringing the pickup group.
Feature Keys Extension Feature Key Assignments (Page 4 of 5) Key Type Description Night Use this option to assign a Feature Key as a Night key. There are two options: System Night key and UCD Night key. The System Night key puts all Key Ring lines and lines terminated to Ring Group master numbers into the night mode. The UCD Night key puts all lines terminated to the UCD Group master number into the night mode.
Feature Keys Extension Feature Key Assignments (Page 5 of 5) Key Type Description Account Code (page 10) Operation 26 1. Place or answer outside call. 2. Press key. 3. Enter Account Code. 4. Press key to return to the call. Use this option to assign a Feature Key as an Account Code key. Busy Lamp Field (BLF) Off . . . . . . . . . . . . . . Not in Account Code mode or not entering Account Codes. Fast Flash (green) . . . . In the Account Code entry mode. On (green) . . . . . . . . .
Flash Flash Description Extension users can access certain CO and PBX features by interrupting line loop current. Flash allows an extension user to access certain CO and PBX features by interrupting line loop current. Flash lets an extension user take full advantage of whatever features the connected telco or PBX offers. You must set the Flash parameters for compatibility with the connected telco.
Flexible Numbering Plan Flexible Numbering Plan Description Change the digits users dial for co-workers and other features. The system’s Flexible Numbering Plan allows you to change the digits users dial to reach the attendant, other co-worker’s, outside lines, UCD Groups, and Ring Groups. The following chart shows the areas of the system number plan you can change.
Forced Line Disconnect Forced Line Disconnect Description Disconnect a co-worker’s outside call in an emergency. Forced Line Disconnect allows an extension user to disconnect (release) another extension’s active outside call. Forced Line Disconnect lets a user access a busy line in an emergency, when no other lines are available. Maintenance technicians can also use Forced Line Disconnect to release a line on which there is no conversation.
Group Call Pickup Group Call Pickup Description Easily answer a call ringing your Pickup Group, even if you don’t know which extension is ringing. Group Call Pickup allows an extension user to answer a call ringing an extension in their assigned Pickup Group. This permits co-workers in the same Pickup Group to easily answer each other’s ringing calls. The user can intercept the ringing call by dialing a code or pressing a programmed Group Call Pickup key.
Group Listen Group Listen Description Use Group Listen to talk to an important client or customer and have your co-workers listen in on the meeting. Group Listen permits a keyset user to talk on the handset and have their caller’s voice broadcast over the telephone speaker. This lets the keyset user’s co-workers listen to the conversation. Group Listen turns off the keyset’s Handsfree microphone so the caller does not hear the co-worker’s voices during a Group Listen.
Group Ring Group Ring Description Use Group Ring to call a group of co-worker’s simultaneously. The system provides up to 8 Ring Groups (1-8). The Ring Group master numbers are predefined as 600-607, but can be any valid extension number not already in use. An unanswered DIL to the Ring Group master number can be picked up by the Ring Group Mailbox.
Group Ring Answering Ring Group Calls Answer a Call to a Ring Group In these instructions: [Super Display Soft Key] [Keyset Soft Key] To answer a call ringing your Ring Group: Do one of the following: 1. a. If the call doesn’t appear on a line or loop key: Lift handset. b. If the call appears on a line or loop key: Press the flashing line or loop key.
Handsfree and Handsfree Answerback Handsfree and Handsfree Answerback Description - Talk over the phone Handsfree, using the built-in speaker and microphone. - With Handsfree Answerback, answer an Intercom call by just speaking toward your phone. Handsfree Handsfree Answerback and Forced Intercom Ringing Handsfree Answerback permits an extension user to respond to a voice-announced Intercom call by speaking toward the phone, without lifting the handset.
Handsfree and Handsfree Answerback Setting Up Incoming Voice Announcements In these instructions: [Super Display Soft Key] [Keyset Soft Key] Do one of the following. 2. a. To turn incoming voice announcements on: [On + EXIT] [On + EXIT] b.
Headset Compatibility Headset Compatibility Description Have the privacy of a handset call without having to hold the handset. A keyset user can utilize a customer-provided headset in place of the handset. Like using Handsfree, using the headset frees up the user’s hands for other work. However, the headset provides privacy not available from Handsfree.
Headset Compatibility grammable Feature. The key lights while the extension is in the Headset mode, and is off while the Headset mode is disabled. If an extension user is on a call, pressing the Headset key automatically switches the active call to the headset. Pressing the Headset key again switches the call back to Handsfree.
Hold Hold Description Have a call wait on Hold, then pick it up to continue the conversation. Hold lets an extension user put a call in a temporary waiting state. The caller on Hold hears silence or Music on Hold, not conversation in the extension user’s work area. While the call waits on Hold, the extension user may process calls or use a system feature. Outside calls left on Hold too long recall the extension that placed them on Hold. If the recall is unanswered, the call diverts to Key Ring.
Hold Hold Recall Display The Hold recall display identifies: ❥ The type of call recalling the extension. ❥ The extension which initially placed the call on Hold. The Hold recall displays occurs as the call is ringing the extension that initially placed it on Hold, and after the call diverts to Key Ring. Operation In these instructions: [Super Display Soft Key] [Keyset Soft Key] Using System Hold To place a call on System Hold: Press HOLD.
Hold Using Exclusive Hold b. In these instructions: [Super Display Soft Key] [Keyset Soft Key] If the extension that placed the call on Hold has a programmed name: Hold Recall 300: Attendant To pick up an outside call on Exclusive Hold: 1. Press the flashing line key. • The line key lights solid (green). Features Using Intercom Hold In these instructions: [Super Display Soft Key] [Keyset Soft Key] To place an Intercom call on Hold: 1. Press HOLD.
Hotline Hotline Description Hotline provides partner extensions with one-button calling and Transfer. Hotline gives a keyset user with a programmed Hotline key one-button calling and Transfer to another extension (the Hotline partner). Hotline helps co-workers that work closely together. The Hotline partners can call or Transfer calls to each other just by pressing a single key.
Hotline Operation In these instructions: [Super Display Soft Key] [Keyset Soft Key] Using Hotline To place a call to your Hotline partner: 1. Press your Hotline key. Features To transfer a call to your Hotline partner: 1. While on a call, press your Hotline key. 2. Do one of the following. 3. a. If your partner answers, announce the call, press TRANSFER. • If your extension has Hotline Automatic Transfer, just announce the call and hang up. b.
Interactive Soft Keys Interactive Soft Keys Description Use advanced features just by pressing a soft key, without remembering feature codes. Interactive Soft Keys provide intuitive feature access. It is no longer necessary to remember feature codes to access the telephone’s advanced features because the function of the soft keys change as the user process calls. For example, while on an outside call a display keyset user can press the PARK soft key to Park their call in orbit.
Intercom Intercom Description Use Intercom to call any co-worker. Intercom gives extension users access to other extensions. This provides the system with complete internal calling capability. Handsfree Answerback and Forced Intercom Ringing Forced Intercom Ringing causes an Intercom call to ring the destination extension. You can enable Forced Intercom Ringing system-wide (for all extensions), or a user can dial a code to have their Intercom call ring the destination.
Key Ring Key Ring Description So they are not forgotten, unanswered calls automatically ring co-worker’s extensions. A Key Ring line rings an extension according to the settings in system programming. Multiple extensions can be enabled to ring immediately or after a programmed delay for each incoming line call. In addition, under certain conditions other types of outside calls divert to Key Ring if unanswered.
Language Selection Language Selection Description Set up a telephone to show displays and soft keys in English or Spanish. Language Selection provides telephone displays for soft keys and system programming in English and Spanish. You can select the language for each extension in system programming, or the extension user can choose their language via the soft keys. Language Selection allows the system to easily accommodate bilingual installations (English and Spanish).
Last Number Redial Last Number Redial Description Quickly redial the last number dialed. Last Number Redial allows an extension user to quickly redial the last outside number dialed. For example, a user may quickly recall a busy or unanswered number without manually dialing the digits. Last Number Redial saves in system memory the last 20 digits a user dials. The number can be any combination of digits 0-9, # and *.
Last Number Redial Using Enhanced Last Number Redial In these instructions: [Super Display Soft Key] [Keyset Soft Key] To redial your last call at a 3-line display telephone: • If you select a line key before going to step 1, the system outdials your most recent call when you press REDIAL. 1. Press REDIAL. At a 3-line display telephone you see (for example): LAST 5 DIALED [4] 1-203-926-5400 2. (Optional) Press Volume Up or Volume Down to display the number you want to call. 3.
Line Group Routing Line Group Routing Description Dial a single code to place a call over the first available line in a Line Group. With Line Group Routing enabled, an extension user can just press INTERCOM and dial 9 to place an outside call. Line Group Routing automatically selects the first available line in the extension’s programmed “dial 9” Line Group. This simplifies placing calls in systems that have a lot of lines for outgoing calls.
Line Groups Line Groups Description Dial codes to access Line Groups for outgoing calls. Extension users can optionally dial Line Group access codes 90-98 to select an available line in the group for outgoing calls. This is helpful in applications that have different services arranged into Line Groups. For example, dialing 90 could access a group of DDD lines for local calls, and dialing 91 could access a group of WATS lines for long distance calls.
Line Keys Line Keys Description Press a line key for one-touch access to an outside line. A line key provides an extension user with one-button access to outside lines. The extension user just presses a line key to place or answer a call on the line. There is no need to dial codes to access or intercept outside calls. In addition, a line key provides a Busy Lamp Field (BLF) for the line to which it is assigned (see the table below).
Line Keys Operation In these instructions: [Super Display Soft Key] [Keyset Soft Key] Using your Line Keys To place a call using a line key: Lift the handset. 2. Press the line key. 3. Dial the outside number. Features 1. To answer an incoming call using a line key. 1. Listen for ringing and look for the flashing line key. • Line keys that flash red are for you and your co-workers. • Line keys that flash green are just for you (such as DILs and transfers). 2. Lift the handset. 3.
Line Queuing / Line Callback Line Queuing / Line Callback Description - When all lines are busy, Line Queuing lets a user wait in line for a line to become free. - Line Callback will automatically call the user back when a line is available. Line Queuing Line Queueing permits an extension user to queue (wait in line) on hook for a busy line or Line Group to become free. The system connects the queued extension as soon as the line is available. The user does not have to manually retry the line later.
Loop Keys Loop Keys Description Loop keys simplify answering and placing calls. Loop keys are Feature Keys that simplify the way extension users place and answer outside calls. There are two types of loop keys: Switched Loop keys and Fixed Loop keys. Switched Loop Keys For outgoing calls, Switched Loop keys provide convenient access to Line Groups. For example, instead of pressing INTERCOM and dialing 90 for Line Group 90, the user can just press the Switched Loop key and dial 0 instead.
Loop Keys Operation Using Loop Keys In these instructions: [Super Display Soft Key] [Keyset Soft Key] To answer a call on a loop key: 1. Listen for ringing and look for the flashing (red) loop key. 2. Lift the handset. 3. Press the loop key. • The loop key will light green after you answer. • If you have Ringing Line Preference, lifting the handset answers the call. • If you have Automatic Handsfree, you can press the loop key without first lifting the handset. To place a call on a loop key: 1.
Meet-Me Conference Meet-Me Conference Description Set up a multiple-party telephone conversation with your co-workers. With Meet-Me Conference, an extension user can set up a telephone meeting with their co-workers. Each party joins the Conference by dialing a Meet Me Conference code. Meet Me Conference lets extension users have a telephone meeting — without leaving the office. Users must join the meeting within the Meet-Me Conference interval.
Message Waiting Message Waiting Description For systems without voice mail, leave a Message Waiting request for a return call. An extension user can leave a Message Waiting indication at a busy or unanswered extension requesting a return call. The indication is a flashing V-MAIL key and Ring/Message lamp at the called extension. Answering the Message Waiting automatically calls the extension which left the indication. Message Waiting ensures that a user will not have to recall an unanswered extension.
Microphone Mute Microphone Mute Description Talk to a co-worker in your office without your caller hearing the conversation. While an extension has their microphone muted, an incoming voice-announced Intercom call announces with a single beep (splash tone). Handsfree Reply Soft Key Display keyset users can press their HF Reply (Hfrp) soft key to turn off their telephone’s Handsfree microphone for incoming Intercom calls.
Monitor / Silent Monitor Monitor / Silent Monitor Description Monitor a co-worker’s phone conversation without them knowing you are on the phone. Monitor lets an extension user listen to the conversation at a busy extension. To implement Monitor, an extension user just calls a busy extension and dials the Monitor code. The busy extension and their caller have no indication of the intrusion. There are no tones heard and there is no visual indication that monitoring is occurring.
Music on Hold Music on Hold Description Callers can listen to music while waiting for their call to go through. Music on Hold (MOH) plays music to calls on Hold, parked calls, and transferred calls. The music lets the caller know that their call is waiting, not forgotten. Without Music on Hold, the system provides silence to these types of calls.
Names for Extensions and Lines Names for Extensions and Lines Description Names help identify lines and extensions. Extensions and lines can have names instead of just circuit numbers. These names show on a keyset’s display when the user places or answers calls. Extension and line names make it easier to identify callers. The user does not have to refer to a directory when processing calls.
Names for Extensions and Lines In these instructions: [Super Display Soft Key] [Keyset Soft Key] Programming Names Do one of the following. 4. a. Press HOLD to back up to step 2 and program another name. b. Press HOLD + SPEAKER to exit.
Night Service / Night Ring Night Service / Night Ring Description Use Night Service to reroute calls after hours. Night Service redirects outside calls to their night mode destination. Typically, the attendant or supervisor activates Night Service after normal working hours, when most employees are unavailable to answer calls. Lines can ring extensions directly at Night, providing specific answering points for Night Service calls. (For example, you can program lines to ring the security station at night.
Night Service / Night Ring Operation Using Night Service / Night Ring In these instructions: [Super Display Soft Key] [Keyset Soft Key] To activate or deactivate Night Service (i.e., to control the night mode of Key Ring and Ring Group lines): Do not lift the handset. 2. Press your System night key. • While in the night mode, the key is on (red) and you see: SYSTEM IN NIGHT MODE. • While in the day mode, the key is off. Features 1. To answer a call that rings a line or loop key at night: 1.
Off-Hook Signaling Off-Hook Signaling Description Off-Hook Signaling helps important callers get through. When a user is busy on a call, Off-Hook Signaling indicates that another caller is trying to get through. Off-Hook Signaling helps important callers get through, without waiting in line for the called extension to become free. After the user hears the off-hook signal, they can use other system features (such as Hold or Park) to process their active call and then answer the waiting call.
Off-Hook Signaling Operation User Programmable Feature Setting Up Off-Hook Signaling Mnemonic Off-Hook Signaling #OHR (#647) DSX Feature Handbook Operation #OHR + Select mode (see below) + Select option (see below) + SPEAKER to exit.
Paging Paging Description Use Paging to broadcast announcements or quickly locate co-workers. Paging lets extension users broadcast announcements to other keyset users and to external Paging speakers. Paging allows a user to locate a co-worker or make an announcement without calling each extension individually. There are two types of Paging: Internal Paging and External Paging.
Paging Note that External Paging can broadcast either extension ringing or line ringing, not both. In addition, External Paging requires additional customer-provided equipment. Refer to the Hardware Manual that came with your system for more. Intercom Ring Over External Page Door Chime Over External Page Door Box chimes can optionally broadcast over External Paging. While Door Box chimes broadcast over External Paging, any extension user can dial a code (INTERCOM + *0) to answer the Door Box.
Paging Operation In these instructions: [Super Display Soft Key] [Keyset Soft Key] Making a Page Announcement To make an internal Paging announcement: 1. Lift the handset. 2. Do one of the following. 3. a. Press INTERCOM, dial *1, then dial the page zone number ( for All Call). b Press your Paging key. • If you are on an Intercom call when you press a Paging key, the system disconnects the internal call and activates the page. Make announcement and hang up.
Park Park Description Park a call in orbit so a co-worker can pick it up. With Park, it is not necessary to locate a person to handle their calls. A call parked in System Park Orbit for too long will recall the extension that initially parked it. The recall for System Park Orbits 68 and 69 is permanently fixed at 5 minutes. If the recall remains unanswered, the call diverts to Key Ring. A call parked in Personal Park Orbit for too long will initially recall to the extension at which it is parked.
Park Personal Park Orbit Recall Display The Personal Park Orbit recall display shows: ❥ On all extensions that are ringing with the recall: - The type of recall (i.e., Personal Park). ❥ On the extension at which the call is parked (while it is ringing): - The extension which initially parked the call. ❥ On all other extensions as they are ringing with the recall: - The extension at which the call was initially parked.
Park Operation Park In these instructions: [Super Display Soft Key] [Keyset Soft Key] To Park or retrieve a call in System Park Orbit: 1. Do one of the following. [Park] [Park] Select Park. • You cannot use this procedure to retrieve a parked call. [Sys] [Orbit x] 2. Features a. (Park only) 22-Button and 34-Button Display • Select System Park + Dial orbit number (0-9). Super Display • Select orbit (Orbit 0 - Orbit 9). b. • • Press TRANSFER and dial *. Dial the System Park Orbit (60-69). c.
PBX / Centrex Compatibility PBX / Centrex Compatibility Description The DSX provides unique features when connected to a PBX or Centrex. PBX/Centrex Access Codes PBX Access Codes are the digits PBX extension users must dial to obtain outside lines. When the DSX is installed behind a PBX, users must dial these codes before the digits for their outside call. For example, if the PBX access code is 98, and the DSX user wants to reach 203-926-5400, they must dial 98-1-203-9265400.
Prime Line Preference Prime Line Preference Description Get dial tone for a new outside or Intercom call just by lifting the handset. There are two types of Prime Line Preference: Idle Prime Line and Intercom Prime Line. Idle Prime Line Idle Prime Line lets a user place or answer a Prime Line call by just lifting the handset. An extension’s Idle Prime Line can be any line or Line Group, regardless of whether the extension has a line or loop key for the line or group.
Privacy Privacy Description Use Privacy to prevent interruptions at high priority extensions. An extension with Privacy blocks incoming Barge In attempts and Call Waiting (Camp-On) signals. Privacy helps extension users that don’t want their conversations interrupted. Note that if an extension with Privacy enabled is on a call with an extension with Privacy disabled, they are still subject to Barge In attempts and Call Waiting signals to the non-private extension.
Privacy Release Groups Privacy Release Groups Description Quickly join in a co-worker’s outside call. You can program extensions into Privacy Release Groups to simplify sharing outside calls. Co-workers in the same Privacy Release Group can easily join another group member’s outside call just by pressing the busy line -key. The co-worker immediately joins in unannounced and uninvited. Privacy Release Groups are a quick alternative to Conference where control over the Conference is not required.
Private Line Private Line Description You can have a line reserved exclusively for your own use. A Private Line is a line reserved for a keyset for placing and answering calls. A user with a Private Line knows when important calls are for them. Additionally, the user has their own line for placing calls that is not available to others in the system. There are three types of Private Lines: ❥ Incoming Only The keyset has a Private Line only for incoming calls.
Programmable Idle Menu Soft Keys (Super Display) Programmable Idle Menu Soft Keys (Super Display) Description Customize the Super Display Telephone idle menu soft keys to exactly meet the user’s needs. The Super Display Telephone idle menu soft keys are customizable in system programming and by the extension user. This allows the idle mode display to be tailored to meet the needs of each Super Display Telephone user. The first chart below shows the default idle menu soft key assignments.
Programmable Idle Menu Soft Keys (Super Display) Super Display Telephone Idle Menu Soft Key Options (Page 2 of 2) 128 ◆ Entry Display 10 SP Dial 2 Press to access Personal Speed Dial bins 711-720. The display shows the Speed Dial number (or name - if programmed). 11-30 PERS SPDL BIN 120 Press to access the associated Personal Speed Dial bin (701-720). The display shows the Speed Dial number (or name - if programmed).
Programmable Idle Menu Soft Keys (Super Display) Operation Customizing your Idle Menu Soft keys (Super Display Only) In these instructions: [Super Display Soft Key] To customize your idle menu soft keys: Do not press any keys and do not lift the handset. 2. Dial #SM (#76). • You see KEY NUMBER?1. 3. Do one of the following. Features 1. a. Press the soft key you want to program. b. Press Volume Up or Volume Down to scroll through the keys. 4. Press HOLD. 5. Do one of the following. a.
Pulse to Tone Conversion Pulse to Tone Conversion Description Use special services (such as telephone banking) over dial pulse lines. An extension can use Pulse to Tone Conversion while placing an outside call to change the dialing mode from dial pulse to DTMF. For a system in a dial pulse area, this permits users to access DTMF services (such as telephone banking) from their DP area. Pulse to tone conversion also helps dial pulse callers use another company’s automated attendant dialing options.
Removing Lines and Extensions from Service Removing Lines and Extensions from Service Description Temporarily remove problem extensions and lines from service until they can be repaired. Supervisors and attendants can remove problem lines and extensions from service. This helps ensure maximum system performance. For example, the attendant can busy-out a noisy line or problem extension until service personnel can repair the problem. The line or extension the appears busy to all callers.
Reverse Voice Over Reverse Voice Over Description Privately call a co-worker while you’re busy on your handset. While on a handset call, Reverse Voice Over lets a busy keyset user make a private Intercom call to an idle co-worker. The busy user just presses and holds down a programmed Reverse Voice Over key to make a private call to the assigned co-worker. The initial caller cannot hear the Reverse Voice Over conversation.
Reverse Voice Over Operation Using Reverse Voice Over In these instructions: [Super Display Soft Key] [Keyset Soft Key] To place a call using Reverse Voice Over: 1. Features While on a handset call, press and hold your Reverse Voice Over key. • You hear two beeps, then you can talk to your co-worker. • The key lights red as you press it. To return to your initial caller: 1. Release your Reverse Voice Over key. • The key goes out. To place a call to your Reverse Voice Over partner: 1.
Ringdown Extension Ringdown Extension Description Call another extension, group or voice mail just by lifting the handset. A Ringdown Extension automatically calls a co-worker, voice mail, a Ring Group, a UCD Group, or a Speed Dial number when the user lifts the handset. The call automatically goes through — there is no need for the user to dial digits or press additional keys. Ringdown extensions are frequently used for lobby phones, where the caller just lifts the handset to get the information desk.
Ringing Line Preference Ringing Line Preference Description Simply lift the handset to answer a ringing call. Ringing Line Preference lets a keyset user answer a ringing call by just lifting the handset. For a user that primarily answers calls, Ringing Line Preference ensures that ringing calls have priority. The tables below show the interaction between Ringing Line Preference and other features for both handset and headset calls.
Ringing Line Preference Keyset Feature RLP = Y Attendant RLP = N RLP = Y RLP = N Does pressing SPEAKER while in the Headset mode answer the ringing call? Intercom (page 93) Ringing Intercom calls Yes Yes No1 No1 Key Ring (page 94) (Line/Loop Keys) Yes No Yes No Transfer (page 161) Yes No Yes No Direct Inward Line (page 42) Yes No Yes No Group Ring (page 81) Yes Yes N/A N/A Extension Hunting (page 66) (Call to UCD master) Yes Yes No1 No1 Call Coverage Keys (page 19) No N
Ringing Line Preference Operation In these instructions: [Super Display Soft Key] [Keyset Soft Key] Using Ringing Line Preference To use Ringing Line Preference: 1. Lift the handset or press SPEAKER. • You automatically answer the call. Features To bypass Ringing Line Preference: 1.
Save Number Dialed Save Number Dialed Description Save the number you just dialed for quick redialing. Save Number Dialed permits an extension user to save their last outside number and easily redial it later on. For example, an extension user can recall a busy or unanswered number without manually dialing the digits. The system retains the saved number until the user stores a new one in its place. Save Number Dialed saves in system memory a dialed number up to 20 digits.
Selectable Display Messaging Selectable Display Messaging Description While you’re away from the phone, callers can receive personalized text messages you set up. An extension user can select a pre programmed Selectable Display Message for their extension. Keyset callers see the selected message when they call the user’s extension. Selectable Display Messaging provides personalized text messaging. For example, an extension user could select the message “GONE FOR THE DAY.
Selectable Display Messaging Operation In these instructions: [Super Display Soft Key] [Keyset Soft Key] Setting Up Selectable Display Messaging To select a Selectable Display Message: 1. Select the Call Forwarding options. [Menu + Call Forward] [Menu + Cfwd] 2. 3. Alternately do one of the following: • Press INTERCOM and dial *3. • Press your Call Forwarding Feature Key. Select Selectable Display Messaging.
Selectable Display Messaging Name Programming Chart Name Programming Chart Press a key the indicated number of times for desired character 1 Time 2 Times 3 Times 4 Times 5 Times 6 Times 7 Times 1 & - / ‘ 1 2 A B C a b c 2 3 D E F d e f 3 4 G H I g h i 4 5 J K L j k l 5 6 M N O m n o 6 7 P Q R S p q r 8 T U V t u v 8 9 W X Y Z w x y 0 space : 0 # Not used * Not used 8 Times 9 Times s 7 z 9 Features Key After selectin
Single Line Telephones Single Line Telephones Description Connect analog devices such as single line telephones and fax machines to the system. The system is compatible with 500 type (dial pulse) and 2500 type (DTMF) analog telephone devices. This includes on-premises single line telephones (SLTs), fax machines, and modems. In DSX-40, SLTs connect to analog ports in the main equipment cabinet. In DSX-80/160, SLTs connect to SLIU PCBs. Each analog port provides power and ring voltage for the connected SLT.
Single Line Telephones Call Waiting / Camp-On 1. Call busy extension. 2. Dial 2 but do not hang up. • If you hang up, the system converts your Camp-On to a Callback. 3. Speak to your co-worker when they answer their Camp-On ring. 1. Call busy extension. 2. Dial 2 and hang up. • Stay on the line without hanging up if you want to Camp-On instead. 3. When Callback rings your phone, lift handset to answer. 4. Speak to your co-worker when call goes through.
Single Line Telephones Direct Line Access 1. Dial 1 plus the line number (e.g., 101 for line 1). 2. Dial outside number. Directed Call Pickup 1. Lift the handset. 2. Dial **. 3. Dial number of extension whose call you want to intercept. • To intercept a call ringing an attendant, dial the attendant’s extension number (e.g., 300); not 0 or 01-04. Door Box To place a call to the Door Box: 1. Lift the handset. 2. Dial the Door Box extension number. To answer the Door Box ringing: 1.
Single Line Telephones Group Call Pickup 1. Lift the handset. 2. Dial *#. Hold To retrieve a line on System Hold at a co-worker’s extension: Lift the handset. 2. Dial *4. 3. Dial the number of the line that is on Hold (e.g., 01 for line 1). Features 1. To place a call on Exclusive Hold: 1. Hookflash and dial *7. 2. Hang up. • If the call is left on Exclusive Hold too long, it will recall to you. • If you hang up without first dialing *7, the call will recall immediately.
Single Line Telephones Meet-Me Conference To set up a Meet-Me Conference: 1. Page the parties and announce the Meet-Me Conference code (#11 or #12). • See Paging (page 116) for more on how to page your co-workers. 2. Hang up, then lift the handset. 3. Dial the announced Meet-Me Conference code (#11 or #12). • Your co-worker’s must join the telephone meeting within the Meet Me Conference time. To join a Meet-Me Conference: 1. Listen for paged invitation to join the Conference. 2.
Single Line Telephones Park To Park a call: Place or answer call. 2. Hookflash and dial *. 3. Dial the orbit number. • System Park Orbits are 60-69. • Personal Park Orbits are *300-*427. Features 1. To retrieve a parked call: 1. Lift the handset. 2. Dial *. 3. Dial the orbit number. • System Park Orbits are 60-69. • Personal Park Orbits are *300-*427. Pulse to Tone Conversion This feature must be switched manually from the telephone.
Single Line Telephones Split A single line telephone can Split (alternate) between their current call and waiting calls. The waiting calls can include a call you previously placed on Exclusive Hold or camped-on calls. To Split (Alternate) between your current call and a waiting call: 1. Hookflash and dial *7. • You are connected to your camped-on call (if any) or the call that has been on Hold the longest.
Speed Dial Speed Dial Description Instead of dialing a long telephone number to reach a client or customer, use Speed Dial instead. Also, store Intercom digits for quick access to commonly used features. Speed Dial gives an extension user quick access to frequently called numbers. There are two types of Speed Dial: System and Personal. Speed Dial numbers can be up to 32 digits long, using 0-9, # and *. Every Speed Dial can have a programmed name up to 18 characters long.
Speed Dial Note that this unique Centrex integration also pertains to voice mail ports accessing stored Speed Dial numbers. Chaining Bins for Dialing Long Numbers A Speed Dial number can be up to 32 digits long. The system allows this by automatically using the next adjacent bin for entries longer than 16 digits. For example, assume you want to store a Personal Speed Dial number for a banking service (203-926 5400) followed by a pause and your 10 digit customer code (9876543210).
Speed Dial Programming and Dialing Personal Speed Dial b. In these instructions: [Super Display Soft Key] [Keyset Soft Key] Press SPEAKER to exit. To dial a stored Personal Speed Dial number: 1. a. Press INTERCOM, dial #, then dial the Personal Speed Dial bin number (701-720). b. 24-Button or 34-Button Telephone Only Press bin key for bins 701-710. c. Press a Feature Key set up as a Personal Speed Dial key. d.
Speed Dial Programming and Dialing System Speed Dial a. Repeat from step 3 to program another bin. b. Press SPEAKER to exit. In these instructions: [Super Display Soft Key] [Keyset Soft Key] To dial a stored System Speed Dial number: 1. 2. Do one of the following. a. Press INTERCOM, dial #, then dial the System Speed Dial bin number (normally 201-299). c. Press a Feature Key set up as a System Speed Dial key.
Speed Dial Name Programming Chart Name Programming Chart Press a key the indicated number of times for desired character 1 Time 2 Times 3 Times 4 Times 5 Times 6 Times 7 Times 1 & - / ‘ 1 2 A B C a b c 2 3 D E F d e f 3 4 G H I g h i 4 5 J K L j k l 5 6 M N O m n o 6 7 P Q R S p q r 8 T U V t u v 8 9 W X Y Z w x y 0 space : 0 # Not used * Not used 8 Times 9 Times s 7 z 9 Features Key After selecting a letter, press
Split (Alternate) Split (Alternate) Description Switch between active calls without Conferencing the calls together. With Split, an extension user can split (alternate) between a current call and a new call. Split lets the extension user easily alternate between the calls without joining (Conferencing) the parties together. Operation Using Split In these instructions: [Super Display Soft Key] [Keyset Soft Key] To Split between your current Intercom call and a new Intercom call: 1.
Station Key Telephones Station Key Telephones Description System keysets provide a host of sophisticated extension features. The system offers 22-Button, 34-Button, 34-Button Advanced, and Super Display keyset telephones. All telephone models are available in two colors: black and white.
Station Key Telephones 34-Button Backlit Super Display Telephone with Half-Duplex Speakerphone The Super Display Telephone is the system’s most sophisticated telephone instrument. It features a large 9 line-by24 character backlit alphanumeric display with 12 Interactive Soft Keys for intuitive feature access. It also provides 10 Personal Speed Dial bin keys, 24 programmable Feature Keys and 12 fixed function keys for streamlined operation.
Tandem Calls / Unsupervised Conference Tandem Calls / Unsupervised Conference Description Join two callers in Conference, leave the call and let their conversation continue. Tandem Calls allows an extension user to join two outside callers in a line-to-line conference. The extension user can then drop out of the call, leaving the lines in an Unsupervised Conference. The extension user that established the Conference is not part of the conversation.
Tandem Calls / Unsupervised Conference Disconnecting a Tandem Call In these instructions: [Super Display Soft Key] [Keyset Soft Key] To disconnect a tandem call (using Forced Line Disconnect): 1. 2. Do one of the following. a. Press the line key for the busy line. b. Press INTERCOM and dial the line’s Direct Line Access code (e.g., 101 for line 1). • See Direct Line Access (page 43) for more. Dial # to disconnect the Tandem Call.
Tandem Calls / Unsupervised Conference Using Line-to-Line Transfer to set up a Tandem Call In these instructions: [Super Display Soft Key] [Keyset Soft Key] To set up a Tandem Call via line-to-line Transfer: Place or answer an outside call. 2. Press TRANSFER. 3. Place or answer another outside call. 4. Hang up to set up a Tandem Call between your initial call and new call. DSX Feature Handbook Features 1.
Time and Date Time and Date Description The Time and Date shows on telephone displays and prints on system reports. The system Time and Date appears on display telephones and Station Message Detail Recording reports. The system administrator can change the time and date from the system programming mode. In addition, extension users can change the time and date from the User Programmable Features. Although the data is entered in 24-hour format, it always displays in 12-hour format (e.g., 1300 = 1:00PM).
Transfer Transfer Description Send the outside call you are on to a co-worker. The system allows the following types of transfers: ❥ Screened Transfer The transferring user announces the call to the destination before hanging up. ❥ Unscreened Transfer The transferring party extends the call without an announcement. Distinctive Flash Rate on Recall Transfer recall features a distinctive flash rate for line keys (see the chart below).
Transfer Operation Using Transfer In these instructions: [Super Display Soft Key] [Keyset Soft Key] To Transfer your call: 1. Do not hang up. 2 Press TRANSFER. 3. Do one of the following. 4. 5. 162 a. Dial your co-worker’s extension. • To Transfer your call directly to your co-worker’s mailbox, do this instead: - Press V-MAIL. - Dial their extension number. - Hang up. b. Press a DSS key. c. Dial a Ring Group or UCD Group master number. d. Press a Call Coverage or Hotline key.
Transfer Using Transfer In these instructions: [Super Display Soft Key] [Keyset Soft Key] To Transfer a call to your co-worker’s speakerphone (i.e., use Handsfree Transfer): 1. Do one of the following. a. While on an outside call: • Press TRANSFER. • Dial you co-worker’s extension number. b. Press Hotline key for your co-worker. Listen for two beeps. • If you hear ringing instead of two beeps, you cannot use Handsfree Transfer. 3. Do one of the following. Features 2. a.
User Programmable Features User Programmable Features Description Extension users can set up their telephones to meet their own unique requirements. User Programmable Features allow an extension user to dial mnemonics to customize the way certain features work on their telephone. With User Programmable Features, there is no need to rely on a System Administrator or Communications Manager to set up each phone.
User Programmable Features User Programmable Features To program a feature, press # and the feature’s code. For example, to enable incoming Paging, press # and dial V P Y, then SPEAKER to hang up. By default, Call Forwarding Clear All, System Speed Dial, and Time and Date are only available to the attendant. Mnemonic Numeric Operation Access Level Hotline #HL #45 #HL + Press flashing Hotline key + Enter extension for new Hotline partner + HOLD + Program another Hotline key or SPEAKER to exit.
User Programmable Features User Programmable Features To program a feature, press # and the feature’s code. For example, to enable incoming Paging, press # and dial V P Y, then SPEAKER to hang up. By default, Call Forwarding Clear All, System Speed Dial, and Time and Date are only available to the attendant. Feature Mnemonic Numeric Ringing Line Preference #RLP #757 #RLP + Y to enable or N to disable + SPEAKER to exit.
Voice Mail Voice Mail Description Voice mail ends the frustration and cost of missed calls, inaccurate written messages and telephone tag, freeing up the company’s receptionists and secretaries for more production work. Integrated voice mail enhances the telephone system with the following features: Call Forwarding to Voice Mail An extension user can forward their calls to voice mail. Once forwarded, calls to the extension connect to that extension’s mailbox.
Voice Mail Personal Answering Machine Emulation Refer to Call Screening (page 453). You may find that Call Screening better meets your requirements. A keyset user can have their idle extension emulate a personal answering machine. This lets voice mail screen their calls, just like their answering machine at home. If activated, the extension’s incoming calls route to the user’s Subscriber Mailbox. Once the mailbox answers, the user hears the caller’s incoming message.
Voice Mail Operation The Voice Mail Basics In these instructions: [Super Display Soft Key] [Keyset Soft Key] To call your mailbox: (Optional) Check the status of your mailbox. • On your display, V-Mail xx [VMxx] is the number of new messages in your mailbox. • In addition, your Ring/Message lamp flashes fast (red) when you have new messages. 2. Press V-MAIL. • V-MAIL is on (red) while you are connected to your mailbox. 3. If requested, enter your Security Code. Features 1.
Voice Mail Transferring Calls to a Mailbox In these instructions: [Super Display Soft Key] [Keyset Soft Key] To Transfer your active call to a mailbox: Method A (Ring first, then Transfer) 1. Press TRANSFER. 2. Dial the number of the mailbox to receive the Transfer. • You can optionally press the DSS key for your co-worker. • To transfer the call to your own mailbox, dial your extension number. 3. Press V-MAIL and hang up. • Voice mail will prompt your caller to leave a message.
Voice Mail Using Conversation Record In these instructions: [Super Display Soft Key] [Keyset Soft Key] To record your active call in a mailbox: 1. a. Press a Record Feature Key on your extension or DSS Console. • The record key can be assigned to yours or a co-worker’s mailbox. • The key will flash fast (green) on your keyset; flash fast (red) on your DSS Console. b. [Record] [Rec] Select to record your conversation. • The Conversation Record soft key is only available for outside calls.
Voice Mail In these instructions: [Super Display Soft Key] [Keyset Soft Key] Using Answering Machine Emulation To activate or cancel Personal Answering Machine Emulation: • Refer to Call Screening (page 453). You may find that Call Screening better meets your requirements. 1. Select the Call Forwarding options. [Menu + Call Forward] [Menu + Cfwd] 2. 3. Alternately do one of the following: • Press INTERCOM and dial *3. • Press your Call Forwarding Feature Key.
Voice Mail User Programmable Features Setting up a Conversation Record Key Feature Mnemonic Operation Access Level Voice Mail #KP (#57) #KP + Press key you want to program + HOLD + Dial 17 + Enter mailbox number or 0 for your own mailbox + HOLD + SPEAKER twice to exit. 3-5 Feature Mnemonic Operation Access Level Voice Mail #KP (#57) #KP + Press key you want to program + HOLD + Dial 24 + Enter mailbox number + HOLD + CONF + SPEAKER twice to exit.
Voice Over Voice Over Description Get through to a co-worker busy on a handset call — without interrupting their call. Voice Over lets a user get through to a keyset extension user busy on a handset call. With Voice Over, the busy keyset extension user hears an alert tone followed by the voice of the interrupting party. The keyset extension user can respond to the interrupting party without being heard by the original caller.
Volume, Brightness, and Contrast Controls Volume, Brightness, and Contrast Controls Description Easily adjust the volume of ringing, Paging, and other features. There are nine steps in the Volume Control adjustment range. This makes it easier for the keyset user to set up just the right volume levels. The settings a user makes are retained after a system reset or power-down.
Volume, Brightness, and Contrast Controls Operation Adjusting your Telephone’s Volume In these instructions: [Super Display Soft Key] [Keyset Soft Key] To interactively adjust the volume while a feature is active: 1 While the feature is active, press Volume Up and Volume Down. • Pressing Volume Up and Volume Down while idle adjusts the telephone’s display contrast. To adjust the display contrast: 1. While your telephone is idle, press Volume Up and Volume Down.
Volume, Brightness, and Contrast Controls Adjusting your Telephone’s Volume In these instructions: [Super Display Soft Key] [Keyset Soft Key] To set up the display brightness, contrast control, and dial pad illummination presets: 1. [Menu + Display] [Menu + MORE (2 or 3 times) + Dsply] 2. Do one of the following. Select the display preset mode. [Contrast] [Cont] • • Select the display contrast preset. When you see Contrast ------, press Volume Up and Volume Down to set the contrast preset (0-8).
Walking Class of Service Walking Class of Service Description An extension user can temporarily use their Toll Restriction and Class of Service options at a co-worker’s phone. Walking Class of Service allows an extension user to temporarily implement their Toll Restriction and Class of Service settings at a co-worker’s keyset. This is normally used to override dialing restrictions at a telephone.
Walking Class of Service Entering or Changing Your PIN Number In these instructions: [Super Display Soft Key] [Keyset Soft Key] To enter your PIN number (if you don’t have one assigned): Press INTERCOM and dial ##6. 2. When you see ENTER NEW PIN: • Enter your new PIN number + HOLD. • When entering your PIN number: - CLEAR erases your entire entry. - REDIAL backspaces over (erases) the last digit entered. 3. When you see REENTER NEW PIN: • Confirm your entry by reentering your new PIN number. 4.
Walking Class of Service 180 ◆ Features DSX Feature Handbook
NEC Unified Solutions, Inc. 4 Forest Parkway, Shelton, CT 06484 TEL: 203-926-5400 FAX: 203-929-0535 www.necunifiedsolutions.com (1093099) June 9, 2006, Rev 2 Printed in U.S.A.