
LCD Projector User's Manual GT1150


E – 21
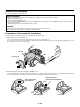
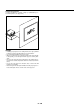
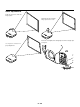
Set up the projector
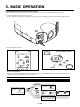
1. Turn on the projector
2. Select your type of projection:
Desktop front, ceiling rear, desktop rear, and ceiling front.
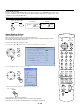
3. Display the test pattern by pressing the TEST button on the re-
mote control or using the menu.
TEST
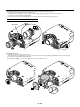
4. Adjust the image position and the image size.
(1) Press and hold the CTL button and press the POSITION button to display
the Lens Shift adjustment screen.
Use the Select button on the remote control or the LENS SHIFT button on
the projector cabinet to move the image horizontally and vertically.
To close the the Lens Shift adjustment screen, press the CANCEL button.
See page E-13 for “Lens Shift Adjustable Range”.
POSITION
LENS
CTL
+
-
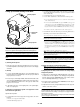
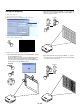
(2) Press and hold the CTL and press the ZOOM + or - button to adjust the
image size. You can also adjust the image size by using the ZOOM + or -
button on the projector cabinet.
MAGNIFY
+
-
+
-
FOCUS ZOOM
LENS
CTL
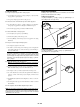
(3) Press and hold the CTL button and press the FOCUS + or - button to
obtain the best focus. You can also adjust the focus by using the FOCUS
+ or - button on the projector cabinet.
MAGNIFY
+
-
+
-
FOCUS ZOOM
LENS
CTL